*
Welcome, Guest. Please login or register.
April 25, 2024, 04:14:54 PM

Login with username, password and session length

Donate

We Appreciate Your Support

Members
Stats
  • Total Posts: 1690665
  • Total Topics: 118343
  • Online Today: 866
  • Online Ever: 2235
  • (October 29, 2023, 01:32:45 AM)
Users Online

Recent

Author Topic: Recycling a pinboard – a short DIY  (Read 1630 times)

Offline Mad Doc Morris

  • Mastermind
  • Posts: 1782
  • Olympus speaketh?
Recycling a pinboard – a short DIY
« on: September 06, 2017, 11:53:53 AM »
Since it's a very cheap and easy build, thought I'd share the process of recycling a pinboard for wargaming.

Requirements (for a desert board):
  • A pinboard – what a surprise! Preferably made of cork. No need for an expensive one.
  • Craft paints. Here white, yellow ochre, and any kind of sienna/orange brown are sufficient.
  • Cork mat or coasters. To make rocks.
  • Filler/putty.
  • Sand. Mix of coarse and light sand works best.
  • Tufts. Or model grass. Or flock.

1) Cover most of the board with filler. Add sand and pieces of cork (torn from the coasters).
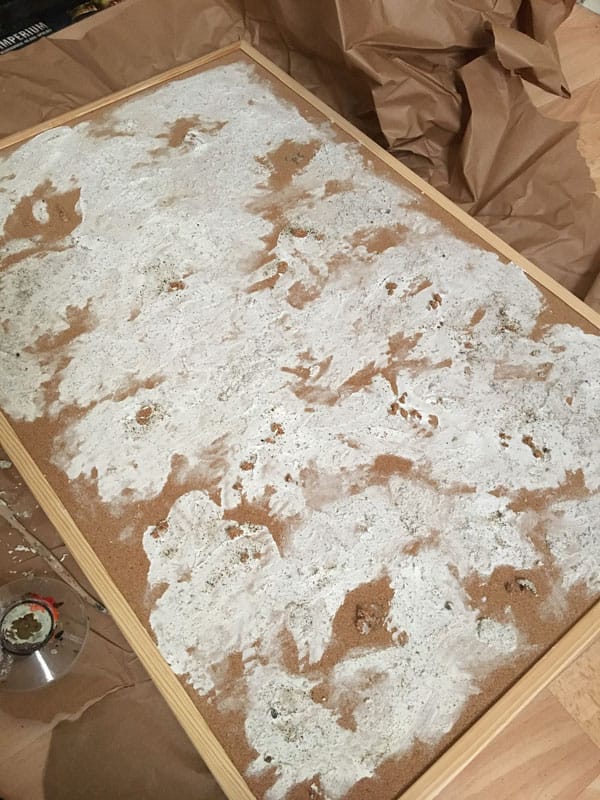


All in fairly random manner.
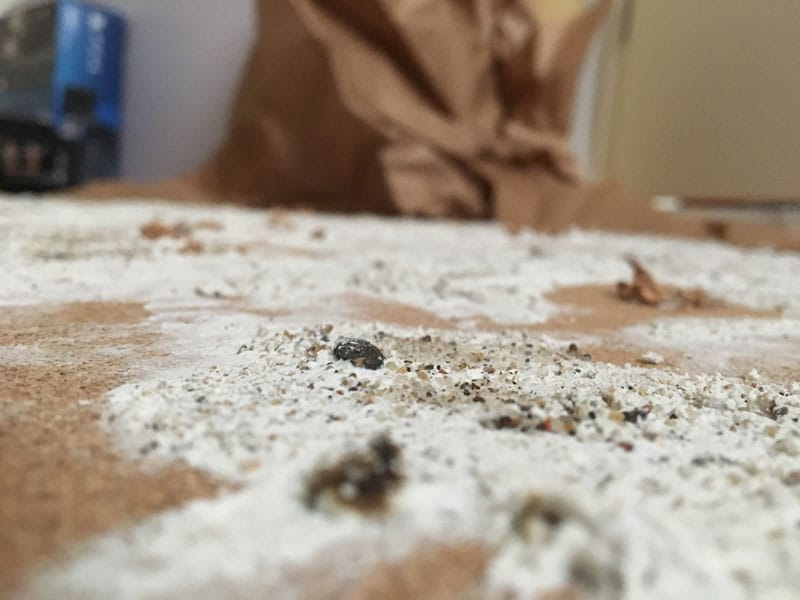


2) After this has dried (couple of hours), paint the whole surface with sienna. Aim for good coverage. (Colours are off on this one, you get the idea.)


3) Again, let it settle for a while. Then apply yellow ochre quite liberally. Start adding white immediately, while the paint is still wet. This will result in a very natural transition. Finish with drybrushing pure white all over it. The picture shows the final stage as you have to be quick.


4) All done. Drybrushing has brought out the small furrows of the cork board. I don't mind them, but be aware. The board will also warp due to all the materials added, yet the frame should keep it in shape. If you're worried, use a more expensive pinboard made of thick cork and perhaps with a metal frame.


5) An optional step. I want to use this board for games which require a gridded surface, like Rommel or To the Strongest. My measuring method was quite time consuming, but I enjoyed that relapse into archaeological habits. lol
There are 12x8 squares, each 7x7cm – which fits the 90x60cm (or rather 86x54cm) board nicely.


6) Adding tufts. Dark green ones were used here to mark corners, light brown or straw coloured ones to break up the sand and stone surface.


Of course, it looks a bit too regular now. But I hope it will ease with some additional scenery and miniatures on the board. The ones shown here are just for size reference.
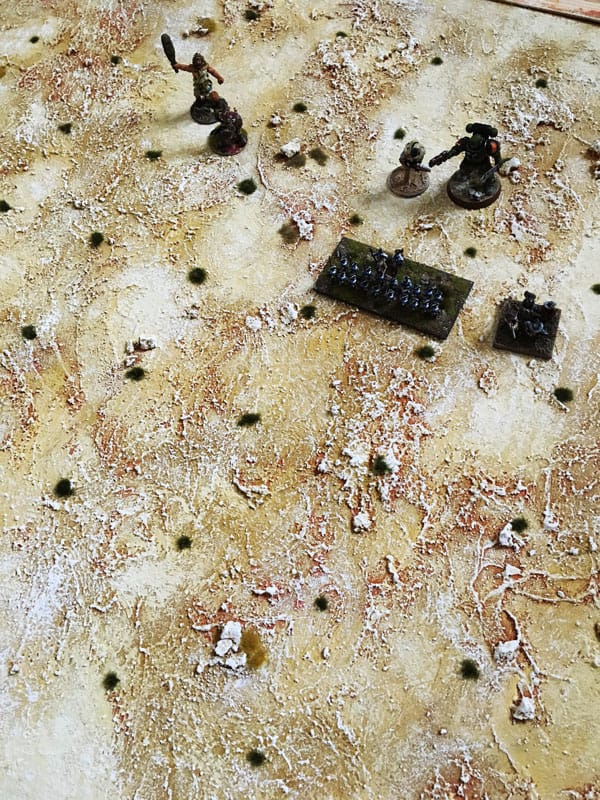


There are 10mm (Pendraken, SYW), 15mm (Tercio, TYW), and some random 28–32mm ones. Most bases don't match the light sand colour of the board, however, bear in mind that the pics were taken in fading daylight; contrast is less stark under a ceiling lamp.
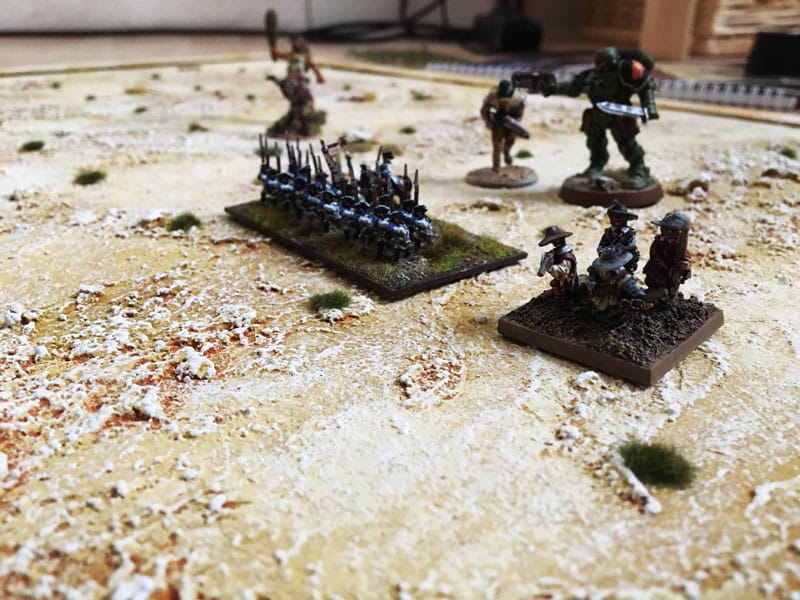


And there you have it, a small, very cost effective gaming board. I've done this on a day off within a couple of hours. While I aimed for a fairly generic look with rather flat surfaces and little fixed scenery, features like roads, hills, or valleys are easily added at the first step.

C&C welcome! :)
« Last Edit: September 06, 2017, 05:33:41 PM by Mad Doc Morris »

Offline Westfalia Chris

  • Cardboard Warlord
  • Administrator
  • Galactic Brain
  • Posts: 7477
  • Elaborate! Elucidate! Evaluate!
Re: Recycling a pinboard – a short DIY
« Reply #1 on: September 06, 2017, 12:58:09 PM »
Looks great. Did you run into warping while plastering and/or painting, and if so, how did you counteract it?

Offline Mad Doc Morris

  • Mastermind
  • Posts: 1782
  • Olympus speaketh?
Re: Recycling a pinboard – a short DIY
« Reply #2 on: September 06, 2017, 01:15:00 PM »
Thanks Chris!
Like mentioned above the board did warp a bit, but the frame prevents more serious bends. Apart from a more expensive pinboard (costs are a factor for me) you could also try to weigh the board down while drying. It would require more time for settling, but I wanted to do this quickly.

Offline nic-e

  • Scatterbrained Genius
  • Posts: 2073
    • Mystarikum
Re: Recycling a pinboard – a short DIY
« Reply #3 on: September 06, 2017, 01:45:05 PM »
I did something similar, I just sprayed mine with textured spray paint and then gave it a drybrush, No warpage.

Yours looks far better than mine tho... :)
never trust a horse, they make a commitment to shoes that no animal should make.

http://mystarikum.blogspot.co.uk/

Offline Westfalia Chris

  • Cardboard Warlord
  • Administrator
  • Galactic Brain
  • Posts: 7477
  • Elaborate! Elucidate! Evaluate!
Re: Recycling a pinboard – a short DIY
« Reply #4 on: September 06, 2017, 02:25:12 PM »
Thanks Chris!
Like mentioned above the board did warp a bit, but the frame prevents more serious bends. Apart from a more expensive pinboard (costs are a factor for me) you could also try to weigh the board down while drying. It would require more time for settling, but I wanted to do this quickly.

My bad. I replied via smartphone and missed the warping reference. Old-fashioned remedies, then. :)

Offline Vanvlak

  • Galactic Brain
  • Posts: 5295
Re: Recycling a pinboard – a short DIY
« Reply #5 on: September 06, 2017, 02:34:50 PM »
Very nice - I like the finish you achieved there.
 8) 8)  8)

Offline Hammers

  • Amateur papiermachiιer
  • Moderator
  • Elder God
  • *
  • Posts: 16093
  • Workbench and Pulp Moderator
Re: Recycling a pinboard – a short DIY
« Reply #6 on: September 06, 2017, 02:42:09 PM »
Clever, that.

Offline Mad Doc Morris

  • Mastermind
  • Posts: 1782
  • Olympus speaketh?
Re: Recycling a pinboard – a short DIY
« Reply #7 on: September 06, 2017, 03:30:07 PM »
Thanks all. And no problem, Chris, it's easy to skip. :)

A second thought; if you keep the surface completely flat, omitting rocks and heaps of gravel, you may be able to use both sides of the pinboard, e.g. with a desert on one side and a grassy area on the other. In my case that would damage the desert surface – unless I'd come up with something to mount it on for gaming. Hmm… ::)

Offline jambo1

  • Scatterbrained Genius
  • Posts: 2138
Re: Recycling a pinboard – a short DIY
« Reply #8 on: September 06, 2017, 04:54:49 PM »
Good stuff, great tips on getting a nice board set up. :)


Related Topics

  Subject / Started by Replies Last post
1 Replies
1177 Views
Last post February 02, 2015, 06:16:40 AM
by Emir of Askaristan
recycling

Started by duhamel « 1 2 3 4 5 » Workbench

69 Replies
12497 Views
Last post July 20, 2017, 03:34:48 PM
by warlord frod
4 Replies
926 Views
Last post November 13, 2016, 08:32:18 PM
by WimVdB
1 Replies
766 Views
Last post November 16, 2016, 06:35:14 AM
by Norm
1 Replies
570 Views
Last post February 22, 2022, 05:08:53 PM
by jambo1