Thank you

Onto part two of the terrain board build...
Okay, so as far as the mountainous area goes, from the offcut of theatrical plastic moulding...
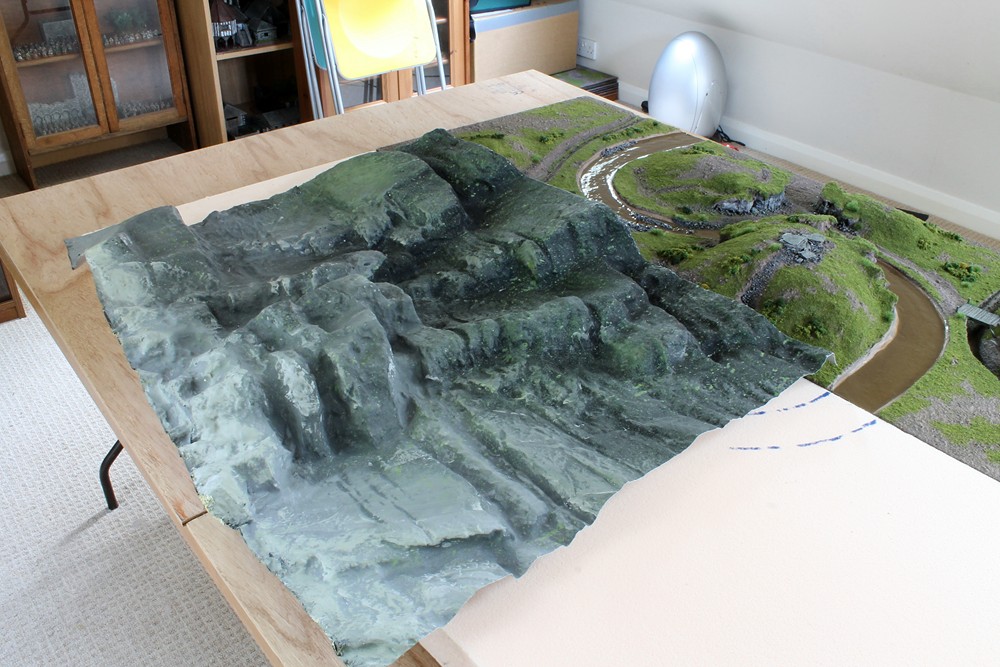
I have cut out these usable / interesting pieces...

...and then fixed them down to the baseboard using the hot glue gun...

As you can see, the hot glue is liberally applied both under the plastic moulding (where it abuts the styrofoam base), and over the join in order to seal the plastic moulding down and in place onto the baseboard.
Where I have gaps, I have shaped some offcuts of foam and glued them in place to provide an approximate base for plastering...
The hot glue also acts as an excellent filler. This stuff is dirt cheap and amazing. It sets clear and rock-hard - like solid plastic.
It doesn't matter what it looks like at this point because all those joins and infilled areas are going to be completely concealed by wall filler at a subsequent step...

So that gives me the basic layout I'm going to be working to... Looks a bit weird at the moment, but will look like a cohesive whole by the time I'm finished


Meanwhile, back in the Cimmerian village...
Once the 'icing' layer of wall filler has hardened, I've then applied the concealing top coat of gloop (sand/PVA/paint mix)

I've also started adding a few embedded features, like a set of stone steps leading up to the chieftain's hut, and flanked by a pair of standing stones. (These are just chips of slate scavenged from decorative plant pot surfacing...
)

The next step with the village will be to create some walls, outhouses and enclosures, to get that semi-fortified Iron Age settlement look... I'll probably just use foam and Green Stuff to do this...
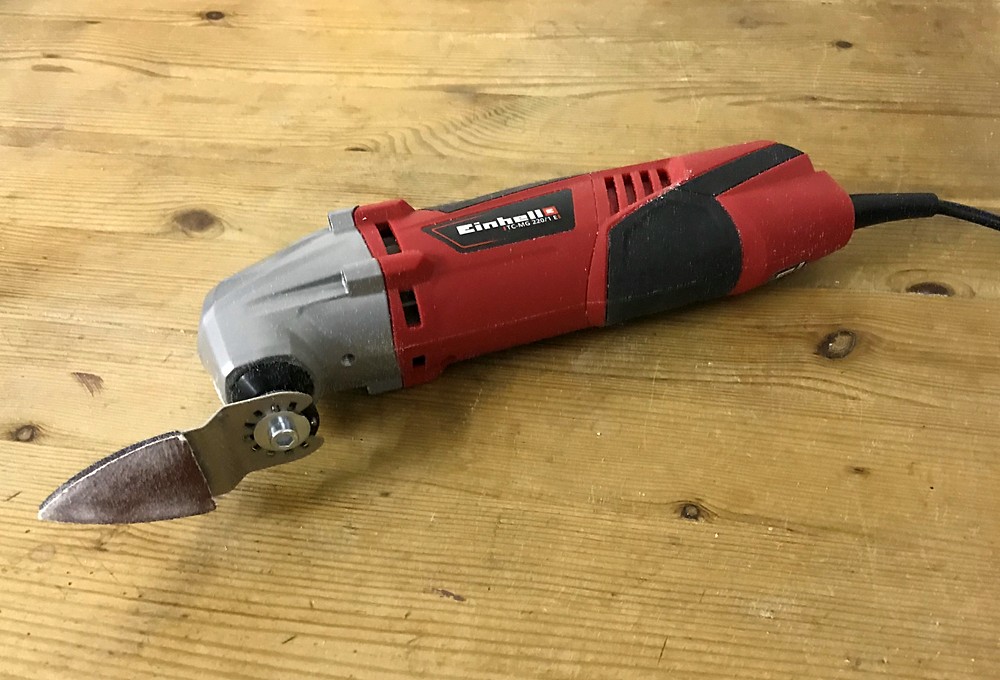
I've also sanded out the river bed on the new section... As you can tell, I fannied about with two or three different routes for the river, but what you are after is a natural, gradual sweep, so once my plastic uplands were fixed in place I could see where the river had to run...

I bought a new cheap and cheerful multi-tool to do this - 30 quid from my local builders' merchants, and a dead useful addition to my terrain-making armoury. Took a fraction of the time it usually does to channel out a nice 3mm deep river bed...
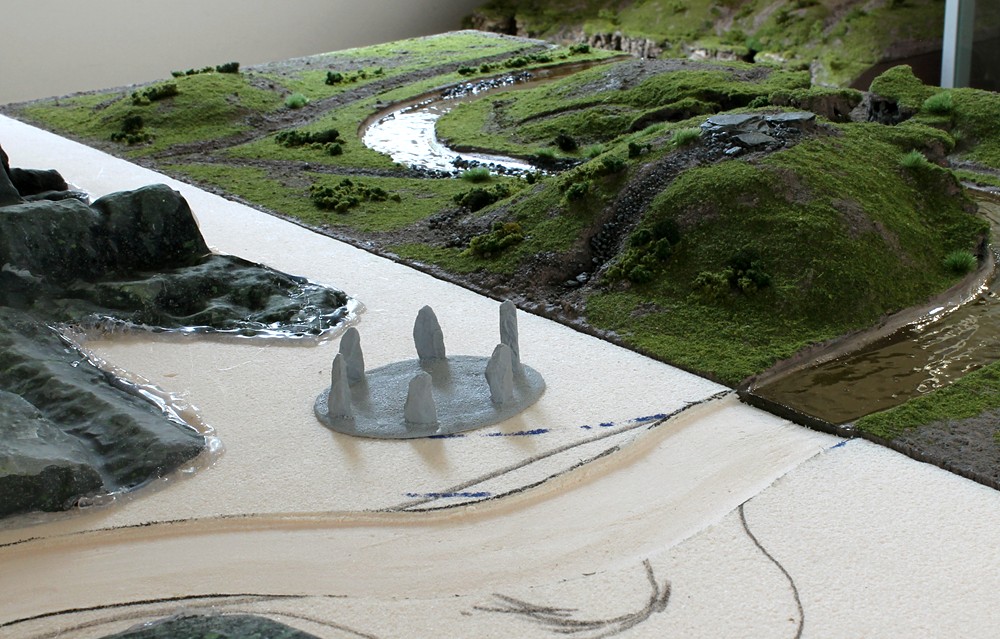
I also acquired this lightweight resin stone circle from Copplestone/North Star, which I'm going to incorporate as a fixture - probably round about here on the new half of the terrain board - providing the mysterious and eldritch portal to the benighted Pictish Wilderness...

And finally for now, I've applied the icing layer of wall filler to blend the plastic vac-formed 'mountains' into the styrofoam baseboard. Also to build up the river banks...

There are a few things to note about this...
1. It's important to roughly stab / score the styrofoam board all over, where the wall filler is going to be applied in order to provide a decent key for the filler to grip onto.
2. The aim here is to conceal the join (including all that hardened hot glue), cover up any bodged infill, and to provide a natural looking blend between the raised areas and the baseboard.
3. Once the basic filler is applied with a palette knife, I then used a very wet, large, soft paintbrush to smooth out the filler so that it follows and blends with the line of the rock formations as far as possible... You can slap as much water onto the filler as you like - once it evaporates the whole thing dries out and it doesn't seem to affect the adhesion, nor the hardness of the final set contours.


Once again, it doesn't matter too much about the join being a little bit messy here or there, because the whole area will be further covered with a top layer of concealing gloop anyway (except for those areas which are going to be left as bare rock, which do need to be smooth).
Here endeth the second lesson


 Welcome, Guest. Please
  April 25, 2024, 10:24:01 AM


