The colonial Afghanistan wars, especially the second Afghan war and the following clashes and campaigns have always been high on my agenda and I had plans to bring it to the tabletop for many years. As my friend Stefan (aka Monty on LAF) explained in detail already in his topic here
http://leadadventureforum.com/index.php?topic=103186.0, our discussions about the "Little Wars" of the nineteenth century brought the initial spark to start this project at least.
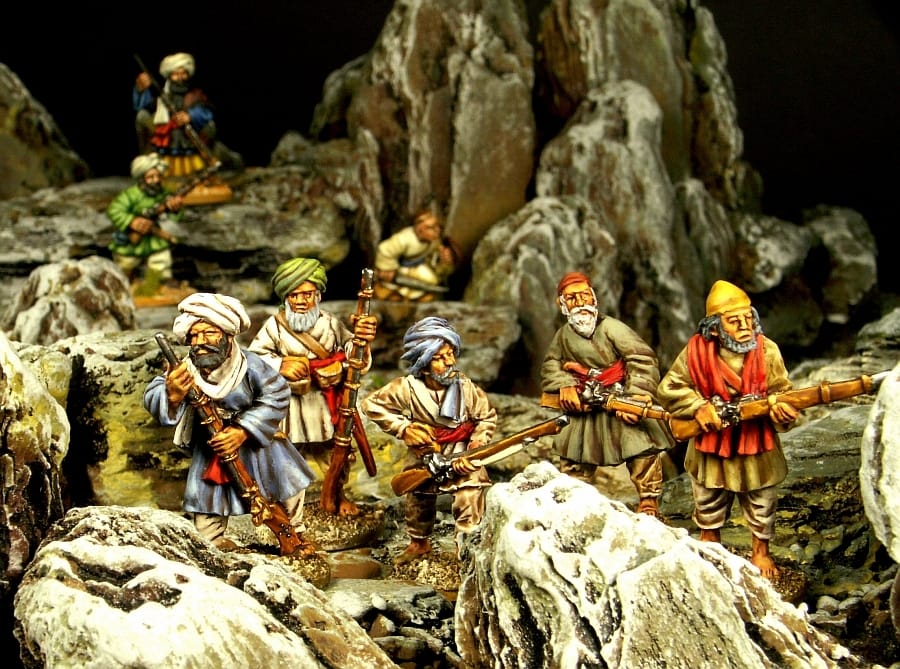
As Stefan's great love of the british side of the conflict set him in charge for most of the angloindian troops, I'm the one responsible for pathans and hill tribes, afghan troops and the bulk of the terrain. That doesn't mean we both can't do anything from the other side if we want to, but as a general management of allocating the work this was a good foundation to start the project. Through the last months a lot of things could be finished already and the game will be at the Crisis show in Antwerp next week for the first time. We plan an expansion of the game for the Tactica in Hamburg early next year, so it will keep us busy through the next months ...
I will show here what has been done already and how I did it, but also pics of finished miniatures and other things of interest and although some parts could have been shown in workbench as well, I like to have everything in one place.
My main inspiration emerged from a range of books Stefan already presented, for example Michael Barthorp's splendid "North West Frontier" book, but also some more I would like to mention:
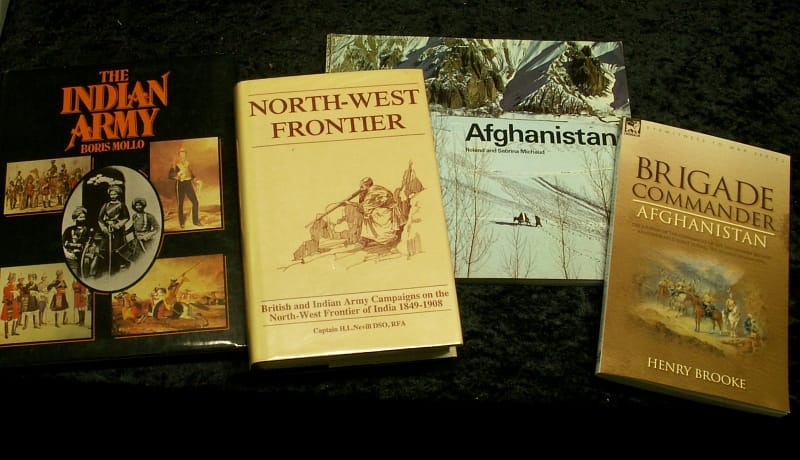
"The Indian Army" by uniform expert Boris Mollo is a wealth of general information about the indian regiments and covers the regiments of the 2nd Afghan War as well. "North-West Frontier" by Captain H.L. Nevill (first published 1912) is an intensely researched survey of all NWF-operations 1849 - 1908, based on Official Histories of campaigns and extensively drawn from personal accounts, and as such the standard foundation for lots of authors and their later works. The third book, "Afghanistan", is a very atmospheric photo book by Roland and Sabrina Michaud who travelled the region, showing landscapes and people living there and is a pool of inspiration for me. The same is true for the fourth book, the journal of the commander of the 2nd infantry brigade, Kandahar Field Force during the 2nd Afghan War, Brigadier-General Henry Brooke. As an eyewitness account it presents an abundance of details and observations and is highly recommended.
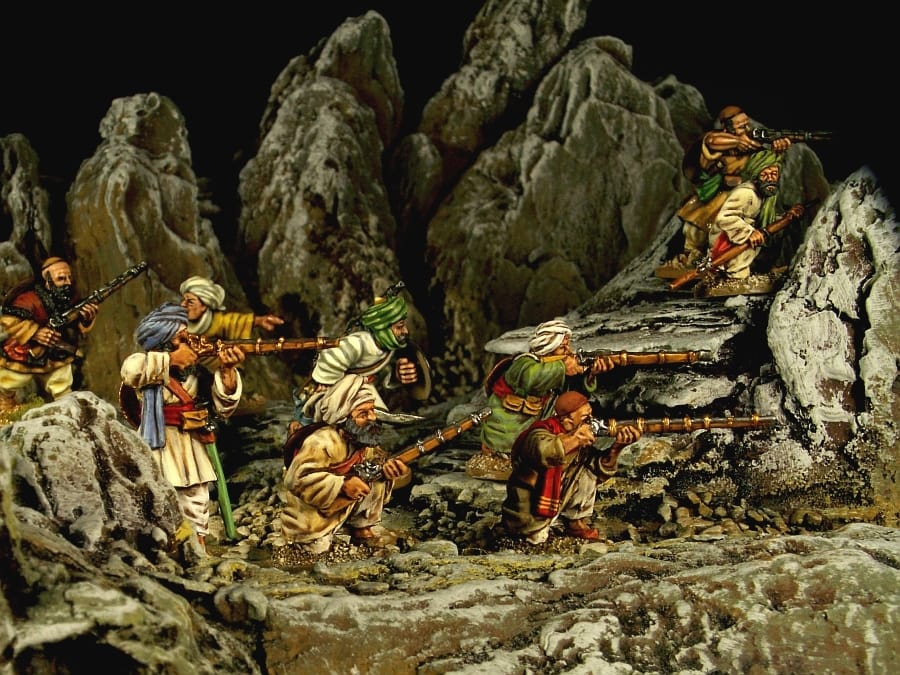
So, on to modelling the tabletop version of afghan hills and rock formations. Later I'll show my approach to build a typical afghan hillfort.
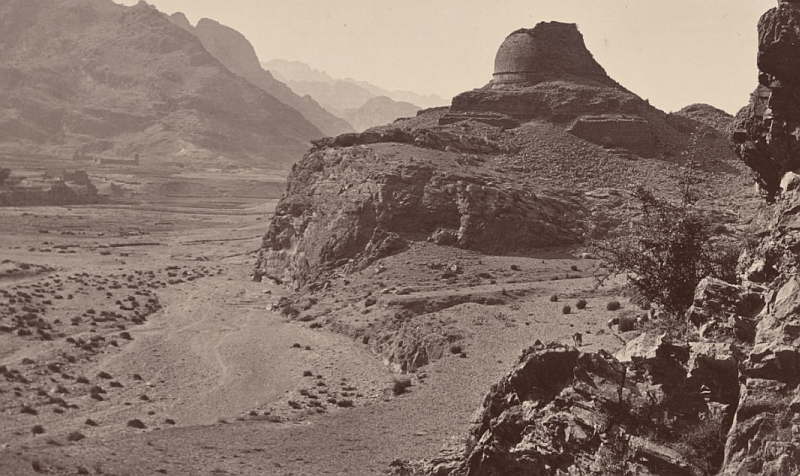
This is a contemporary photo of the afghan highlands region and shows the very rocky terrain with steep and craggy formations. When searching the internet for modelling approaches of such terrain I quickly found the inspirational
http://maiwandday.blogspot.de/ by Mad Guru and
http://horseandmusket2.blogspot.de/search/label/Second%20Afghan%20War by Michael "Reggie" Davies. Both blogs - highly recommended as well!
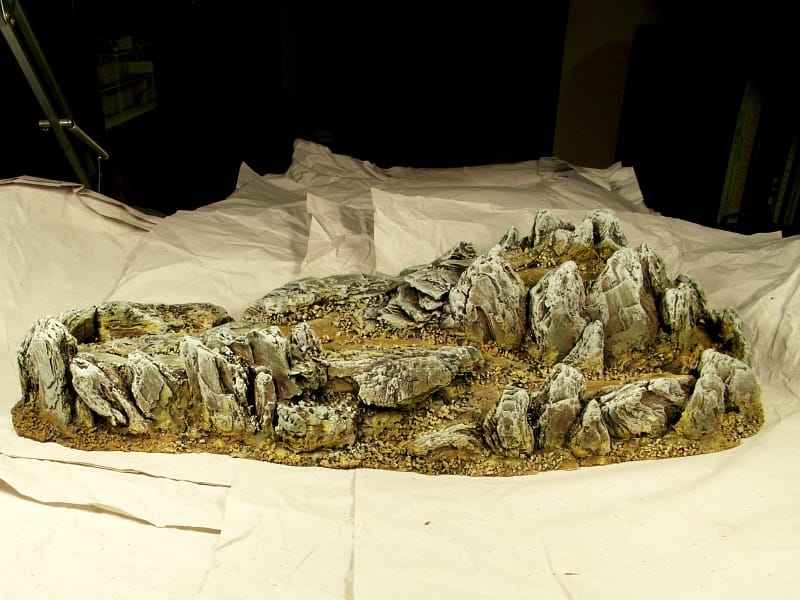
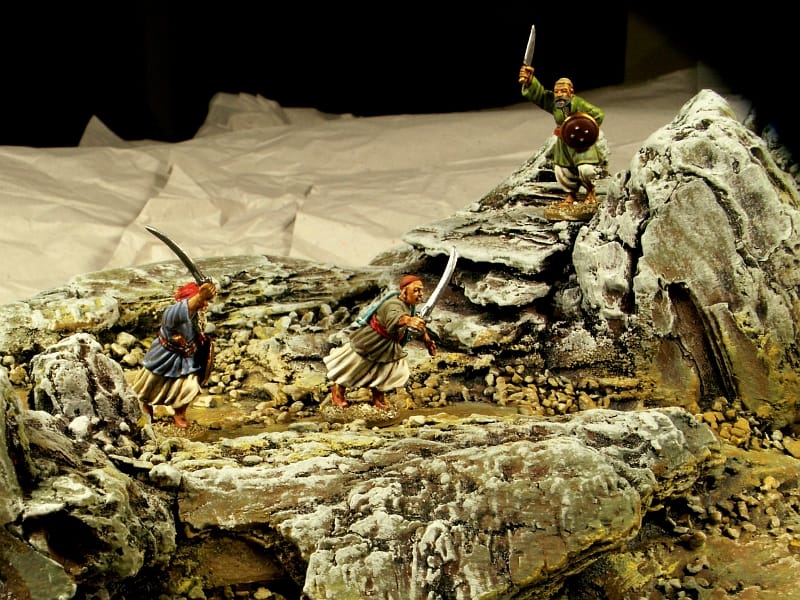
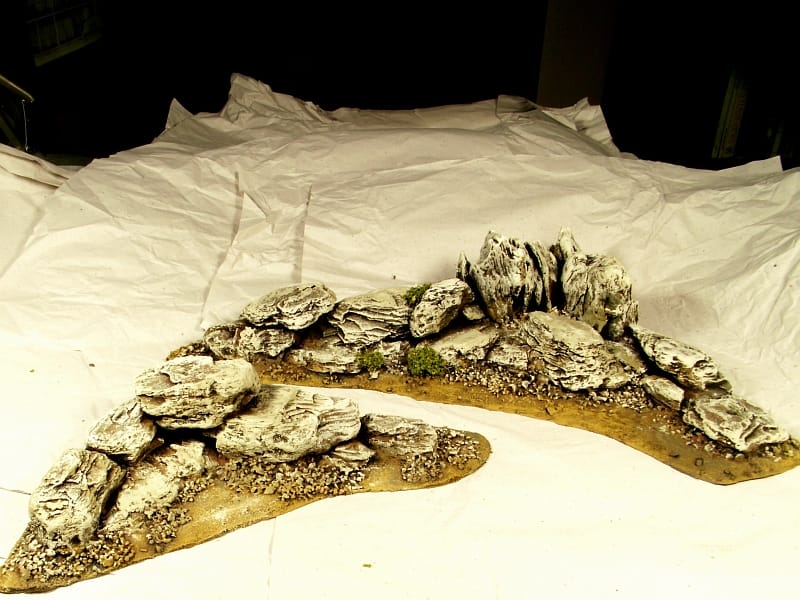
In the end I could create the landscape you see above (one of the pics I entered into the last Lead Painter's Legue #11). And some more pics of the finished pieces, followed by step-by-step photos of how they were created.
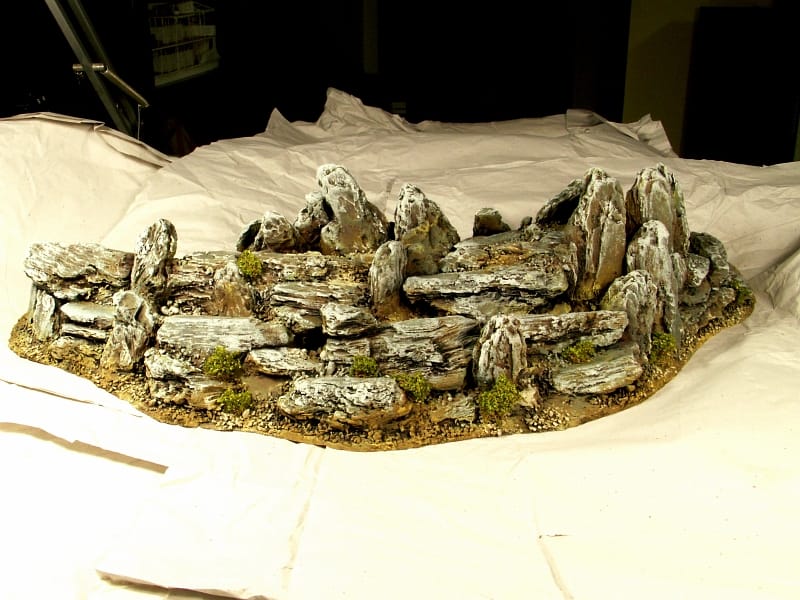

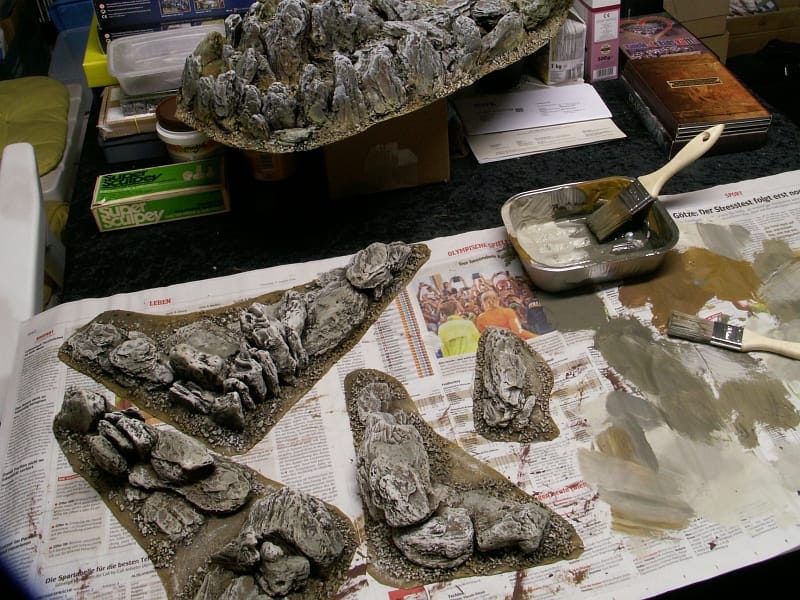
All my hill and rock formation elements are based on 5 mm MDF material. If you want maximum security against warping, use this material. It was cut with an electrical jigsaw at 45° first and later with a craftknife to thin down the edges. The basic shape of the hill was built up by layers of 30 mm foamcore (Styrodur) fixed with fast setting contact glue. The magical material for the rocks itself is pine bark, an easy to work with natural stuff you can buy in larger quantities at garden centres or ebay for example. I bought a 60 litre bag of extra large pieces up to 100 mm for around 16,- Euros, enough to build the entire Hindukush (or share some with friends ...).
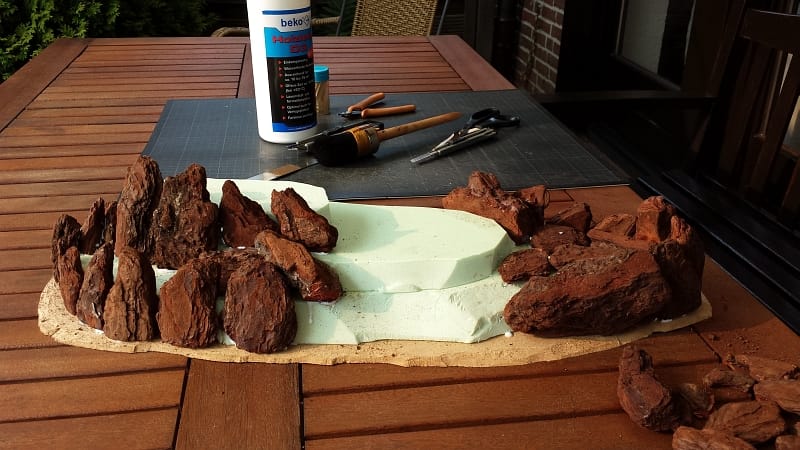
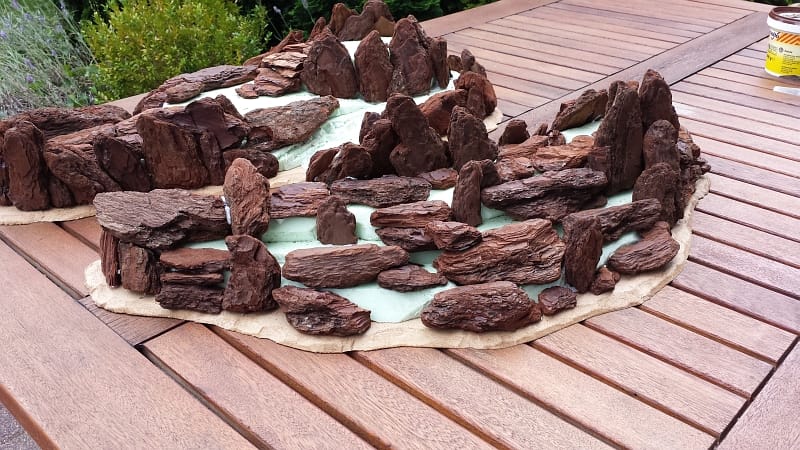

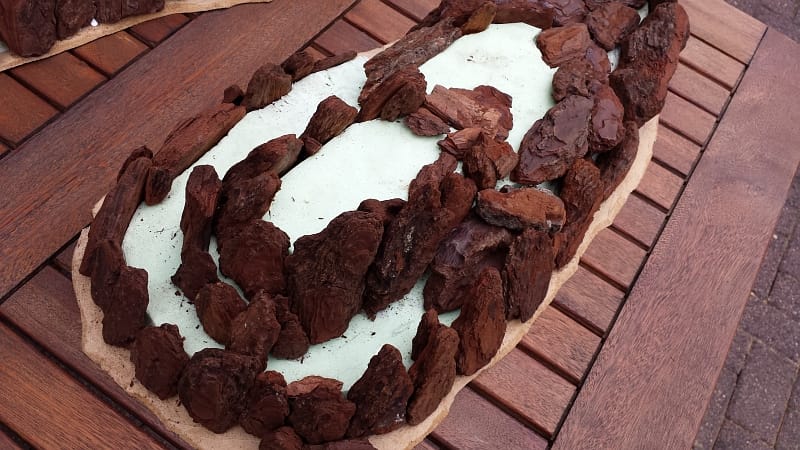
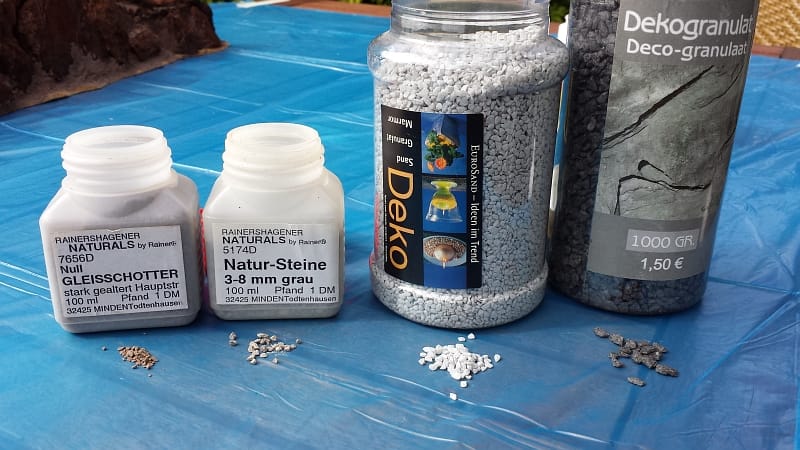
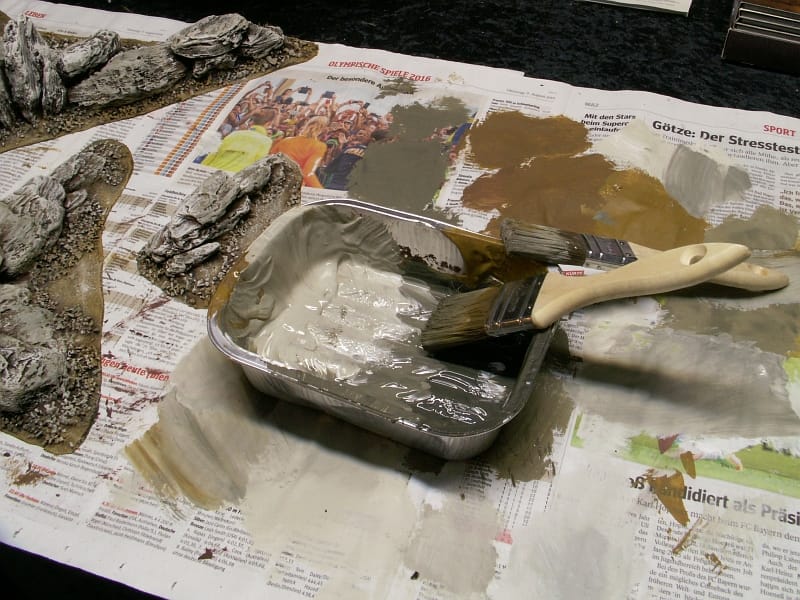
The bark should have time to dry thoroughly for some days as it's quite moist fresh from the bag. It can then be cut with a craftknife quite easily and glued down with a hot glue gun or with waterproof white glue as I did for extra strength. When dry I used ready made filler to fill any holes between the pieces and to smooth everything into a believable piece of rock formation. For additional ballest I used a couple of materials I had at hand, but you could also use cat litter or similar products to simulate rock debris and rubble. Everything was glued again with waterproof white glue and after drying got another coat of glue to fix everything securely in place for the coming heavy drybrushing work.
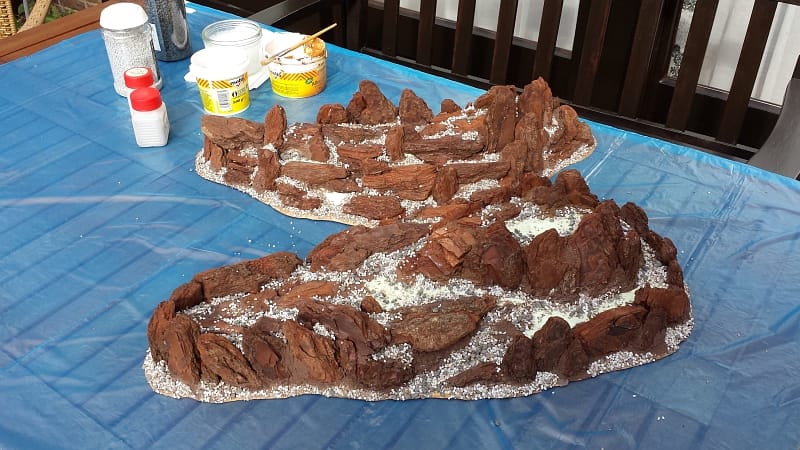
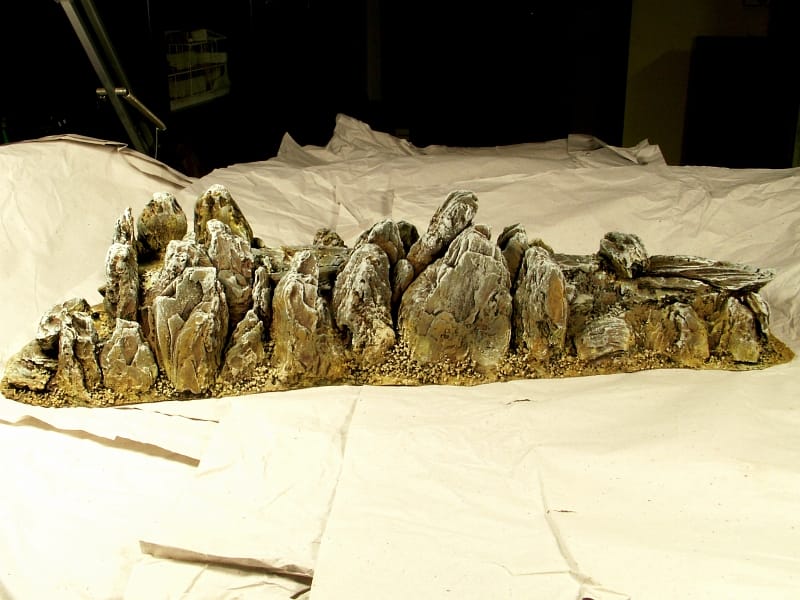
The finished pieces got a black undercoat first from a spray can and were then heavily drybrushed with craft colours in dark brown, medium brown, khaki, then lighter drybrushed with some sand tones and finished with two medium and light grey colours:

That's it for today. Next comes my favourite project for this game board, an afghan hillfort ...


 Welcome, Guest. Please
  April 26, 2024, 03:01:55 PM


