I thought I would share the story behind the creation of my War Rig The Green Dragon.
With the 2017 Pendraken painting competition I decided I would bump up making the Stronghold for my Post Apocalyptic Road Warrior army. For those who are not familiar with the HOTT (Hordes of the Things) rules, a Stronghold is like a camp for your army, and only the defender fields one. If it is taken, then the game is over and the defender automatically loses - but I will say in all the years Ive played HOTT I have only taken one Stronghold!
My plan was to create a War Rig a la Mad Max Fury Road and the Guzzoline truck in Mad Max 2/The Road warrior. So, I started looking at all of the possibilities from the various Pendraken ranges because I really like working with those models, the service cannot be beat. They also fit nicely on the allotted size bases, and fit fine with my 15 MM figures. After careful consideration of the look I was seeking I finally decided on the Spanish Civil War armored truck, model SCV1 as the starting point.
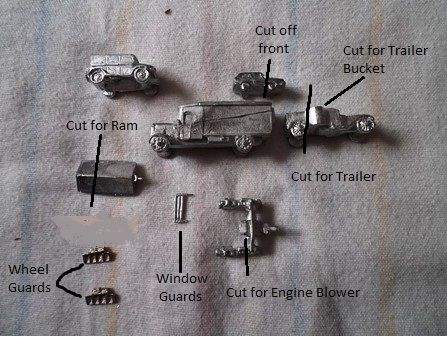
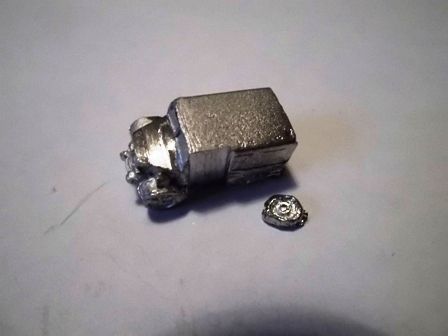
Here is a preliminary view of some of the basic components and where I had planned to create various pieces from.
The Truck has been modified to remove unwanted hatches and mold lines, while the trailer has been cut from the armored car body and the 6 MM car body has been modified to remove the front end and the wheels. The car body used in making the model is a 6 MM Irregular car that seemed to fit just right in the final look I had for the model. You can see the truck body still looks 1920-ish and needs to be modified to resemble a more modern truck. Also, in removing the front end from the car body to go on top, I wanted to be sure and leave enough to create the firewall.
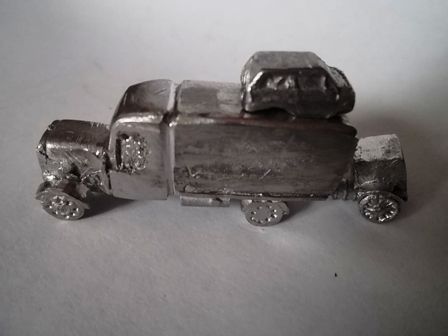
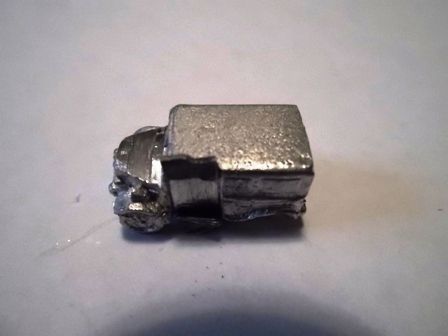
Here you can see the beginning steps of modernizing the truck by filling in the old style open side leaving a space for the windows. Also you can see the wheel guards made from the WW2 hedgerow cutters with the space between the spikes filed down and curved to fit over the fender. The engine blower assembly is cut and sized for fit, and a scoop roughly cut to go on top. The car body has had the firewall filed into shape, and the rear hatch removed, including the bumper.

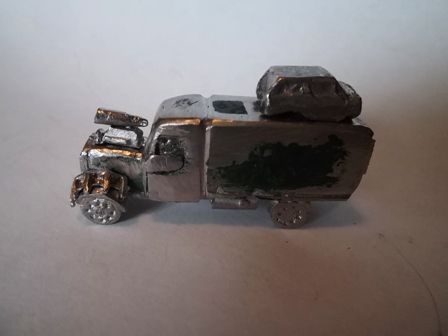
New hatches are added to the sides and top of the rear portion of the truck body, and the ram has been cut and glued on. The air cleaner can has been added to the right rear of the engine, but still needs the scoop added. The rear wheel guards have been cut and glued on and the front window guard has been glued in place. The cab of the truck has been reshaped to give a more modern look, and the side steps have been added to each side.
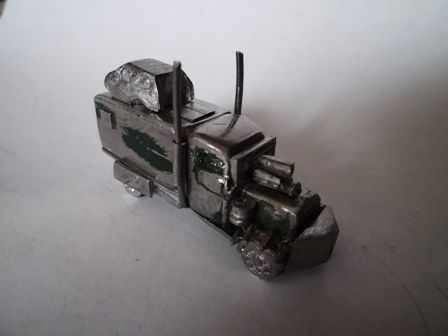
Here you can see the exhaust pipes added, but intentionally left long so I can size them later in the process. The exhaust guards have also been added to the rear of the cab to allow the exhaust pipes to project upwards through them. The front wheel guards have been permeantly attached and you can see the hole thats been drilled for the air cleaner scoop.
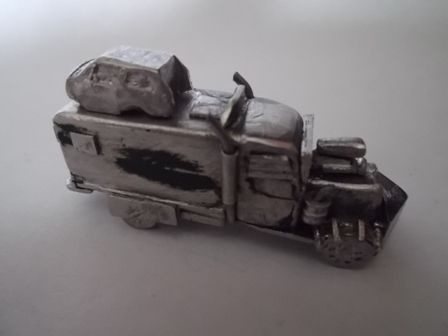
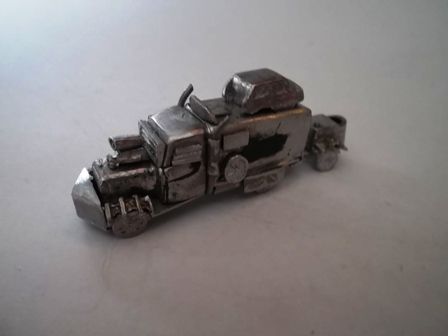
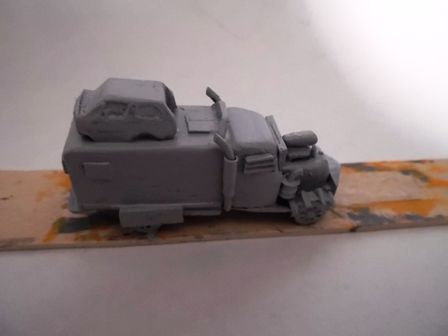
The exhaust pipes have been cut down and shaped with a rearward rake, and the air cleaner scoop has been added. The small shield in front of the top hatch has been added and shaped. Lastly, the side window guards have been added, and the blower assembly scoop has been shaped. The truck is nearly finished and ready for painting, but a spare wheel was cut from the left over armored car body and glued to the driver side off the front of the cargo area.
Next, to the trailer. The trailer was shaped from the rear portion cut from the armored car, a fuel port made in the top, and the wheel guards added, made the same as the front wheel guards on the truck. The fighting position on the rear of the trailer was made from one of the turret portions of the armored car, being carefully cut out and shaped, then hollowed out. A new floor was added and both were glued to the rear of the trailer. Lastly, a towing bar was made and attached to the front of the trailer. You can see the spare wheel on the truck in this view.

Heres a view of the completed trailer.
That finishes the creation of the truck and trailer from a modeling stand point, but since the base size for a Stronghold allows for me to use a 60 x 80 MM base, I decided I wanted to create a look of post apocalyptic desolation and abandonment around the truck. So, instead of just doing a rough ground and set the truck out I decide to do a section of highway, with potholes and grass growing up in places. That also allowed for me to include a wrecked, abandoned car.
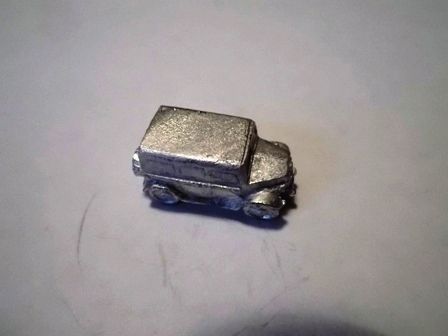
I thought the Humber Staff Car model, BRV93, would allow for a pretty simple conversion to a more modern looking SUV, so that was the starting point. Of course it would need some modification to the front end, and I also wanted to have the hood raised slightly and the drivers door ajar, so that was going to require some creative conversion work.
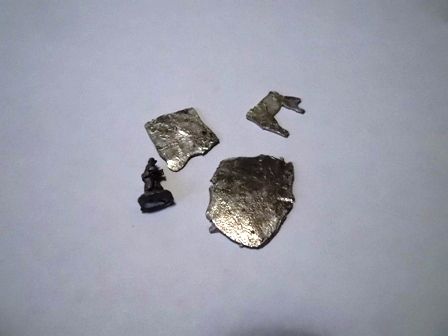
To create the door and hood I was going to need some additional flat metal to work with, which I cold forge by hammering left over odds and ends from figures to the thickness I need. This picture shows some I had made with a 10 MM figure to give a perspective on size. Some of the parts for the truck model were made the same way and then shaped and formed.
Next was to work on the car body itself, which meant to file out the area where the door was going to be ajar and the area where the hood would be open. And, yes you can see that I filed away parts of the vehicle I still needed, so they had to be added back using some off the cold forged metal. I also wanted one of the wheels to be taken off and lying on the ground next to the vehicle so I removed the drivers side rear wheel. Then after removing the rear wheel I carved out an area for the wheel well and then created an axle and hub using again left over scrap metal shaped to the part (I keep a box of left over metal and remains of cut up figures as you never know when you might need it). Lastly, to have the wheel laying on the ground, I carefully removed the spare wheel from the back of the model.
I took this photo to show you how I repair or create new shapes on a model. There is no way I could cut and file a piece to fit, so what I do is cut a piece oversized but to basically fit the need. Once the glue has dried than I then cut and file it to the shape I want. You can see the top above the open door, i.e. the body portion, and the same below.

Here you can see the area above and below the door have been cut and filed to shape. The new door made with the window cut into it, and the piece of metal to fix the fenders on the front and make the hood. The spare tire has ben cleaned up. Then the fenders needed to be made more modern looking, new bumpers added and the center bar of the windshield/windscreen removed. Then after all that work I had to go and bang it up and flatten the tires. So, I gouged out places in the fenders, added some scraps and dings about the body and pulled the new bumpers away on two of the corners. Then it was time for the really scary part flatten the tires. I know with plastic modeling you can heat a screwdriver and hold it against the wheel and it will flatten as long as the screwdriver isnt too hot. So, I tried that first, but found I wasnt able to heat the screwdriver enough to do anything, and I decided to try a soldering iron. Oh yeah, plenty scary!!! I carefully touched the bottom of the wheels just very quickly and it melted some of the bottom of the tire but did not give a flat tire look, so I then added some green stuff to the bottom and built up the bottom of the tire to look flat. Of course the right front tire would not be sitting on the ground so although I flattened it a slight bit it is nothing like the other two tries. Whew, is all I can say as that was a very nervous bit to do!
Here you can see the finished modeling of the wrecked SUV, the flat tires and the axle where the rear wheel is missing. All primed and ready for painting. Broken window glass will be added to the open door window after it is painted.
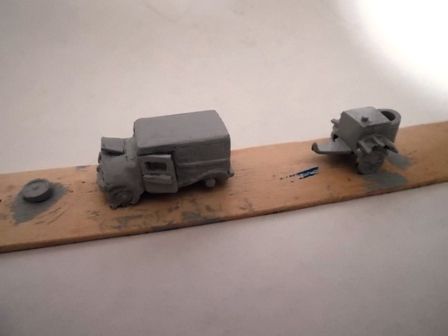
Heres the truck primed and ready to paint. This can be a satisfying time or a frustrating one, as it will tell you if you been successful in filling in gaps and such.
This brings me to the painting stage and I will post that shortly as I am still writing it and also the development of the base. So, more to follow


 Welcome, Guest. Please
  April 23, 2024, 07:39:57 PM


