Last night at Perth Miniature Gamers Group my mate Pete and I played
The Bridge at Gehondeskirk, a
Chain of Command scenario from the TooFatLardies 2017 Christmas Special.
This is a variant on the CoC Attack and Defend Mission designed to showcase the
Unreliable Allies rule in the forthcoming Blitzkrieg 1940 Handbook. The BEF are in Western Flanders retreating towards Dunkirk, and are tasked with slowing the advancing Heer. At the fictive village of Gehondeskirk a stone bridge, capable of taking the weight of the Wehrmacht's panzers and heavy guns, crosses the Ypres-Comines canal. Destroying it will delay the German advance and buy vital hours for the retreat and evacuation.
Unaware of the recently signed Armistice, Belgian Engineers are toiling to place explosives on the bridge. To assist the BEF infantry, a French infantry section, and a 25mm AT gun, both caught up in the chaotic withdrawal, have agreed to assist in the defence. The fog of war means that these troops must work together, but could be pulled from the battlefield at a moments notice.
****
The battlefield from the north-west (BEF left). The canal and bridge overlooked by a small quay. Scattered farm houses and residential buildings among the fields to the east: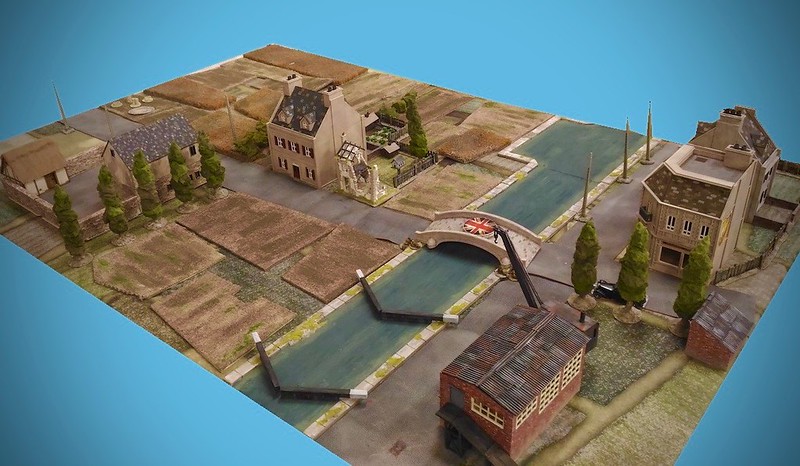
Despite two free patrol moves for the Germans, the BEF patrolled aggressively, enabling them to lock down the enemy JOPs in the buildings at the rear of the table. BEF JOPs were in a small industrial building overlooking the canal lock on the British left, another in the Cafe overlooking the canal bridge, and another on their right (southern) flank. The industrial building was reinforced with crates and sandbags to form a defensive Keep.
Initially the game started quietly, with a good roll or two for the Belgian sappers to place their charges (activate on a 1 or 3, roll a dice to accumulate pips - attempt to blow the bridge when 36 pips have been accumulated). The Germans then got a run of two and then three consecutive phases, allowing them to deploy both Panzer IIs on the road, and advance forward.
A closer view of the building from which the Germans attacked. One German section fired on the bridge from the farmhouse just visible among the trees to the left of this picture: 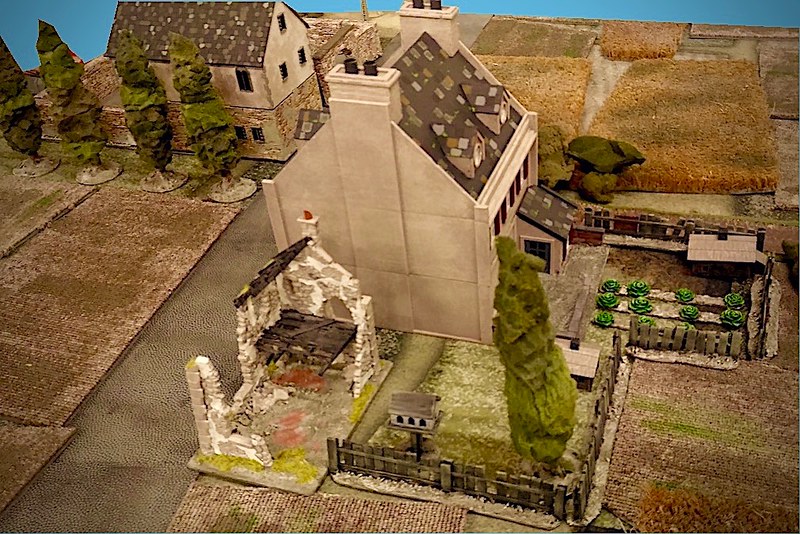
BEF finally got some troops in the keep, and at last the prized French 25mm anti-tank gun on table just to the north of the bridge, sighting down the road. A shell hit a Panzer II but aside from a loud clang, did little to dissuade the confident Panzer crews. The Panzer retuned fire with HE from its 20mm cannon, wounding the French
Caporal directing the gun, and killing a crewman. In the distance
feldgrau Grenadiers could be seen moving in the dust and among the shadows of the buildings to the east.
The lead Panzer II moved to the left side of the road, using the arch of the bridge to obscure it from the 25mm. At this point a British Boys gunner, positioned on the tiles of the cafe floor, aimed his weapon and pulled the trigger. It punched a hole through the panzers armour and stunned the gunner as it ricocheted around the confined turret. In the meantime British infantry arrived on both floors of the cafe, and among the shooting the brave Belgians could be seen scurrying around the bridge with charges and fuse wire.
At this stage a full German CoC dice ended the turn, and forced an Unreliable Allies roll for both French and Belgian contingents. Luckily for the Allies they had no intention of leaving, and got on with their work.
The French gun crew continue the defence, while Belgian sappers set their charges: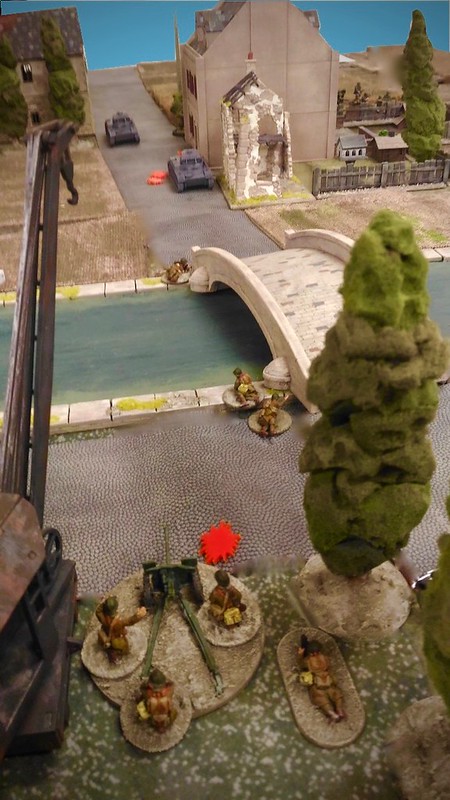
A German squad responded with small arms fire on the cafe from the farm house on their right flank. It was a long range shot and aside from smashing a few chairs and shattering glass, it had little effect. The further of the two Panzer IIs fired at the 25mm gun, killing the
Caporal, but not knocking the gun out of action.
The Allies responded with more fire from the Boys, and also a hail of .303 from two Brens in the cafe. They were joined by the chatter of a French Chatellrault LMG fired by the freshly arrived French infantry from the cabin of a dock crane. This hail of angry lead was enough to unnerve the lead Panzer, its commander ordering the driver to reverse back a bit.
A phase of return fire from the 25mm was ineffective, as was a response from the German troops in the farmhouse. The forward Panzer took a moment to steel itself as its commander rallied his crew.
All seemed temporarily in the balance until, with a cry, the Belgians came running from the bridge. They dived into the cover of the cafe and there erupted a tremendous explosion behind them. The Bridge at Gehondeskirk disappeared in a cloud of dusty smoke, large chunks of 19th century stonework splashing into the canal. A great cheer went up from the assembled Allied contingent, and with taunting fists and obscene gestures at the distant troops across the canal, they prepared to pull back toward the beaches.
With a tremendous bang and a cloud of smoke, the bridge is destroyed, as seen in this remarkably well-timed photograph from an RAF Lysander passing over the battlefield: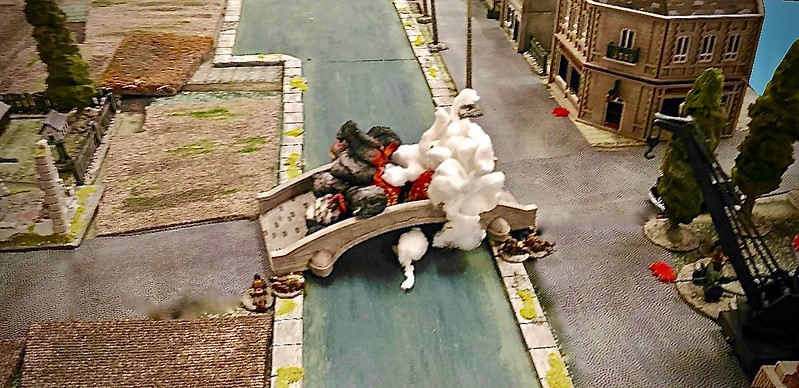
******
Great game against a worthy opponent once again. The defence was brittle (potentially falling apart of its own accord) but I was lucky with demolition rolls, and fortunately faced only one
Unreliable Allies roll which was easily passed by both contingents. I was also able to make good use of the ability for small arms to drive off lightly armoured vehicles at close range.
Looking forward to more 1940 action as part of our clubs themed early war gaming of 2018. In particular Im very keen to get my hands on the forthcoming TFL Blitzkrieg 1940 handbook (full title yet to be announced), which cannot go on sale quickly enough for my money!
Thanks Pete.


 Welcome, Guest. Please
  April 20, 2024, 05:31:51 PM


