I was asked on another thread how I built these Balloons.
I did take some photos during the build but I can’t find them just now. I will post them later if I can find them.
The components I used to build them were –
Brass rod
Plastic card
Plastic tube 2 mm diameter
Plastic tube 5 mm diameter
Plastic tube 20 mm diameter
Plastic box section
Balsa wood sheet
Plastic rod for rivets
A blister pack for clear plastic
Plastic net bag for holding onions
Thin cord
Eureka Pig Tickler Uni cyclists
And
A plastic ball from an old ball pool which my kids have grown out of.
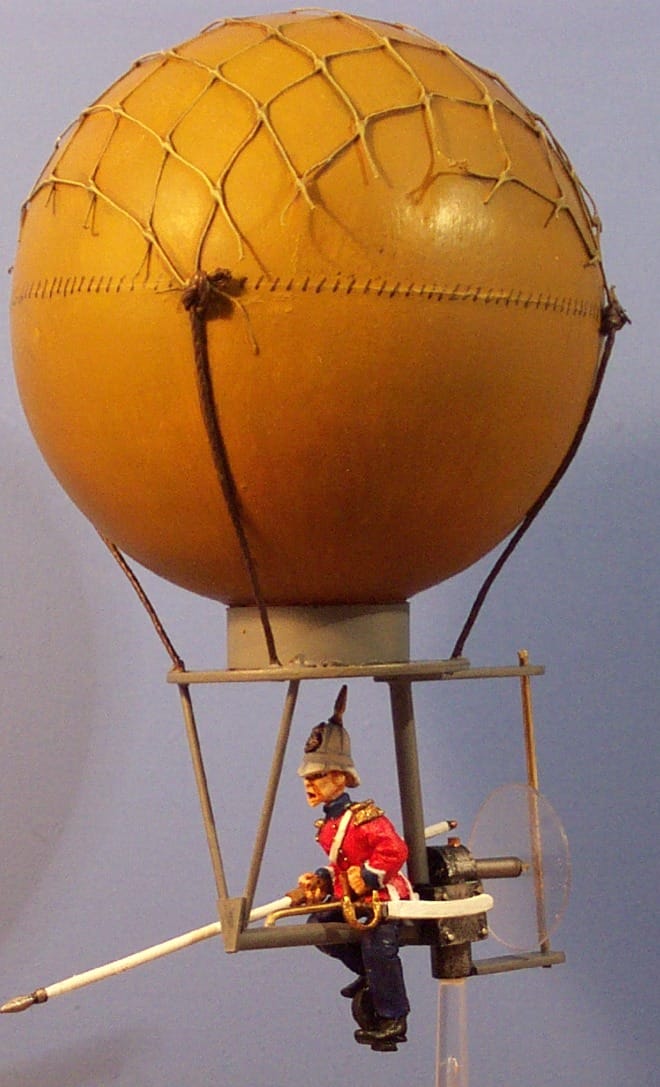
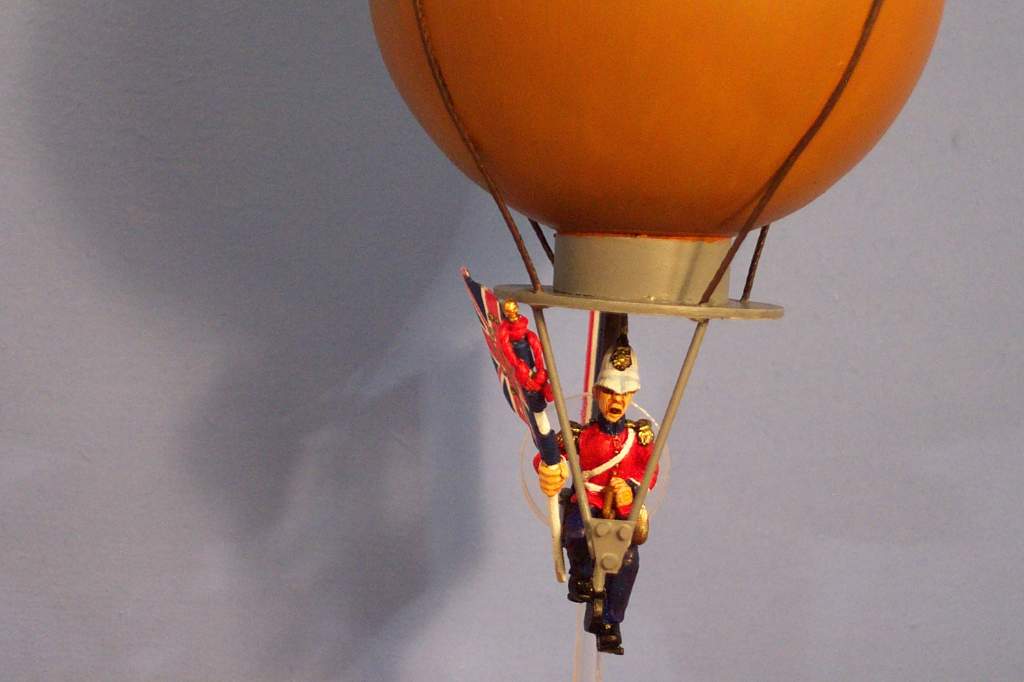
Below are a couple of pictures showing where the components go –

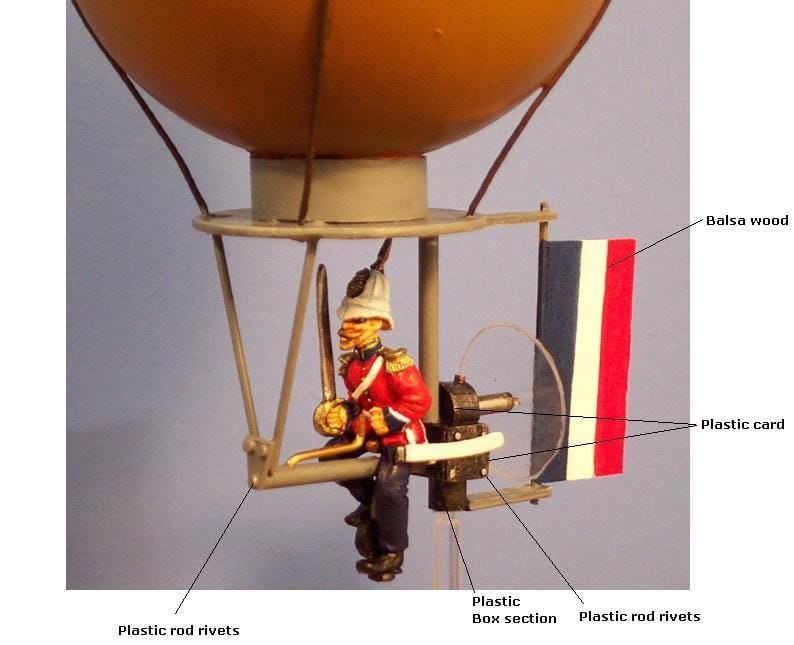
The gear box was built from a small box section capped off at either end with plastic card.
A bit of plastic tube was cut in half and glued on top. This was closed off with plastic card at the pilots end.
A small hole suitable for my brass rod, was drilled into the bottom of one face of the box section, again the face nearest the pilot. A bit of brass rod 30 mm long was then glued into the hole. This was to create the bit for the pilot to sit on.
I cut the wheels from the Eureka Pig Tickler Uni cyclists, just below the bottom peddle.
I then drilled a hole through the saddle support, right below the saddle, again the hole was suitable for the brass rod I had.
A small 5 mm long section of 2 mm plastic tube was slid over the brass rod sticking out of the gear box. Then the pilot was threaded on to the brass rod as well. Another piece of plastic tube was then threaded on in front of the pilot. The two bits of plastic rod had to be filed to fit neatly between the pilot’s legs.

The pilot and front bit of tube were not glued in place to allow for removing the pilot to paint.
A small length of 2 mm tube was fitted into the half piece of tube on top of the gearbox, facing backwards. A bit of brass rod was then cut just slightly longer than the tube and then glued inside the tube with a little protruding to fit on the clear disk of plastic represent the propeller. Clear disc was cut from a blister pack and a hole drilled to suit the brass rod. Again this was not glued in place to allow for painting.
A small section of 5 mm tube was then glued to the bottom of the gearbox to give a place for the flying stand to fit.

The rear end support for the tail was then built out of plastic card, more tube and brass rod.
A small bit of brass rob was bent into shape for the steering handle and a small hole was drilled in the tube that sits in front of the pilot.
The net over the top of the balloon was a diamond shape cut from an onion net bag. This was quite tricky to get neat and was achieved with a lot of trial and error and a lot of onion bags (Scratch builders never throw anything out. Eco friendly lot). The cord was then tied to the four corners. This was then stretched over the ball and super glued in place at the centre line. Again this was a bit fiddly with both net, cord and balls being stuck to my fingers at various stages.
A disc was then cut out of plastic card, 30 mm diameter. A short length of the 20 mm tube was cut and glued in the centre. Four small holes were then drilled at the four points of the compass on the disc.
The ball was then glued to the 20 mm tube. Once dry the cords were fed through the small drilled holes in the disc and glued in place.
Two other small hole were drilled in the disc to locate the “V” shape at the front made out of more brass rod.
Various rivets were added.
Then it was all painted and then fitted together and glued.


