Now that Cold Wars has come and gone, I can share with you the story of how I came to build my top-secret Skeleton Cay board. It all started with an idea--a time-spanning pulp game where pirates would bury the treasure in the 1640s and then in the 1930s, various people would try to dig it up.
Your quintessential movie pirate island has a big skull-shaped rock and lots of reefs or rocks, or what have you. I also needed a body of water to represent the turquoise waters of the Caribbean. And palm trees, naturally. But since the overall game board was going to be only 2' by 2' (the standard size of a board for Gloire and .45 Adventures) I couldn't go overboard. Every inch of table space that's impassible is lost.
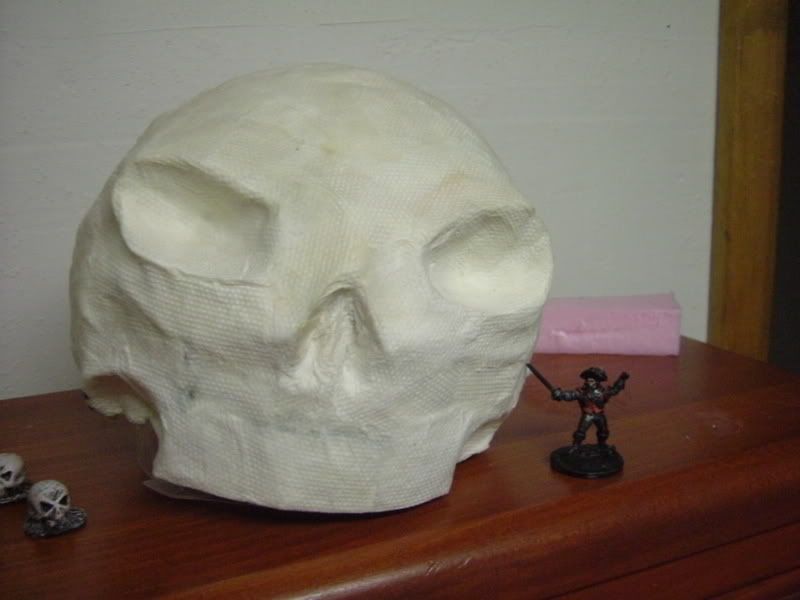
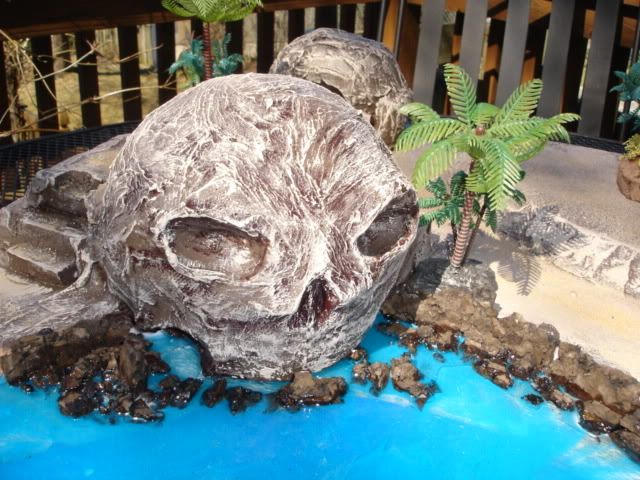
So I started out by making the skull. I thought I'd use papier mache for the construction. I found a good Mexican recipie and instructions for making a rough skull form. Good enough for me! For paper, I used torn-up scraps of paper towel and some art paper liberated from a giant roll on the kids' easel. The heavy art paper was for support. The paper towel was for smoothing out the joins. The glue used was a boiled mash of cornstarch, water, and wood glue--fantastically strong stuff. A balloon, some masking tape, and some cardboard made the form.
So here's the skull (Brigade Games 28mm Swashbuckler for scale):
Okay, next step was to take my 2' square piece of 3/4" thick pink foam and cut out a bay. I saved the piece I cut out, and I'll show you how it got incorporated later. To the underside of the board, I glued a 2' square plastic light cover for fluorescent light fixtures--this was a "cracked ice" design. I used PL400, or "Liquid Nails," as it is called in the language of Men.
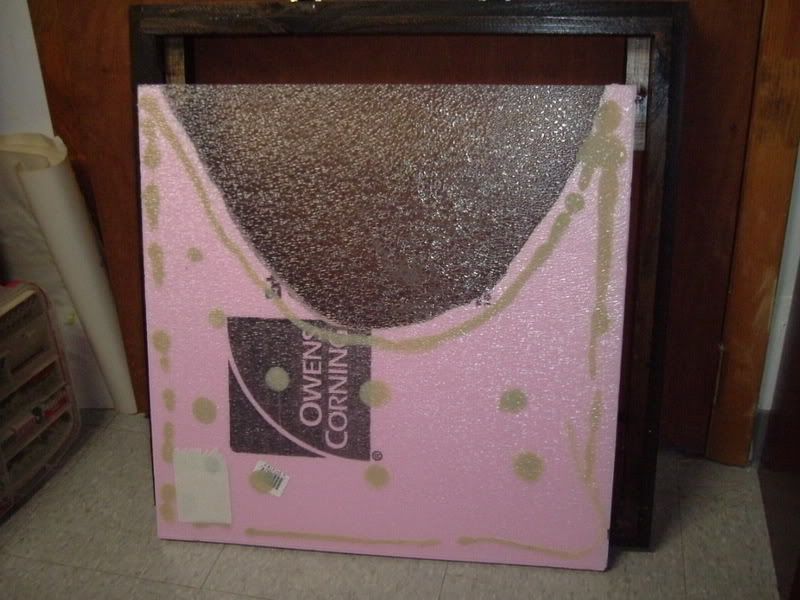
This plastic layer isn't going to be the water itself--it's going to be a transparent barrier so that I can create the illusion of deep water without using a 3" thick layer of Envirotex Lite.
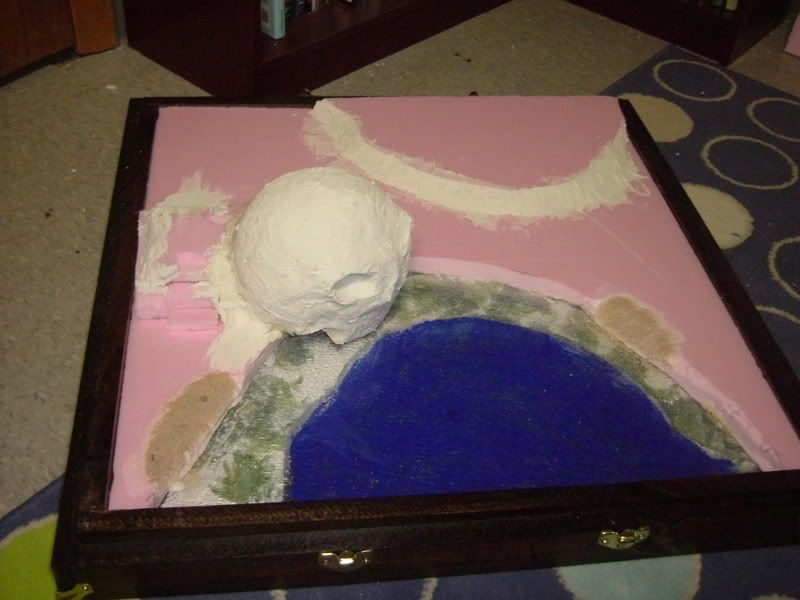
The next step was to take the bit of foam left over from where the bay was cut out, and slice off a "C" shape bit of it. This part would be visible under the water, representing the sort of low surf that you can see through the water. This in turn was painted white with green and gray blotchies for a sort of coral-like appearance. Then the "C" was hot-glued to the underside of the plastic light cover.
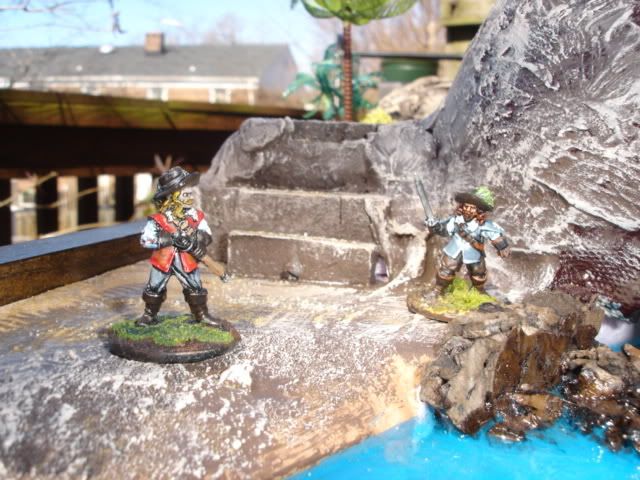
Using the last remaining bit of foam from the original bay cutout, I made a hill on the board. The skull was "boxed" into place with other bits of pink insulation foam. I cut steps into it so characters could walk around the back of the skull.
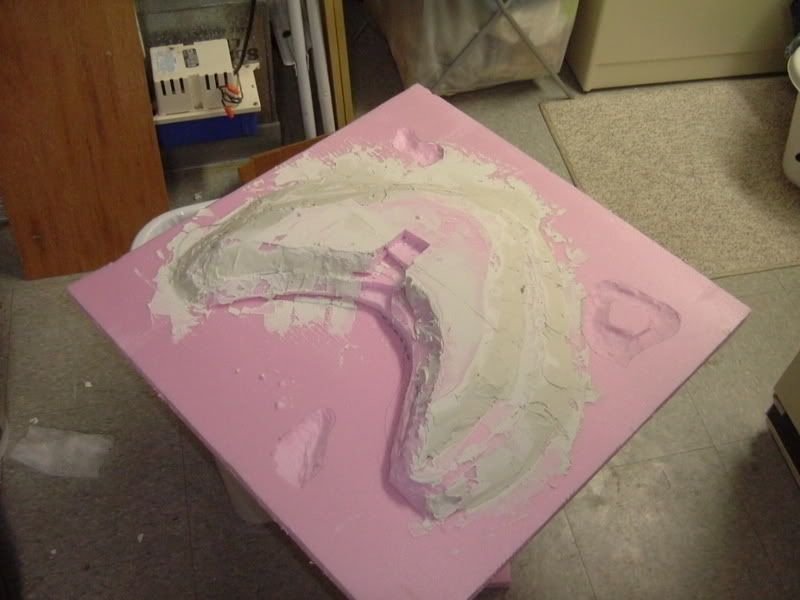
Then I used drywall compound (a.k.a. drywall mud, polyfilla) to make smooth slopes for the hills. This is easier for me to do since I don't have a hot wire foam cutter. Here's the board with everything blocked in and mudded down:
Just for comparison's sake, here's my "Redoubt" board at about the same step in construction:
I get out my stands of palm trees and put them down to see how I'm doing for space, as well as a cave I've made out of extra foam. For the first time, I get a sense about what Skeleton Cay might look like when it's all done...

There are several things I've decided I don't like about Skeleton Cay at this point. First of all, I've put in two beach areas (they're the tan sandy regions), but there's nothing impressive about the rest of the vast pink water's margin. So I dig through the stock of things I've saved forever, and come up with a cork tile. The tile is at least 15 years old, and has survived at least 4 cross-country moves. It's time for glory has come. The tile is cut and crumbled into impressive-looking volcanic boulders, glued to the plastic light cover and the shoreline. A liberal helping is applied to the area right in front of the skull, just in case someone gets Ideas about trying to tie up their boat there.
The next logical step is the water, but this requires planning. I'm going to use Envirotex Lite, which is an epoxy, which means that anything the Evirotex goes over is DONE. There's no touching up or going back to cover a misstep. Hmmm.
This means I need to paint the skull and the beaches, then. Or at least get a primer coat on the skull. The skull is painted a dark brown--almost a purple color--called "Mocha Brown." The mocha is glossy, and my son insists on calling Skeleton Cay "daddy's chocolate head" at that point. How droll!
So we're ready for the water. For an Envirotex Lite pour you need three things:
1. A warm location.
2. A plastic drop cloth.
3. Endless patience.
The directions on Hirst Arts' website are pretty good. They're under the "Egyptian Waterway" section and give you a good notion of what to expect. You do VERY MUCH need a drop cloth, though, because no matter how well you think you've sealed a corner, a slow leak over eight hours can put a lot of very permanent epoxy on the floor.
I picked the coldest week of the year for the pour. So I took our basement bathroom, stuck a space heater in there set to "liquify iron" and proceeded to mix and pour. But the trick with Envirotex is you have to will yourself to forget that it exists. Otherwise you mess with the slowly-congealing epoxy thinking you can "help it along" and end up doing more damage than you think. As long as your surface is level and you're well-guarded against leaks, you're okay. Take a deep breath, walk away, and fight the temptation to assist over the cure cycle.
And then when it's done, you can paint. I used some surplus exterior latex paint from a family painting project--it came in both a chocolate brown and "trusty tan", so that was danged handy. Sand was liberally applied to the wet paint for texture. I essentially dry-brushed the top tan layer with a 2" house brush.
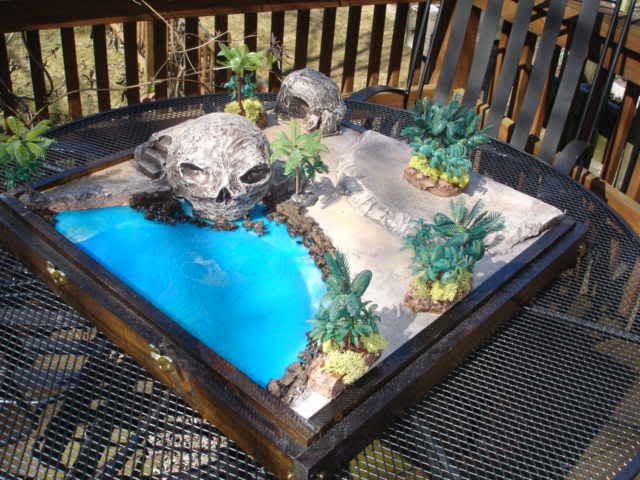
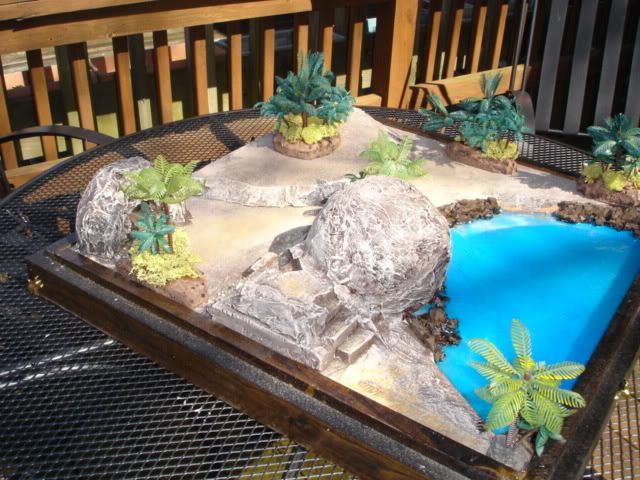
Here are the finished pictures:
So what did it cost?
Skull: Balloon, paper, wood glue, and cornstarch were free. Five hours or thereabouts over two days, to allow drying time for the lower layer.
Base board: $11 for an 8' x 2' board. Overall, I think I used less than half for everything. $3 for the "cracked ice" light cover.
Trees: $5 at a cake decorating shop to supplement existing stock of palm trees. I think I have a few left over.
Paint: Free. Always recycle paint before buying Just the Right Color.
Water: Envirotex is pricey, but I had a coupon for 40% off one item. I bought the biggest box of the stuff, and used more than 3/4 of it. Of that, quite a bit was wasted due to bad seals between the board and the dam.
Here's a link to it at Cold Wars,
all set up and ready for a game!


 Welcome, Guest. Please
  April 25, 2024, 07:48:50 PM


