Modelling has been on my back burner for quite some time, but I'm finally getting back to it.
Some of you may recall my earlier projects making houses for 28mm fantasy RPG games with playable interiors. My first one involved whacking apart the laketown house kit to do the interiors. After that, I built a larger house from scratch using old bank calendars as cardstock with balsa pieces to do the timbering:
Later, I got a dozen houses from a
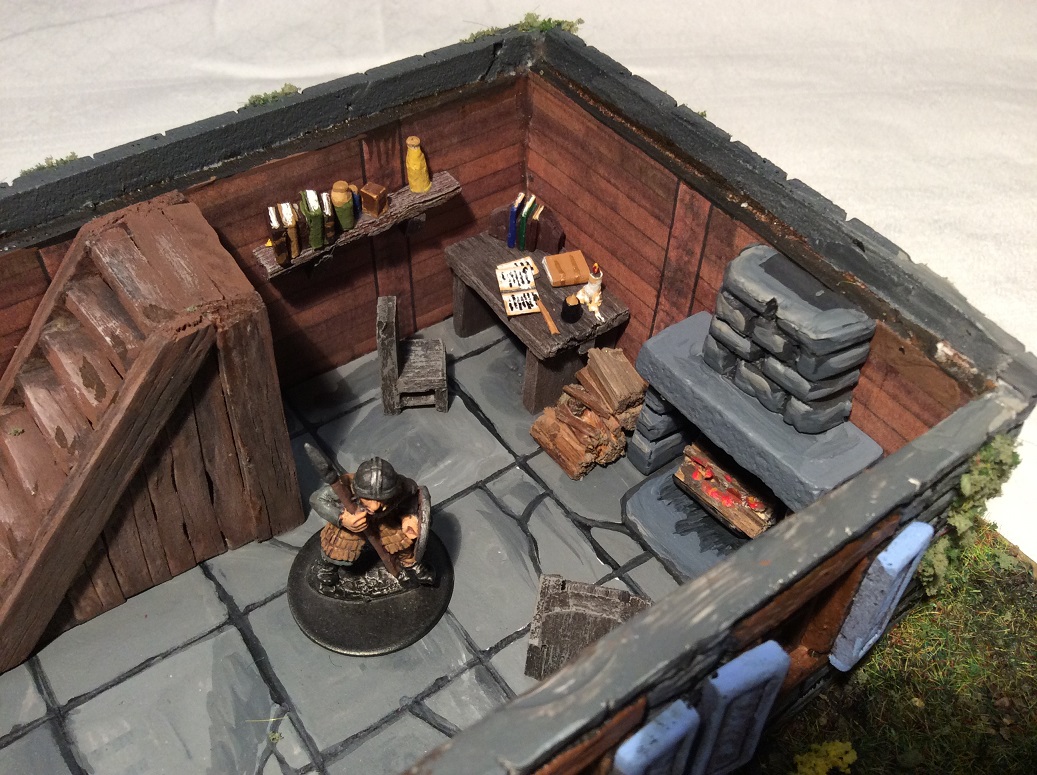
Tabletop Basement kickstarter (resin kits with blank interior walls) and tarted up the inside, assembling the kit as intended, just with added floors and interior details. I then did a second one, shortening the side walls of the ground floor to create the characteristic overhang of half-timbered houses. Here is a view of the ground floor interior of that house:
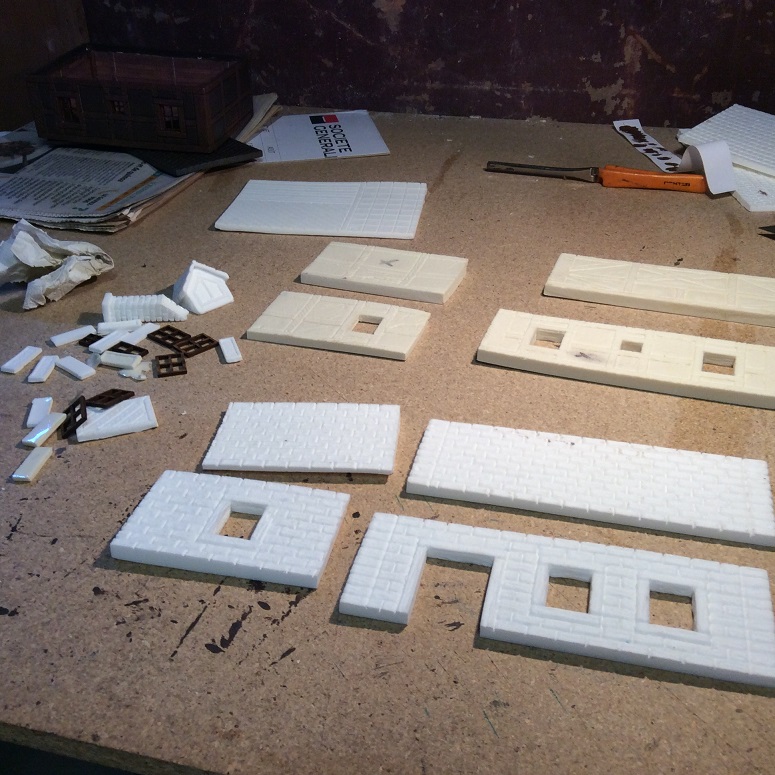
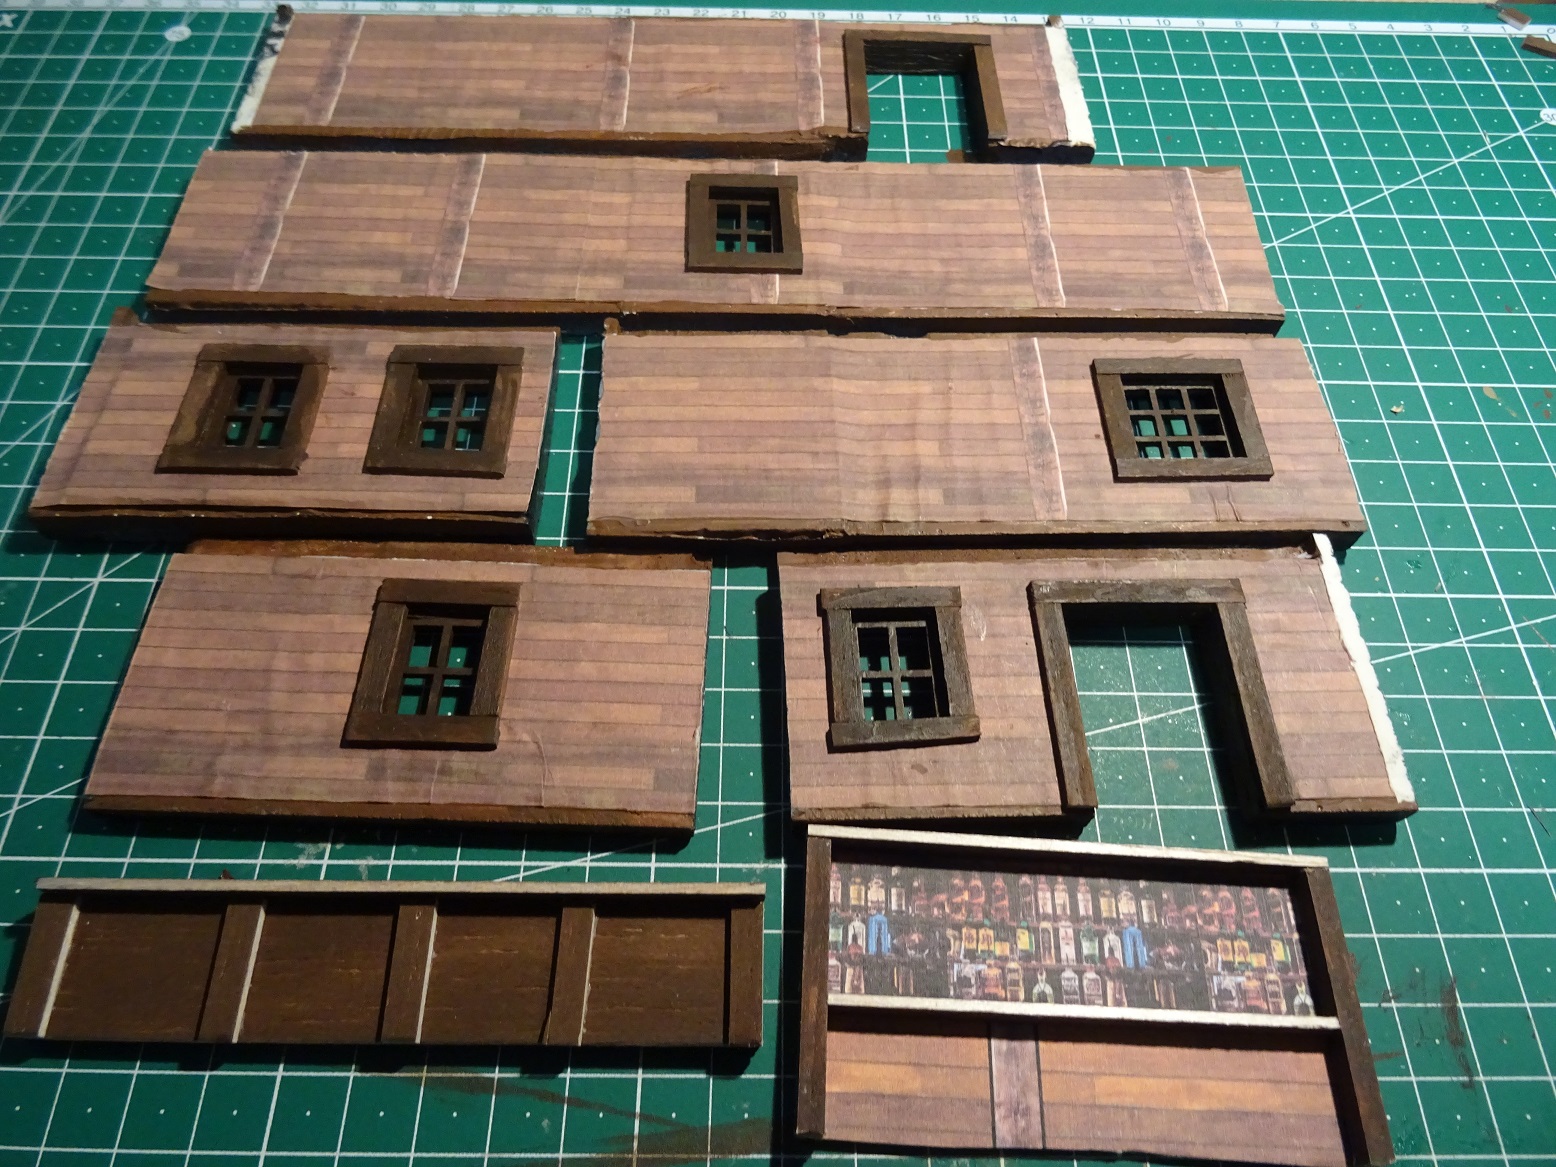
So now, on to my current project. I decided I wanted to add some variety to my village, but all the Tabletop Basement have the same basic rectangular floorplan. Here is a view of the components of one of their kits:
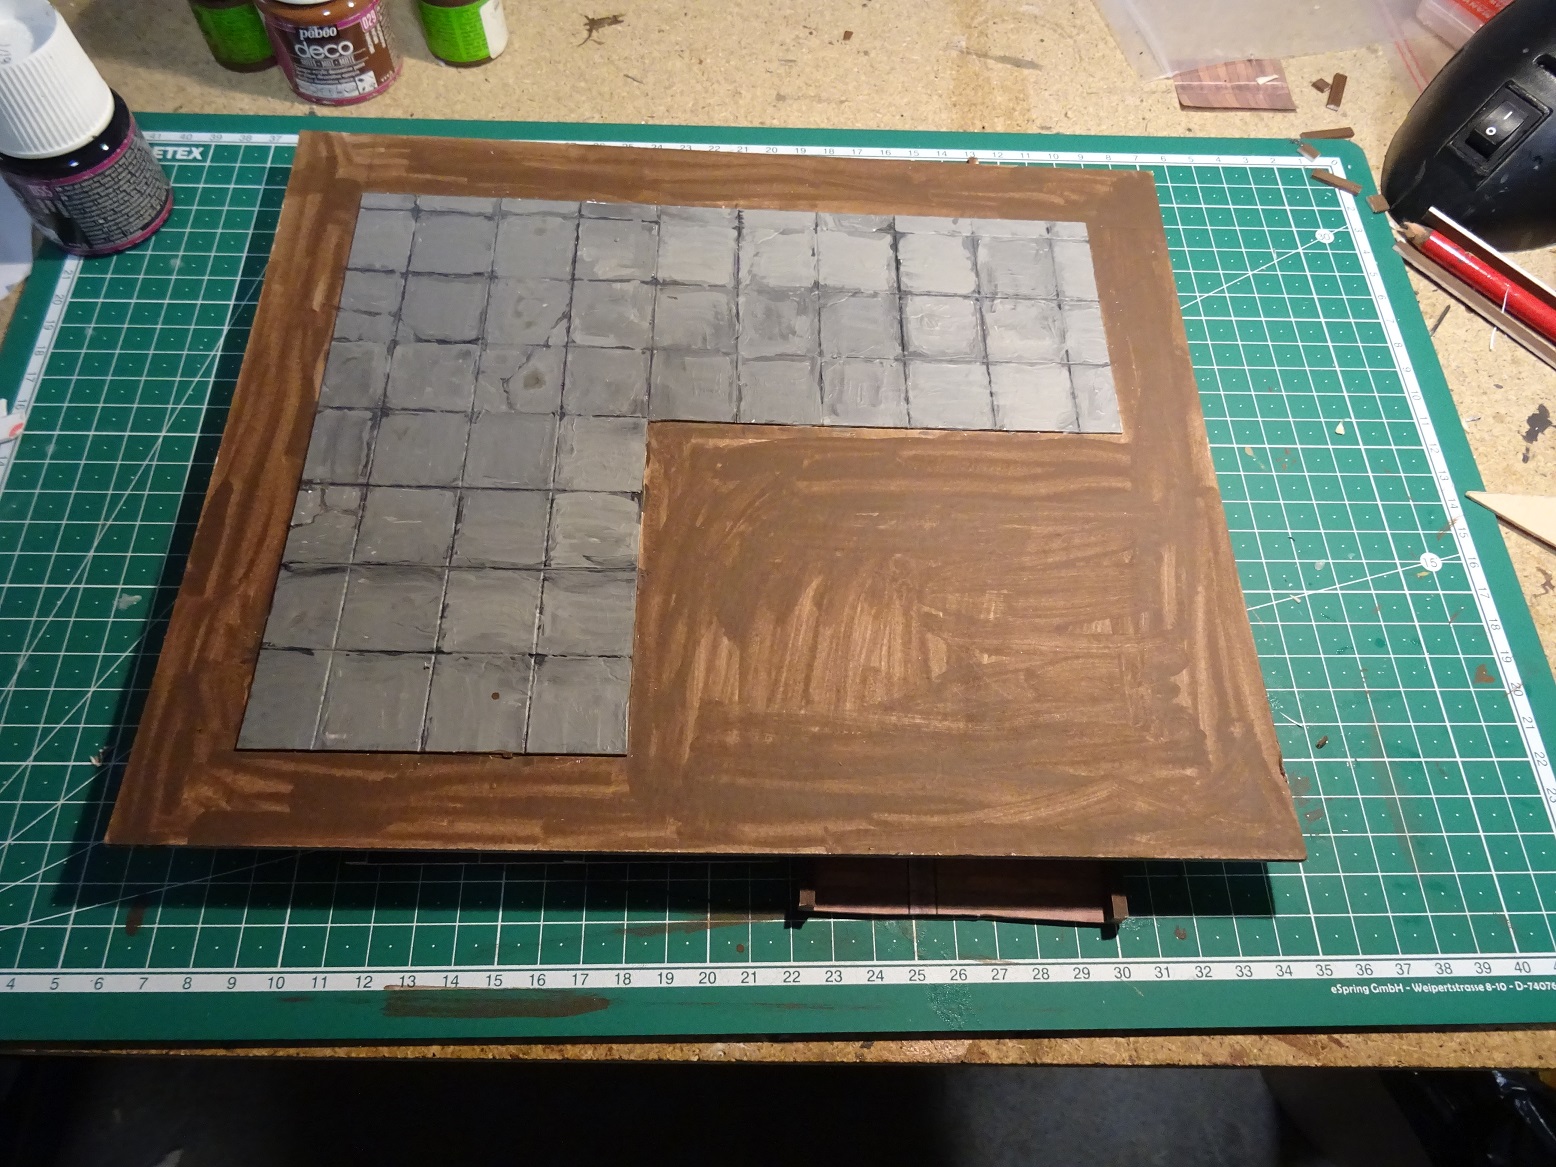
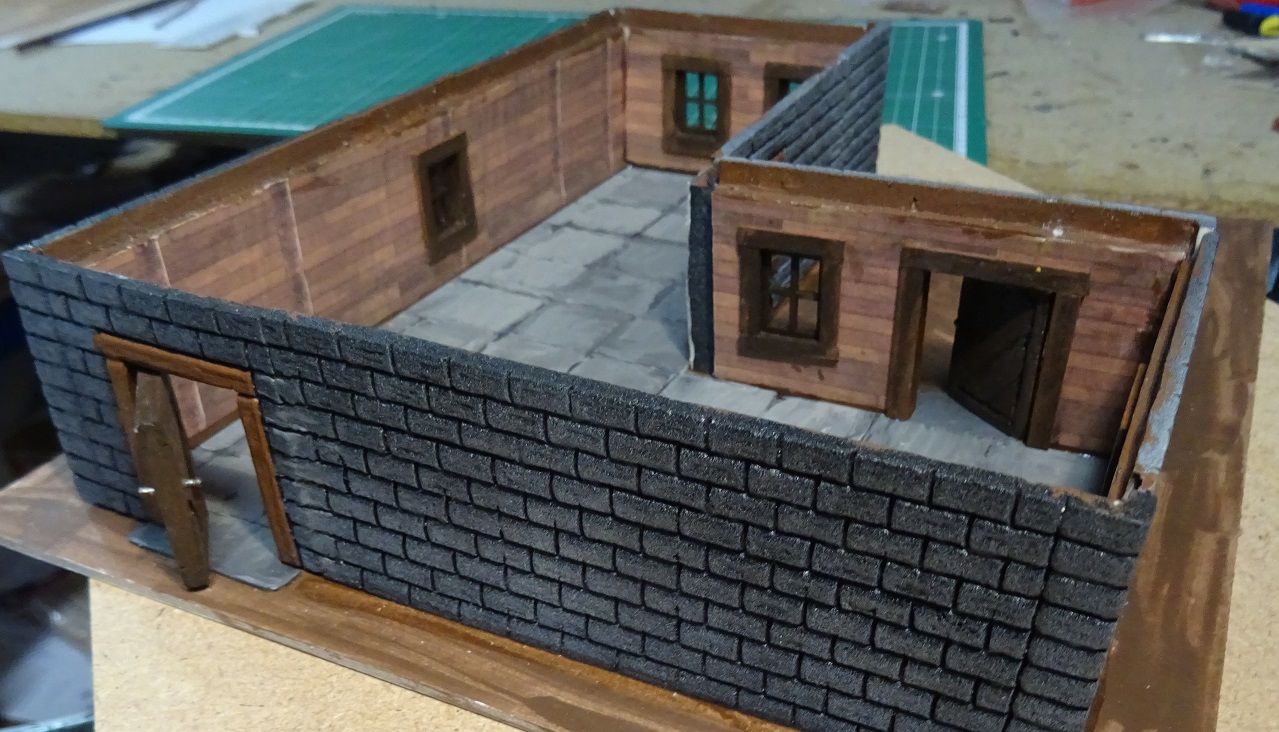
I decided to take the ground floors from two kits and put them together to make a larger L-shaped building. This involved cutting some walls to size (dremels work wonders!) and gluing the longer walls together from shorter pieces. Here is the base of the new house, made from 2 layers of heavier cardstock, and the L-shaped floor was scribed in 1-inch squares before painting.
I had also learned something from my previous projects: to finish all the interior walls *prior* to assembly, since it's really hard to do any painting inside there once the walls are put together. I printed up a nice wood-slat wall texture and glued it to the interior of the ground-floor walls, clamping them in place with wax paper to prevent them from sticking to each other, but there were still some unsightly wrinkles when I had finished, doubtless due to using too much glue or rushing the project. I *almost* decided to rip the offending paper off, but finally settled on accepting it as "good enough" and added some trim for the window interiors.
The ground floor was ready for assembly. I used 2-part epoxy to glue together the resin pieces, and that seemed to do a reasonably decent job. This was also the stage when I had to prepare the doors (one included and one built from calendar cardstock and balsa) by drilling holes in the upper and lower corners, inserting short bits of paper clip and drilling corresponding holes in the resin walls and base, to leave doors that open and shut.
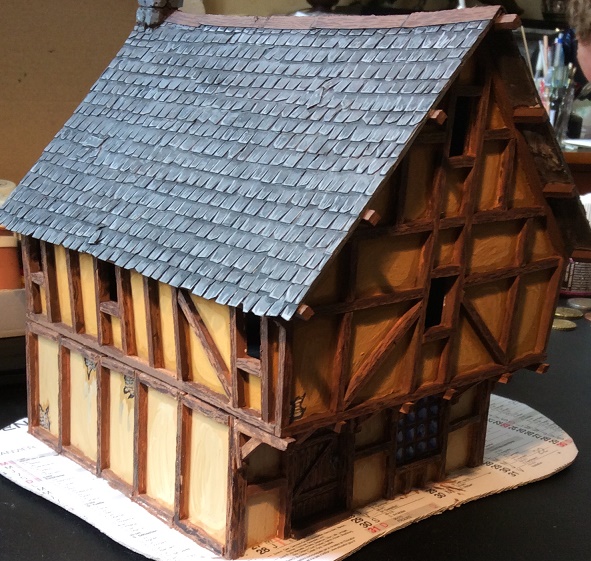
Originally, I had imagined also doing the second floor from Tabletop Basement kit parts as well, but suddenly changed my mind. These resin kits are fine on the outside, but the interior blank walls are often uneven and require a lot of sanding and other preparation to make them work, and then require additional material to make the interior walls look right (like the printed textures I used on the first floor). I decided the rest of the building would be fully scratchbuilt. The Tabletop Basement pieces work great for the ground-floor stonework, but the upper floors are built from timbers and plastering, so balsa and cardstock would be quicker and easier.
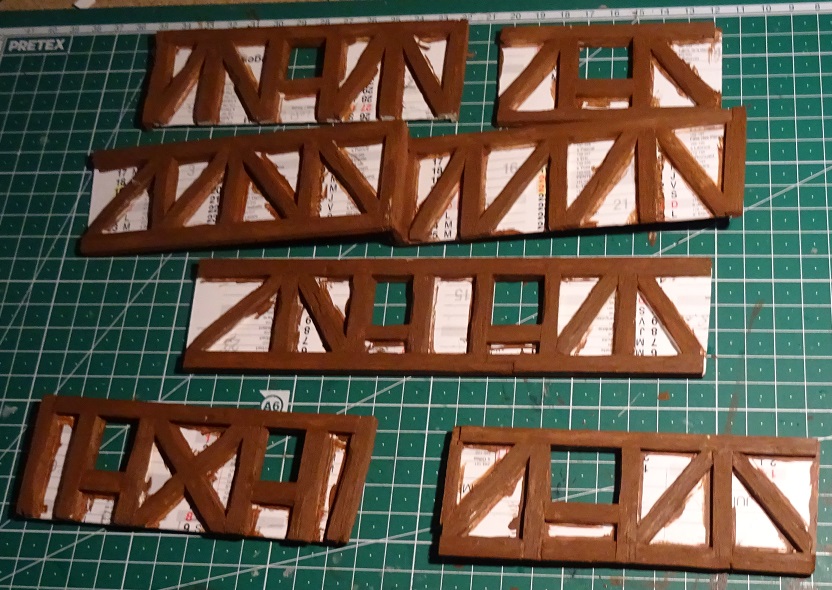
First step was laying the beams that would support the upper-floor flooring. I put thinner balsa along the interior lip of the ground floor, so the upper storey would settle firmly in place, then added beams with a slight overhang, like in real half-timbered construction.
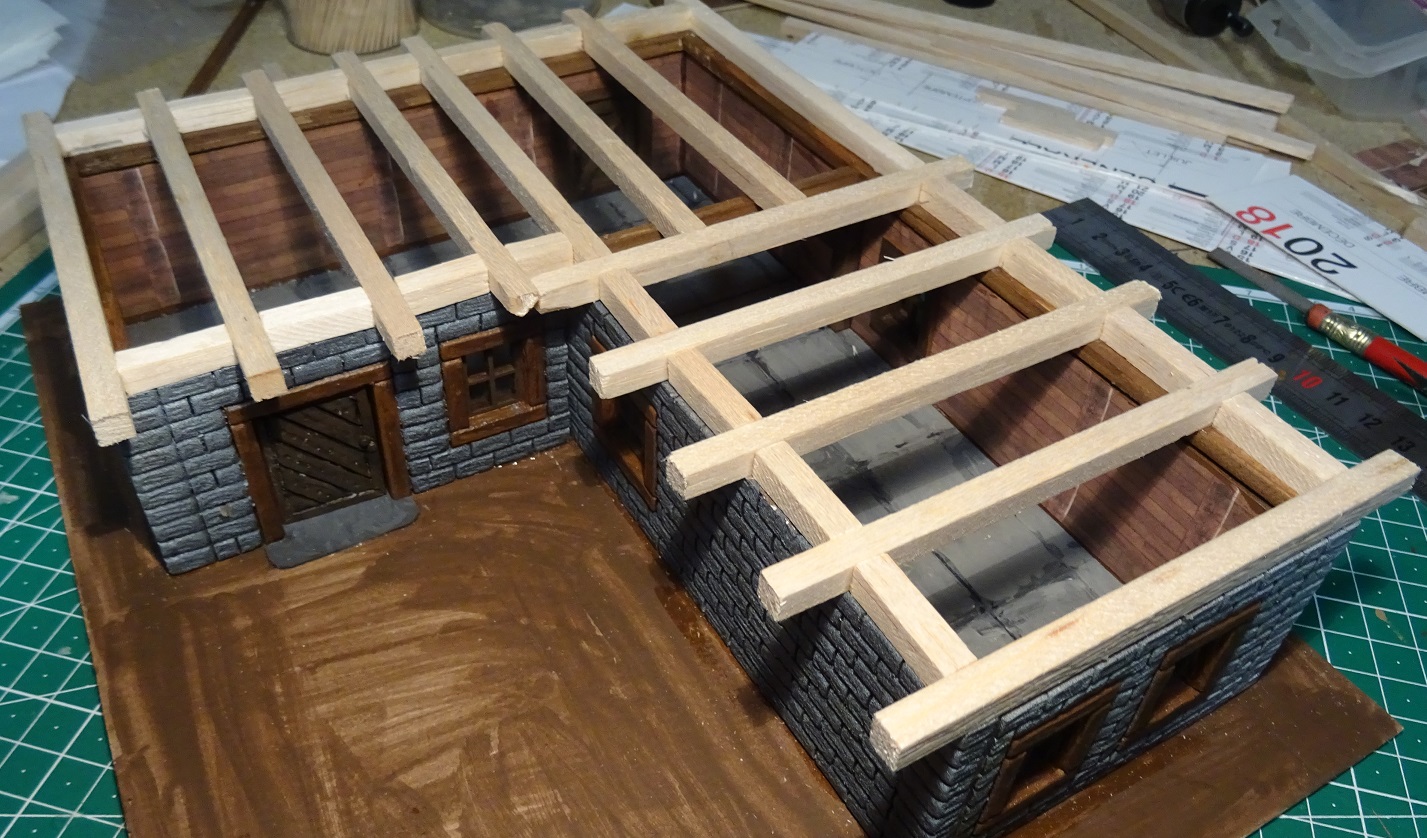
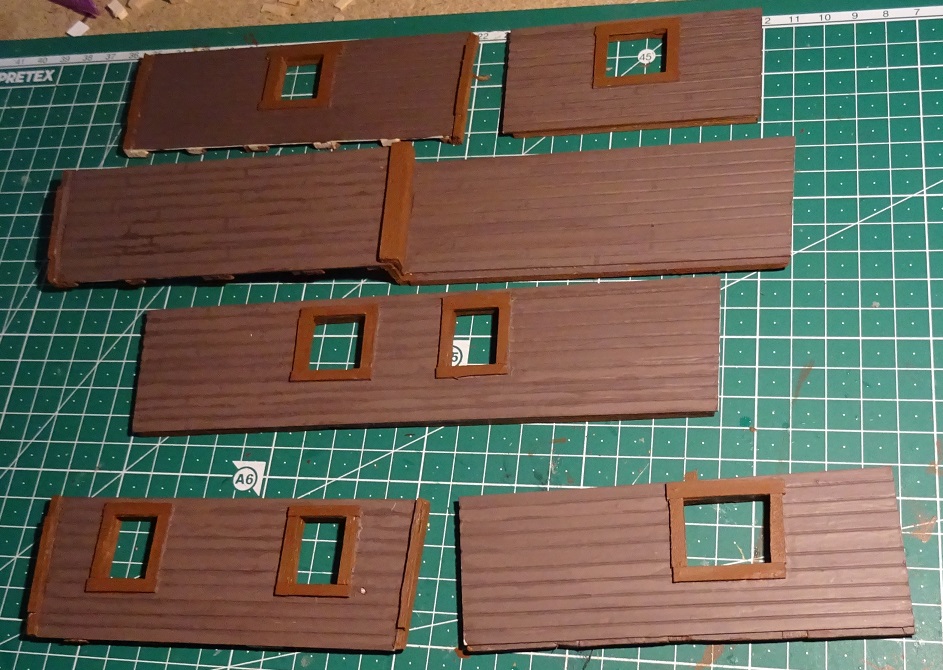
I then laid the floors and started measuring the wall pieces with a very slight outward lean, about 4mm over the height of the storey, all from old bank calendar cardstock, scribed to represent planking. I cut balsa for the wall bracing to a little less than half the width of the beams, cut a few windows, and added some interior trim for the windows as well.
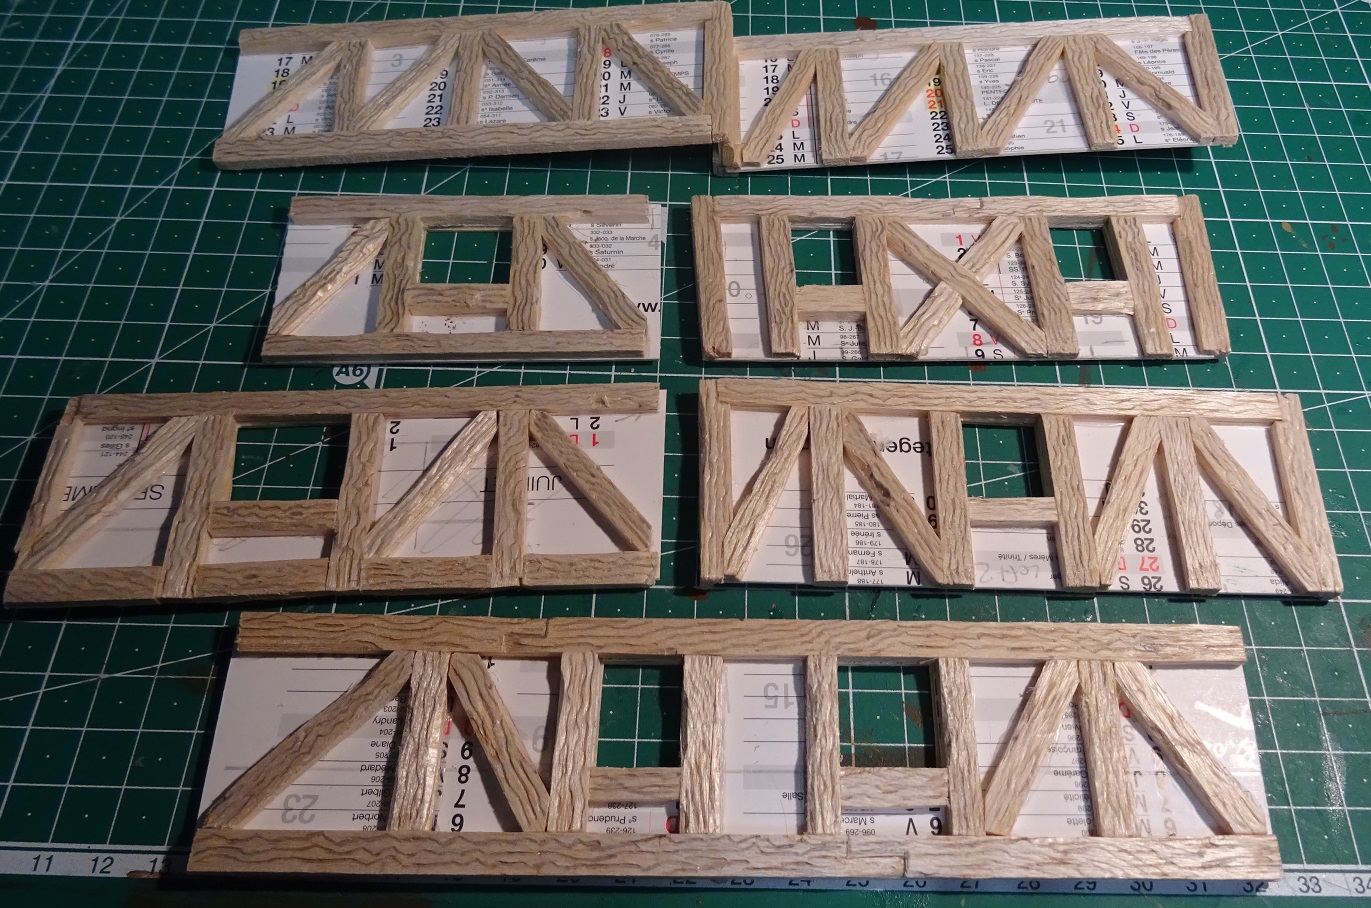
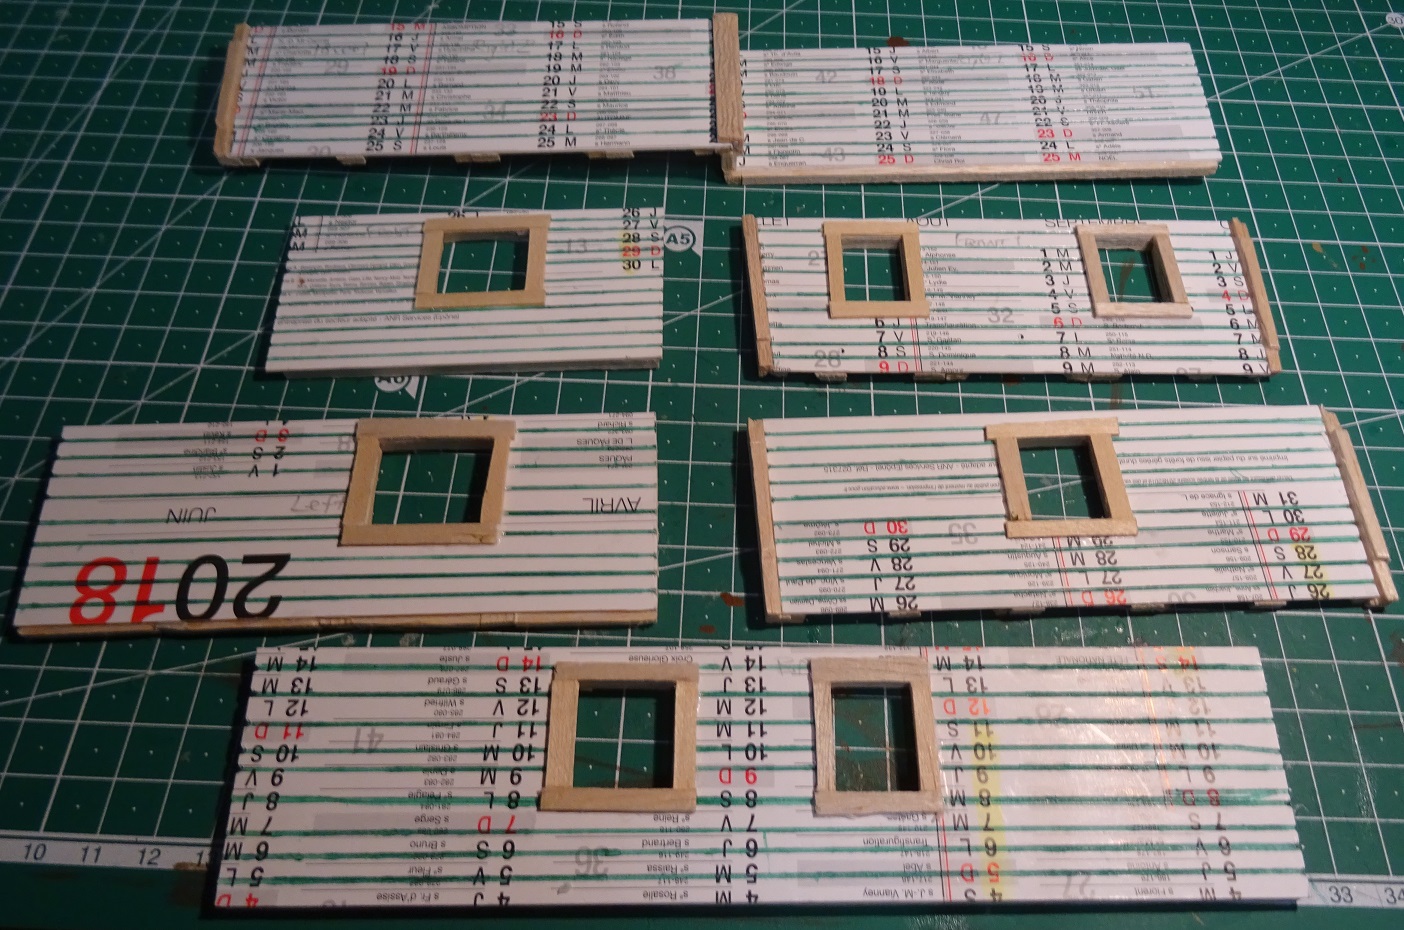
After initial painting, this is what the upper-storey walls looked like:
Then began the really tricky part. In my previous half-timbered house, the exterior bracing wasn't "filled", I just painted the walls to simulate plastering. Now, I wanted to go a step further and fill in the blank spaces between the bracing beams with patching plaster. So I got a small trowel, and had at it.
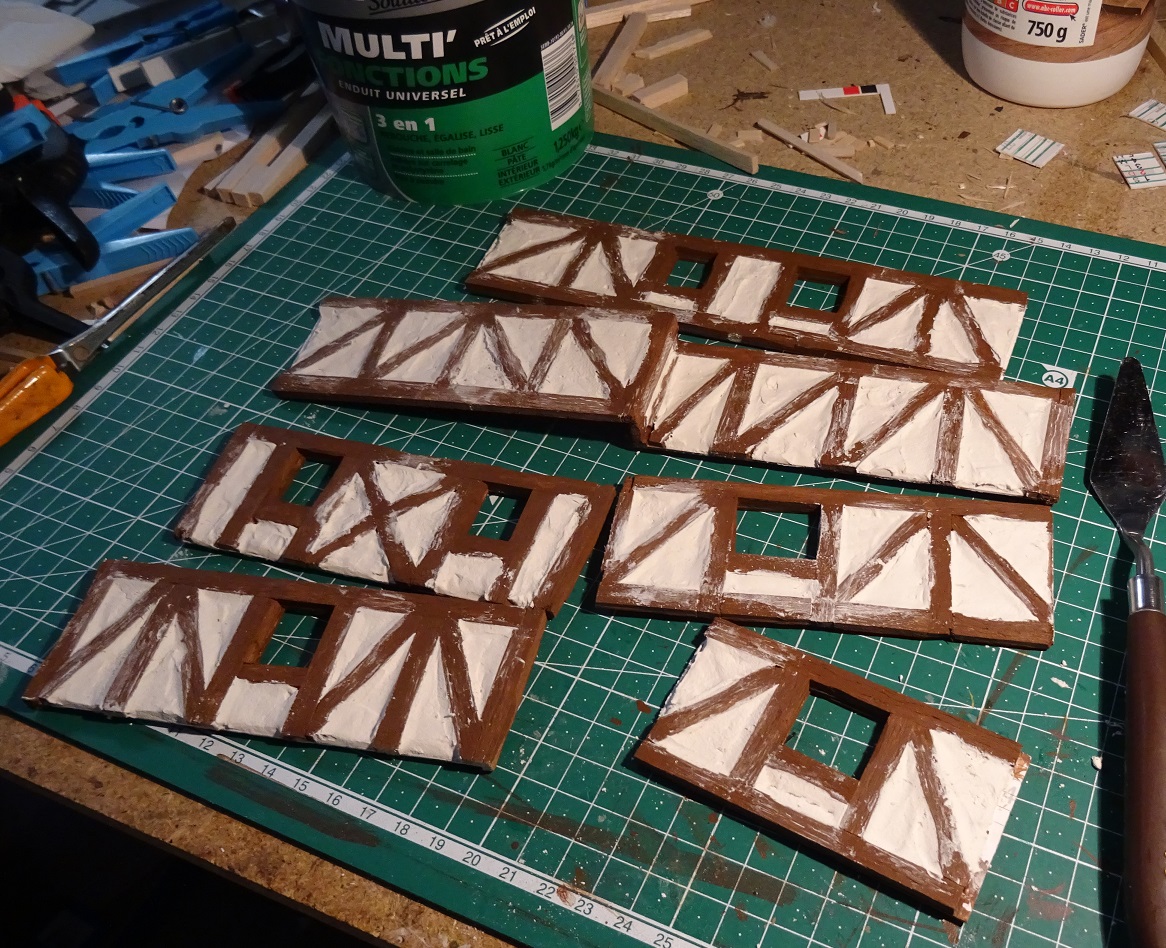
After drying, however, there was a lot of shrinkage, as well as more than a few unacceptably uneven spots, so my next step will be adding another coat of patching plaster in the hopes of obtaining acceptable results. That's where I am today. I need to put on that second coat, repaint the exterior, add more interior details, and I will be ready to assemble the upper floor. After that, more beams to support the attic, more beams for the roof and dormer windows, the roof itself, and a nice styrofoam chimney down the back side.
A also snagged two excellent Mirliton kits for seated tavern figures,
The Dragon's Inn and
The Medieval Tavern, so I'll have my hands full for the next couple months.


 Welcome, Guest. Please
  April 19, 2024, 07:20:06 PM


