Some guys on frothers asked how I did the metals on this one:

Perhaps this tutorial might come in handy.
There goes the tutorial. Please excuse my meager presentation-Fu.
Weathered Metals
My aim on this mini was to combine the "grimey" aspects of metallic colors with the zenithal (positional) highligths found on NMM parts in order to get a weathered while "stylised" result.
At first place your bare metal mini under a strong light source and take a pic. This will help you later on as to where place reflections and shadows.
There are two principles to keep in mind:
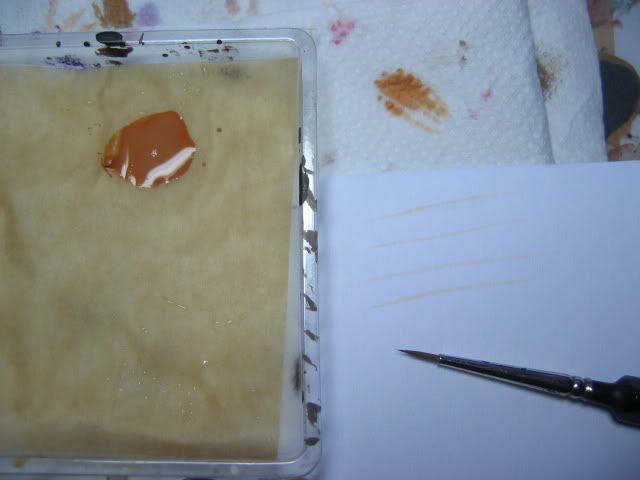
-Thin your paints down so that they are nearly transparent. A wet palette is a must here. Baking paper, make-up pads and a plastic lid is all you need (Buying make-up pads gives you funny looks so grasp the opportunity to stock up on lip stick too.)
-It is far easier to darken a color than to ligthen it up.
Silver areas
-Basecoat chainmail.
-Thin down some brownish orange and apply it in strokes towards the point where the deepest shadows are. The first strokes will be merely visible but the more strokes you apply the richer the graduation will get. Due to the combination of high dillution and minimum paint on the brush individual strokes will dry within seconds.
It´s basically "feathering". (
http://www.coolminiornot.com/article/aid/273 )
-Add some redish brown and continue like above but minimize the space you are working on. The darker the paint the less area there is to apply it to.
-Continue this way until you reach a deep brown color.
-Thin down your base color and feather it where the shading process began
-Add some white to the chainmail and place light spots and highlight appropriate edges. Be careful here, More is less
Everything in one amateurish pic:
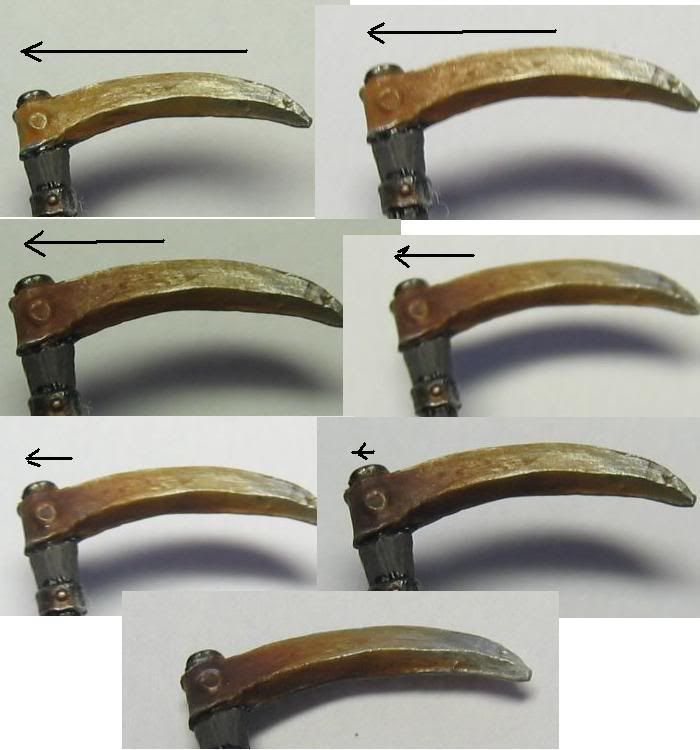
The arrows indicate the length of individual strokes.
Gold parts:
VMC Old Gold+ VMC Orage Brown base
Shade with Tamiya Clear+ VAir Burned Umber
Dark Shade with VMC Black Brown
Highlight with bsecolor+ White
Bronze parts:
Brazen Brass + mid Brown color
Shade with Tamiya Smoke
Highlight with basecolor and buff
Veridigis:
Mix up some Tamiya Smoke and VGC Vile Green and add this to the area in question. Add some Vile green and continue. These stages are just there to smooth everything a little bit
Use pure Vile Green around the rivets. Again less is more.
Some more examples:


 Welcome, Guest. Please
  April 19, 2024, 06:05:01 AM

