This is a single excerpt from an ongoing thread about my role playing game campaign, so bits of the commentary might not make sense, but the core is about building the terrain piece, so Im presenting it here for you guys.Making a Viking Long House
for $4.00!I know what youre thinking: Grubman hasnt posted for a long time; hes lost interest and moved on to something else.
Nothing could be further from the truth! Fact of the matter is that I havent been posting, or on the forums because Ive been so super busy preparing for this Tuesdays (24th) game that I havent been able to do anything in my free time besides paint and build stuff and write. Ive painted no less than 29 new miniatures for the next game! But most of my time has gone into building this surprisingly time-consuming long house.
I dont want to show the miniatures, and thus ruin my players surprise, but here is the long house in step-by-step, with usual commentary.
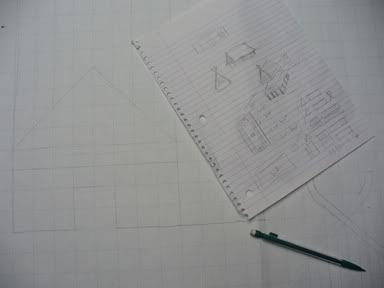
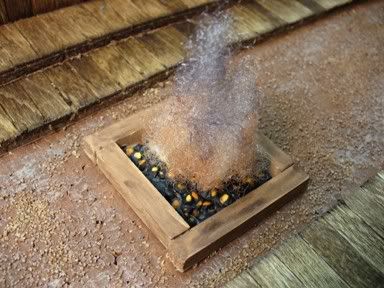
My Evil Plan!While historical accuracy isnt something Im anal about, I did want my long house to look at least close to authentic. After researching both exterior and interior I found this picture of Trelleborg-hall, and decided to use it as my base for the model. I drew up some sketches of how I planed to proceed with the project, and started thinking about what materials I would need.

 Material
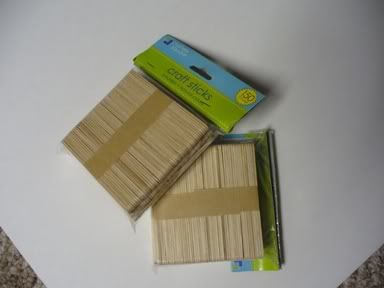
I did a lot of debating on how to proceed with this project. Should I whip it up out of cardboard and have a less impressive looking model, or should I use scrap hardwood and carve each board, or would I spend a fortune on Balsa wood? In the end I got a brilliant idea!
Remember all those things you used to build out of Popsicle sticks when you were a kid? I thought that skill would never amount to anything
who would have known? They carry these in the local $1 store (thats right, everything is a dollar USA in that store). I decided to use foam board as my core, also available in the dollar store.
So I went and spent a whopping $3 and had almost everything I would need for the project (paint, glue, and patience not included in the price!).
 Getting Started
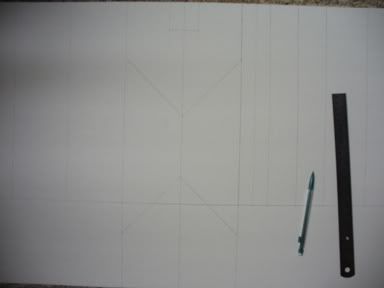
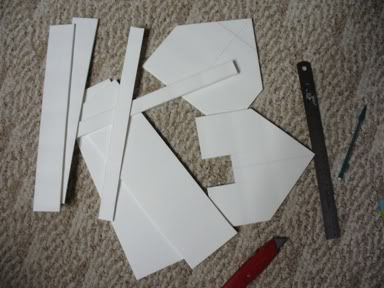
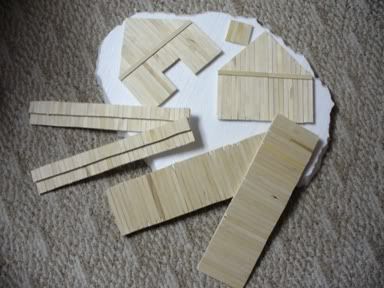
The first thing to do was cut out my core foam board pieces. I was going to need the basic structure, as well as the 2 tier long benches that line the interior of the house.
 More Sticks Than I Can Shake a
er
Stick At!
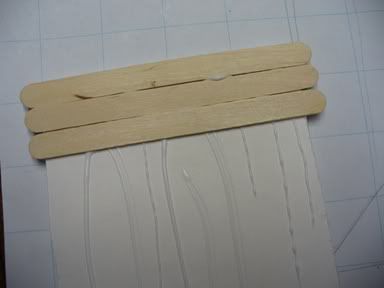
More Sticks Than I Can Shake a
er
Stick At!This is where the patience comes in. I had to line each piece with the individual craft sticks, wait for them to dry completely, cut off the excess (with a saw), flip and repeat. The saw was unforgiving, tossing chips of sticks in all directions and refusing to cut straight. Sometimes things that frustrate you turn out to be a boon, as this ended up giving the whole structure a rustic look.
I decided that rather than base this on a piece of hardboard, Id put it majestically on a hill, so I cut a piece of Styrofoam for the base from scraps from my other terrain. (This would come back to bite me in the ass later!)
 Dude, Ventilation is Important!
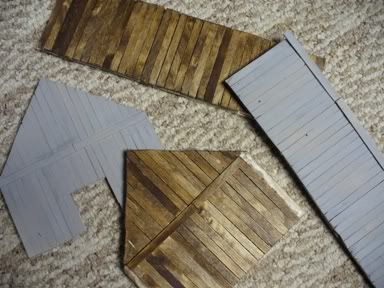
While every project I do turns into a big experiment, I decided to try something new
staining the sticks instead of painting them. I primed the outside of the structure (because I was going to paint that with a weathered look) but stained the inside. I didnt open my garage door while doing this and had a nice headache by the time I was done. The stain took a full 24 hours to dry and be fumes-free enough to work on more.
When this was done, I could glue the whole thing together.
 DOH!!
DOH!!While this was drying I was going to start working on the porch that surrounds the long house using sticks from the woods for uprights. It was at this point that I realized that my base wasnt cut big enough to support the porch structure (slap hand to forehead!).
I realized this was going to reduce the coolness of the model, but, oh well. I tried to rationalize it by telling myself it was only for one game session, and it has already taken way longer than I expected to build
but it still sucks!
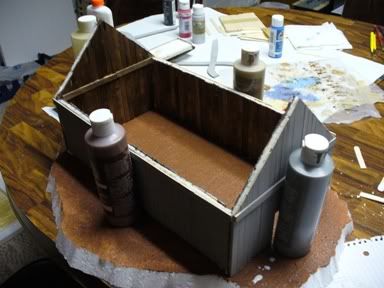
Interior DesignI glued the benches in place, as well as a little stage for the Jarl to hang out on. I also build a fire in the center. This is actually pretty much how these houses were designed. I did plan on putting support columns in (like were found in real long houses) but I figured they would just get in the way, so decided to skip them. I wish I had a bit more time to fill the house with shields and weapons and bedding, ect. But sometimes you have to make sacrifices.

 The Roof (or how I spent my last dollar)
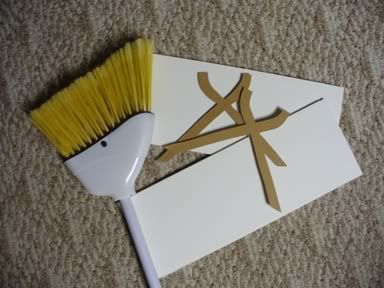
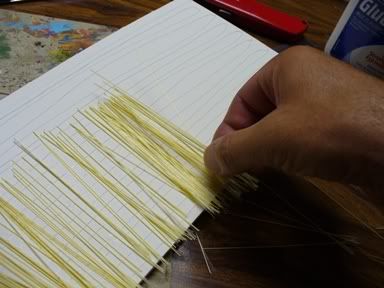
Well, cant just have an open top! I now turned my attention to the roof. I was originally going to go with shingles, no small project considering the size of this building (I cut each shingle individually), but then I decided to try something I hadnt done before
thatching! I got this idea while I was in bed the night before, and eagerly ran to the dollar store to pick up a small broom. I cut the bristles off and glued them to the foam board.
I cut some decorative edging out of hardboard scrap.
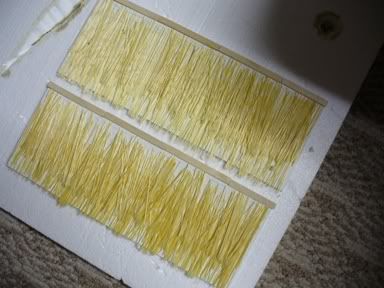
At this point I was getting worried, because, well, it looked like shit!
I ended up painting the thatching with some exterior paint (Ironic, huh?) that I had in the garage, and then stained it. The whole thing took 48 hours to dry (frustrating for a guy like me who likes to finish projects in a day!). Oh the emotional pain!
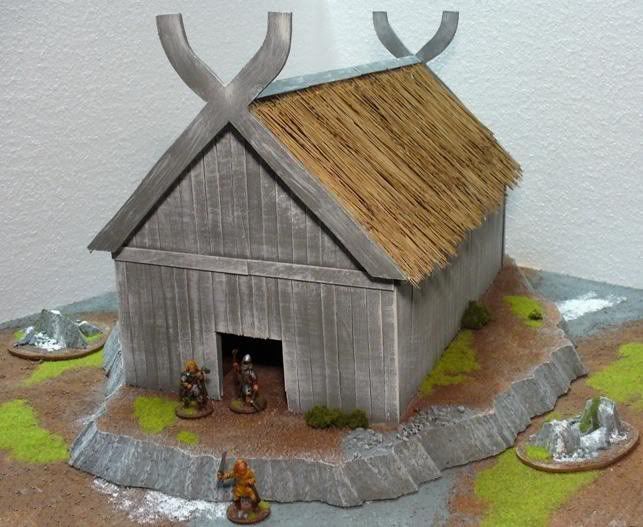
[/b]And There It Is![/b]
Finished up the base, assembled the roof and tadah! In the end Im happy with the model. Yes, it could have been better. The porch awning (or whatever its called) would have looked really cool, and I cant help but think I could have shaved some time and effort somewhere. But hey, experimenting and learning for next time is half the fun of this hobby.
So Im almost ready for Tuesdays session
then I can turn around and start working on the NEXT sessions stuff! $4 well spent!


 Welcome, Guest. Please
  April 26, 2024, 12:40:35 AM


