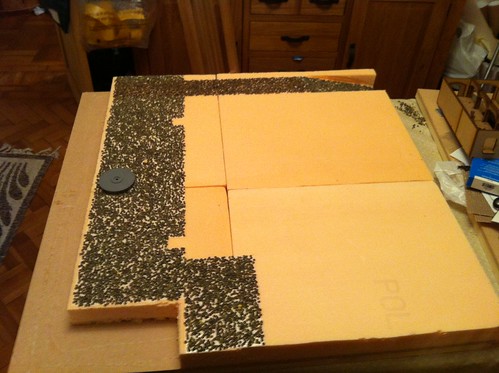
Right, apologies for the lack of updates but the last few days have been spent with me fighting materials. I was given a big bunch of the GF9/FoW 15mm cobblestone roads to use for the board and they are great for paved roads. I would like to say however that whoever decided this was a good 15mm product had clearly been drinking as the cobbles would be the size of large flagstones! For 28mm however, they're great, the only issue is the width, which has been done to 15mm sized roads. So why the delay? Because these things are designed to go together end to end and you can get some almost seamless joins with a bit of care and a sharp knife, but side to side is a whole different matter. The roads vary in thickness, have shrank after pouring to varying degrees and are often not straight, all of which means they are a nightmare to get looking good. That said, a suggestion has been made by a colleague about how to overcome this which holds promise so I'm taking a break before I destroy them all and working on a different section.
Tonights task was to get some cobbles done. The street board will have the paved roads but for the warehouse/dock area I wanted a more rugged and rough feel. This will be the home of the lentil cobblestones

So a quick walkthrough of how I've done them....
The first thing I did was mark out the first section of road with doublesided tape. I used carpet tape as it's nice and wide. Then I dumped a small pile of lentils at one end. I use Lentils Verte as they have a nice colour variation and are a good size. They do have their skins on though so make sure you don't get them wet as it can cause it to lift. Interestingly these are not the same thing as green lentils which are wider and flatter but from the name I would have assumed they were.
 Cobbles 1
 by
dewbakukI then pushed the lentils along the tape so that they spread out a little. This works better than just dumping the lentils all the way along as it results in less lentils falling all over the floor and also controls their distribution.
 Cobbles 2
 by
dewbakukYou don't want the lentils too close together as they tend to overlap and it looks wrong in the finished piece. Push them around to spread them a little, the tape grips them but won't hold them making it easy to position them how you like. Once they are spread to a satisfactory covering, gently run your fingers back and forth over the lentils, this will cause the lentils which are on their edges or overlapping too much to come loose and either fall into place elsewhere or can be brushed down to the next section. Then press down firmly on the lentils to make sure they are flat and reasonably well attached, any which are still angled too much will become obvious to your fingertips and can be flicked aside. Don't worry too much about it looking patchy, that will dissapear later, although if it seems too much, just lay a couple of lentils in any big holes. You probably only want to work on a 6 inch stretch at a time doing this as it's easy to get lost.
Here's a pic during this process, you can still see a few lentils which are on their edges.
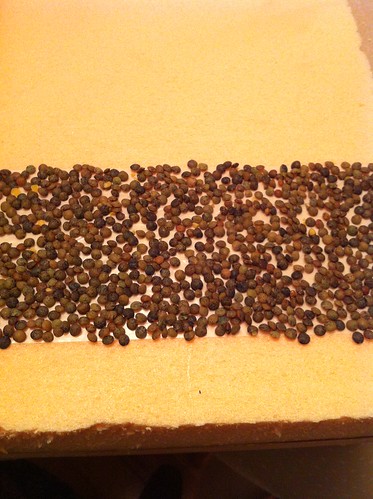 Cobbles 3
 by
dewbakukHere's a pic of the first road stretch after lentils are done.
 Cobbles 4
 by
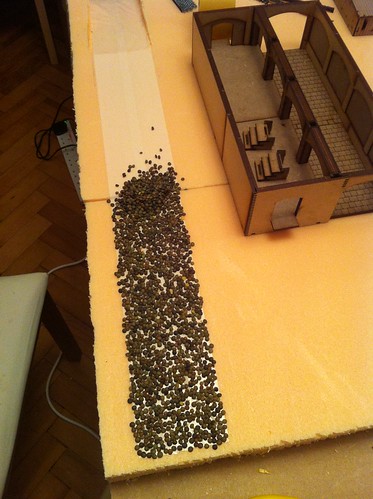
dewbakukNext pic shows the next stretch of cobbles to be worked on. This is the main working area and the cut outs in the tape are where the warehouse steps will sit. You can also see the small cup I stole from my daughters cupboard which I use to pour the lentils currently heaped at the start of this stretch
 Cobbles 5
 by
dewbakukSo, rinse and repeat until you've covered the area you want. I then tip the board up to allow any loose lentils to fall off.
 Cobbles 6
 by
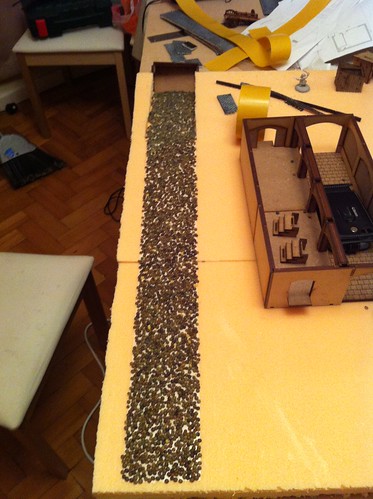
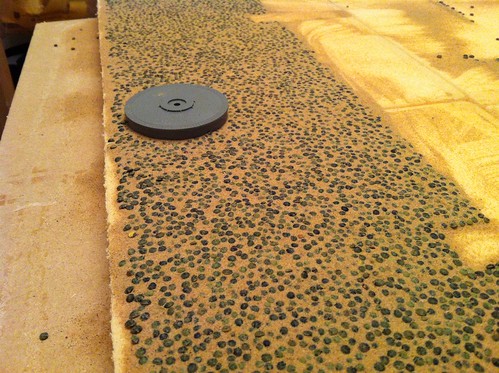
dewbakukThe next step is to add the sand. Use a few small heaps dumped on the lentils so that you don't end up with huge amounts to clear from any area.
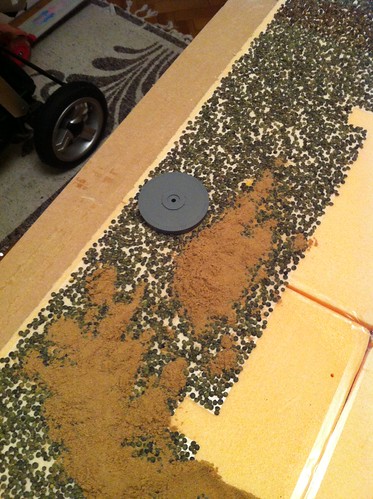 Cobbles 7
 by
dewbakukGently spread the sand over the lentils with your fingers, filling the gaps inbetween and partially covering them. Once it's covered start to brush the sand away with your fingertips. This is where the magic happens as all of a sudden it starts to look like a cobbled area! All the gaps tend to dissapear here and also, any last lentils that were too loose or out of place will come free with the sand. You want to get the top of the lentils clear of the sand so that you have a cobble, not dirt, and you don't want heaps of sand for the same reason. Just brush it gently off to the sides allowing it to naturally form a sloped edge and reveal the cobbles. The natural size variation in the lentils will give you an uneven floor which adds to the look so don't worry about having to brush down more in some places than others. Brush the excess sand away from the cobbled area to give you some clear space.
Here's that last pic for this installment.
 Cobbles 8
 by
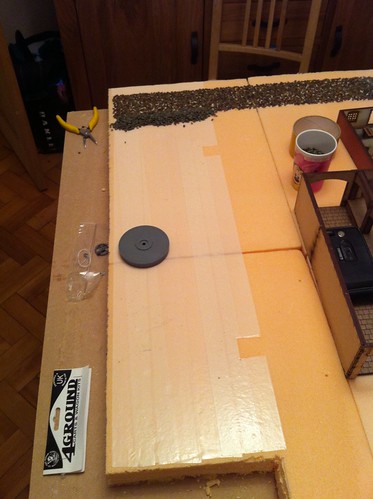
dewbakukThe last stage I'm doing right now is to spray the cobbled area with a cheap hair spray. This acts as a fixative and holds the sand in place while you do any other bits that need working on. Do not tip your board before this as the sand will all dissapear from between your cobbles!
The final stage which I will come back to later, is to spray a PVA water mix over the sand and cobbles to seal it and make it all solid. I'm not doing it now because I'm not finished with sandy ares and I'll do it all in one go. Also, it's now early morning so I'm going to bed


 Welcome, Guest. Please
  April 24, 2024, 11:42:43 PM


