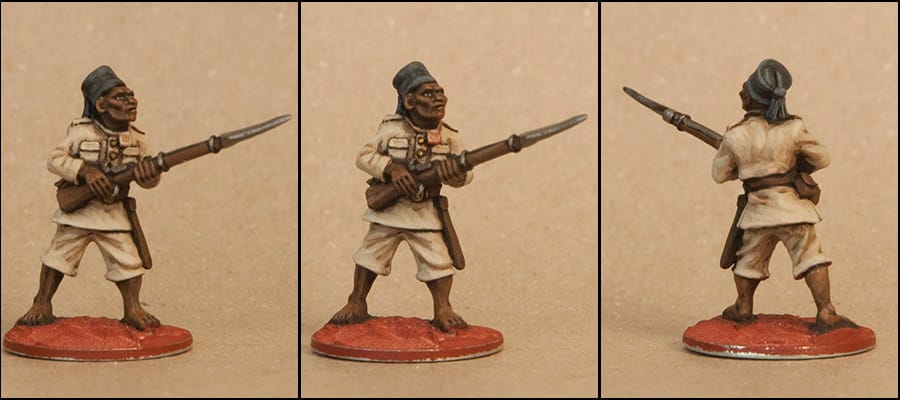
I've finally found a little time to get a tutorial together. It's pretty shoddy, and has served to illustrate how poor my memory is, the laziness of my technique, and that I really need to get a proper nuetral background if I ever want to do a serious WIP progression (which I do). Also, I don't have a 'stock recipe' per se, this is just how I did these figures and certainly isn't how I've done Africans in the past. Sometimes when I write that I have 'applied' a color, it is actually a few thin layers.
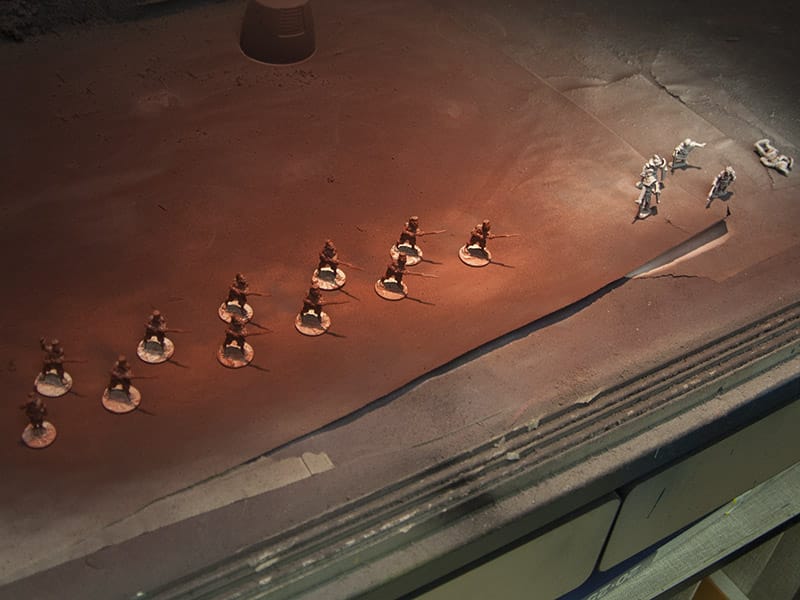
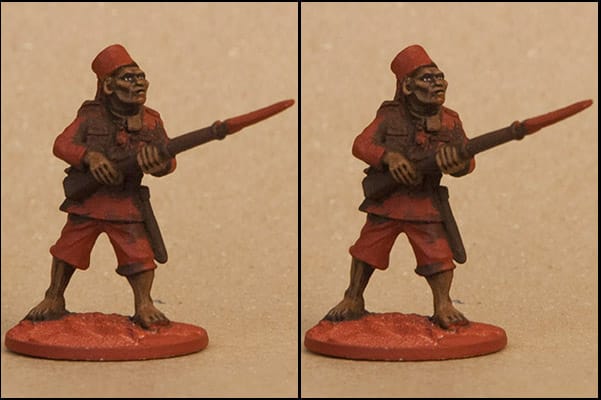
I left out the filing, cleanup, etc. as I presume most of you don't need to see that, and quite frankly I never thought to do it until too late anyway. I glued the figures to 7/8 width fender washers. I use superglue but I think I am going to switch to epoxy. I then prime the figures using Dupli-Color automotive primer. My default color for Africans is red/brown rust color. If it is a figure to be painted white or light tones, overall flesh, I'll prime red/brown from below, then white from above (which you can see on the gladiators nearby). I prefer red as it imparts a nice warm tone especially if you're applying paint thinly.
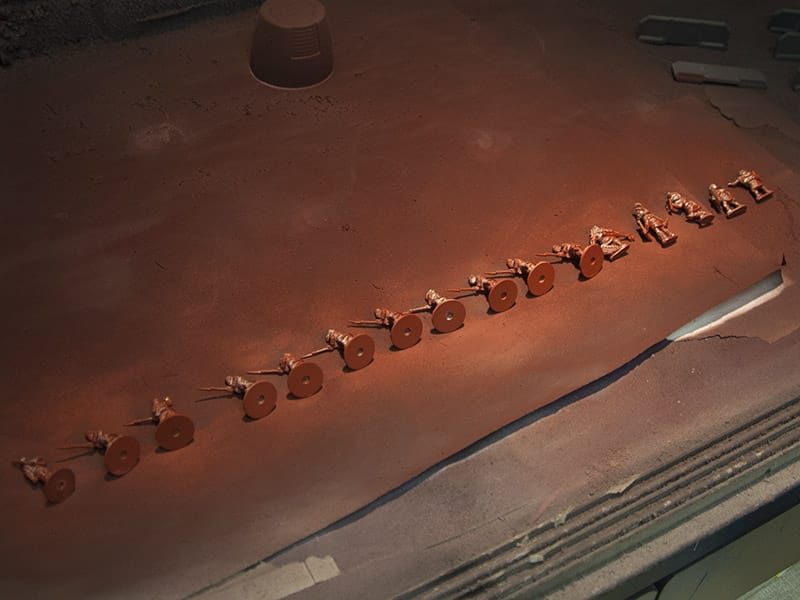
As you can see I lay the figures on their sides, spray, flip, spray, stand, spray, rotate, and spray.
Painting Skin
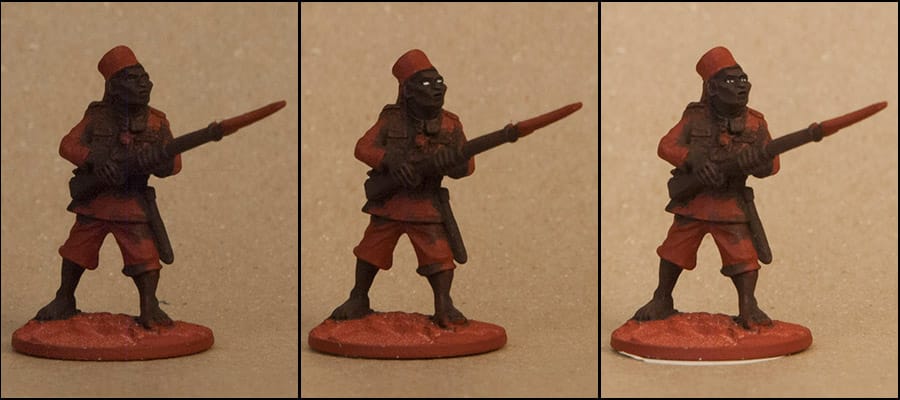
1. After the primer has dried, I paint the skin and equipment with Americana 'Soft Black'. It's a craft paint. I also sometimes use Coat d'Arms 'Negro', but I really like the Soft Black. I use this color to separate the pockets and clothing too, leaving hints of red primer here and there. Then I paint the eye socket black.
2. White in the eye (yes, I'm one of the dastardly eye painters). I used a Games Workshop white- whatever they call it these days.
3. Dot in the pupil with black, and use black to clean up the top and bottom edges of the white if need be.
4. I use Delta Ceramcoat 'Spice Brown', again a cheap craft paint, on the raised anatomy, leaving dark brown in the recesses. This color had its formula changed and really sucks now as it is very translucent. However, in this case we can use that- give the figure two or three passes with Spice Brown, contracting your application a little each time so you fade it in toward the highlights. Vallejo 'Beastly Brown' works too.
5. Add a little Ceramcoat 'Toffee Brown' to the 'Spice Brown' and hit highlights and raised areas. This will 'gray' the figure a little, shifting the tone, because 'Toffee Brown' is more opaque.
6. Straight 'Toffee Brown' on highest areas of skin, knuckles, etc. Another color one could use here is Coat d'Arms 'Beige Brown'.
7. I apply a thin layer of Games Workshop 'Reikland Fleshshade' wash over all the skin, including the eyes. It's pretty close to the old 'Ogryn Flesh' wash. Don't 'pool' it, just use it to color shift the skin back to warm, unite the layers, and knock the eyes back a bit so they don't 'pop' as much. Because it is pretty translucent, you can use 'Spice Brown' here too instead of a wash- it will look very different applied over the 'Toffee Brown' as opposed to painting it over the dark base. Experiment!
8. Highlight with 'Toffee Brown' again. Some figures I skipped this on, so the whole unit doesn't have the same flesh shade. You can also use other brown washes instead of the 'Reikland'. These guys are just rank and file- on a character or one of the Hasslefree beauties I'd probably do another wash and highlight just to smooth things out more. Keep it warm.
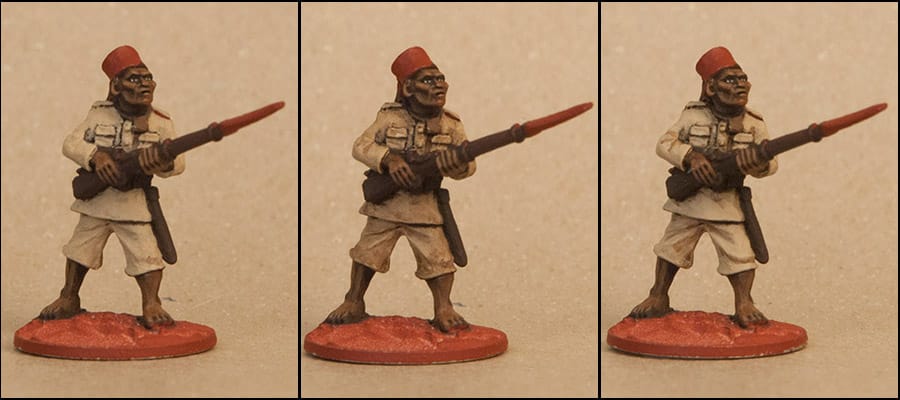
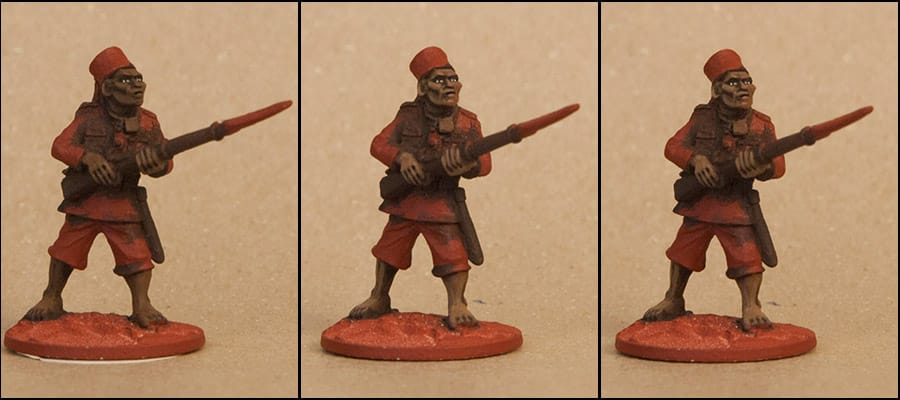
9. I painted the clothing with Ceramcoat 'Trail Tan', leaving brownish or red outlines where pockets are, and in other areas needing visual separation. This paint was kind of coarse, I'll probably look for a close match in another brand.
10. Apply a wash over the tan. I used Games Workshop 'Argax Earthshade' but 'Devlan Mud' would be fine here. On one or two figures I used a sepia colored wash at this stage, again for variety. I don't use heavy pools when washing, it's for tonal shifting.
11. Reapply the 'Trail Tan', contracting a little bit from your earlier application. You should have two or three slightly different tones in the khaki at this point.
12. The next highlight is 50/50 'Trail Tan' and Apple Barrel 'Sandstone'. I could also use bleached bone or a cream color, 'Sandstone' was in front of me so I used it.
13. 25/75 'Trail Tan' and Apple Barrel 'Sandstone', followed by pure 'Sandstone' on edges.
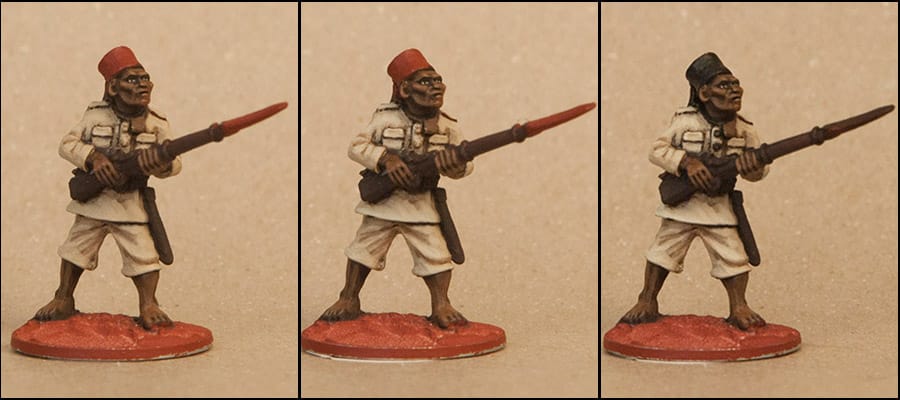
14. Paint the fez, hair if visible, and metal parts of the weapon black. It looks like I painted the buttons black here too. As a rule, I don't use black much to separate elements of a figure, but in the case of a figure like this with brown skin and a brown gun, a little thin black line will help the two separate visually.
15. I paint the brass buttons and buckle with Games Workshop 'Gretchin Green'. It's a yellowy-olive color. Wood and brown leather get Vallejo 'Beastly Brown'. Just make sure to use something different than the skin.
16. I painted the gris-gris on his neck 'Toffee Brown'. I'm sure I did something else here too, but I don't know what. I can't imagine I'd take a pic of just that

17. First highlight on the fez, using Ceramcoat 'Charcoal'. I painted metal with Games Workshop 'Boltgun Metal'.
18. Highlight on the gris-gris. Added a little light gray to the 'Charcoal', then applied to the fez. I used 'cool' grays on the fez, to contrast with the overall warm uniform.
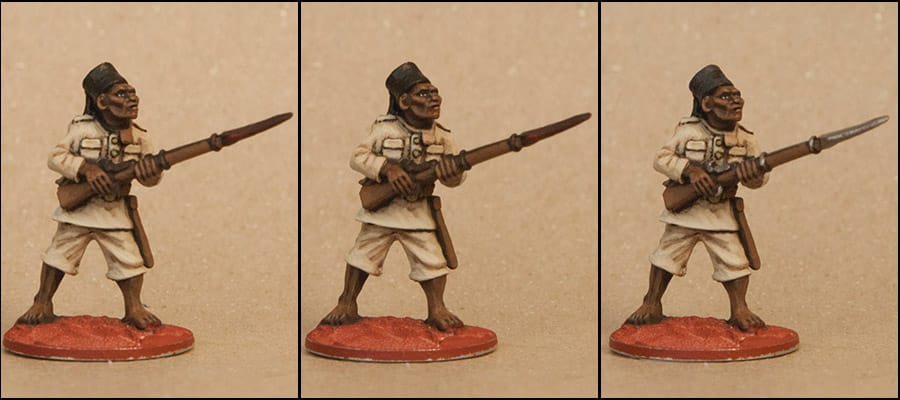
19. Gold on the buttons (probably Reaper gold, which is no better than any of the other so-so golds on the market. Can't seem to find a good one, which is why the base tone underneath the gold color is so important). A little more cool gray highlight in the fez, reddish wash over the gris-gris.
19/20. Highlight brown equipment with 'Beastly Brown' and a little 'Beige Brown'. Hint at woodgrain on the gun.
21. Wash the fez with Games Workshop 'Nuln Oil' to tie the tones together and darken it up. I also washed the metal and probably reinforced a few lines I wanted darker. Thin wash of brown ink, probably Games Workshop 'Gryphon Sepia' over the wood and "Argax" over the brown leather.
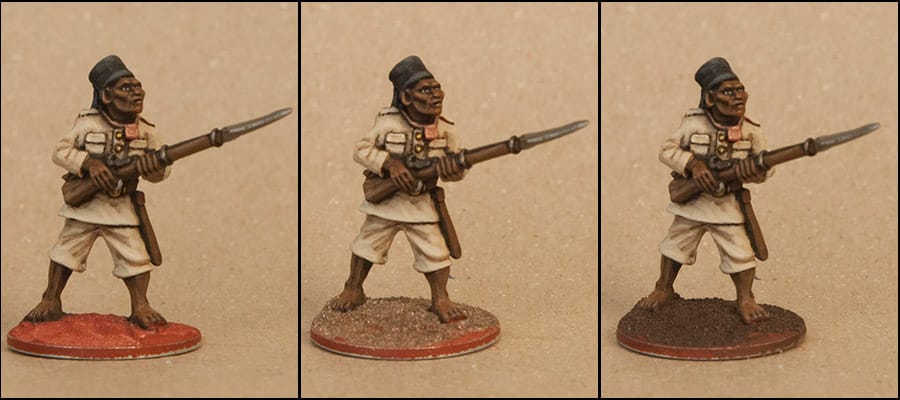
22. Glue sand to base with PVA white glue.
23. Paint the sand with a dark umber color. I used cheap craft paint here too, probably Apple Barrel 'Burnt Umber'.

24. Drybrush the sand with 'Spice Brown'. It's a good idea to paint a little black around the feet here if they blend into the ground too much.
25. Drybrush with 'Toffee Brown', followed by a thin burnt sienna color. I always want to try for that red African earth, but it always looks odd to me on a base so it ends up pretty conservative.
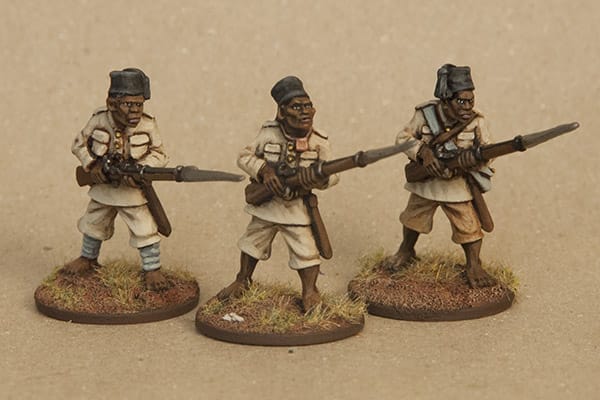
26. Static grass and a couple of little rocks.
27. I realized that I forgot to paint the lips. Painted the lower lip with Ceramcoat 'Royal Plum', then as a final highlight 'Royal Plum' with just a hint of white.
I hope this helps capture my erratic technique. On Foundry and Copplestone figures I guess I'd say I use a modified 'Foundry/Dallimore' method incorporating washes. I'd have been a little more careful if this was going to be an LPL entry, but I find a little heavier line work looks good on the tabletop, and on Copplestone figures in general. Normally I wouldn't be as methodical as this either- but I planned to take photos and organized my applications to save time. If nothing else, it will serve as my guide on the next unit- I would have forgotten how I did these otherwise

Post Scriptum
Actually, I was surprised to find that I used so many craft paints when I wrote this up. It seems a little disproportionate. I have so many Games Workshop paints it's kind of sad.
Regarding craft paint, there's only so many non-toxic pigments available to manufacturers, and the craft paint is going to be using the same pigments as the expensive stuff. The difference is the particle size, and the vehicle/binder. Craft paints will often be less finely ground, and will typically have more binder/filler/extender additives which will modify a pigment's painting properties and opacity. I typically hate applying multiple coats when I want something covered, so craft paint usually sucks for coverage- unless you can use that translucency to an advantage.
One thing I forgot to mention is that for general figure painting I use Robert Simmons 'White Sable 785' brushes- sizes 2/0 for detail work on eyes and face, 1 and 2 for everything else. I paid more attention to that too- realizing I'd typically grab the 1 or 2 depending on which was closest. The thing that's most important is that it have a reliable shape. For drybrushing I use an old watercolor 'mop'. I think the name has rubbed off that one.


 Welcome, Guest. Please
  April 25, 2024, 06:15:17 PM


