Here we go, this thread dragged up from the depths again

But I have an excuse!
Having picked up the new 'Never Mind The Billhooks' rules with WI, if I'm going to give them a go (which I am), I'll need some suitable 'daunted' and 'disarrayed' markers - having a peculiar OCD hang-up about NOT having coloured plastic/printed tokens sharing my tabletop with nicely painted figures and terrain.
My recently devised 'ploughed-in cannonballs' (see
https://leadadventureforum.com/index.php?topic=122963.0) will probably do for 'disarrayed' markers, but I need something more, um.. daunting for 'daunted'.
As it happens, years ago, I had a go at making some squashed Perry plastic WOTR figures as battlefield debris. Now it occurs that these would make rather nifty markers for NMTBH.
So I've made up some more.
I'm not going to do a complete tutorial, but here offer some hints and tips for anyone that's interested

I'm lucky, I suppose, that having made up about 250 assorted Perry WOTR plastics, plus a lot of other plastic kitbasing, I have huge tub of spare parts with many hundreds of arms, heads, weapons, pieces of weapons, and innumerable bits of bodies. So it's not really costing me anything to use up some of these leftover bits to create some more models.
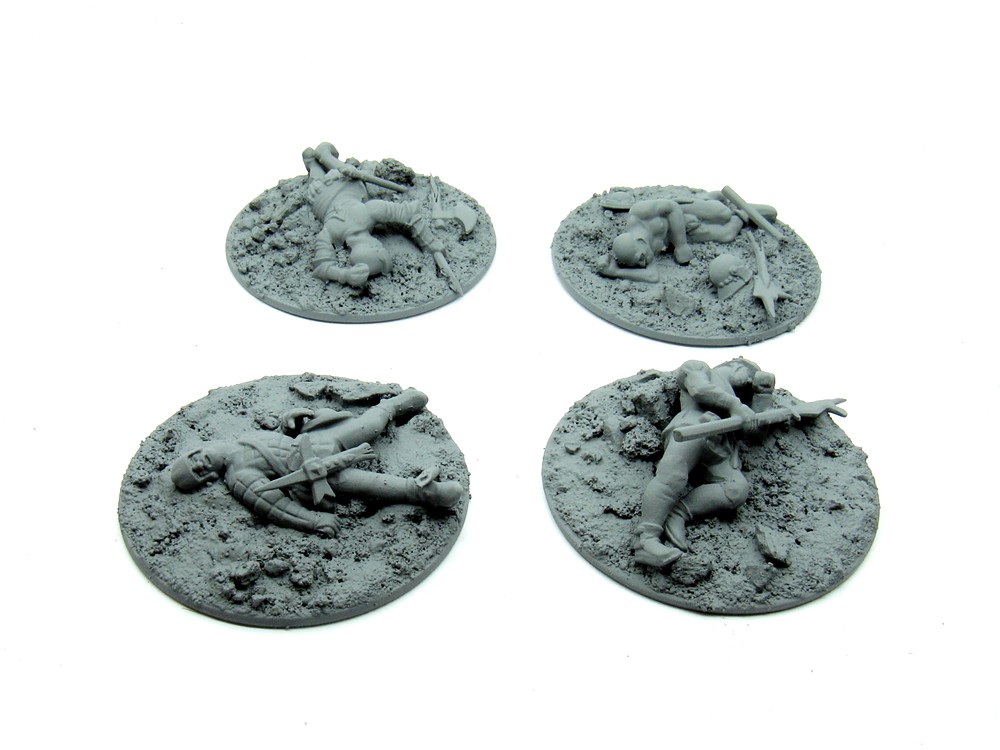
First up, you obviously need to cut the base off the figure. Some of the bodies lend themselves to a 'dead' posture more than others, although almost any of them will work with enough surgery. This is really just trial and error.
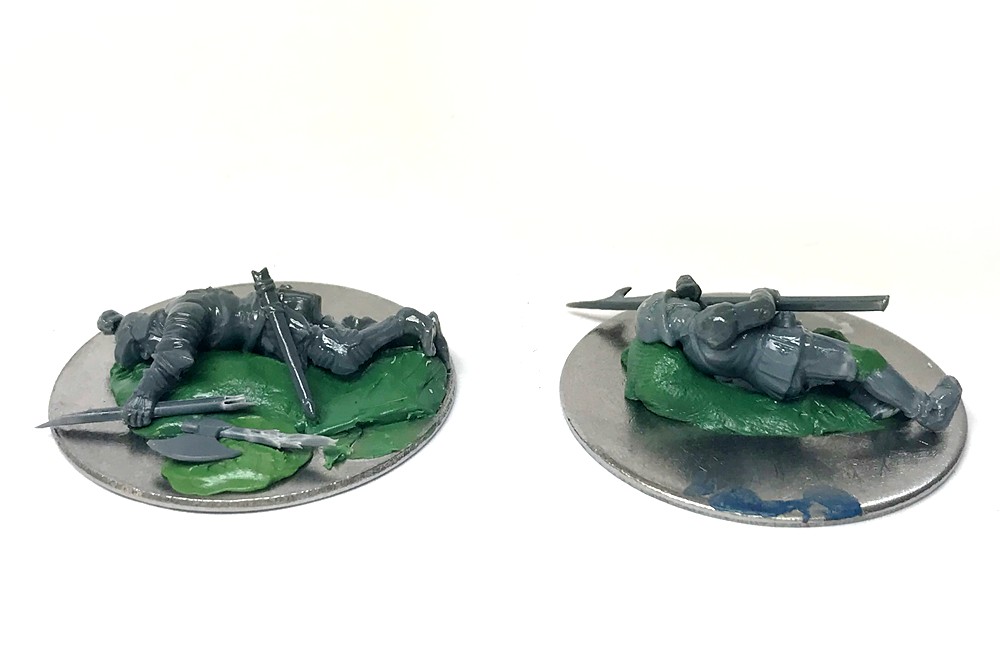
Having chopped off the base (easy with a sharp knife), a good first step is to chop off one leg too, and then reposition it slightly at a somewhat unnatural angle. It could be broken or it could just be the kind of strange attitudes you see in dead bodies, where the limbs often appear to fall in peculiar positions, as life has been extinguished. You will see I've done this on several of the figures shown below.
Also, you can make an incision behind the knee, snick out a small wedge of plastic, and then bend the leg back so it's tucked under the recumbent figure, whether its lying face down or face up.
If the leg breaks during this process, just glue it back on (I draw the line at severed limbs lying around), and you can make good the kneecap with a tiny bit of Green Stuff. Or just cover it up with an abandoned buckler or the shattered haft of a polearm.
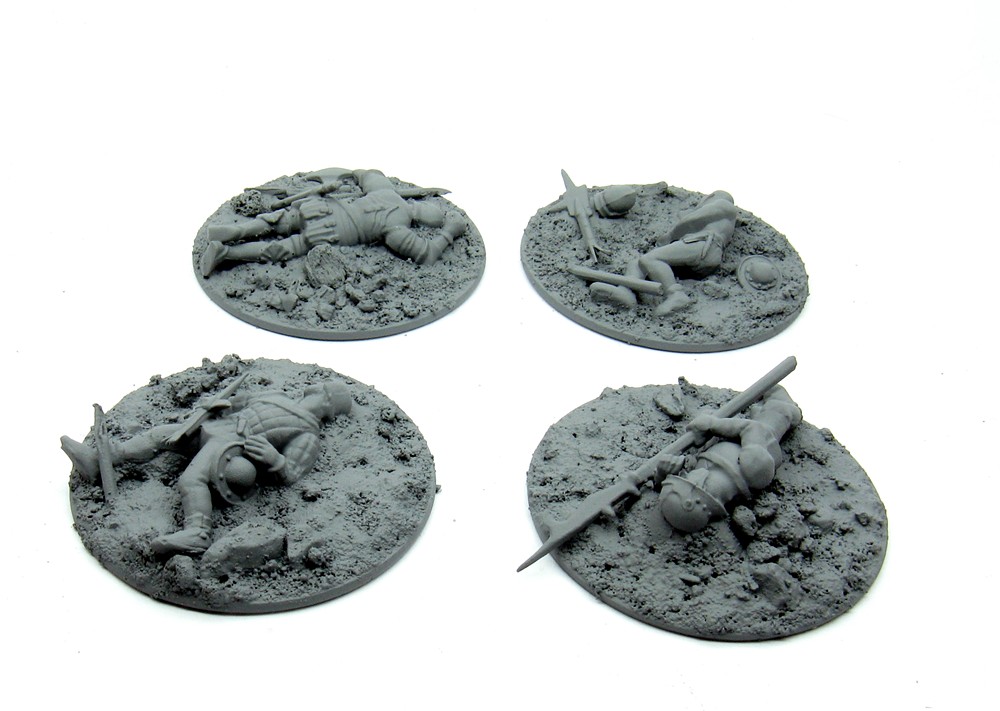
Battlefield debris, by the way, really help to set off these dead characters - discarded helmets or swords, bucklers, a shattered pieces of polearm, all help to create that picture of the aftermath of a ferocious melee.
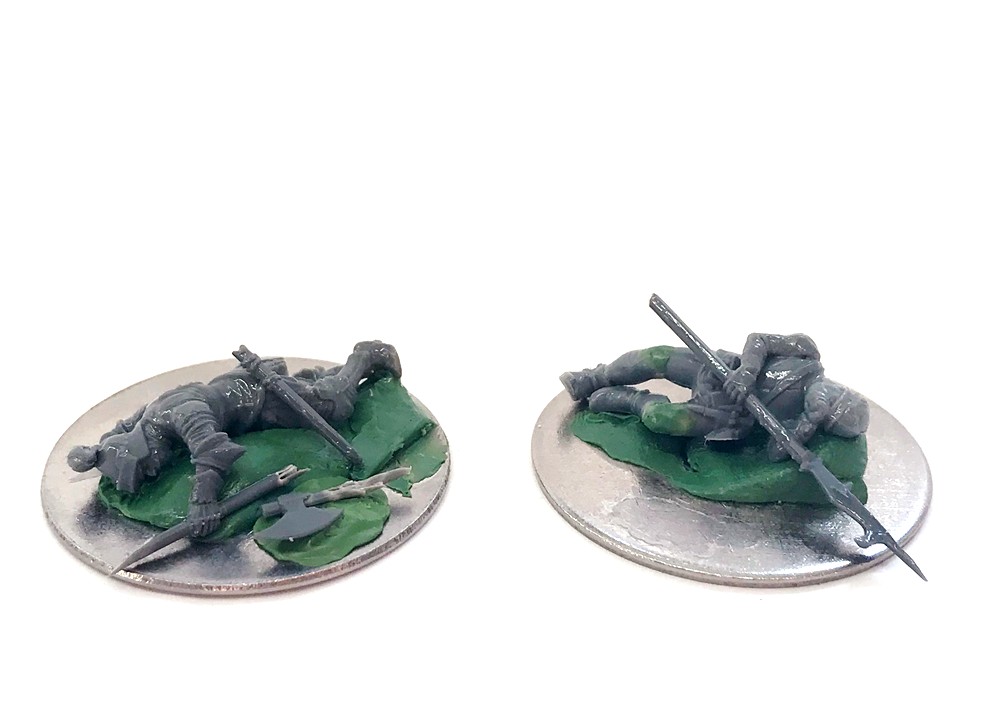
The position of the arms is also important. They basically need to look lifeless and flopped. On the figures shown below, in several cases I've done hand swap to change the attitude of the hand itself, so that it appears to be hanging limply at the end of an arm. These kind of minor alterations really are dead simple (haha) with a sharp knife and a splash of poly cement. It literally takes 20 seconds.
Once the newly attached appendage has started to set, which takes only a minute or two, you can bend it to its final desired posture, and then give it a quick brush over with another generous splosh of poly cement, to magic away any obvious join or visual inconsistency.
The second most important thing is the position of the head. Hopefully you'll see that in all the bodies below, the head is resting at a slightly unnatural angle - thrown backwards or lolling forwards - not at all like the head of a living person. You have to push this much further than you may at first feel comfortable with. It looks odd to start with, but once the figure is embedded on its resting place, it is this awkwardly positioned head that will really sell it as a corpse (ghastly, I know - sorry about that

).
Finally, THE most important thing is actually the base and the groundwork.
Even with surgery, a casualty figure created from a body that's portrayed in a walking / standing pose, will almost certainly not lie obligingly flat on the ground, on whatever base you put it on. Instead of worrying about how to make the figure lie flat, all you need to do is terraform the ground BENEATH the figure, to raise up the ground surface so that it follows the figure's contours and appears to be naturally supporting the figure, wherever / however it has fallen.
To do this, you can first support your figure on a small pad of Green Stuff, roughly moulded to fit the shape of the figure and raise it up onto a natural undulation.
Then fill in all around the figure with your basing compound (as for all things, I use gloop - a simple, homemade sand / paint / PVA mix, very easy to apply, and you can make it as thick or thin as you like to further build up the ground surface, or to run into small crevices, like between the figure's legs, etc).
Finally, judicious positioning of small rocks also helps makes visual sense of the finished model.
If an arm, leg, or head is still a bit up in the air, then stick a rock under it, and then build up around the rock with a small amount of gloop. Hey Presto. It no longer looks like the body part is resting in the air at an unnatural angle - it now looks like it has naturally come to rest against a rock.
You can do the same thing with small twigs masquerading as logs, and with helmets, bucklers, weapons etc.
And finally, if there is any aspect of the finished figure that doesn't look quite right, you always have tufts to camouflage a multitude of sins.
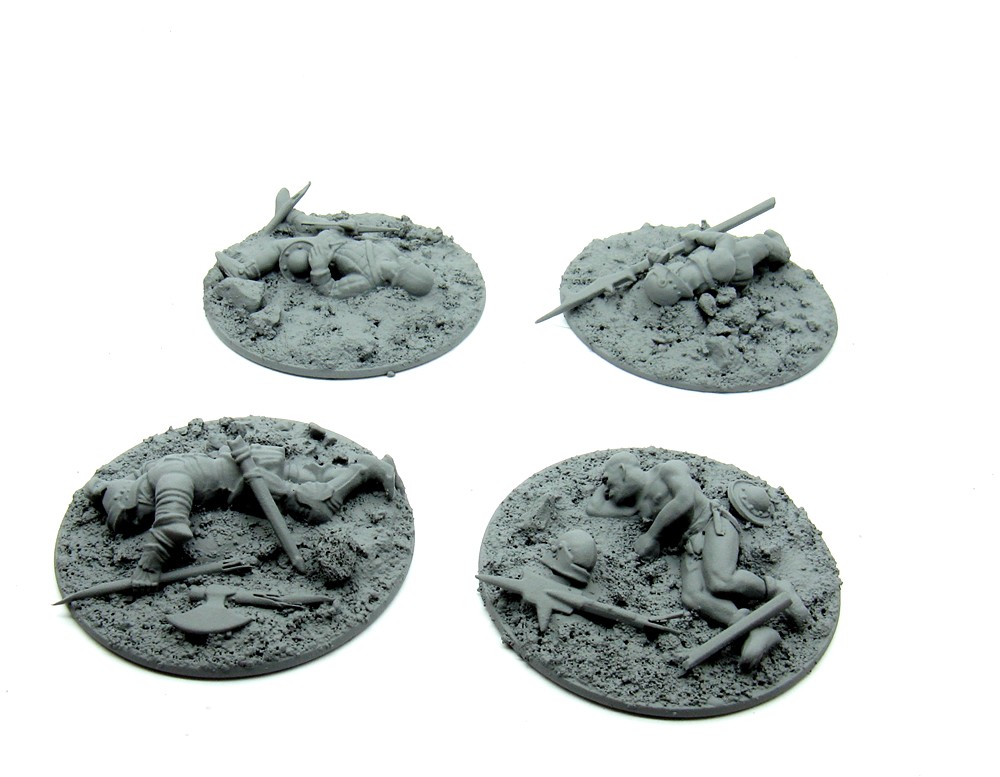
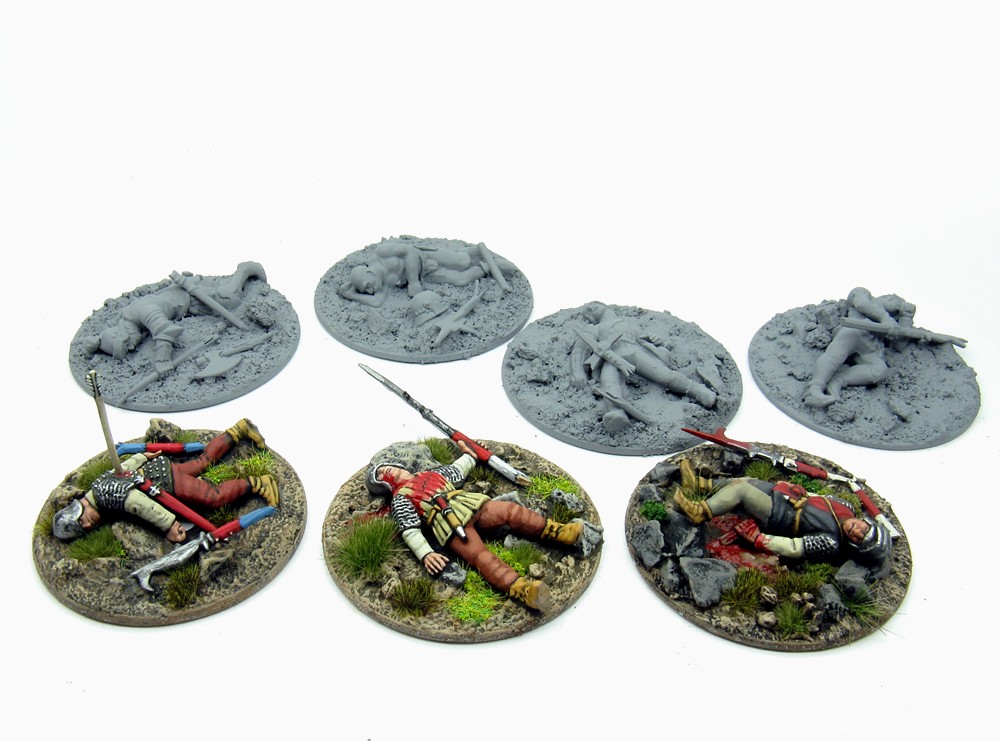
The bare-chested figure is actually a Zulu casualty from the Perry Zulu set - figured I might as well use him. I've given him a Green Stuff codpiece, waist ties and boots, and he'll be painted as wearing hose, the battlefield scavengers having clearly looted his gambeson and shirt.
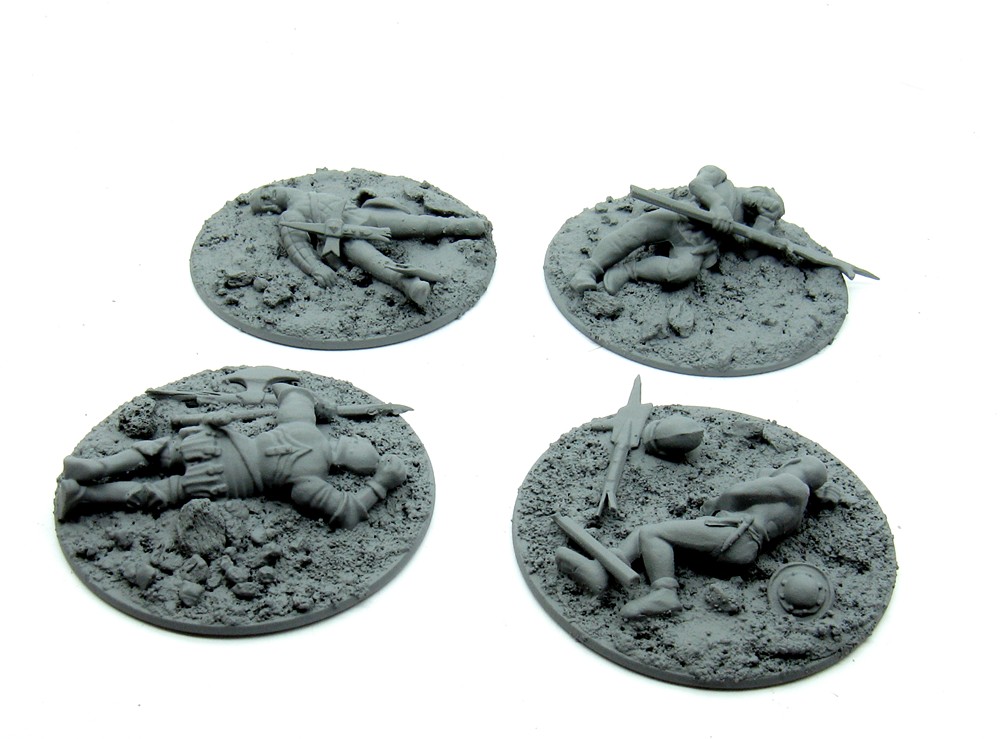
Here are the four new ones with the three that I made some years ago.
I think I'll probably make another three or four to make sure I've got enough for a game involving 20 or so units.
Can't imagine more than half the units on the battlefield are going to be 'daunted' at any one time, right?


 Welcome, Guest. Please
  May 11, 2024, 03:15:42 PM


