In a recent discussion about foundry paints the often heard "the tops break off" comment was made.
Actually, lots of folks complain about paint pots and their tops breaking off, so I thought I would have a try at a quick... "How to Maintain your Paint Pots" tutorial.
I know this would be far more convincing if given by someone like the Prof, Captn, or about a zillion better painters than me, but I've been using pots for going on 30 years so, I thought maybe experience counts some...

Anyway... off we go.
I'm working on some 15mm AB Chasseurs and I have come to the point where I want to paint their swords. So I rummage around my paints and found a bottle of Foundry Chainmail. Here's a pic of what I saw:

Notice how the lid is sticking up on the right side? Hmmm... let's look inside:
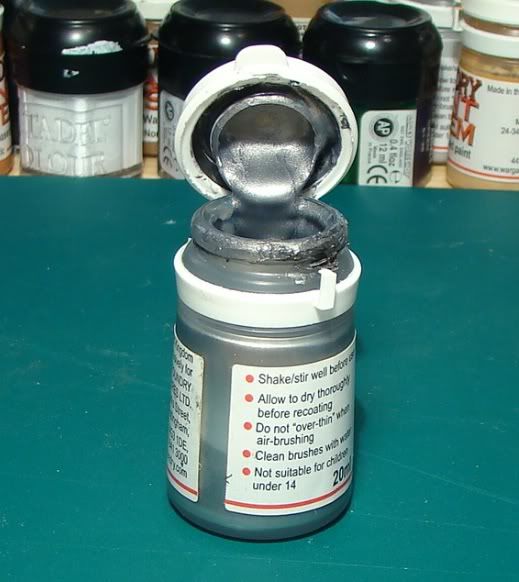

YIKES! WHAT A DISASTER!!!

Notice the inside of the top is clogged with dry paint. The top of the bottle is caked in paint crapolla and the paint itself is oozing out of the top lip like sludge!
This diffidently won't due. Clean up time!
So first off, I take my trusty exacto knife, stab into the lid and pull out all the dried paint there.
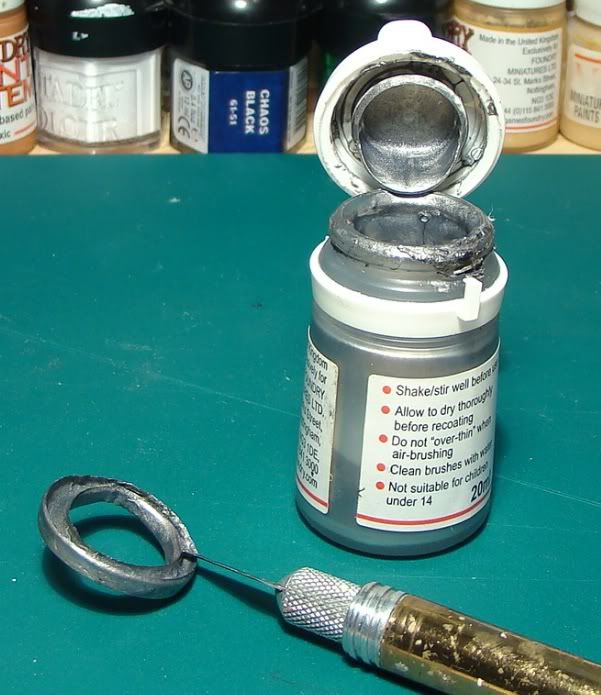
CAN YOU BELIEVE THAT!
Amazing...
Next, I use some paper napkins and clean all the junky stuff on top, on the side and inside the top of the pot...
Okay, that is looking better! But notice how much paint is in the lip of the jar? I mean, I'm not sure if I should use a brush or a spatula to work that stuff...

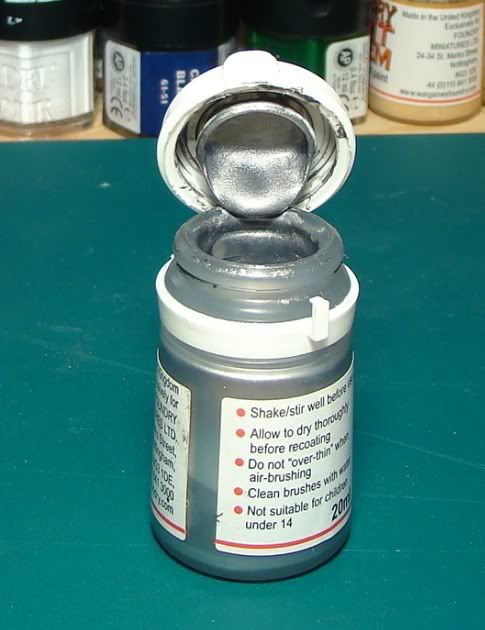
So now I water it down. It took me two shots at it to get it the consistency I wanted, which is a little more thick than most of the paints I use. (I open the tap of a faucet and close it slowly into it is just leaking out drops... then I put the pot under and let it drop in.) Notice the difference?
Okay, so now I am ready to use the paint.
BUT WAIT! Weren't we talking about tops breaking off? Hmmm... Yep!
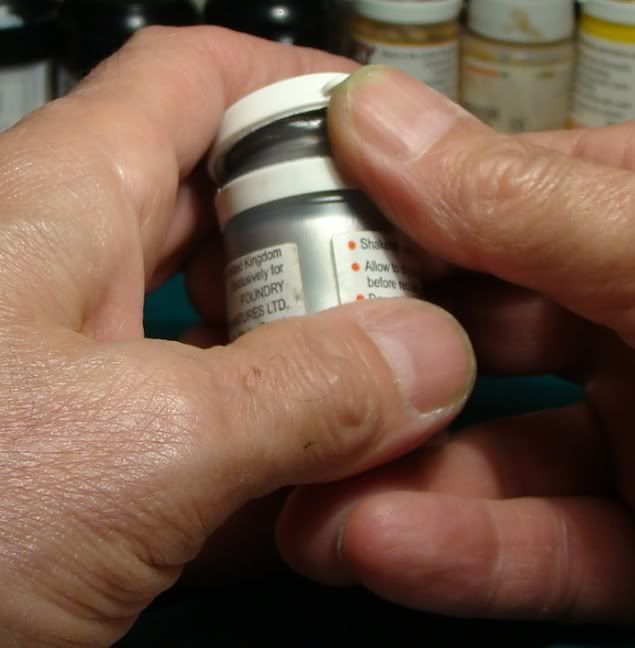
First off, I give it a good shaking to make sure the paint is well mixed. I let the pot sit for about 10 seconds (more on that later). Then I grabbed the pot with both hands. With my left hand I put a finger over the top of the pot and give the back end (where the hinge is) support, my right finger wraps around the pot and holds the hinge, then applying steady pressure with my right thumb, I push up until the top pops free. When it does, I keep control of the top with my left hand so that I don't put lots of stress on the hinges. Here is how I do it:
In the above photo, the top is free of the pot. Having popped the top, now you can just open it up. Remember, we are opening a soft plastic bottle here, not flipping coins...

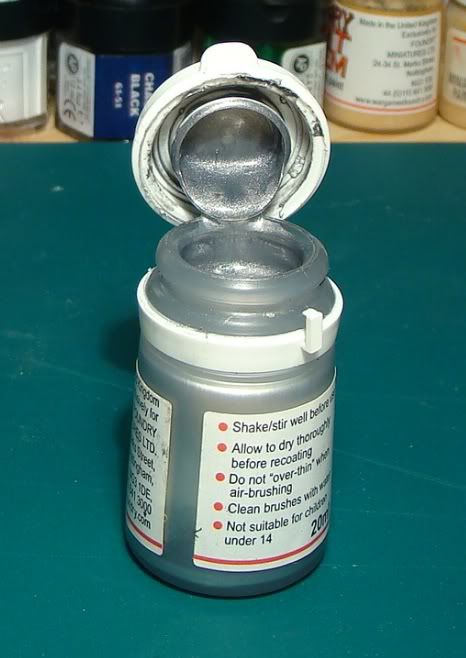
Now let's take another look inside:
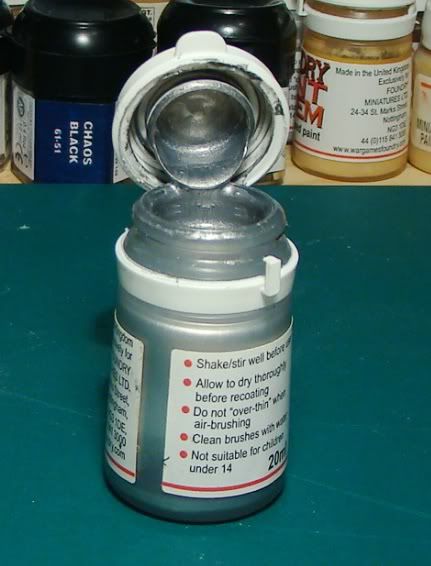
Notice how much paint is in the lid? Very little, don't you think? You know most folks say they want to buy a paint that only needs one application, but in all honestly, that applies to just about every paint on the market. Problem is, with heavily pigmented, unwatered paint, if you use it as is, it has a tendency of "glopping" all over the place, especially if you hit the same point twice before the first coat is dry.
Personally, I prefer my paints far more watered down. It means I usually have to put two coats, but by the time I finish the first coat, the paint has dried. When I then go back and give it a second coat, the paint goes on nice and smooth with NO GLOPPING!
Of course, once we have cleaned our pot, watered down the paint and understand how to open the top carefully without breaking it off, we need to MAINTAIN A CLEAN POT. This is very important because any dried little bits will fall into the paint and one day end up on your brush and then your mini.... OOPS! Don't want that.
So here are a couple more tips...
1) When you are going to use a new color, give the pot a brisk shaking and then... LET IT SET for 10 or 15 seconds before opening. This allows excess paint, time to flow out of the lid before you open the top. If you open your top immediately, in many cases, the excess will spill off the lip and onto the rim of the pot. DARN... all that cleaning for nothing!
2) If you are using a couple pots at the same time (I do this a lot... mostly with a color and black), remember to close the unused pot so that your light doesn't cause it to dry. When you need the second pot... most times you DO NOT need to re-shake the bottle, just pop open the top and you are ready to go.
And lastly, when painting with watered down paints, keep a close eye on the rim of the lip of the pot. Watered down paints dry faster, which you will see on the rim. Here is a picture to illustrate:
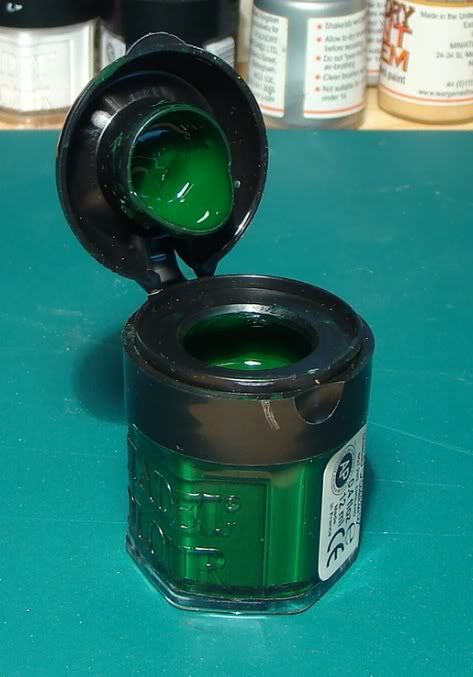
Once you start getting too much drying on the rim (the dark green on the lip in the picture above)... say a millimeter or so, it is time to close the pot, give it a good shake, wait 10 seconds or so, then open and continuing painting.
In summary, I know I have broken off lots of tops of my pots. I've also let lots of crap get into my paint.

But... as they say "A good craftsman doesn't blame his tools."
Once I started taking better care of my pots, I stopped breaking off the tops, found my paints lasted lots longer, got a much smoother effect on my minis and was free of little junky bits getting stuck to my minis.
Give it a try... it might make a difference!


