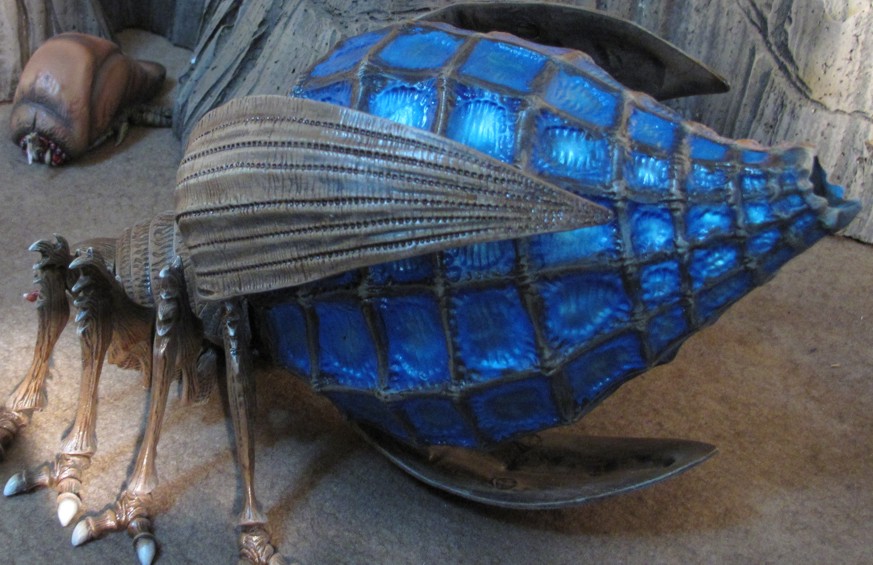
Been looking at all my unbuilt SST stuff (got a lot built but still a bigger pile un-built) so I finished my Plasma bug Thursday and got him into combat Friday. The plasma bug is the biggest model produced in the now OOP line done several years back and one I was really not interested in building. It has some real challenges in the paint dept! The entire rear end of the bug is supposed to be glowing from the about to be released plasma energy bolt.
I decided that this was a job to trot out the airbrush on and the results surprised me.
So after assembly I primed the model with Krylon Automotive primer, flat black. Yes I prime nearly everything in Black and have done so for over 25 years way back when everyone else I knew was priming in white people thought I was crazy! But I developed a style over the years that I like and paints quickly . I then dry bush the entire model with a wide flat brush using water based acyclic in off white or beige. This has the effect of helping me “see” the figures detail more clearly and decide how I will approach painting it. It also helps to define the highest spots and get a head start on shading. Likewise it helps those colors like red, yellow, blue, green, ect, that suffer from being laid directly over black.
The head, trunk, and legs of the bug did not worry me as they were a straight forward bug job, but the back section that needed to glow like a build up of plasma energy was occurring did. I had seen several other plasma painted with the typical white / blue shading effect, much like you would use on a lantern or internal fire effect. Since this was going to be an energy effect of glowing plasma I wanted something different.
I decided to use a lacquer based chrome silver from Testor’s that had been in my paint kit for 20 years, back when was painting model airplanes. The plan was to start with it and the spray a very thin coat of light blue over it and then circle out from there getting darker all the way to the skeleton “cage” that would be painted like the main body of the bug. I had hoped that by thinning the paint way down it would show through and create the depth I was looking for. However it did not work no matter how thin I made it, it covered and dulled the brightness of the silver chrome, it also was so thin that it barely showed blue and I wanted the effect to be intense and appear deep.
I the remembered a paint I had used on some Battletech figures years ago. It was transparent red paint from Tamiya that gave some great results. After a quick pop down to the local hobby shop I had a bottle of Tamiya Blear blue. It is water/alcohol based and can be thinned with isopropyl alcohol. I mixed some at 50% paint to thinner and popped it into the airbrush, and started to lightly spray over the silver. It was perfect; the silver took on the vibrant blue but retained its shine and after a few more light coats even appeared to have a depth or thickness!
It dries very quickly being 50% alcohol and the rest of the paint job was pretty routine. As always I clear coated the whole figure with Testors gloss lacquer using my airbrush, then added a bit of dull coat to the mix giving me a nice semi gloss bug look.
This turned out to be a very fun and interesting build and I'm keen to do two more with some type of lighting effect!
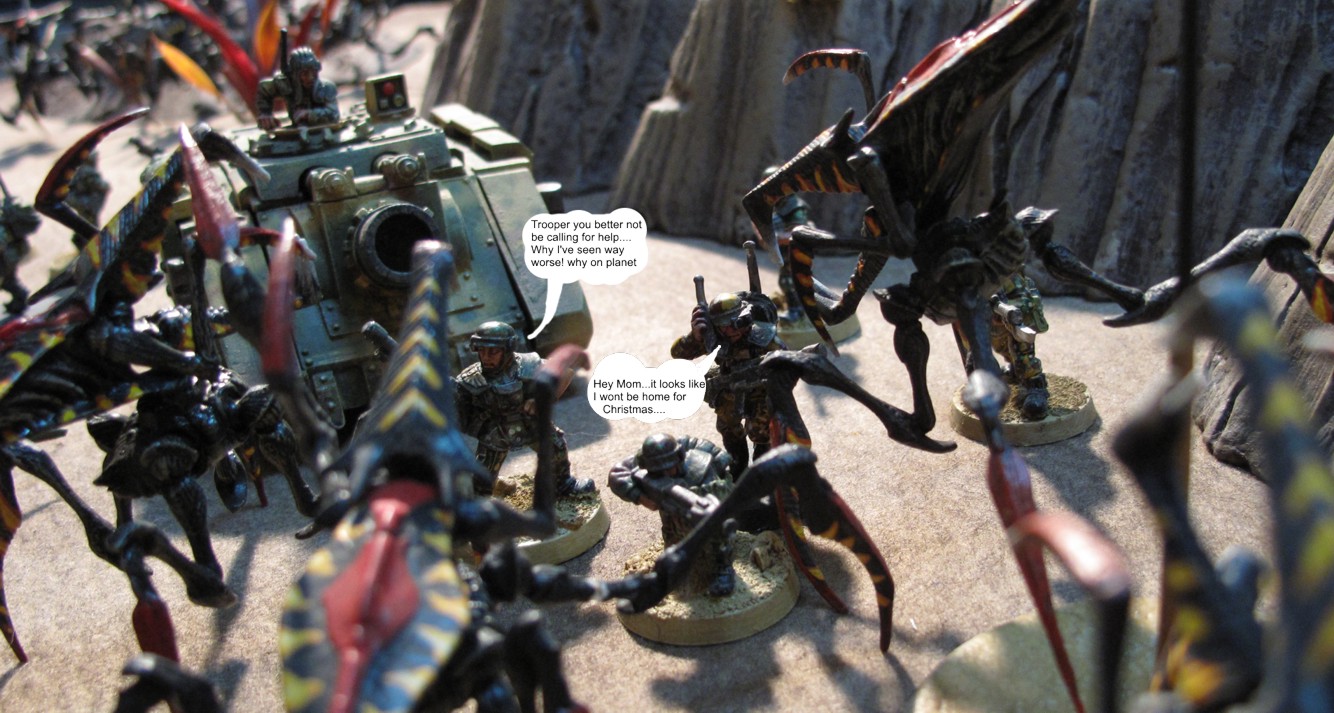
 A picture from friday nights battle, if there is any interest I post up a battle report with some more pictures!