Thanks for all your nice comments, chaps! New entertainment to follow - starting the afghan hillfort (or pathan watchtower or whatever you'll call it).
It's not so easy as it might seem to find good comtemporary pictorial material about afghan hillforts or watchtowers. After searching the net I couldn't get what I wanted, but looking through my own books got me to this photo in Barthop's NWF book:

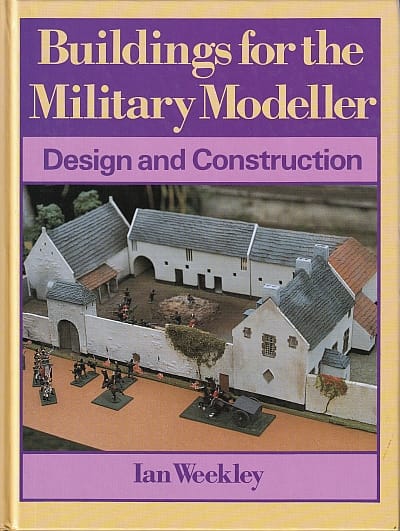
That gave me some inspiration and I started drawing some rough floorplans, thought about overall size and transport choices (!) and went over to my books and Google again to look around for possible modelling approaches. Ian Weekley's famous "Buildings for the Military Modeller" came to mind and his mighty plywood afghan hillfort from the early Eighties:

And of course, all the fantastic models from Chris Riordan aka "Chris The Model Maker" who sells on Ebay.ca and regularly gets appropriate prices for his masterworks. Two examples:
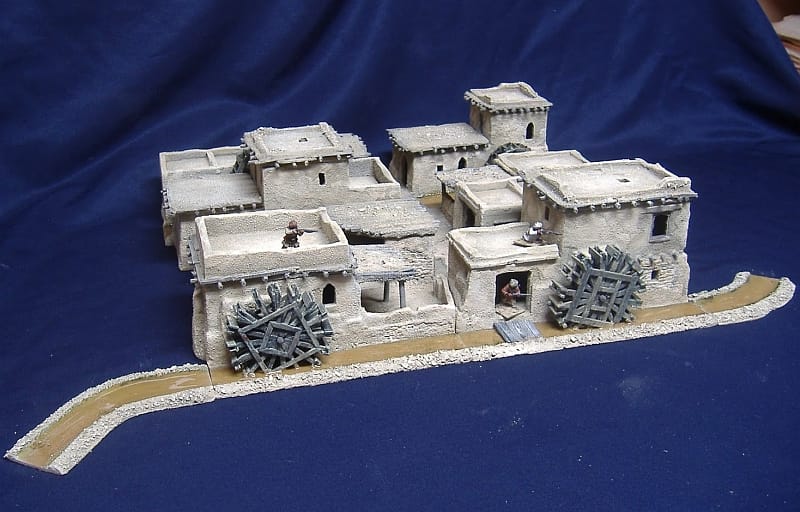
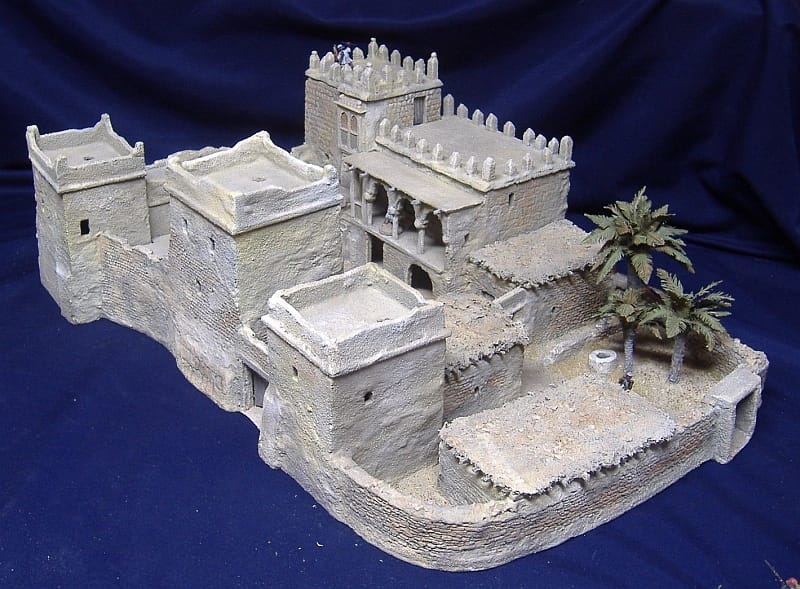
He is a master of wall structures and realism in miniature and as another good friend of mine was able to buy some of CtMM's models in the past, I could borrow the one or other and studied them extensively, trying to work out how he did things. If I was successful is up to you to decide in the end ...
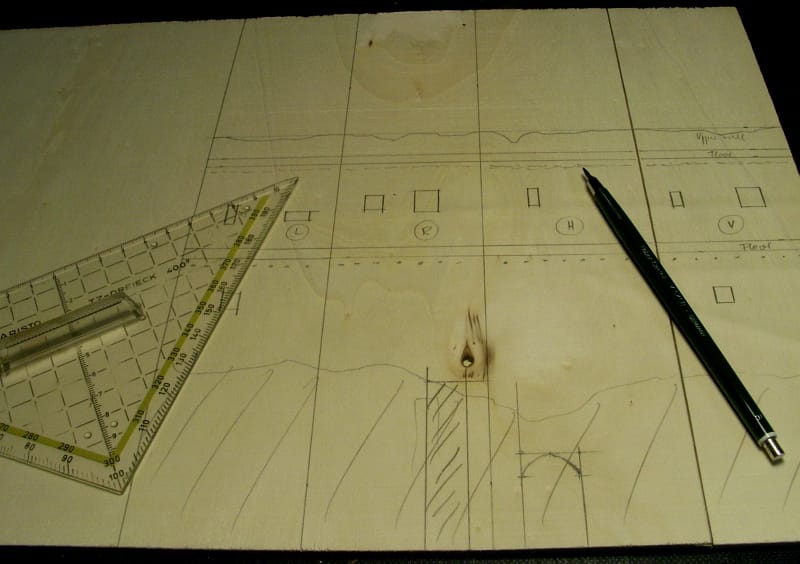
First things first, construction of the first building directly on top of 5 mm plywood. Why not foamboard, balsa, cork tiles etc.? Would be much easier to work with, that's for sure, and I did it myself for years. But if you ever had a plywood model in your hands you could feel the stability and sturdiness of that model, it feels you could drop it to the floor and nothing would happen (provided it was properly built ...). And no problems with warping at all. Anyway, I still like to learn new things and wanted to know if I could do it right. Of course I needed some new tools

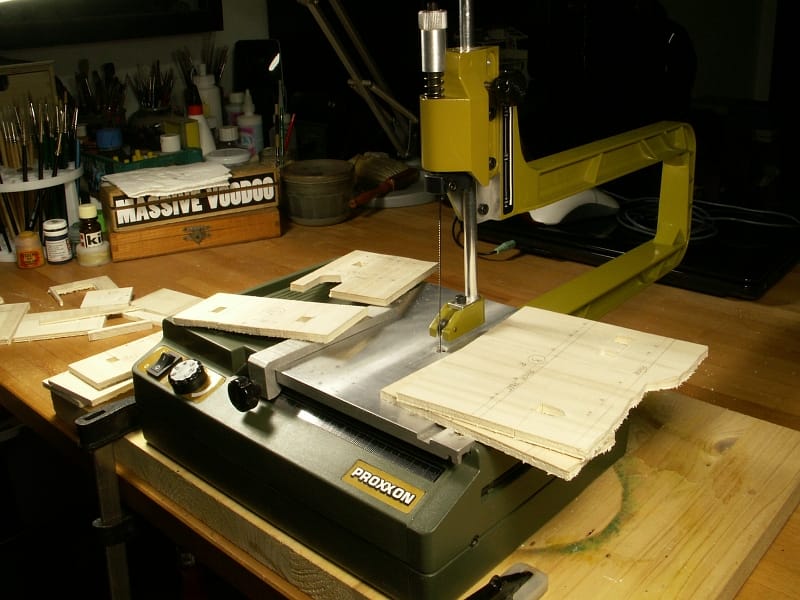
Got this nice little machine for 60,- Euros on Ebay, a Proxxon fretsaw. Not the top tool of the month and you could freak out when it comes to changing the blade, but it did all the work it should do quite nicely:
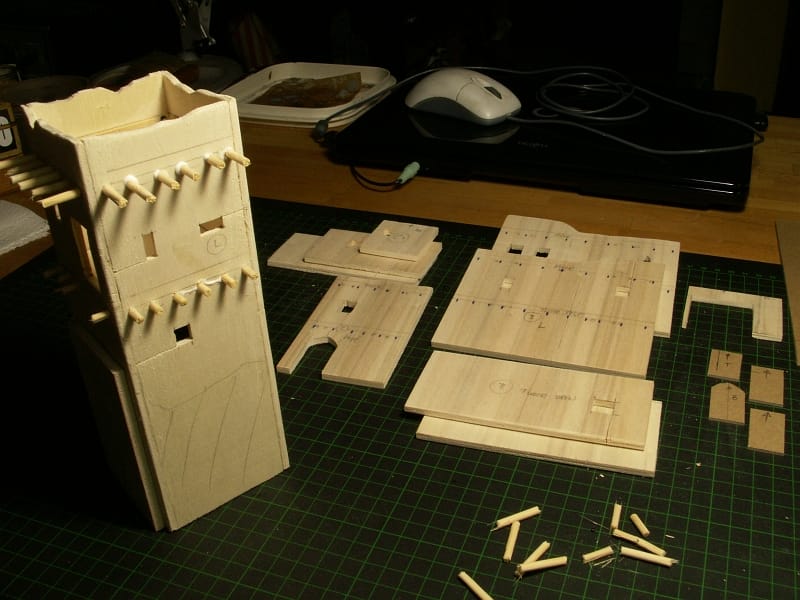
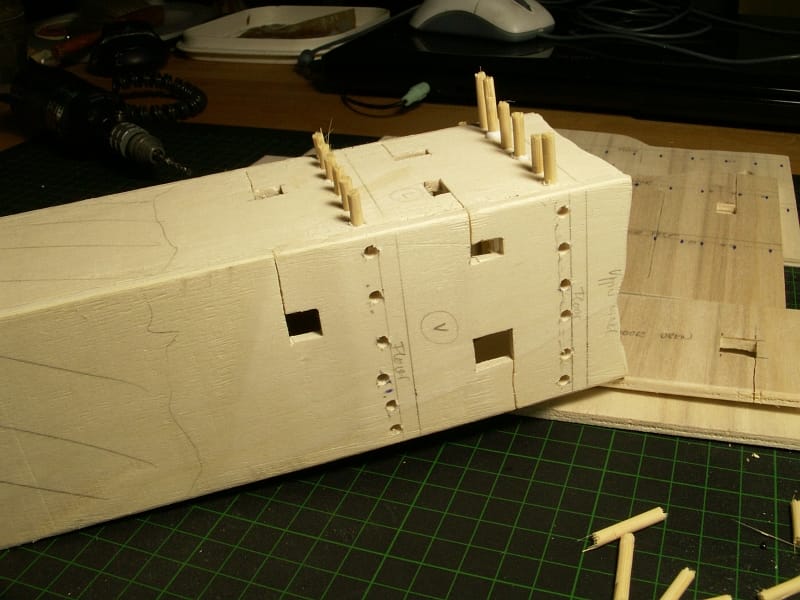
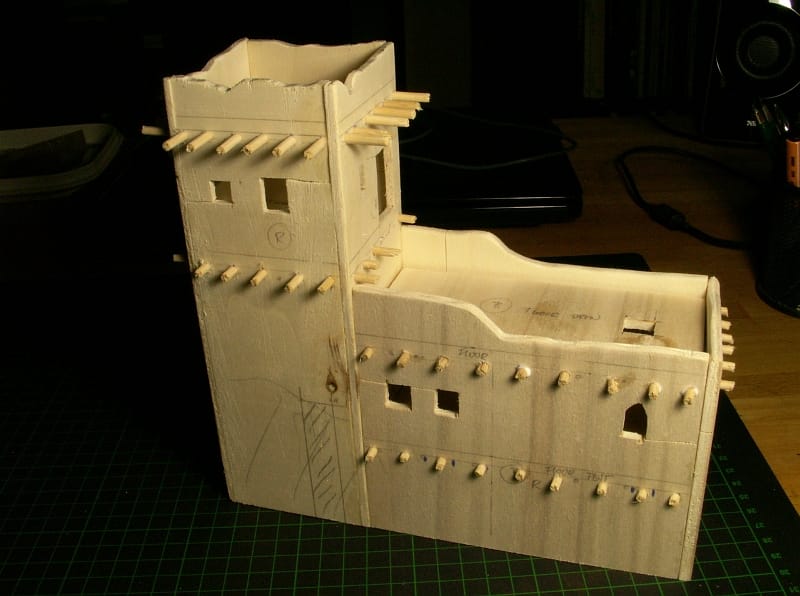
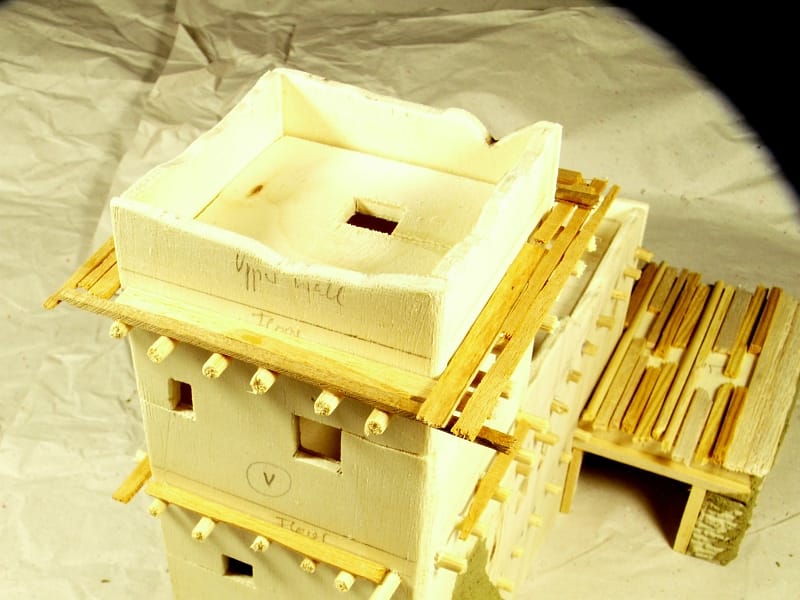
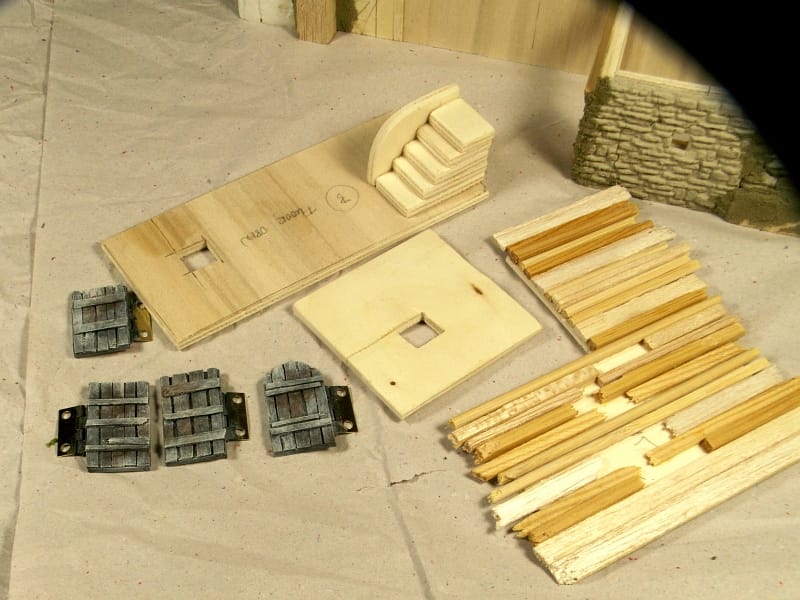
The girders were made from kind of skewers I bought in different sizes and diameters in a garden centre and just roughly broken into smaller pieces with pliers.
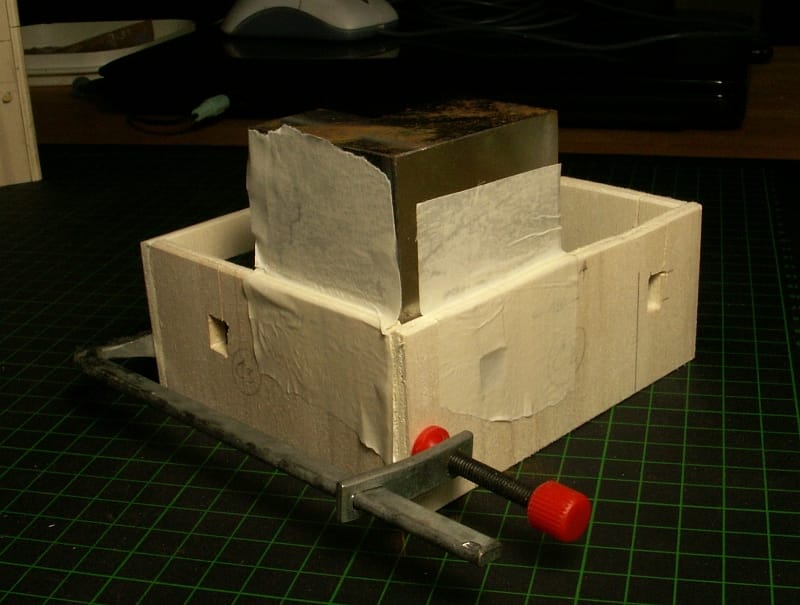
To get square angles, pieces were temporarily fixed to a heavy right angled steel piece after getting the wood glue on the edges and then clamped together for some minutes. This is really essential when working with wood, only this way you'll get strong and permanent joints. I use a fast setting wood glue needing only about 5 minutes to set.
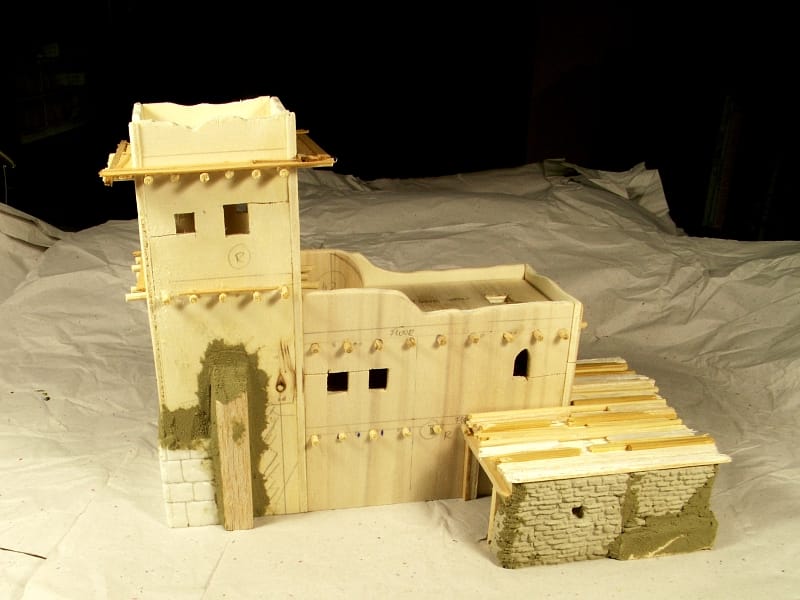
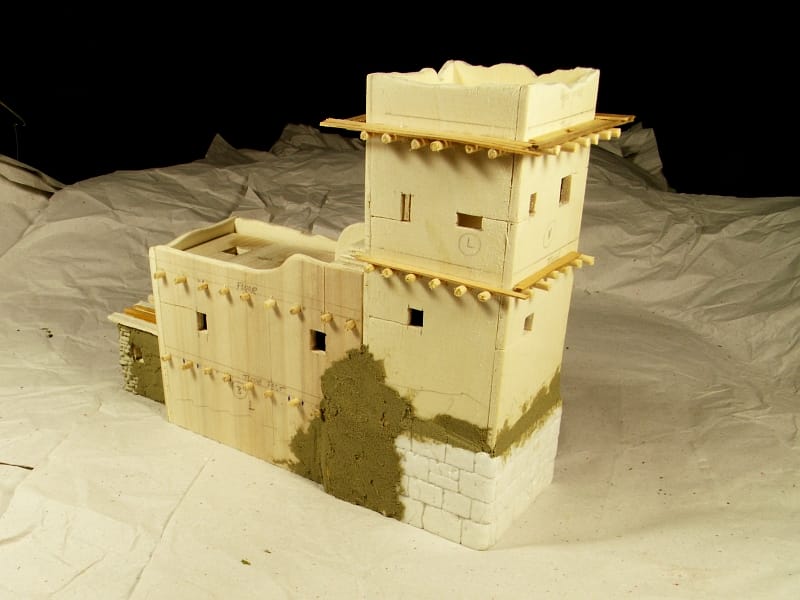
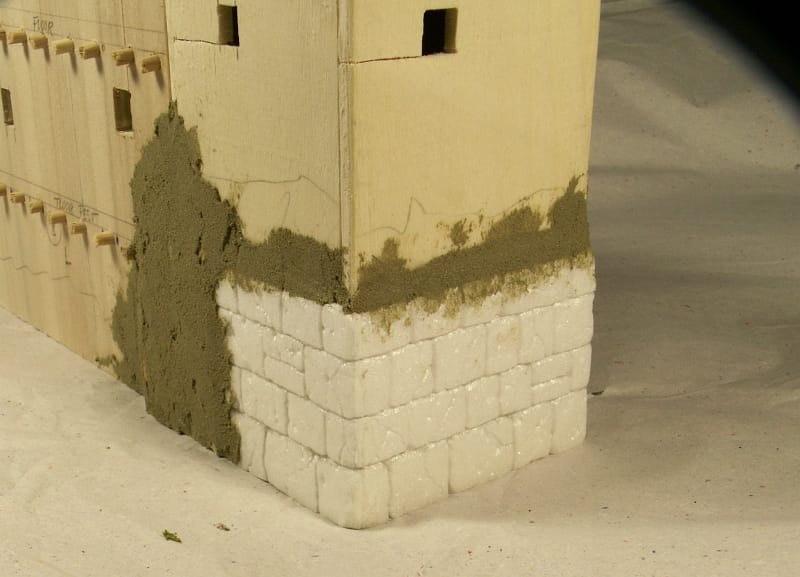
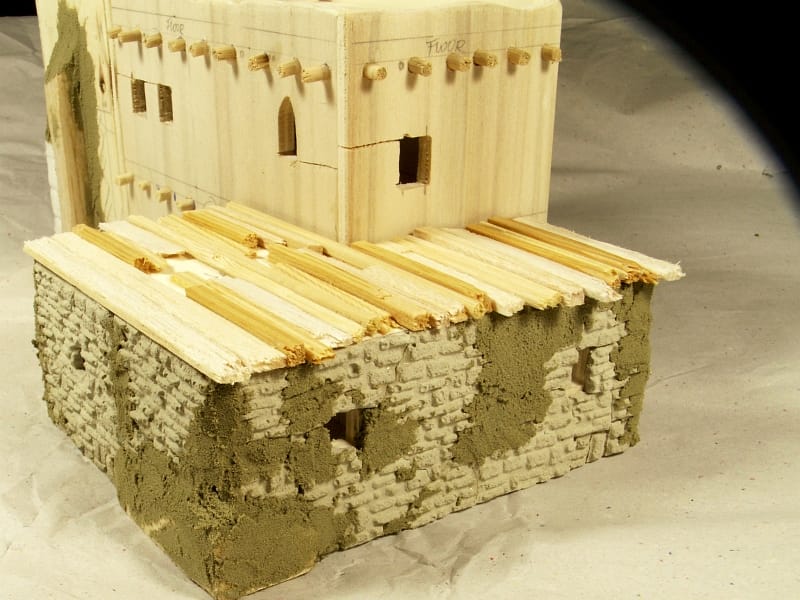
The last two pics show different approaches to brickwork structures. The foundation of the tower was simulated using styrofoam with carved in stone rows. A real small rock piece was used to press some stone structures into. The shed's brickwork is from my own mastermould and cast in some household compound. I used different ready made fillers and spackle to smooth out contours and fill some gaps. All quite roughly as it will be covered heavily later.
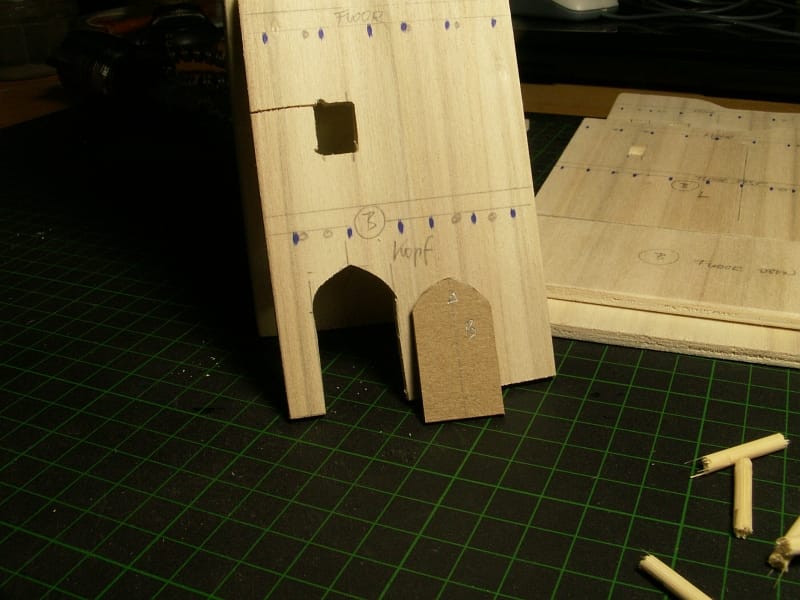
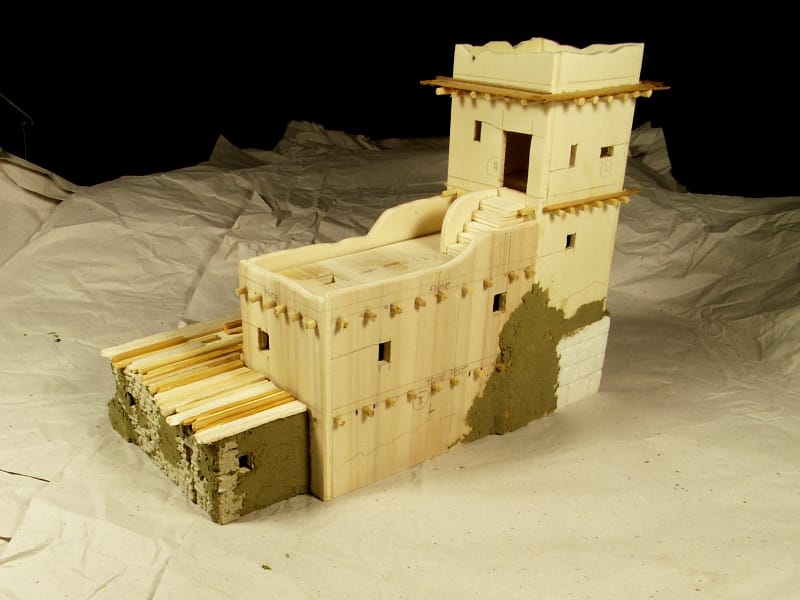
Some steps further, details added, moveable doors modelled and painted, all single pieces on the last shot. What else to say ending the first part building the fort? Always plan your terrain pieces to fit into an existing transport case, not the other way round! Learned it the hard way ...!

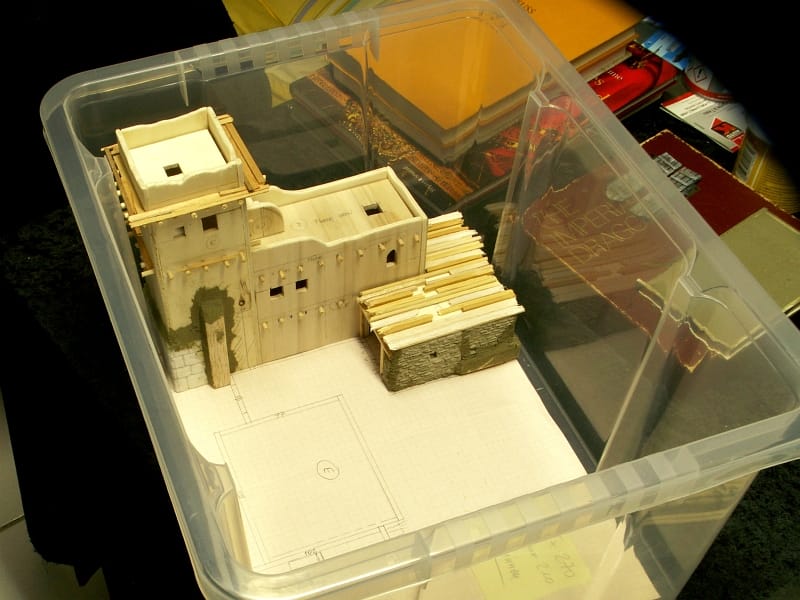
You note there is much more space to be filled ...?


 Welcome, Guest. Please
  April 29, 2024, 07:26:52 AM


