Cheers fella.
Ok, game 6. The British are still trying to force their way through the main German defensive line at Fontenay.
Worried about the losses sustained so far, the Brits pull their troops out to be replaced with a freshly brought up platoon.
The Germans dont have that luxury, and have to hold with what they have.
Dice rolls at the outset are very much in my favour. I roll high on force morale, Jamie low, and to further thwart him, he only rolls for two advances in the scouting phase.
I am down to two depleted sections for this one, a panzer IV and 7 points of support. Having struggled to make two tanks work for me before, I opted to spend points on a sniper, a small rifle section with junior leader and an adjutant. This later point was wasted as it happens.
Jamie had a fresh platoon and 21 points of support *parrrrrp*
My biggest hope was to inflict losses against this new platoon before loosing the table.
As this is turn 6
..I have lost the option to use the wild card counter attack later in the campaign. A shame as I was looking forward to using a pair of panzer Vs and had bought the half tracks especially for this. Maybe we can fight that game after the campaign conclusion?
Anyway, on with the game.
I just want to post this. These are Jamies notes taken through the game. I want simply highlight the ridiculous number of times double or more sixes were thrown but both sides when rolling the command dice! First time either of us had thrown a quad six
..though it turned out to be a damp squib
.but in a more dynamic game, this would have been carnage!
Jamie's notes
Dave rolls a double phase
Dave then rolls four sixes.
Pre game barrage gone and he has a CoC dice
I then deploy three squads and drop smoke
Dave rolls 64443 does nothing
Jamie moves up two of his sections and brings in a ranging shot on the road.
Dave rolls 63322 and moves tank
Barrage comes down more smoke deployed units move up.
Dave ends turn.
Daves roll is 11224 sniper fires at FOO and puts shock on 2mortar
Dave deploys a unit near the barn and fires at the unit in the open. SL injured. 4 dead and 4 shock. Tank rotates to change direction
66311 battery is available smoke is placed. Churchill moves down road
66542 sections move up barrage activated
Churchill crosses hedge to left flank
Dave 32211 sniper misses. Tank moves up really fast!
Jamie rolls 66332. Small unit movement and shock removal.
55432 barrage wipes out 2 sections. More shock removal and a section moves up. Dave has a JL wounded and is only remaining man in that section
66653 tank moves up. Turn end.
66555 full CoC dice now
55442 moves line JL back lots
66541 moves up places smoke
22211 Churchill moves up section on right does too
55521 small rifle section of five appears and throws a grenade and opens up. JL wounded by grenade. 9 shots all no effect!
64311 light mortar fire ineffective unit fires back. 2 shock.
Dave rolls 33111 sniper kills off a 2mortar team. Morale down to 4
Jamie rolls 5411 puts shock in small unit.
Spends a CoC dice fires again and pins small unit.
65111 2nd CoC dice.
Jamie withdraws and section three lose 3 men and on JL next campaign turn
Also two men dead.
Long and short of it
.the Brits set up a heavy machine gun, an artillery spotter and light mortar to cover three deployed sections as they approach the chateau and its important crossroads.
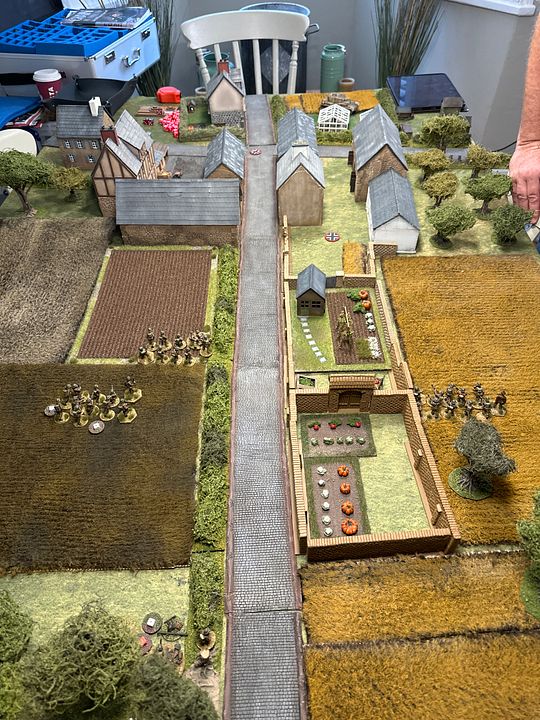
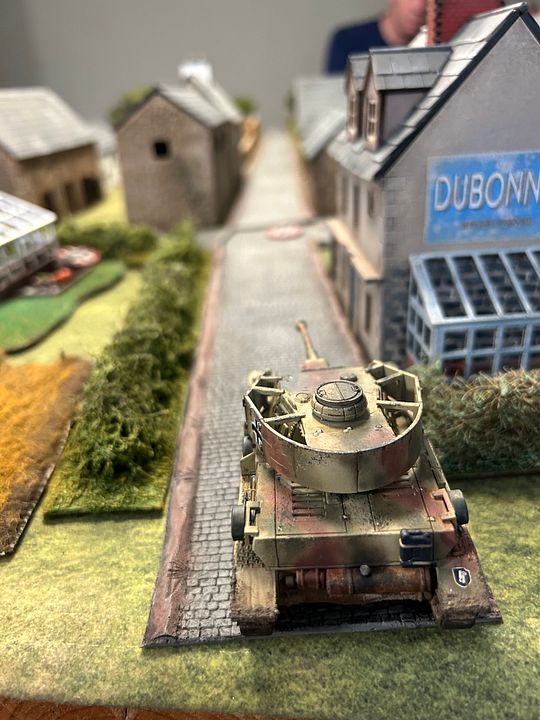
I had been covering the road with my panzer.
My sniper was pretty active through the game, but only managed to take out a couple of 2 mortar firers despite their being a selection of officers and forward observers available!
The artillery spotter successfully brought in a barrage on target twice in the game was ended once by my playing a CoC dice and once again by the rolling of all those sixes. They were in contact with the battery a third time too but by then the infantry had moved up too close for it to be a comfortable choice to bring down.
The section and senior leader moving to my left flank looked awfully tempting and I declared a section of two mgs a tad early, inflicting injury on the SL, with four more dead and four shock.
One of those barrages though effectively wiped out my section, the only survivor being my junior leader!
The surviving Brits climbed into the walled garden.
I moved my panzer, indecisively left, then right ( looking for opportunity to use it) and this allowed the Brits to rush a Churchill down the road which then veered to its left to support the two sections moving though the field on my right.
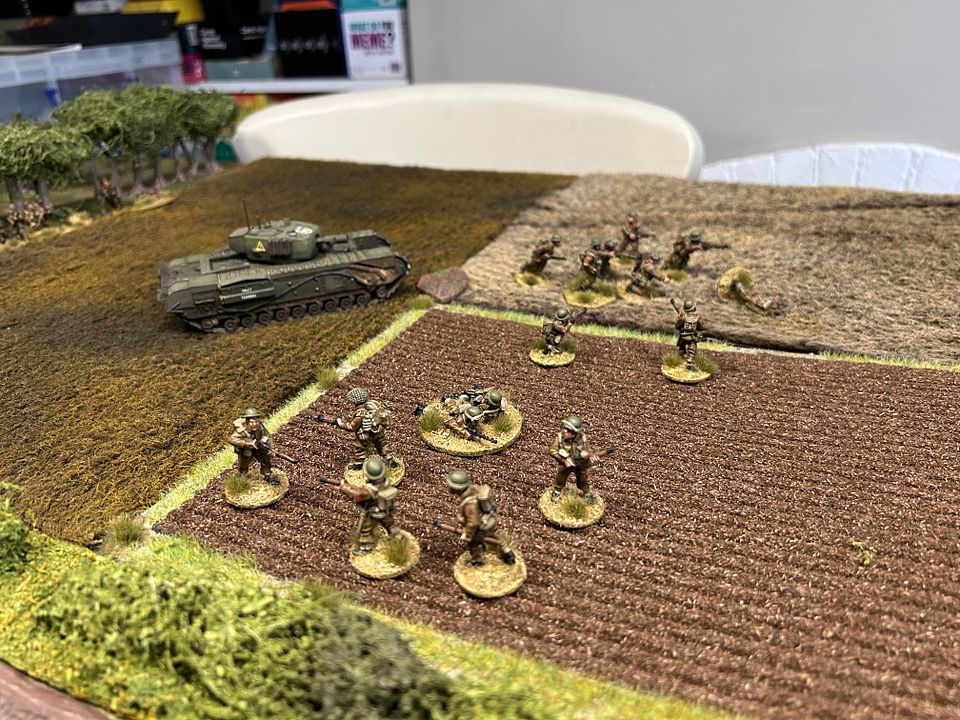
The remenants of the British section, proved too tempting for me, and I deployed my rifle support section such that they could lob a grenade which injures the JL, then sprays them with bullets
missing every single one of them! In return they get pinned by combined small arms fire and he rounds from the two small mortars. My sniper finishes off one of the mortars as I said, and their morale drops to 4.
I decide to bring in my final section as I see a chance to hit another section in their flank behind a hedge over the road
.but Jamie then declares they are pulling out!
It seems I had fixated on a support section, not part of his core force. So in truth I had knl6 inflicted a couple of kills that would count.
The sections dashing back to their start positions mostly made it back unscathed with a small handful getting lost en route.
I had managed to hold them up once more. After all the end of game rolling, the following stats were determined.
British finish.
1 permanent loss, 4 temp. New JL with one action to stand in for temp loss JL)
CO +1
MO +1
22 points of support to play next game.
German finish
8 permanent losses, 2 temp. Still have three JLs
CO+3 support +1 point
MO -1
So I get 8 points of support next time.
Jamie is now feeling a little time pressured and Im wondering how to inflict the maximum damage on the Brits next game. I need to read the signs better and try to hit core units rather than support ones. That one extra point of support does give me ideas though
😉


 Welcome, Guest. Please
  April 27, 2024, 12:51:06 PM


