Having tried out an inaugural game of 'NMTBH' at Eric the Sheds on Tuesday, I decided to play a solo game yesterday, just to see if Id understood / remembered everything. (I hadnt!)
The rules are blissfully short and the core mechanics (moving, shooting, melee, morale check) feel very familiar from various other rule sets, and pleasingly simple.
But considering theyre only a few pages long, the rules also contain a fair few tricky and nuanced points which can be difficult (for me anyway) to grasp. Like the relationship between how many orders a leader has, what he can do with them, and how those translate into actions for himself and / or the units in his ward - particularly where a unit may be composed of more than one unit, which in turn can do different things!
There are also several nitsy-bitsy little rules that you only get to remember by playing repeatedly like when you can makes re-roll and for which dice results in which circumstances; how many ranks or part-ranks can fight in a particular situation; various pluses for this or minuses for that; when you do and dont test morale, and so on. Theres actually a surprising amount of this sort of detail, making quite a mound of difficult bits and pieces to remember to start with. Im sure theyll stick after a few games though.
I thought a small game (72 points per side, plus leaders, split into just two wards) would be a good test of how much Id taken on board.
That gives about 60 figures per side basically four fighting units (which yields four army morale tokens to each side), plus a couple of skirmish units each.
I deliberately picked different types of units to see how they fared.
120 figures is about a third of my WOTR collection - Ive been collecting, kitbashing, and painting it since Michael Perrys first box of brilliant WOTR plastics hit the scene over 10 years ago. (If you've got a spare few hours, you can view the entire project thread here:
https://leadadventureforum.com/index.php?topic=40936.0 
)
Unfortunately, most of the collection isnt neatly organised into twelves of anything.
For various home-brew rules, Id built and organised my factions (representing local lordlings from my home area, plus a couple of historical WOTR bigwigs) into mixed retinues (each roughly 20 25 strong) of bills, bows, men at arms, and cavalry. So difficult to form neat, uniform liveried units of twelve bills or bows out of that. So Ive had to mix up some different liveries from different lords to form units for this (which is probably historically what happened TBH).
Clearly Im going to have to make up and paint yet more

Heres the bat-rep along with the
questions that cropped up as I went through the game.
If you know the answers, please do reply below!
(I will also ask on the NMTBH Fb page, and I know FAQs are imminent, which might answer some of these. Or it may be that I just missed info thats already there!)
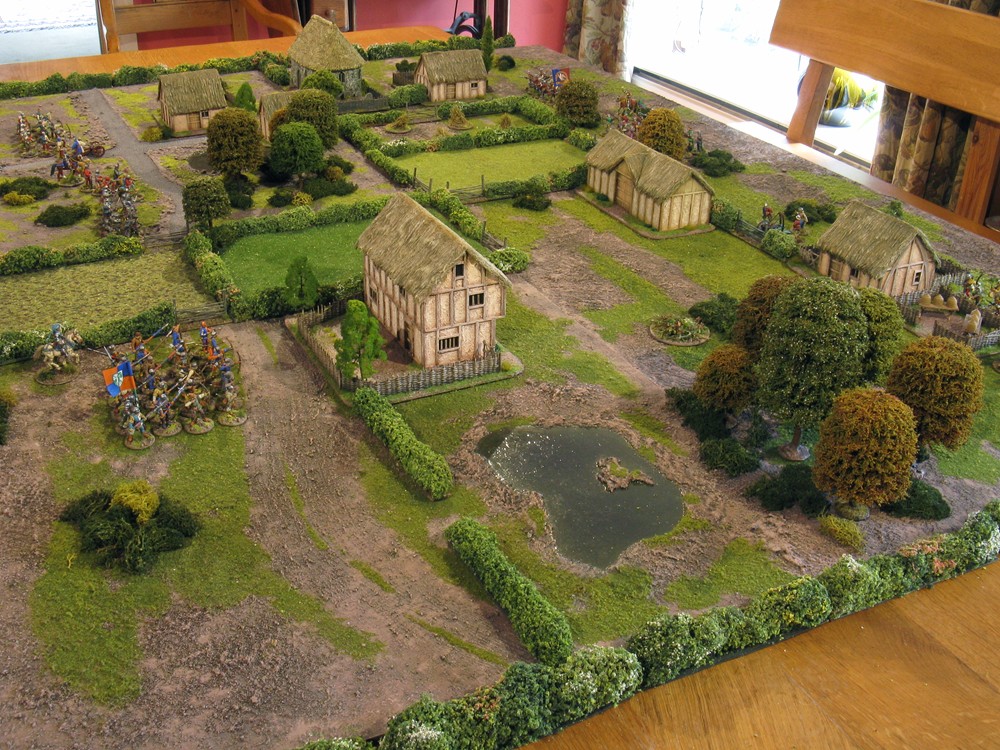
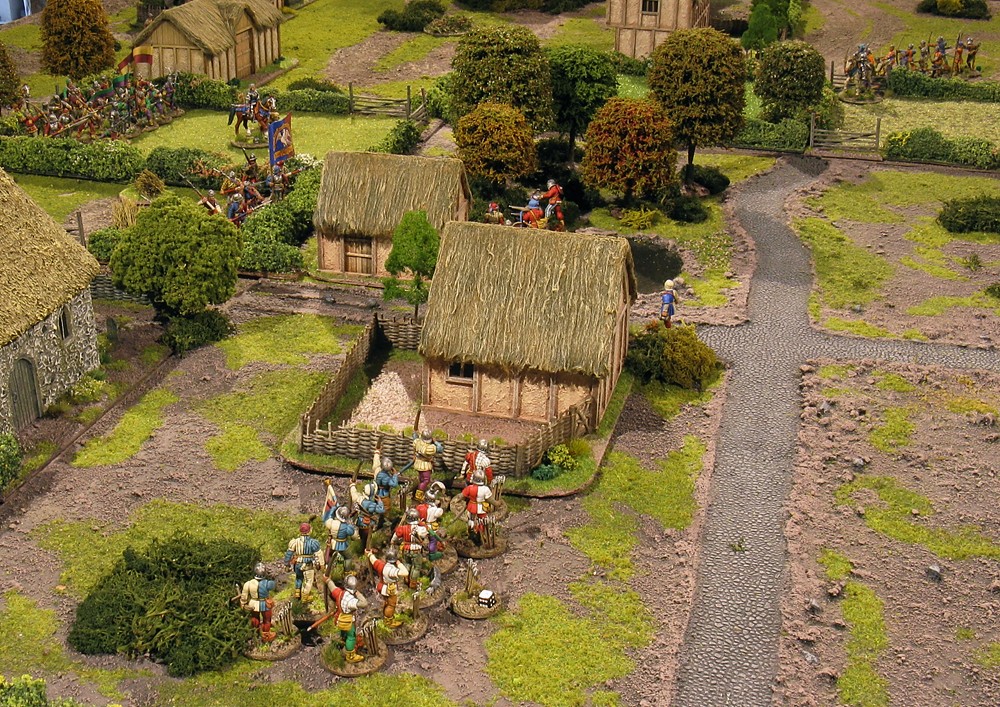
The battlefield is fairly open no hills, a couple of ponds and spinneys, but with fields, hedges and buildings.
Now thanks to disarray every time you cross a hedge or stream, I appreciate these rules are really designed for a fairly open field battle (well, skirmish). Personally though, I dont find that very visually (or tactically) interesting as a wargame. Nor do I think its particularly true to many WOTR encounters, where there is much historical record of bloody fighting amongst hedgerows, ditches, sunken lanes, streams, bridges and so on. That sort of setting seems to me to be one defining aspect of this particular conflict in the bucolic English countryside. A WOTR game fought on a fairly featureless grassy steppe, just doesnt seem right to me, especially when we know England was very much more densely wooded and forested 500 years ago.
But I digress

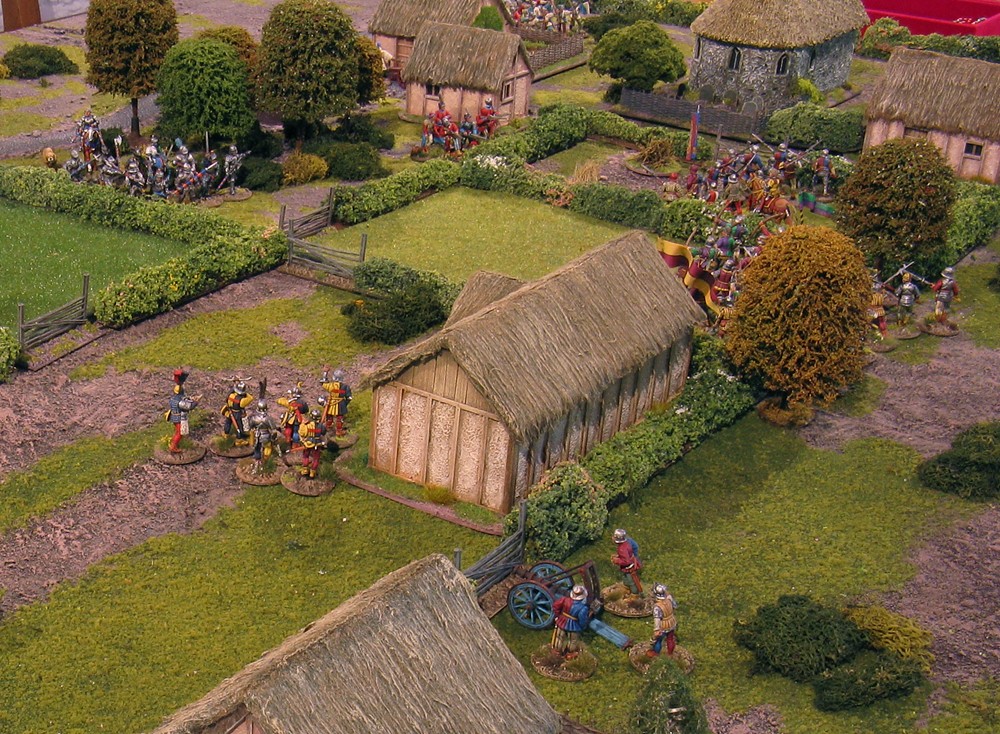
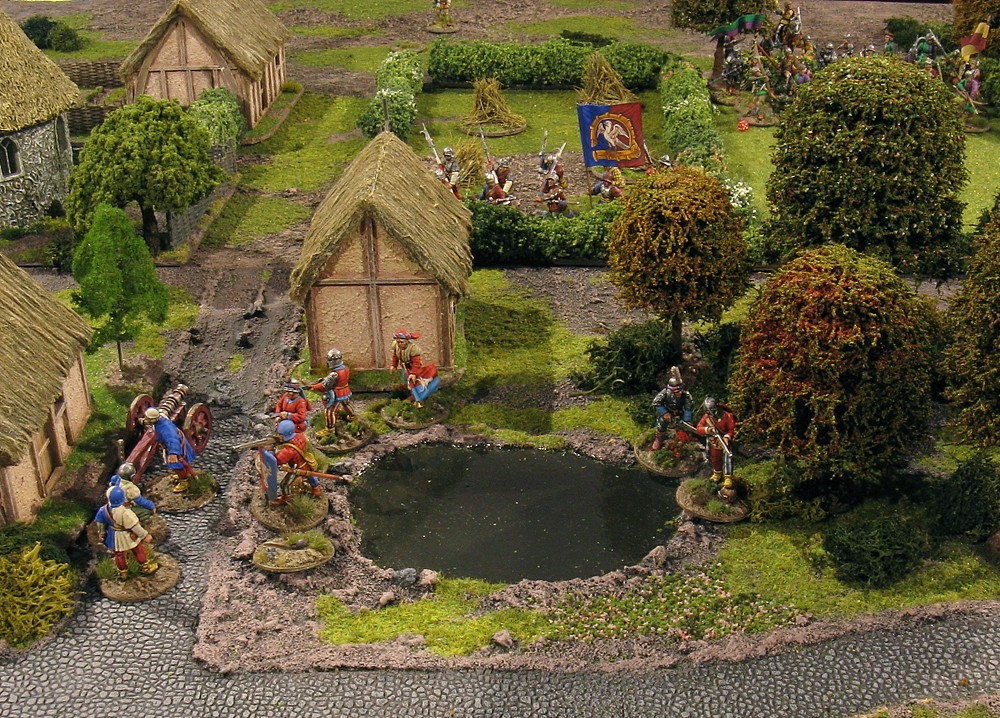
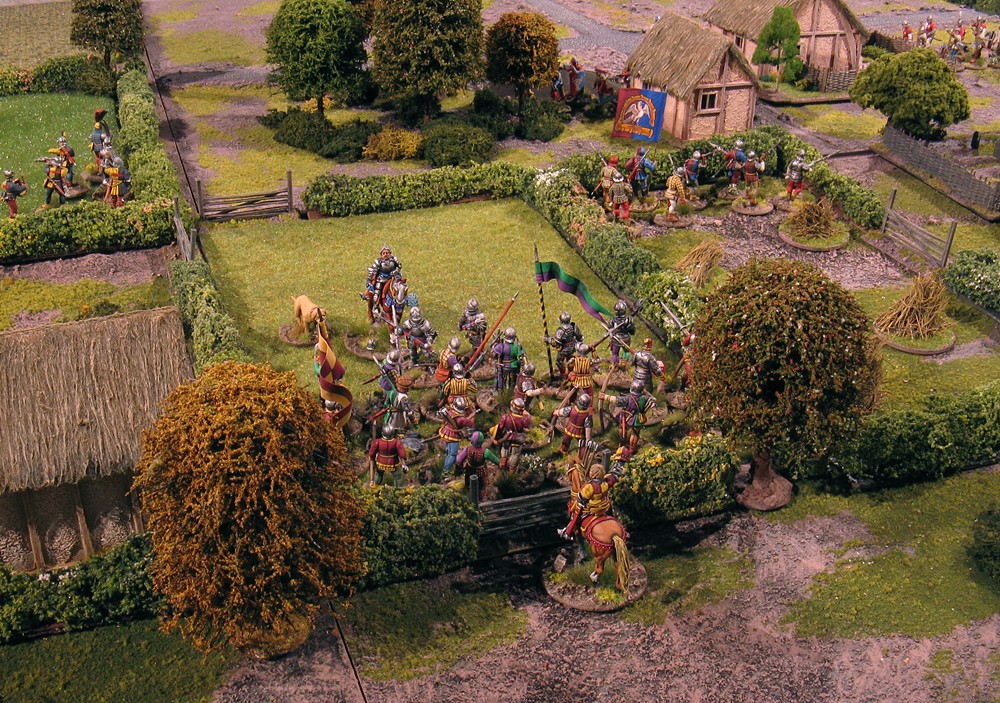
Heres the table looking along the Lancastrian line (to the left)
On the right of the Lancastrian line, a block of retinue bills and bows (two conjoined companies) under Sir Gilbert Foyle of Crowhurst. That block comprises the Right Ward.
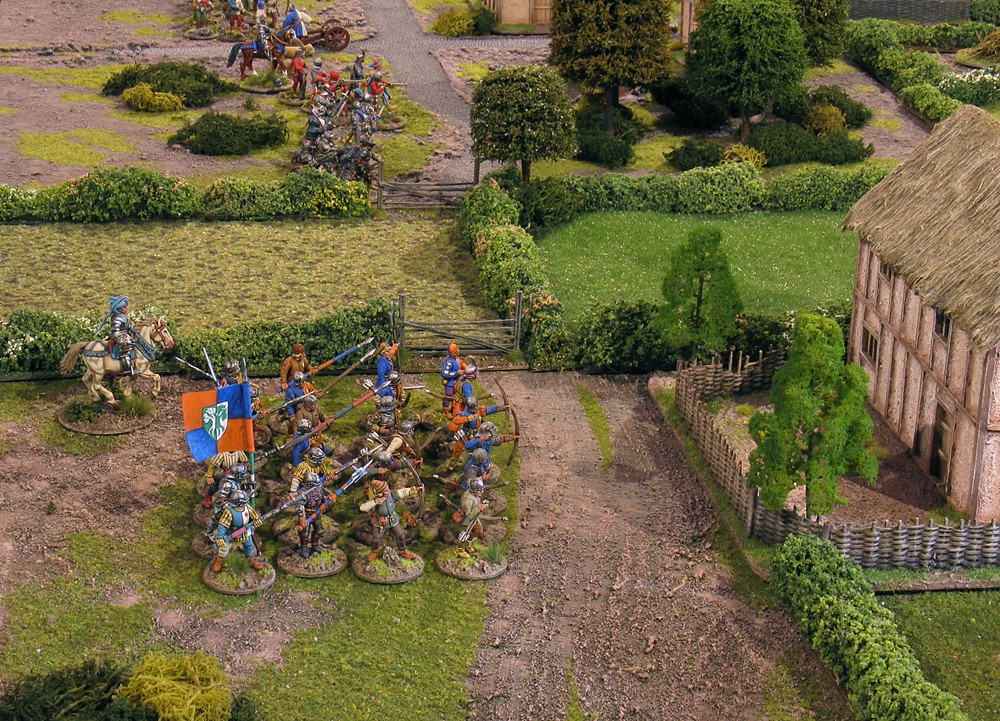
Now looking from the
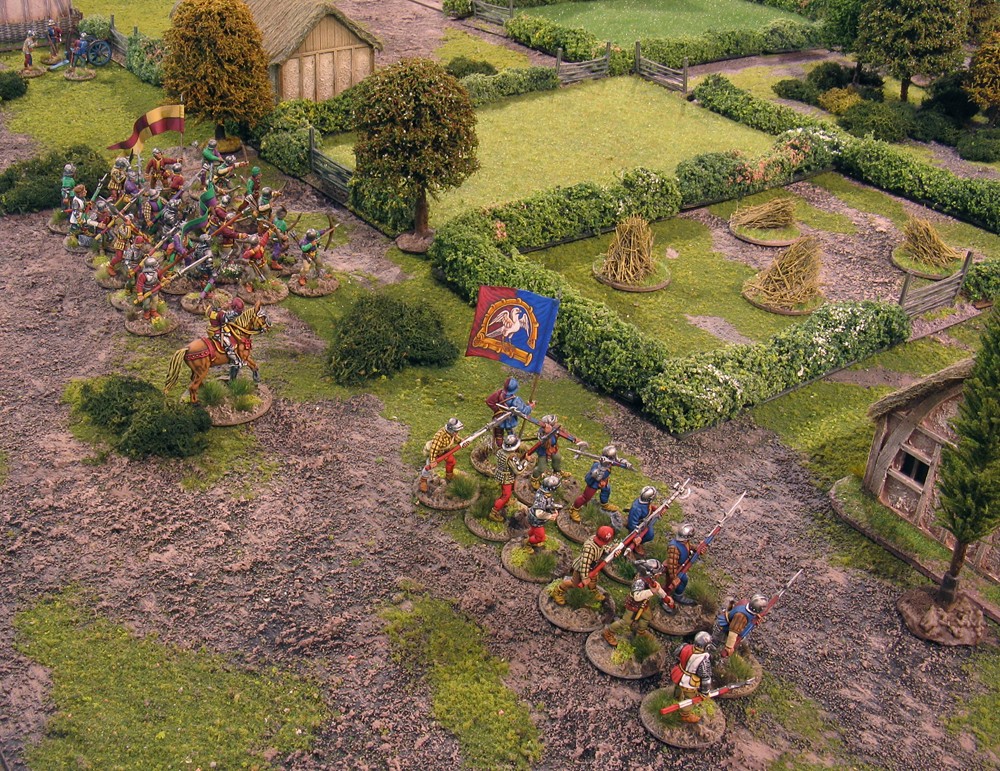
left of the Lancastrian line, the Main Ward under Sir Roger de Brassey of Tandridge consists of: A company of retinue archers; a field piece; Sir Rog and his faithful mastiff; a skirmishing band of Milanese handgunners; and a company of men-at-arms in full harness.
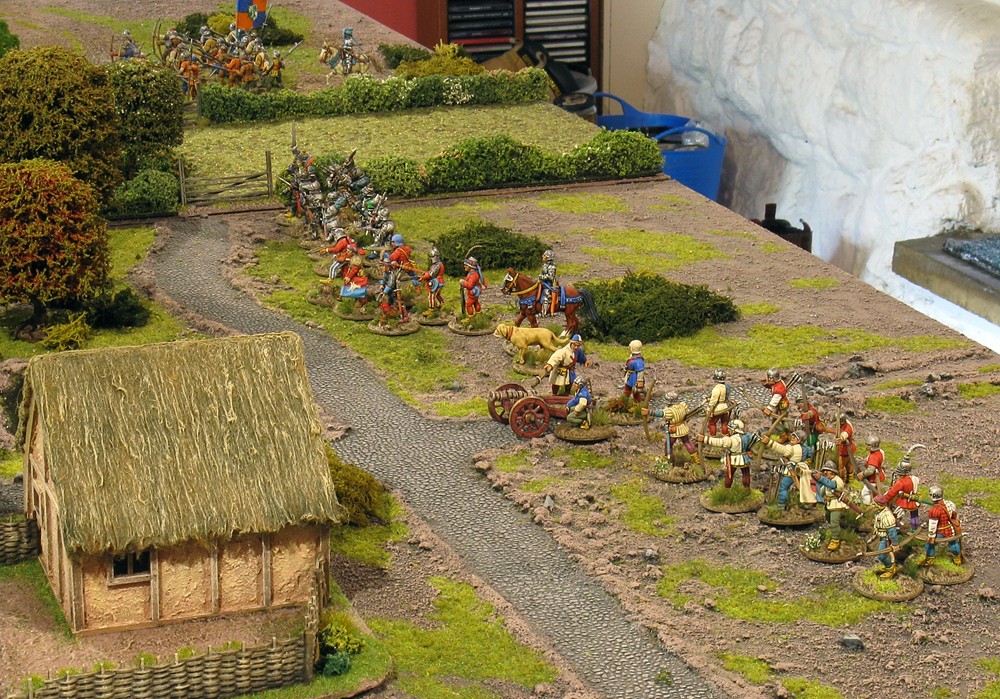
(Point to note although the skirmish and artillery units are part of the ward and
can be ordered by the leader of that ward, they also operate independently on their own initiative when their activation card is turned, so theyre effectively separate. So you dont need to worry about keeping them within the command radius of their notional leader (a mistake I made in both this game and the first one I played!)
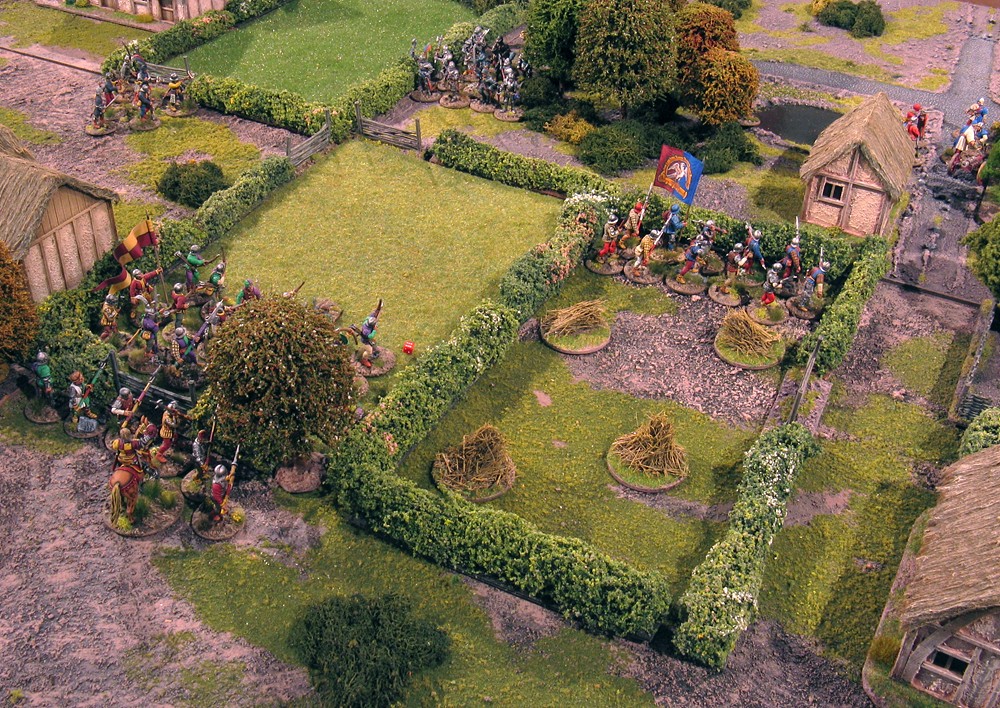
Over to the Yorkist line
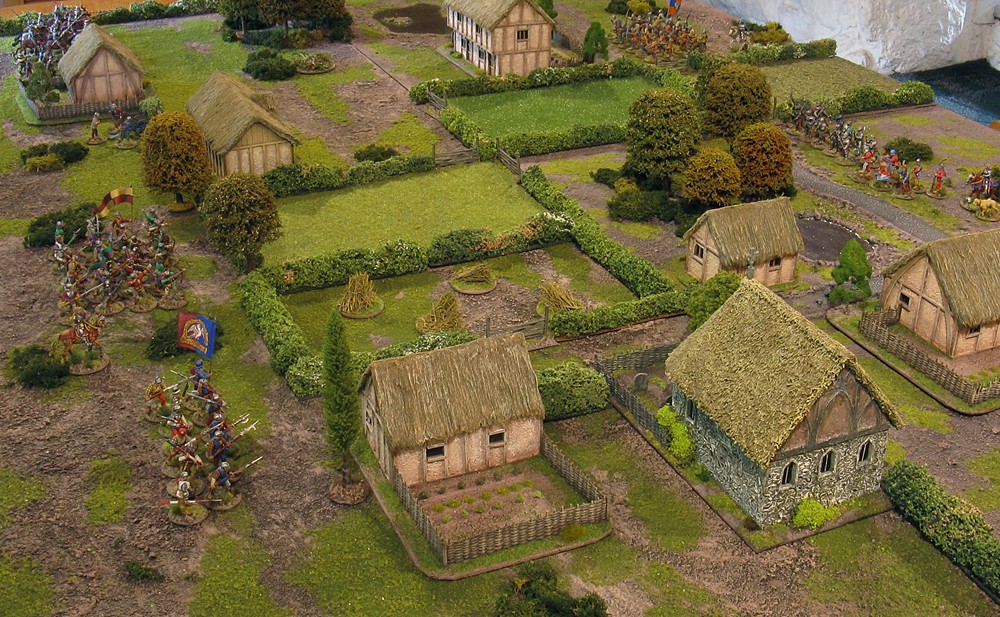
On the Yorkist right flank, the Right Ward under Sir Robert Tenchley of Staffhurst, consists of a unit of retinue bills, plus a block of retinue bills and bows (two companies).
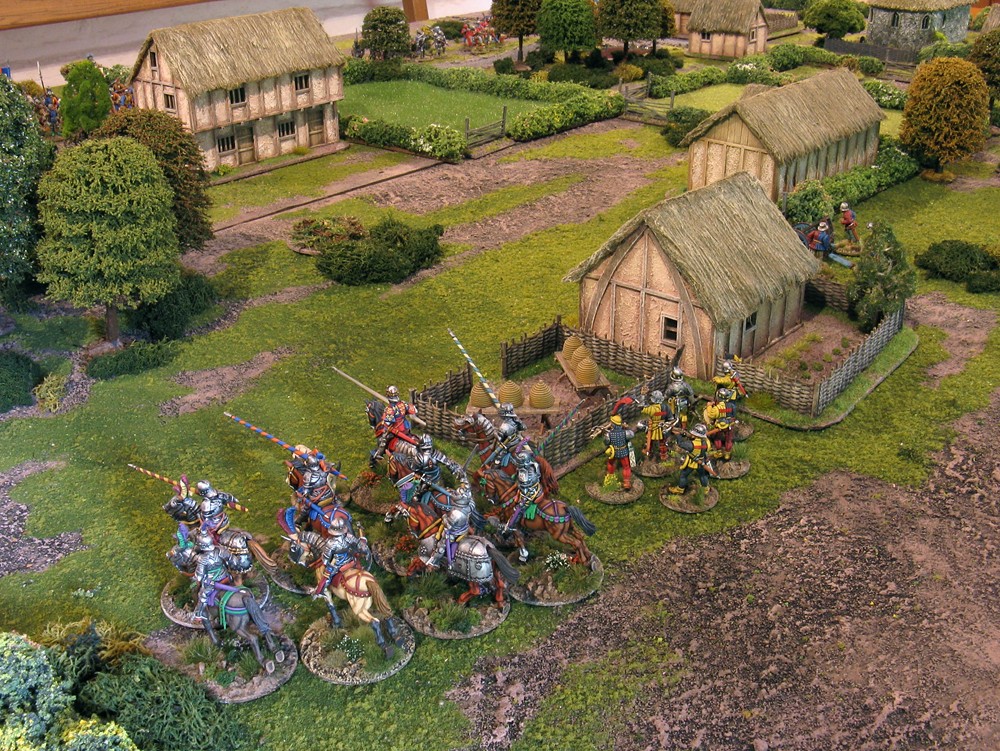
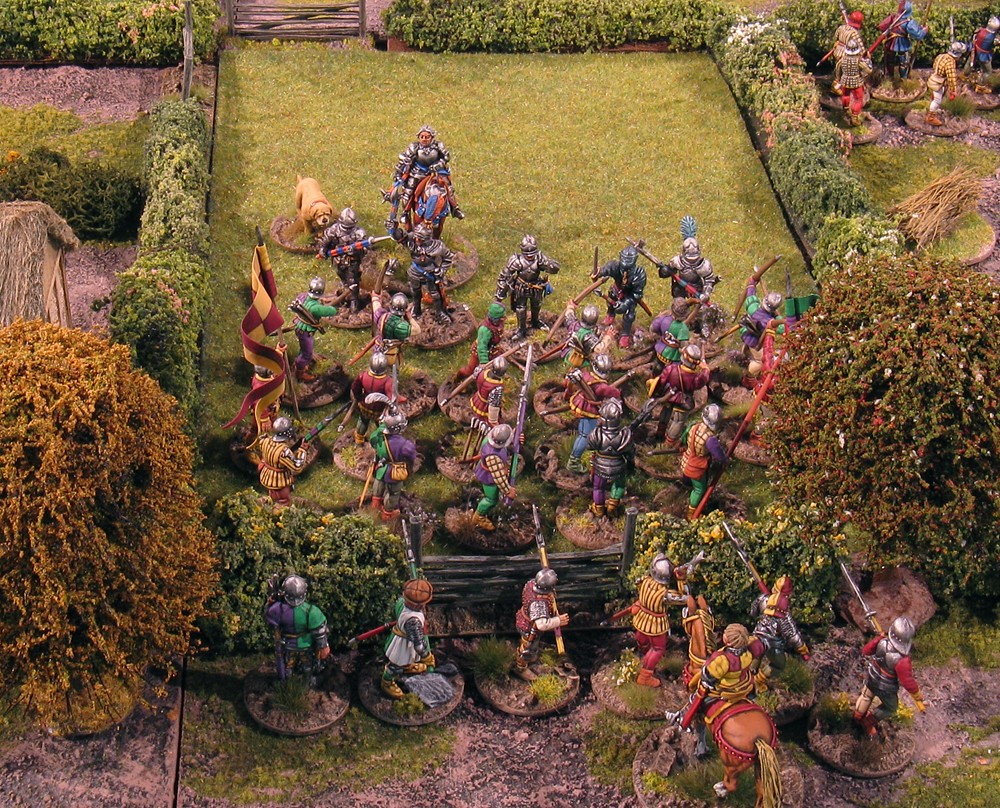
The Yorkist Main Ward (on their left) led by Richard of Gloucester, has a company of mounted knights, and then the semi-detached skirmishers: a band of Flemish crossbowmen, and a field piece.
(Its the main ward because although its much smaller numerically, Duke Richard is very much more important than mere Sir Robert Tenchley!)
Point to note: Ive seen several NMTBH army lists where people are costing artillery and crew at six points. But the rules say that the gun itself is six points and the artillerymen are one point apiece - which would make the cost of a field piece nine points not six. (And nine is what it says on the QRS on the back of the rules).
Worth remembering, because guns are not particularly effective, can blow up fairly easily, but are more costly than skirmishers. They do have a 30" range of course, as opposed to 12", and hits from guns can't be saved...
The game commences with two rounds of the manoeuvre phase, where the two forces move forward, unit by unit, one side at a time, and shape up towards each other.
This phase is ended when the Lancastrian gun opens up, although to no effect. The game then switches to card-driven activation of units
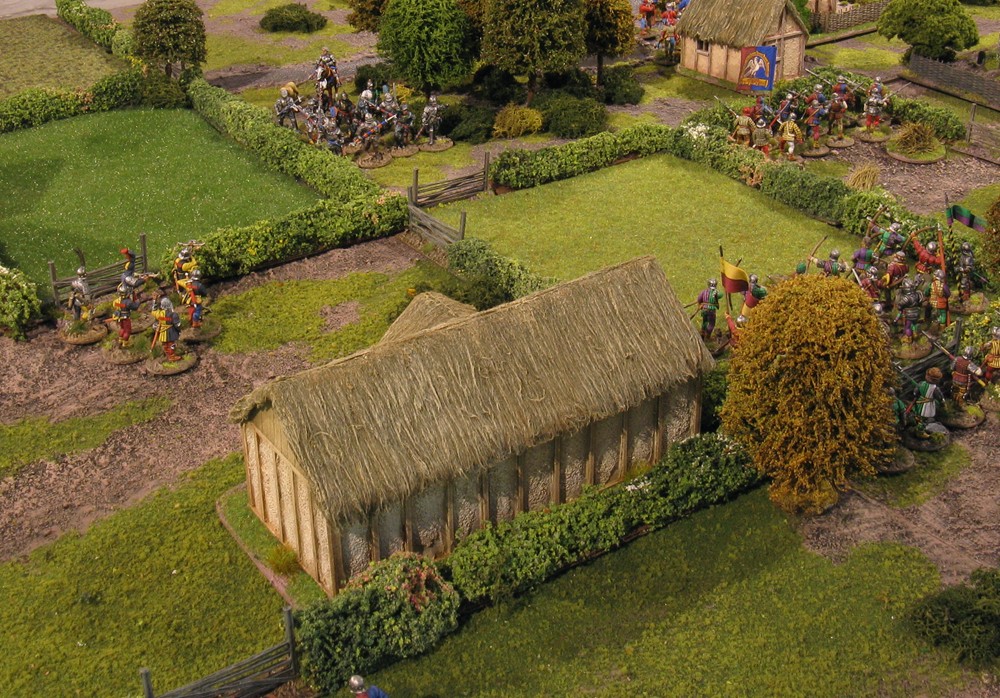
The Yorkist Right Ward have used their manoeuvre phase to advance over the hedges into the fields in front of them, picking up disarray tokens for their trouble.

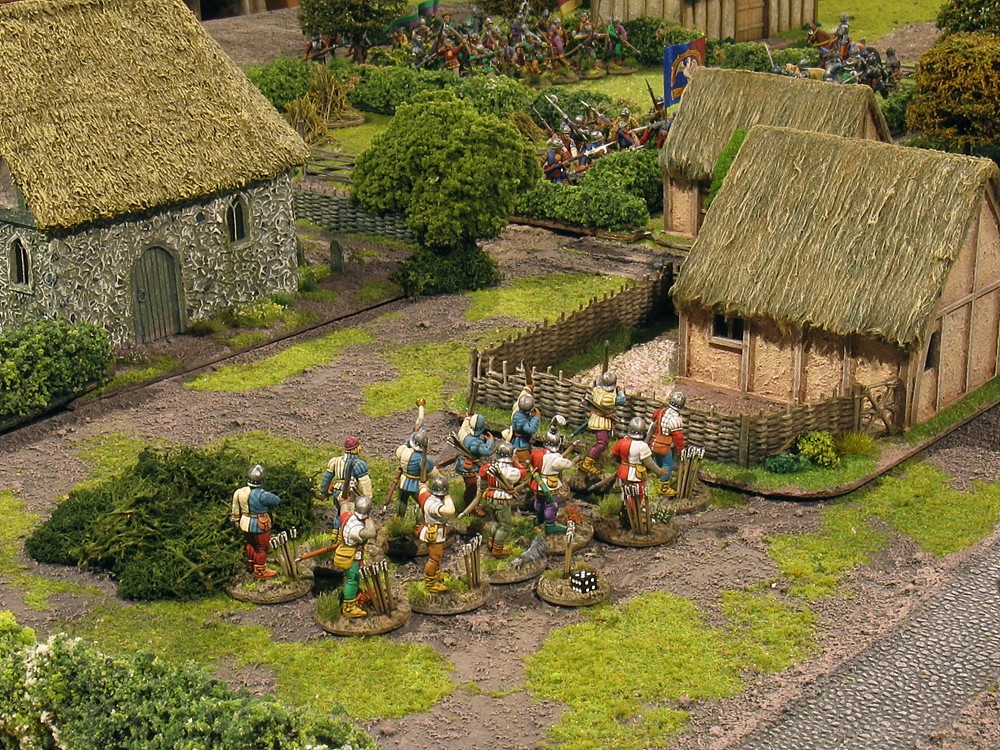
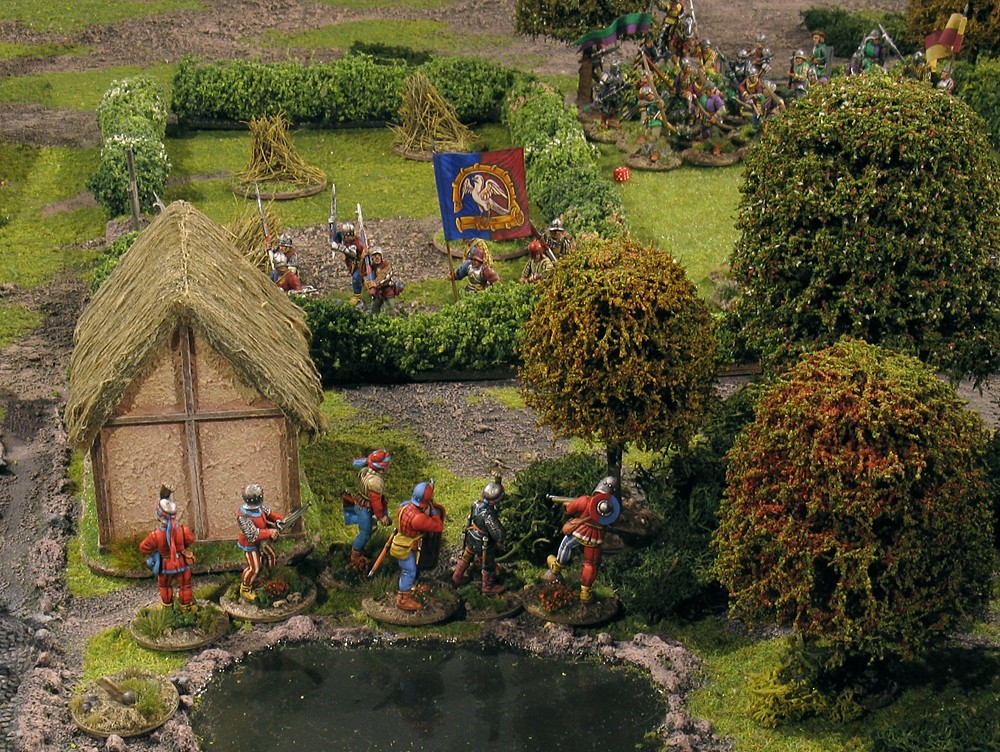
Meanwhile, on the Lancastrian left, the Milanese handguns have scampered through the wood, skirted the pond, and can start firing over the hedge at the unit of Yorkist bills in the hayfield in front of them.
The men-at-arms, under Sir Roger de Brassey, advance around the right hand side of the wood.

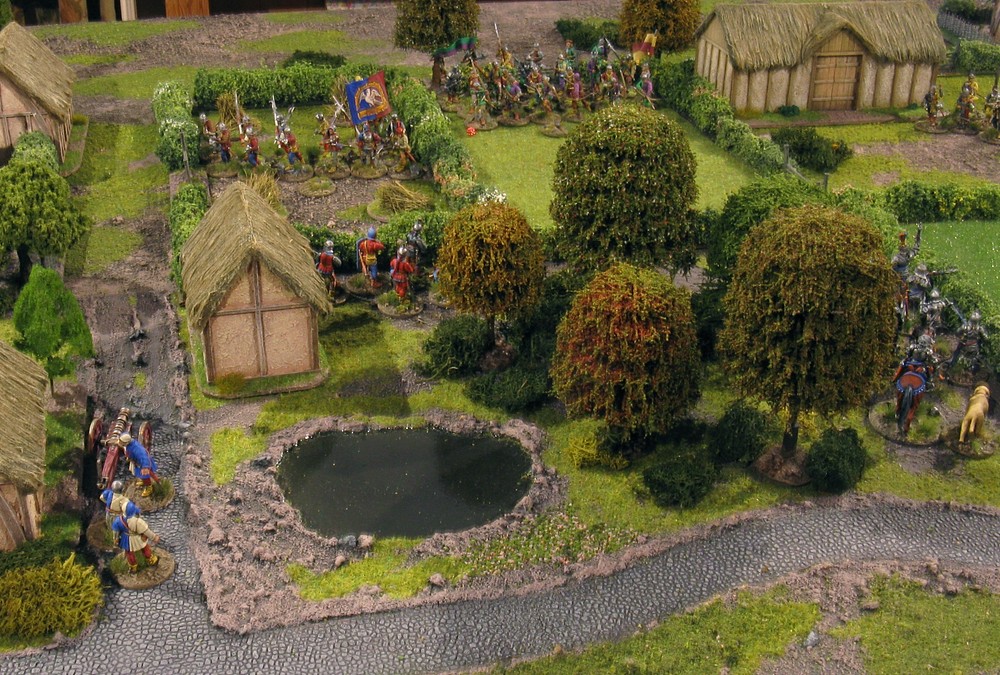
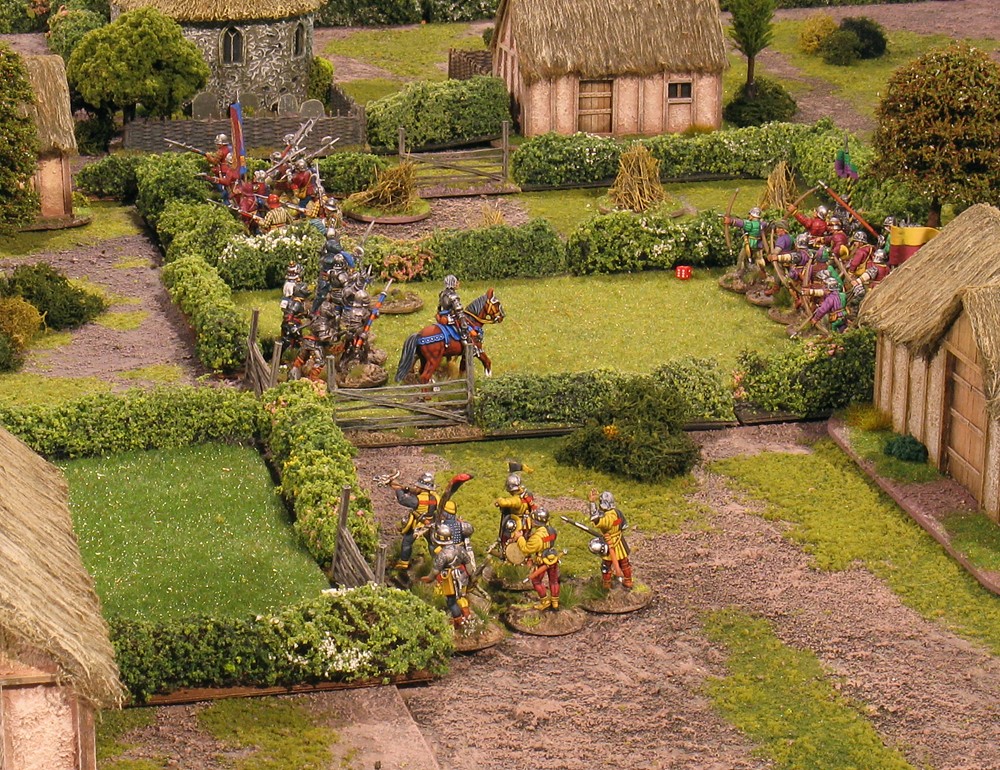
Sir Gilbert Foyles Lancastrian Right Ward (the block of bills and bows) has advanced to the hedge in front of them - and there they intend to stay, as Gloucesters mounted knights thunder into view, around the wood over to the right of Foyles position, beyond the pond. His archers loose off a flight of arrows at long range but to no effect.
The Yorkists Flemish crossbowmen meanwhile, from their starting position behind the beehives, make a beeline towards de Brasseys advancing men-at-arms, whilst the Yorkist gun fires ineffectually at Foyles Lancastrian ward.
Next turn.
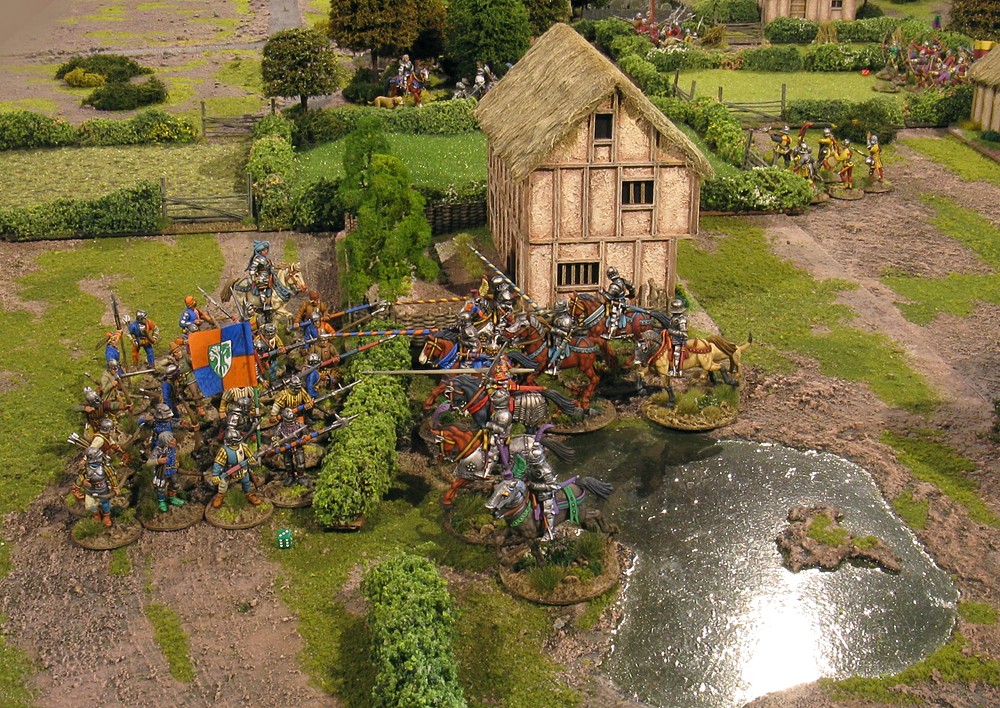
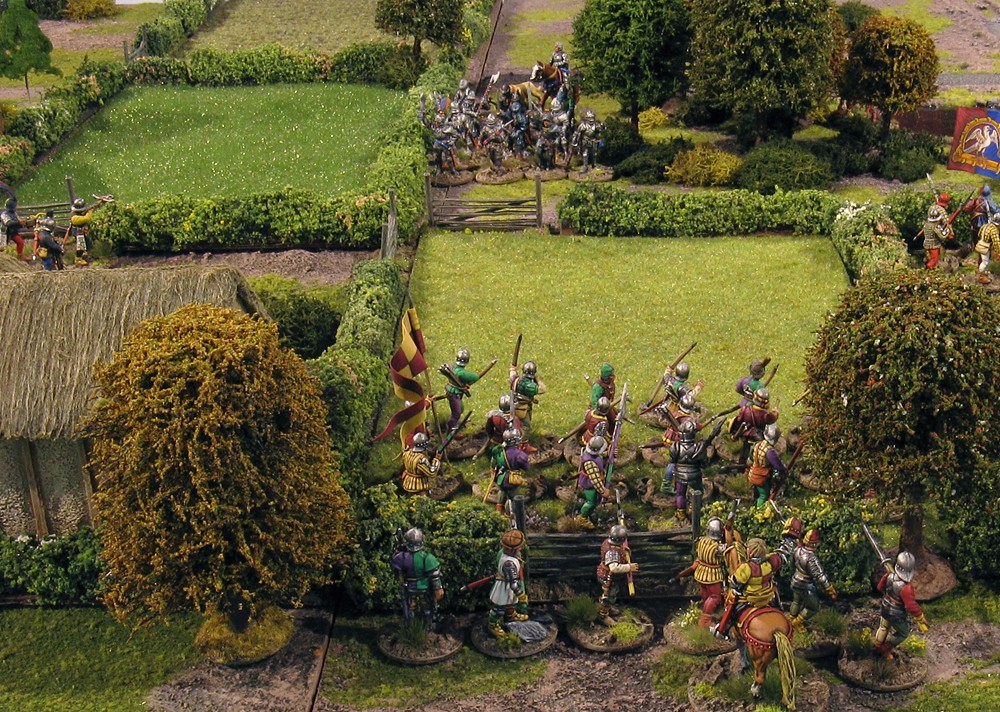
Sir Gilbert Foyles archers now loose two arrow barrages at Gloucesters rapidly closing knights, but still at long range succeed in killing just one from 24 attempts (several hits, but all saved bar one Knights saving on a 3,4,5,6 against archery, are jolly hard to kill! )
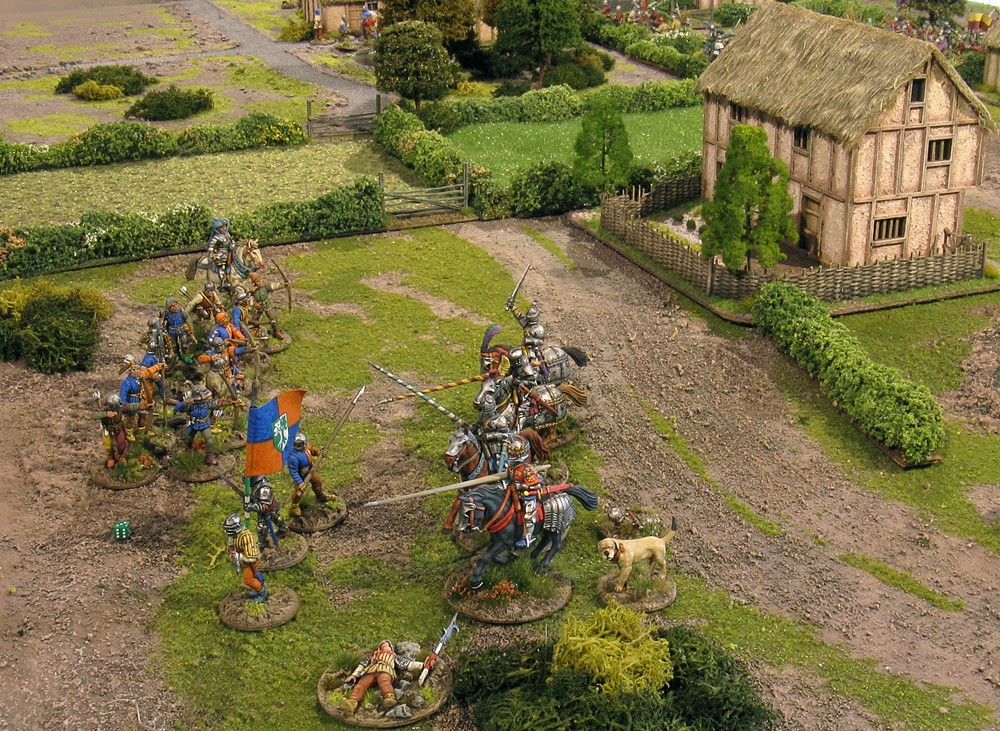
The Knights now barrel into Foyles ward.
The archers dice to see how they react, and evade backwards, trading places with the billmen behind them. A melee now ensues across the hedge.
 Question
: Interestingly if Ive got it right the hedge makes no difference? The attacking knights have yet to
cross the hedge, so are not disarrayed.
But nor do the defenders count it as an obstacle (the rules say stakes and walls are an obstacle, and have the effect of pushing up the defenders armour quality one notch for saving throws. But trees arent. So presumably hedges arent either? Seems wrong to me that one, but there you go
)
Anyway, the melee goes predictably badly for the Lancastrians - seven dead billmen, versus three dead knights.
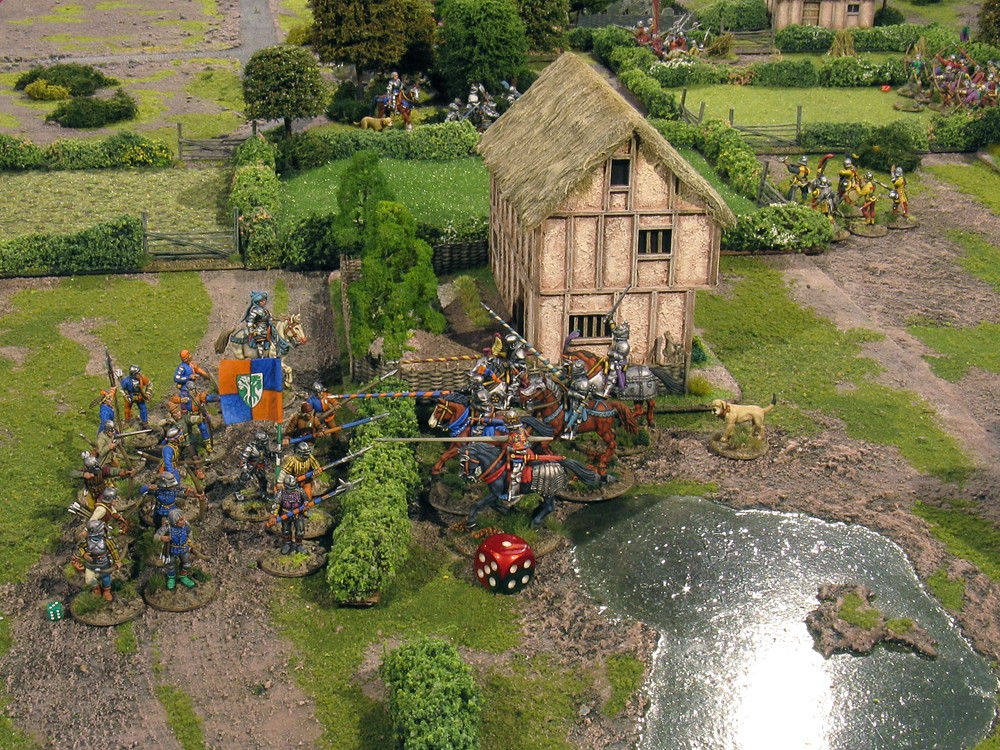
The bill and bow unit duly fails its morale test, is daunted, falls back, and in accordance with rules, if Ive read them right splits into its two constituent parts, both daunted.
The rules dont say (unless Ive missed it) what happens to the attached leader in this situation.
Question: Can a leader choose either unit to remain attached to when the block splits?
(Ive assumed so, and Sir Gilbert has remained attached to his intact company of archers, rather than his heavily depleted billmen).
Similarly, when the mounted knights follow up to continue the melee (as they are obliged to do), I have assumed they remain in contact with the billmen they were facing, rather than the archers who have now split off? (
Thats another question!)
In any event, the Lancastrians surrender their first army morale token to the Yorkists.
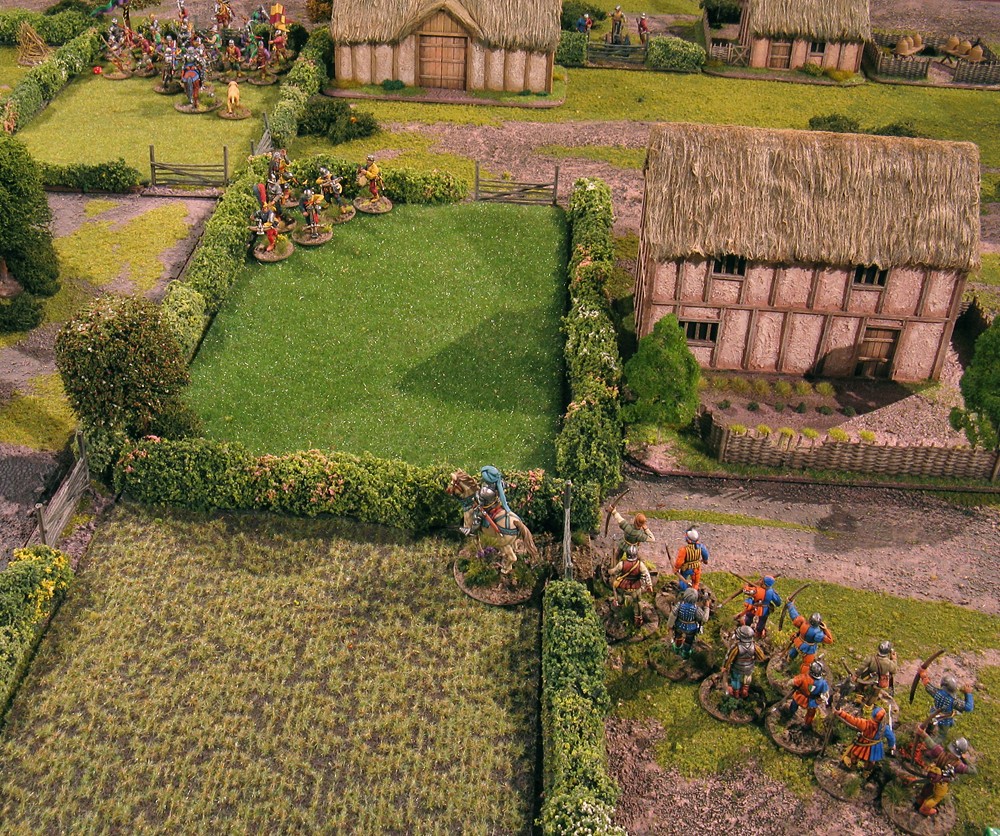
Meanwhile, the company of Yorkist bills in the hayfield rushes towards the Milanese handguns (who have inflicted a casualty on them). The wily Italians evade as they have to do, I think Im right in saying?
 Question
: Skirmishers dont have to roll for it, they just automatically leg it if attacked?
But they are disarrayed by evading? (The skirmishers are exempt rule on movement penalties, P.14, suggests not; the rule on evading, P.18, suggests they are disarrayed however). Which is right?
As one of his orders, Sir Robert Tenchley has attached himself to his block bow-and-bill unit and rallied them to remove their disarray.
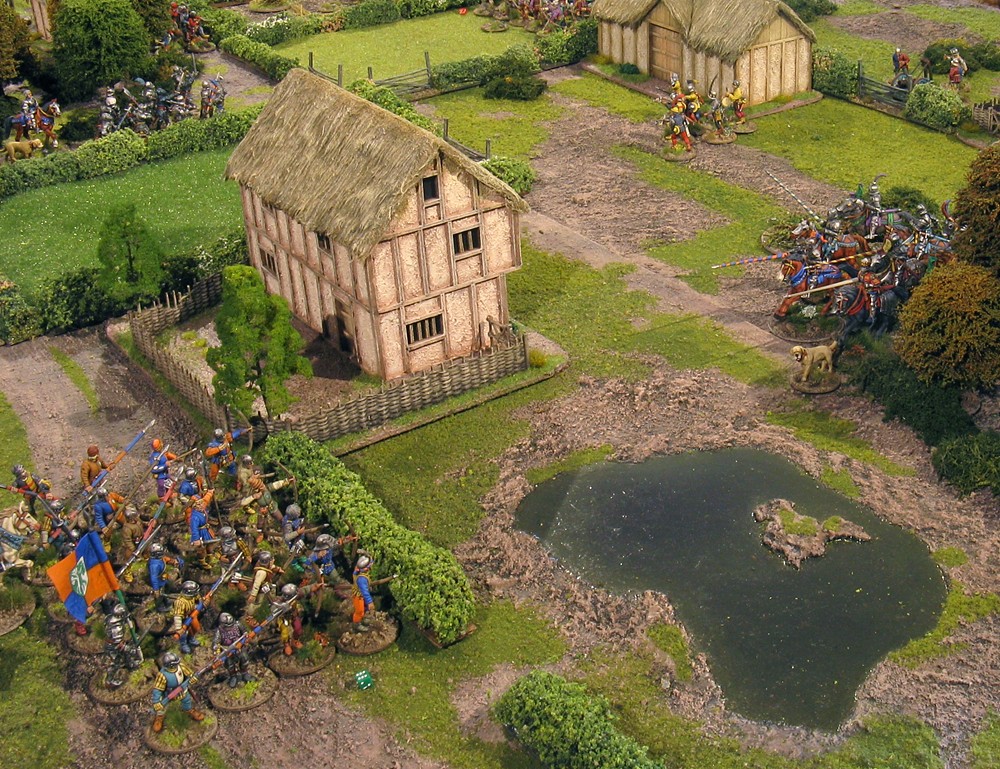
The Flemish crossbowmen have advanced again and are peppering de Brasseys men-at-arms with crossbow bolts, causing a couple of casualties. The reduction in armour class for fully armoured men against handguns and crossbows is quite telling.
Tenchleys Yorkist archers also get in on the act, and take down another Lancastrian man-at-arms.
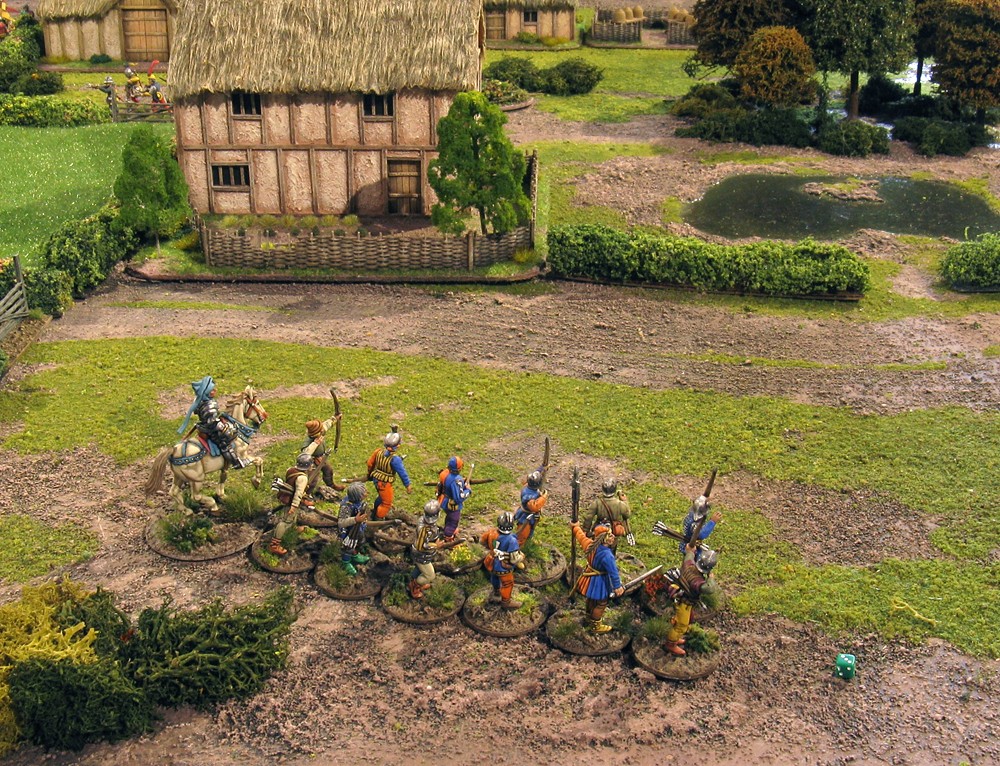
Meanwhile, de Brasseys company of Lancastrian retinue archers are left marooned out on his left flank, well out of range of his 6 command radius.
Just bad generalship really - but the terrain and his initial deployment kind of forced the split in his force.
Its the end of the turn however, and since theyve done nothing, the idle archers do at least get to shoot off one volley or arrows towards the hayfield which is just in range, removing another Yorkist billman. So all is not completely lost.
Next turn.
Tenchleys bowmen carry on shooting de Brasseys advancing men at arms who are also now disarrayed by climbing over / through the hedge.
The bonus card comes up, which means Gloucesters melee against Foyles daunted, depleted billmen resumes.
The knights were disarrayed by crossing the hedge as they followed up (
Question: Is this right? Seems odd? Theyre not disarrayed by fighting a bloody melee, but they are disarrayed by following their reeling and retreating enemy over / through a hedgerow?)
Nevertheless, its still a one-sided contest. One more knight is killed, but two more billmen. The bills break and rout (thats a second army morale token to the Yorkists), and Gloucester and his knights pursue them, as they have to, right off the table, Towton-like, in a mad pursuit.
I took the view that they would not be able to return (
Question: Could they? Should they?)
Ironically this leaves Sir Gilbert Foyle and his archer company completely intact. And he uses his own action to rally off their daunted marker.
They have emerged remarkably (unrealistically?) unscathed from the whole encounter.
Back in the centre, the rascally Italians (still disarrayed I presume?) have turned back, and begun firing at the Yorkist bills again, starting to knock off more figures.
Whilst the combined effect of archery and crossbows remorselessly whittles down de Brasseys men at arms to under half strength. By the time they reach the enemy, there wont be any left!

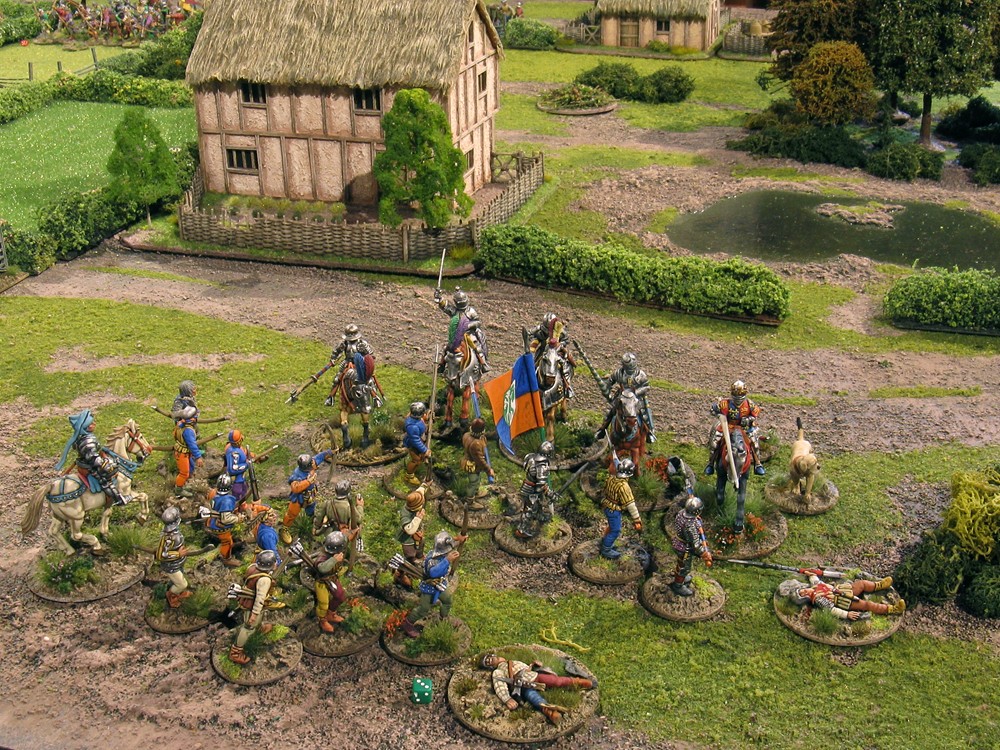
Nonetheless, before they have to take an end-of-turn morale test for falling below half strength, de Brasseys leader card comes up, and in pile the heavy mob!
The bowmen dice to react, fail to evade, loose off a shot, but fail to inflict any casualties. Yikes!

Actually the melee results are fairly even. Three more men-at-arms killed and four archers.
The bill-and-bow unit passes its morale test with flying colours though, so does not retreat. The melee is effectively a draw and continues.
Now we come to the one bit that bothers me.
By coincidence, the next card turned up is Tenchleys. But he cannot continue the melee his unit is already engaged in, because the melee only continues when another bonus card is drawn.
Question: is that right? Doesnt seem to make a lot of sense to me.
Instead, Tenchley now orders his billmen forward to swap places with the archers at the front. Again, seems a bit gamey, but also seems logically what would happen, if they're unable to just carry on fighting until the bonus card comes up?
Question: Is it legit, mid-melee, to switch melee troops forward from the rear ranks, to replace missile armed troops in the front ranks?
In any event, the bonus card comes up next, so the melee resumes, and the switch of the bills forward does the trick. Twelve bills against two men-at-arms, and each side with a leader contributing two free hits, finishes off the men-at-arms.
Thats the third of the Lancastrians army morale tokens handed over to the Yorkists.
Sir Gilbert Foyle starts to lead his archer company over to support the ill-fated de Brassey, but too late. And the Flemish crossbows move to block him anyway...
I called it at that point.
The Yorkist knights have disappeared in a wild pursuit, but everything else is fairly intact on their side.
The Lancastrians though, have lost their armoured punch altogether, with both their bills and men at arms destroyed.
They do have two intact archer companies left - albeit one with only three shots remaining in their quivers. But there's realistically little way back for them to take four army morale tokens off the Yorkists.
The disconsolate Roger de Brassey, leaves the field, followed by his faithful mutt.
Overall, the rules work well and certainly give a nice flavour of the period.
The way it plays feels a little disjointed to me in places the hiatus in the melees and so on. But thats probably just my inexperience with the rules.
The bonus cards and special event cards didnt really play much of a role in this. There were a couple of re-roll perks, and the special event card for truce was drawn, but there was no opportunity to play it.
One of the only things I would say by way of constructive criticism, is that the terminology could perhaps be more consistent and Im sure will be tightened up in the next edition. Orders, order activations, command actions, and similar terms seem to be used interchangeably. (Or the specific different meanings of these different terms are simply eluding me).
Similarly, in some places the rules refer to casualties, but in other places kills. I think these are one and the same thing, but Im not 100% sure. (At one point I was thinking casualities was being used to mean hits).
One last
question. I'm confused about the rallying rule. At one point it says that only by a leader attaching himself to a unit can a daunted or disarrayed marker be 'rallied off'. But then in the 'end of turn' sequence rules, it seems to suggest that units who haven't done anything that turn can automatically rally off a disarray marker. Without a leader joining them?
Answers on a postcard please
So what else did I get right and what did I get wrong about the rules? There were certainly one or two things I forgot to include... (like re-rolling sixes in morale checks on daunted / disarrayed units... )
Comments and corrections welcome. Thank you.


 Welcome, Guest. Please
  April 27, 2024, 08:09:04 AM


