If you can’t see the pictures, please switch to a browser that will accommodate them. Firefox seems to work well here, although I haven’t been able to make chrome, explorer, edge, or brave work. So no comments on this please, unless you have technical expertise on how to make those browsers show pics on screen. Pictures will also be recapped below.
I wanted to model a drive-in theatre similar to the one in Fallout 4, but nobody really makes a model for it. So I had to make something “close enuf good enuf”. Since I’m a [generation ID redacted], my experience with these hearken back to the 70’s and 80’s, not the retro future mid century Fallout scene.
Back then there was a kooky post-apocalyptic movie called “Dead End Drive In”. A real cheeser, but it had some kind of appeal that I can’t quite put my finger on. Give it a look though and you’ll understand. It is kind of entertaining, as most of the PA knock-offs of that time were. They were at least funny, even if they were pretty low-quality. So the Skyview drive-in was born in my head.
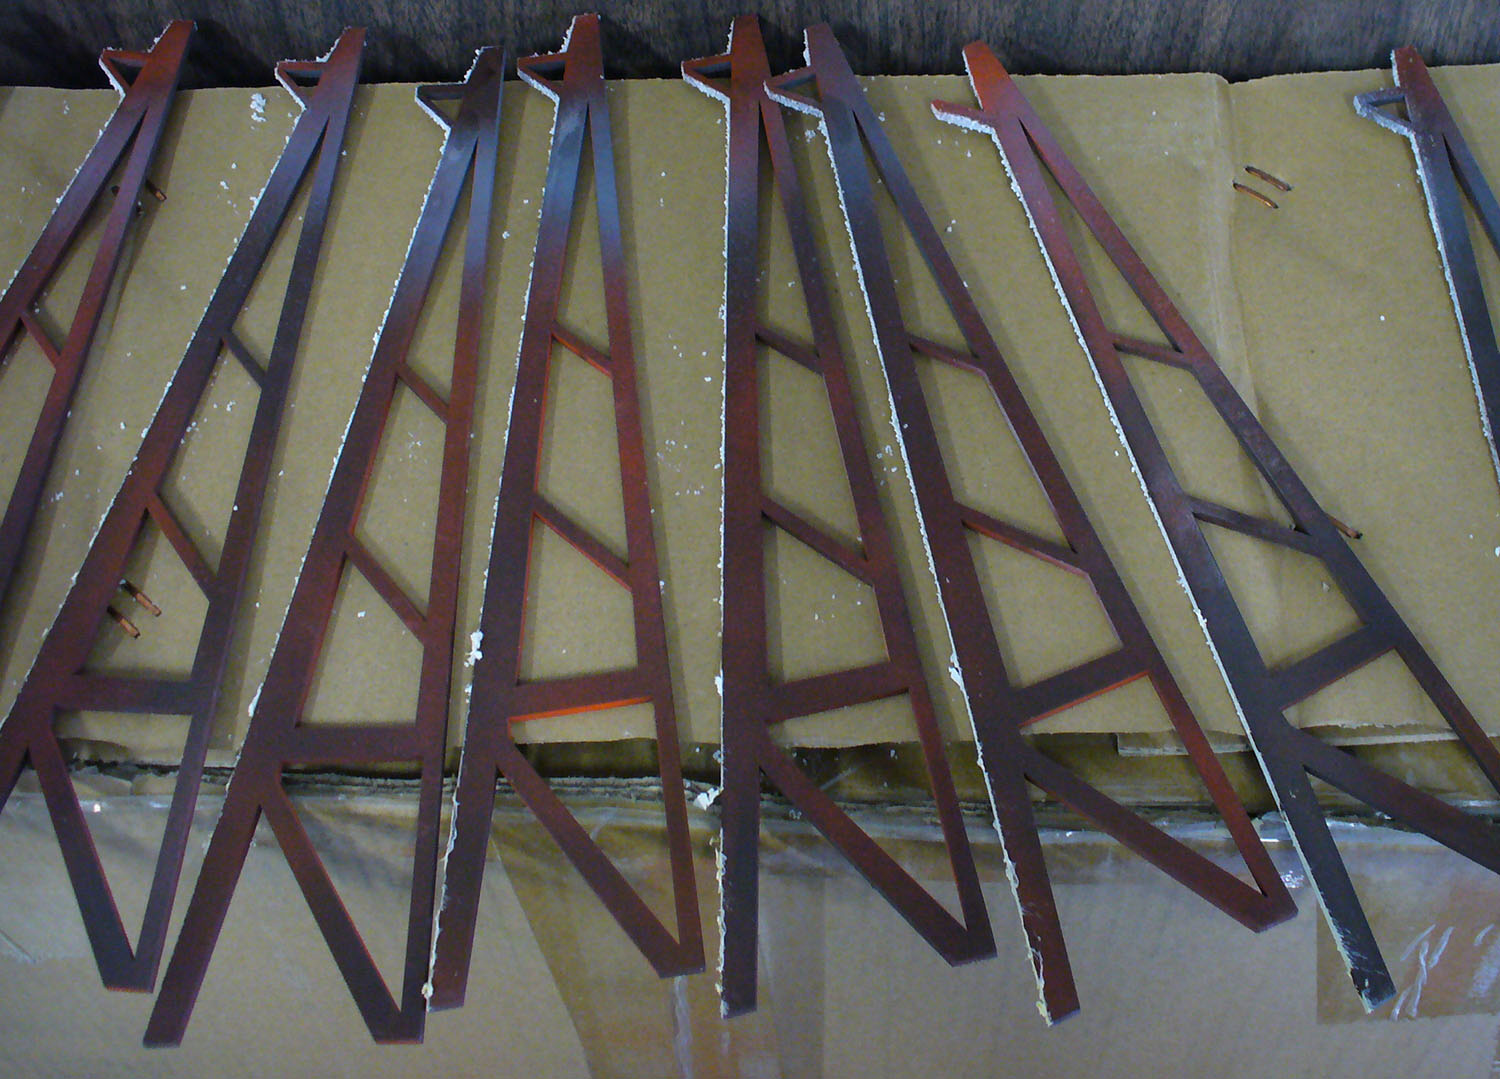
Since I couldn’t find any parts to make a model screen, I had an online laser-cut company cut me some custom-designed (boy what a difficult process) screen girders, which I’ve had in my “to do” bin for a year and a half now. I’m still in a form of confinement, but it’s time….. time to build!
This tutorial will cover the build and the techniques involved, including masking by “the salt method” as well as by masking liquid, which is basically liquid latex that you can get at the art store.
First, paint your girders the color of rust. I used rattle-can dark brown with light oversprays of medium brown and a few whiffs of orange. Then fully flat/seal your girders. You should have something that looks like this:
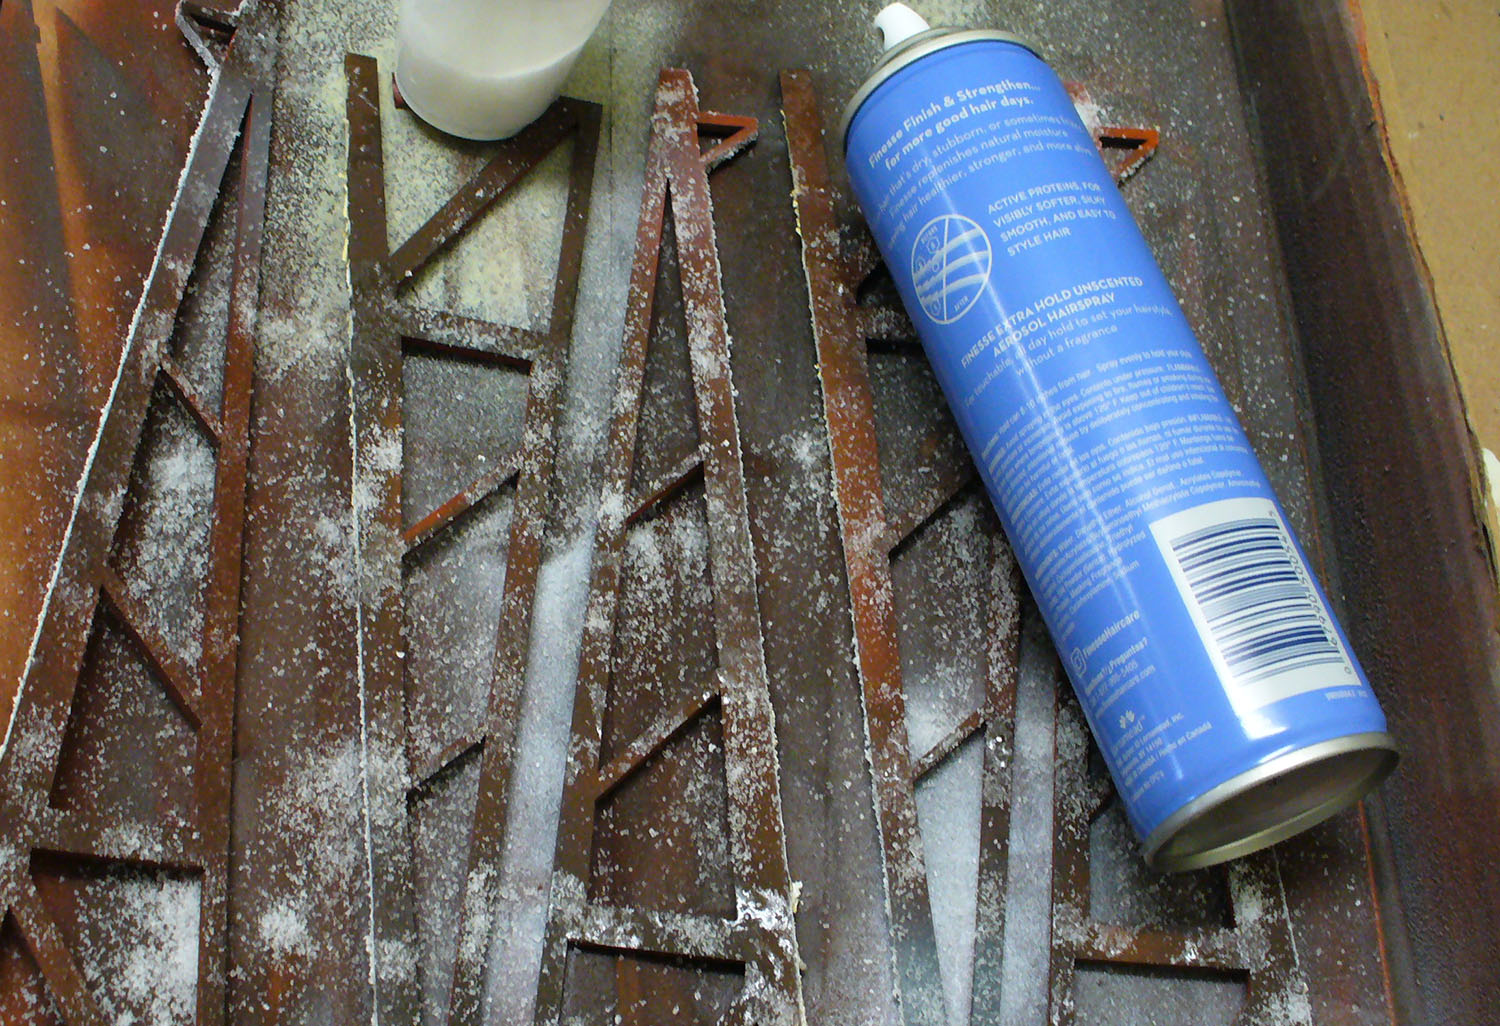
Once that is completely dry, you’ll want to mask off the areas that should remain rusty, with the goal of getting something that looks like flaked-off paint with rusty spots peeking underneath.
The next step is to use a piece of sponge to blot in the larger rust spots. Get some liquid mask, dip the sponge into a pool of it, and dab on the spots where larger rust sections predominate. Typically this is more towards the lower part of the model as that is where water will accumulate, but having the odd dib and dab on other parts of the model such as where girder meets girder is completely appropriate.
After that, get out some hair spray and spray the surface of the girders. Quickly dribble small or large patches of ordinary table salt onto the sections that you’d like to have some rust. After this step, you should have something that looks like this:
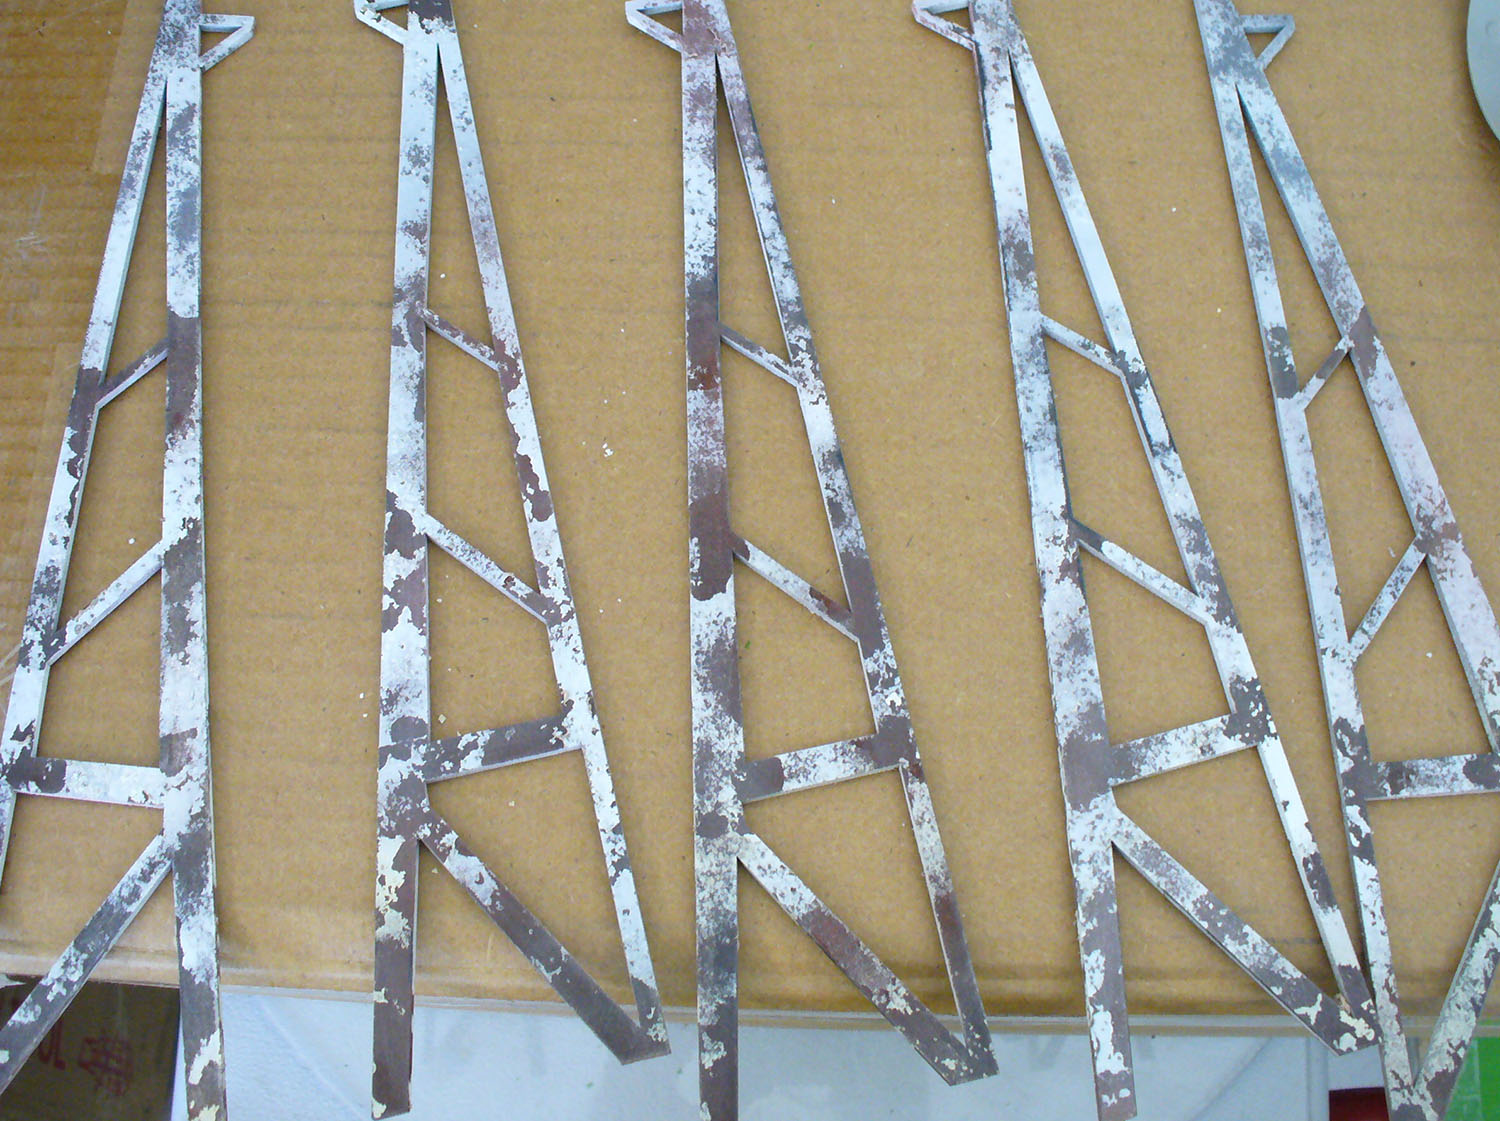
Spray paint the “paint color” onto the model and let it dry. You’re then ready to remove the masking and have the beautiful rust shine out from underneath! With plastic or metal as your base material, this is easy as you should be able to just put in under a tap of warm water and just dissolve the salt. You can just rub off the latex mask with your hands. But if you’re working with wood, MDF board, or anything else that can’t get wet, you’ll have an extra challenge get the gunk off.
Challenge accepted!
One way of getting salt (only) off would be to just use a small hand broom (from the dollar store of course!) and brush it off. What I recommend is that you get an old pair of rubberized garden gloves. Don’t get the ones with the slick plastic surface, get the ones dipped in black rubber for extra grip. Take your dry piece and stand over your garbage can. Put on the gloves and just hand-rub the salt off. Use your fingers in a scrubbing motion if there are any exceptionally stubborn parts. The latex rubber will also come off easily.

Once you have done this, you should have something that looks roughly like this:
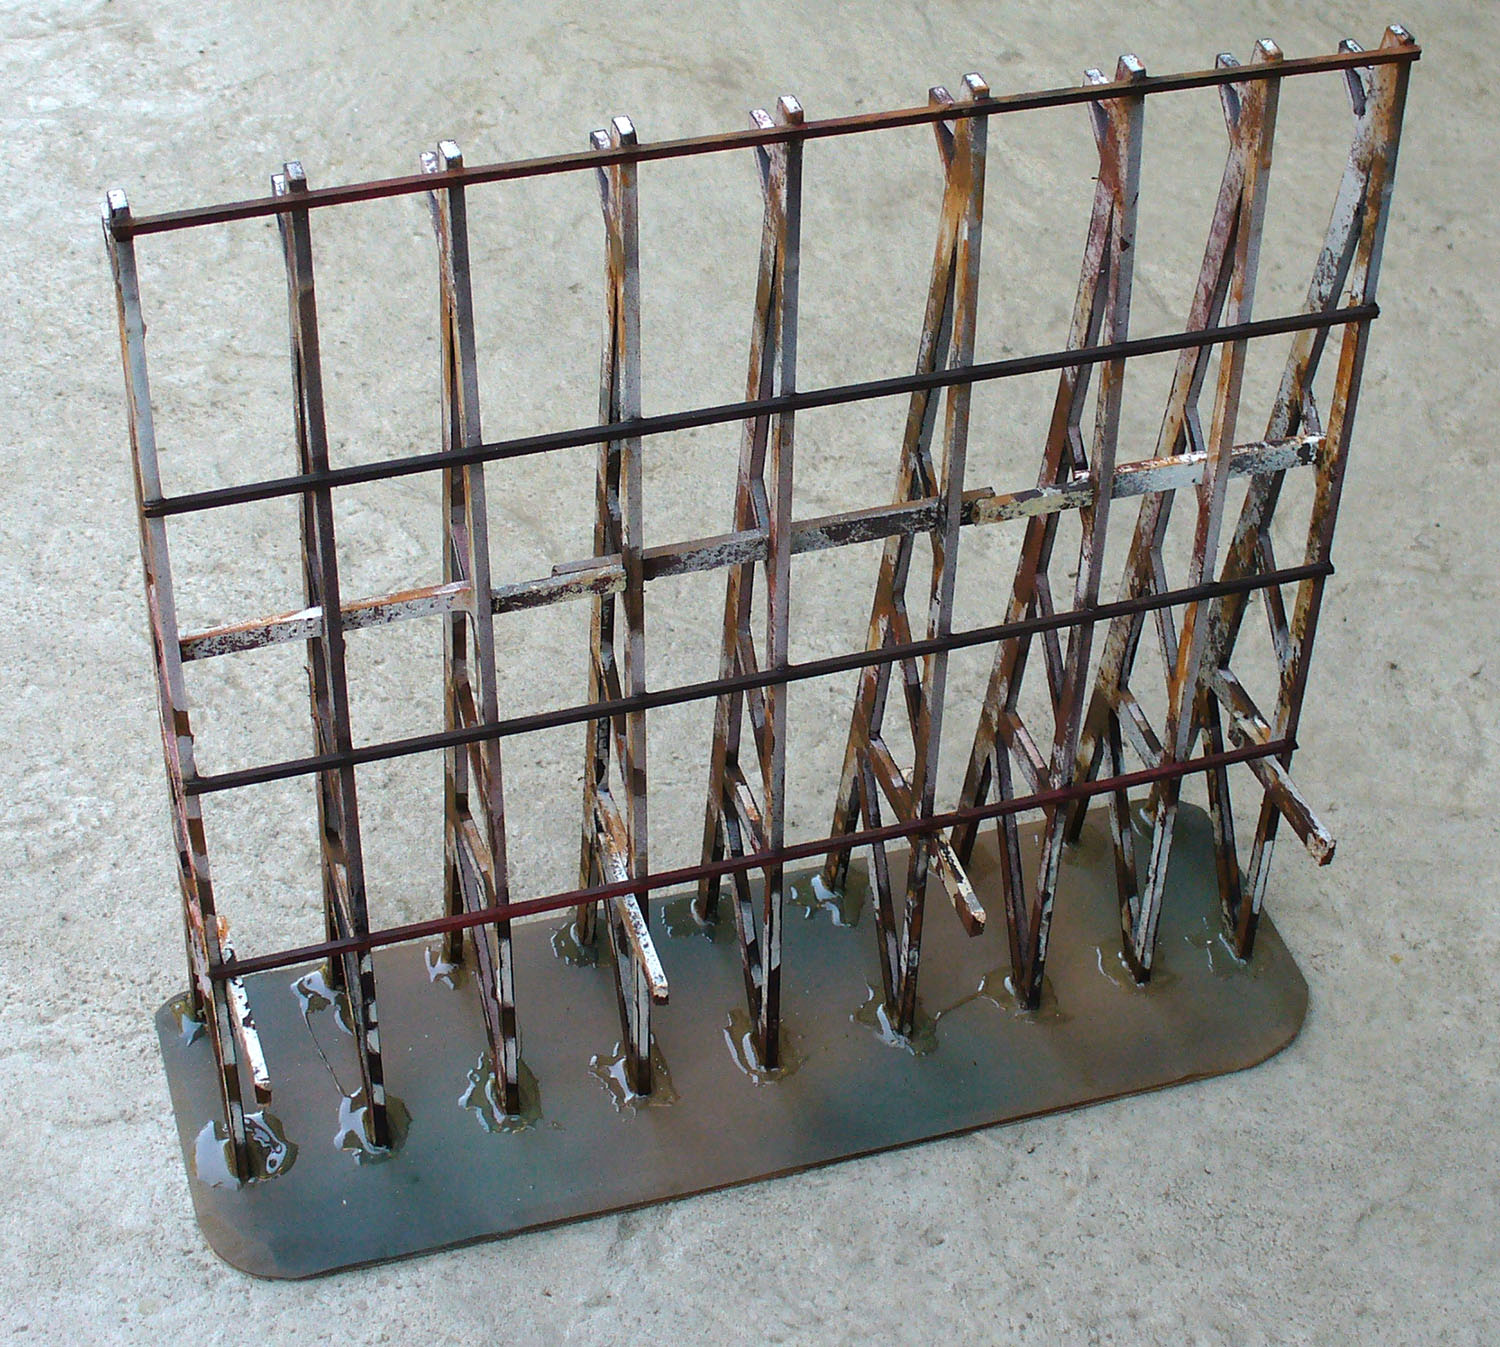
Glue your girder sections to your base and put any needed support rails between them. In my example, I had 10 girder sections cut, but sacrificed one of them by cutting it up to make supports. I did the initial gluing with CA (bob smith maxi cure) glue, and once that was dry reinforced the girder-to-base connections with brushed on 5-minute epoxy.
Far from complete. You’ll need a screen. Mine was made of 2 sheets of plastic card reinforced on the rear side with basswood strips. The back was painted gray with minor graffiti decals, and aged with pastel chalks. I scored the front into sections with an exacto knife, then did a base-color-light-gray and surface-color-white salt method after reviewing some pics of old drive-in screens online. I did some basic rusting on some of the edges with the Vallejo rust paint set.
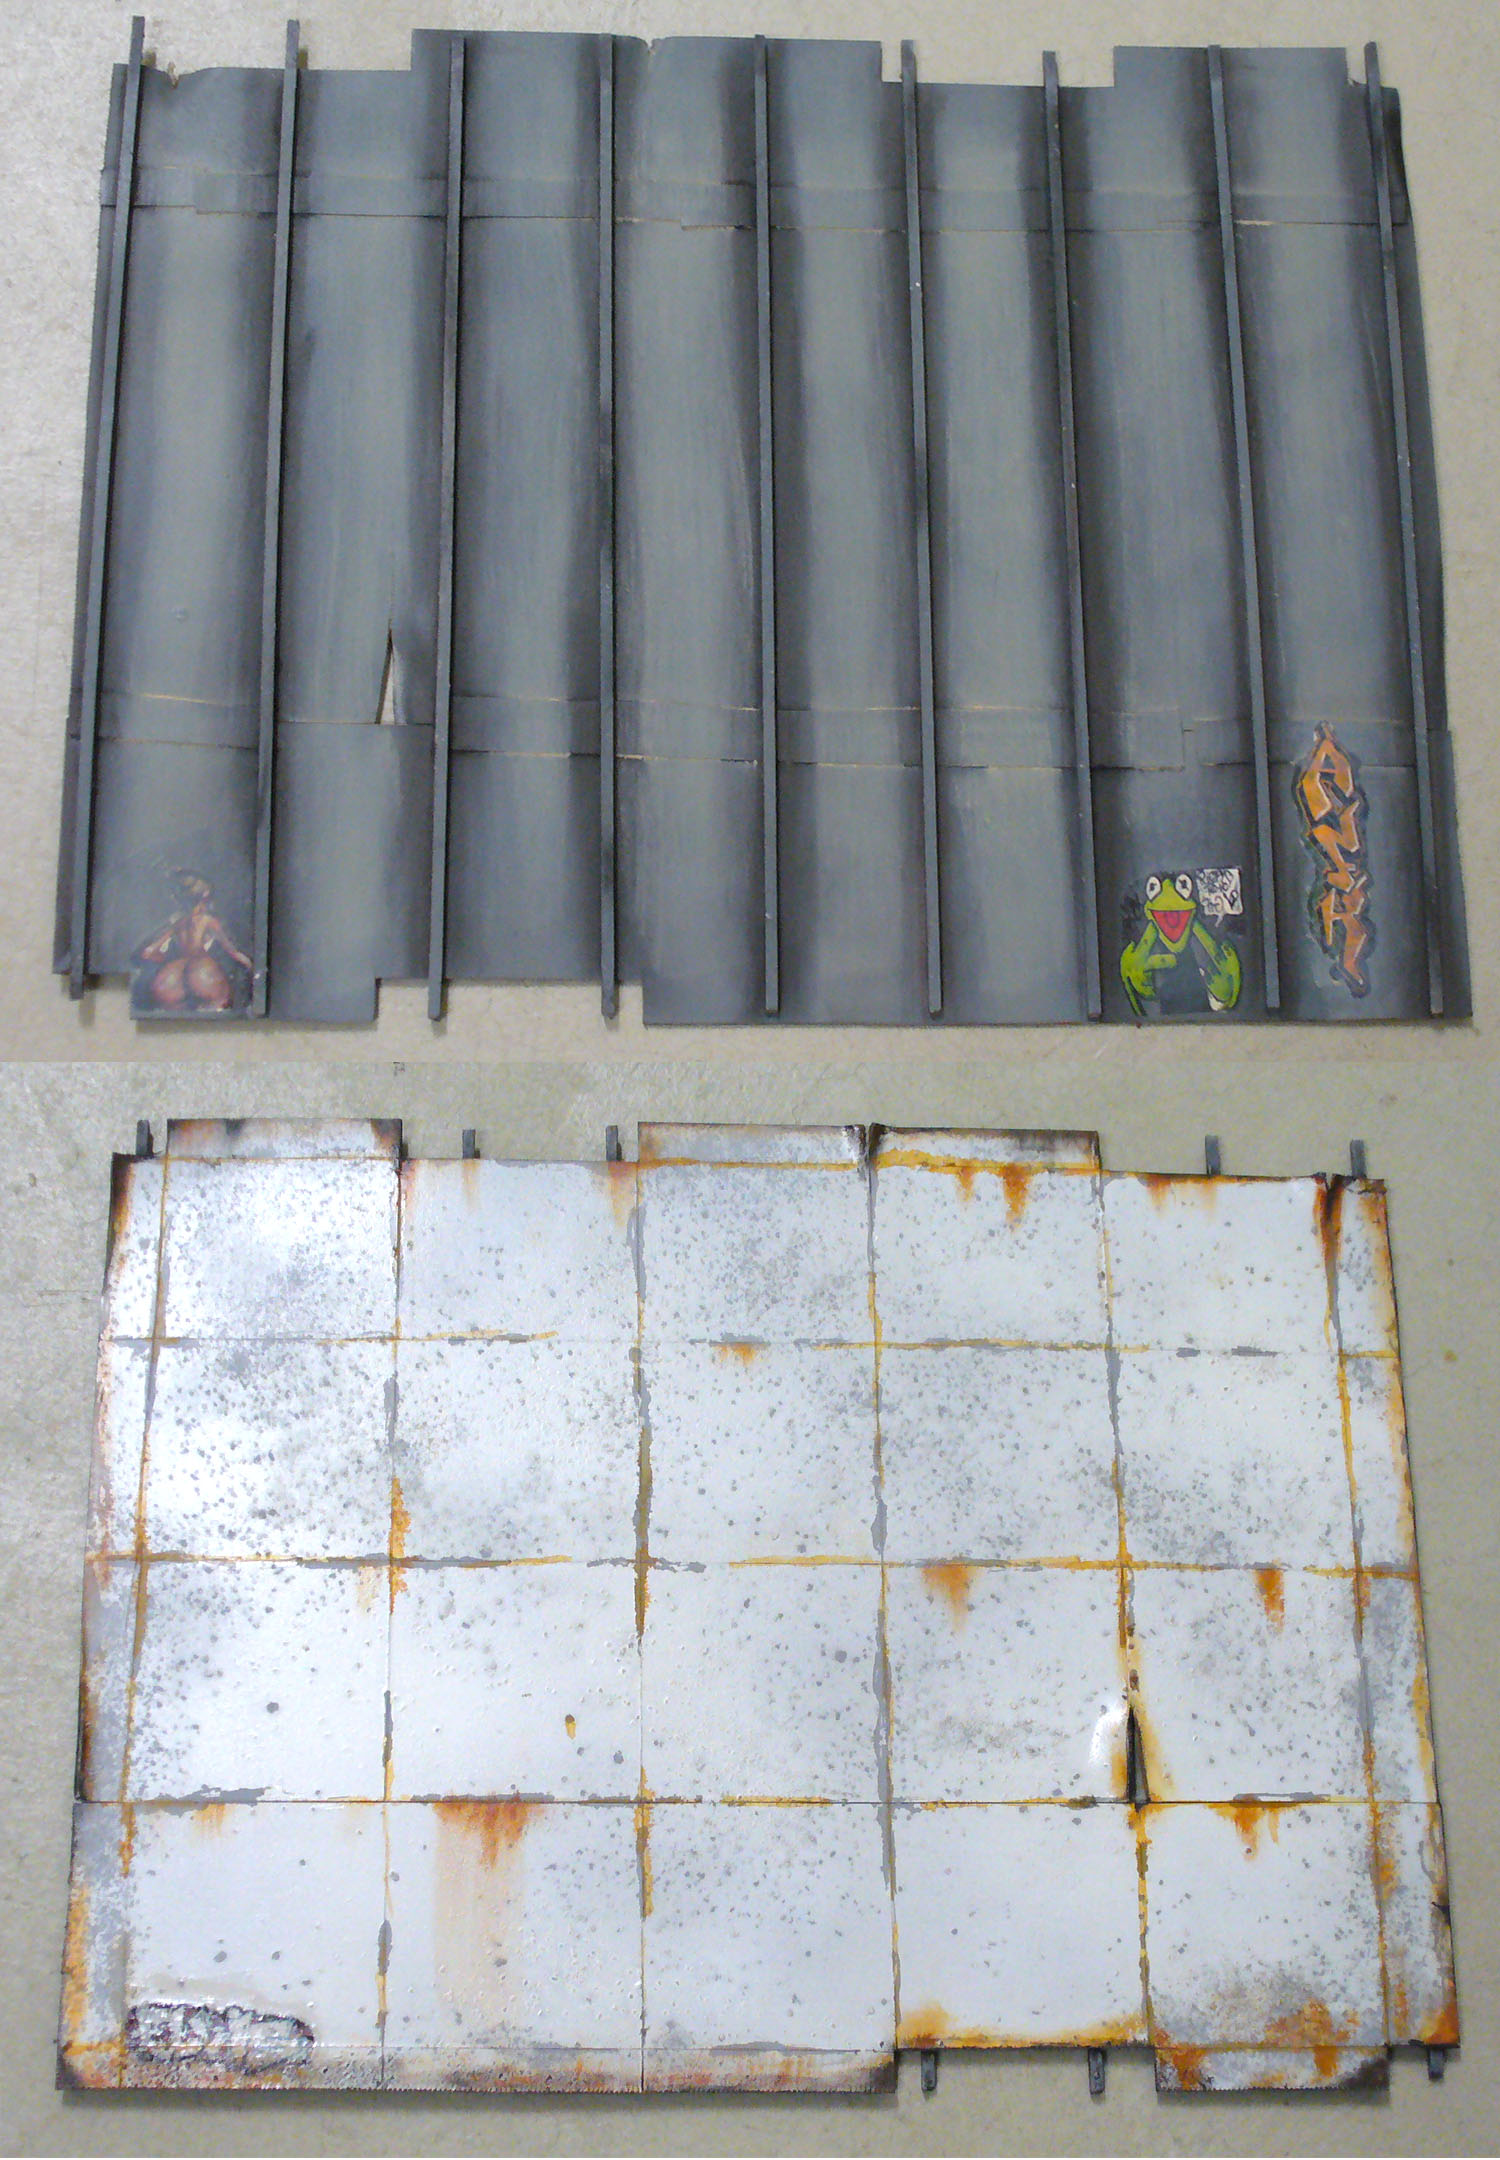
Once everything dried, I glued the screen to the girders. This model has a small lip of protruding girders at the bottom so that I can use it as an easel, placing printed-out scenes from movies to simulate a flick. At some point in the future, I can attach a small tablet and simply play a movie for maximum effect.

I made the audio speakers the old-fashioned way: Originals modelled in green putty, then made a mold. Cast in resin and glued onto a short nail and painted. The wires are small pieces of floral wire. All mounted on a dime and based with GW technical paint to taste.
And now for something completely different. It’s…….!....


