Gemigabok presents...
Winter of No Surrender
Campaign Eleven Fangs of the Wolf
Game Five Parts One, Two and Three
 Winter of No Surrender
 (WoNS) is a series of Winter War campaigns for Chain of Command and other game systems. This is our playthrough of the eleventh
WoNS campaign
Fangs of the Wolf. The campaign is currently in playtest and will be released... later.
We're using Chain of Command rules with the At the Sharp End supplement, loads of special campaign rules, and 20mm figures on an 8x5 ft table. We have some new players... John continues as Colonel Sharov but our new guys Don and Tom are ready to join the game along with Miika, who has followed our games before. There are no changes on the Finnish side as Jarkko still stars as Lieutenant-Colonel Susitaival, with Mikko as his assistant command. We're playing on Discord using three 720p HD cameras as most of the players are located at least 600 km from me.
Previously on Fangs of the Wolf:
Campaign Introduction:
https://thewargamersforum.com/viewtopic.php?f=13&t=4954Game One, Part I:
https://leadadventureforum.com/index.php?topic=137031.0 Game One, Part II:
https://leadadventureforum.com/index.php?topic=137317.0Game Two:
https://leadadventureforum.com/index.php?topic=137428.0 Game Three, Part I:
https://leadadventureforum.com/index.php?topic=137800.0Game Three, Parts II & III:
https://leadadventureforum.com/index.php?topic=138177.0Game Three, Part IV:
https://leadadventureforum.com/index.php?topic=138510.0Game Four, Parts I & II:
https://leadadventureforum.com/index.php?topic=138831.0 Game Four, Parts II and IV:
https://leadadventureforum.com/index.php?topic=139313.0
As you may recall from Game Four, Group Wolf has split the Red Army forces into three distinct encirclements:
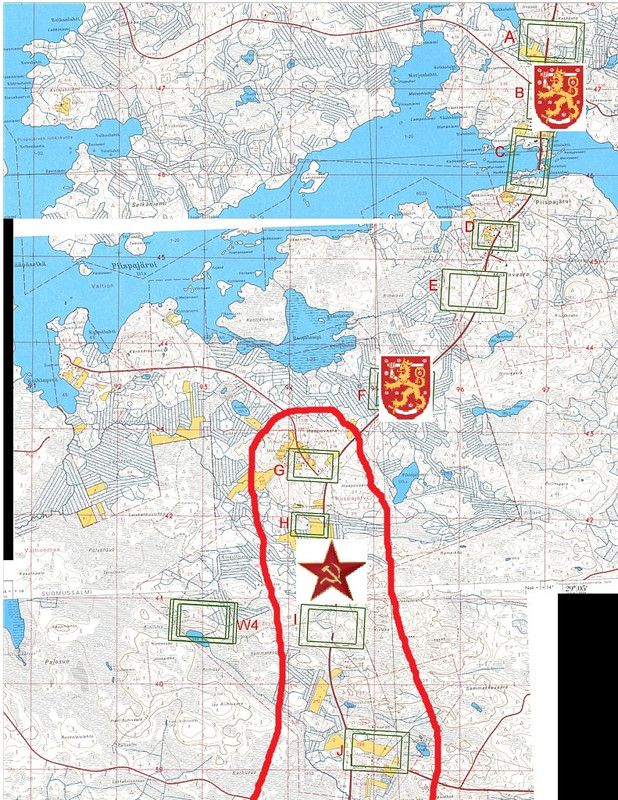
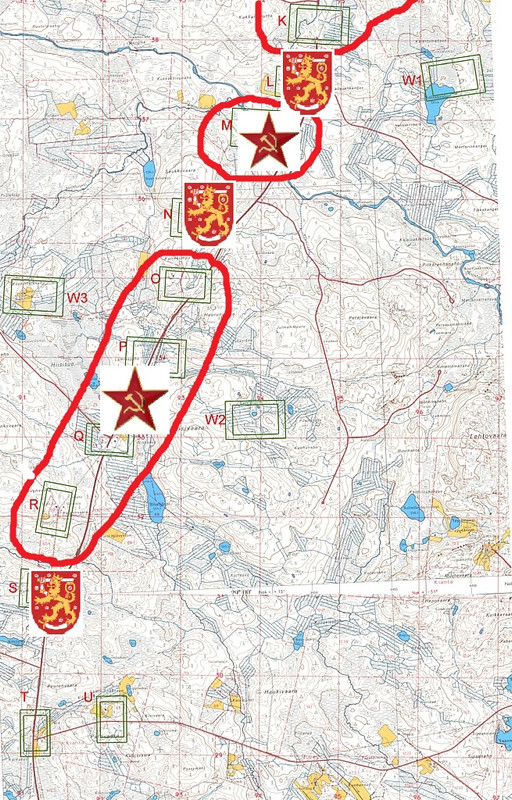
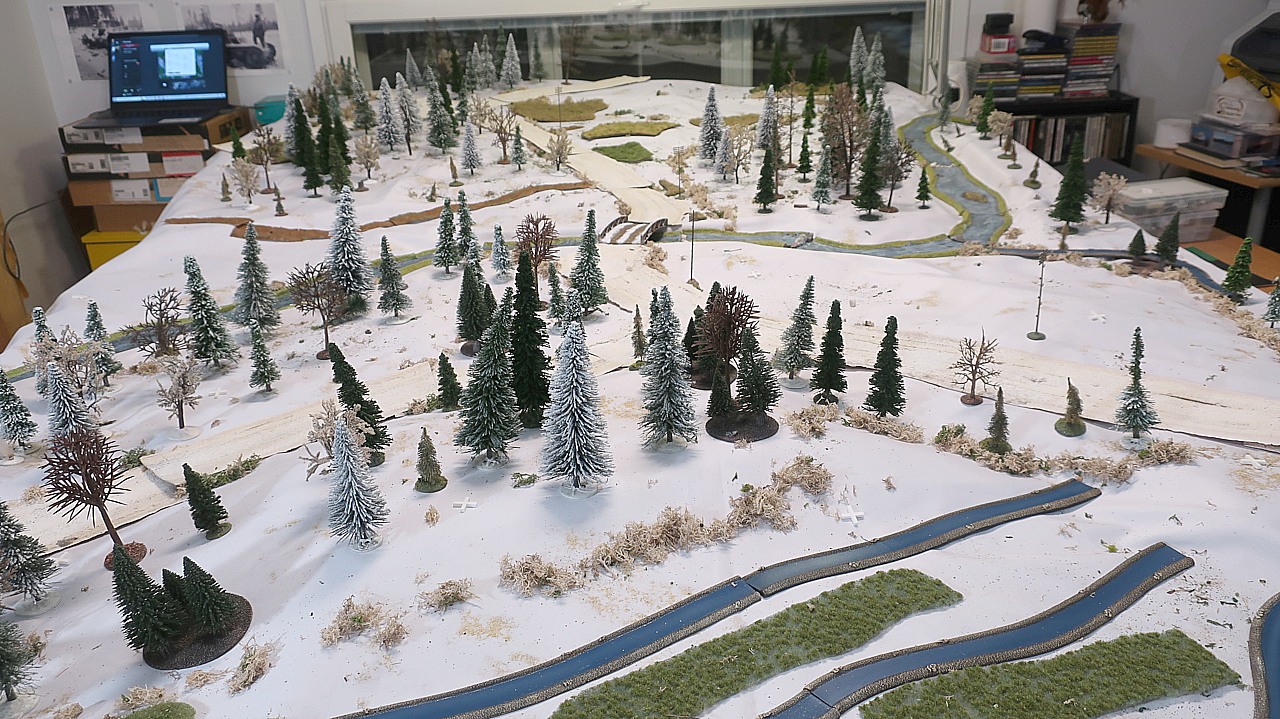
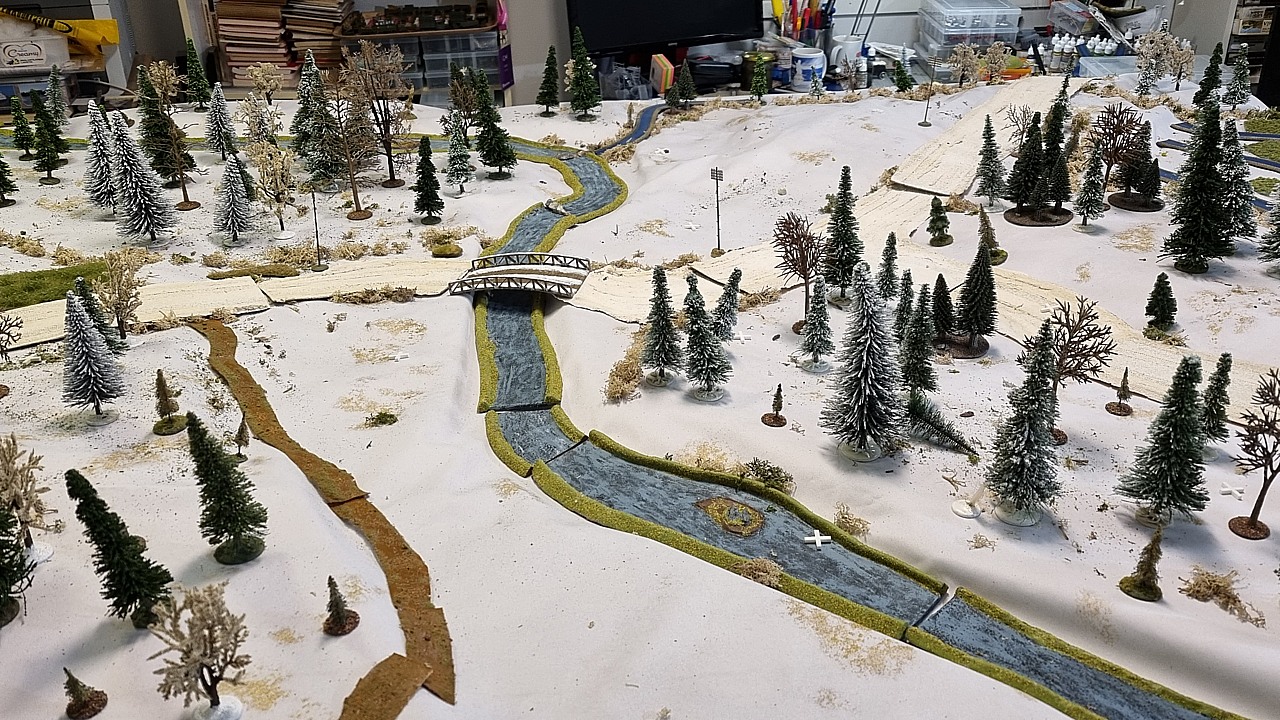
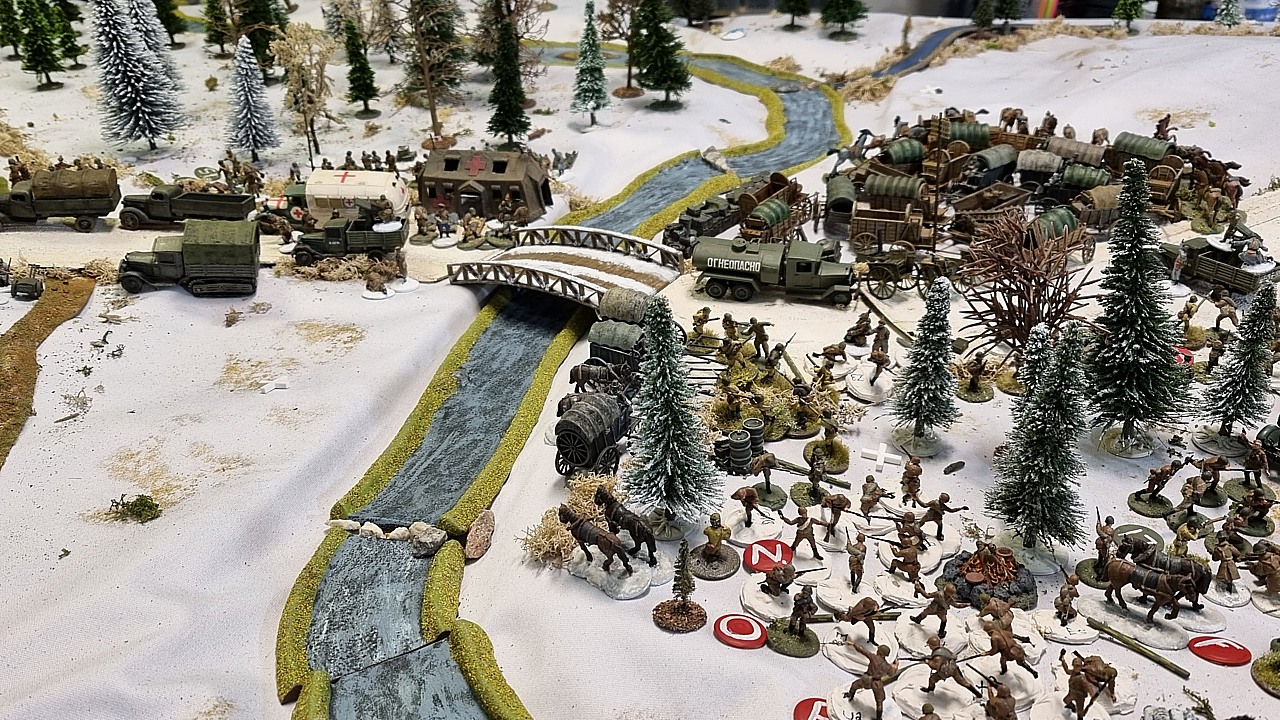
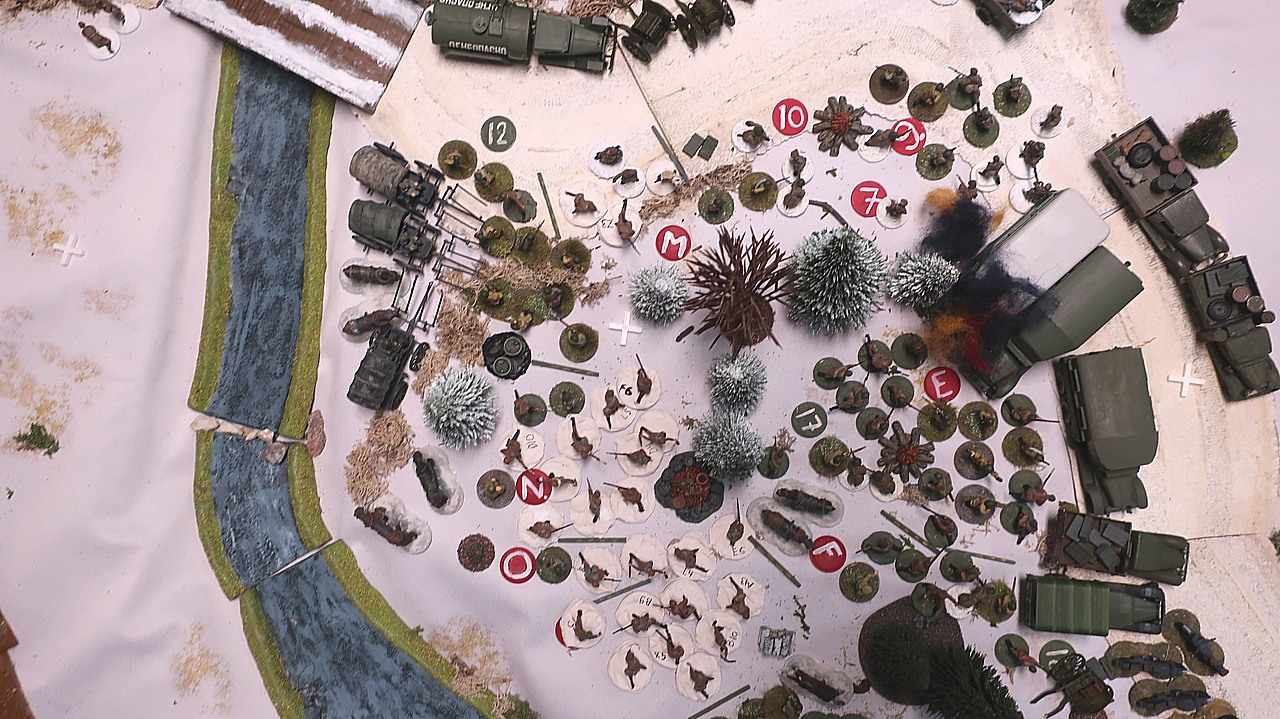
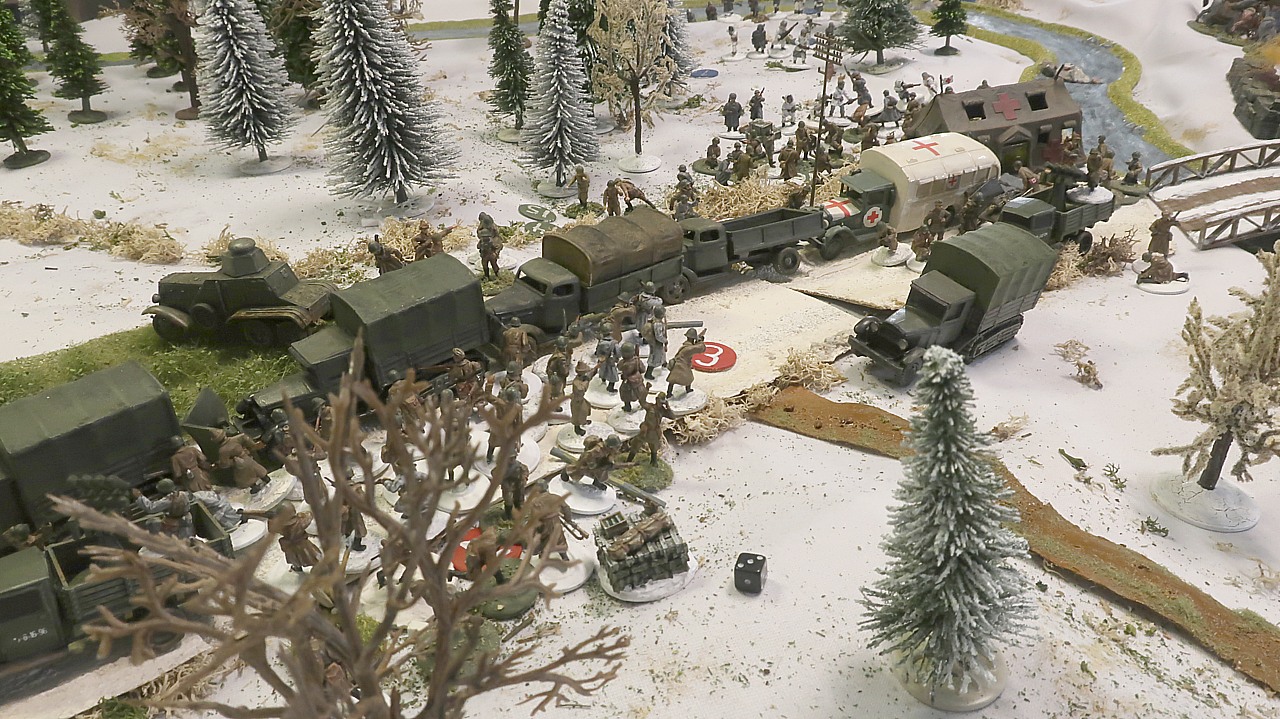
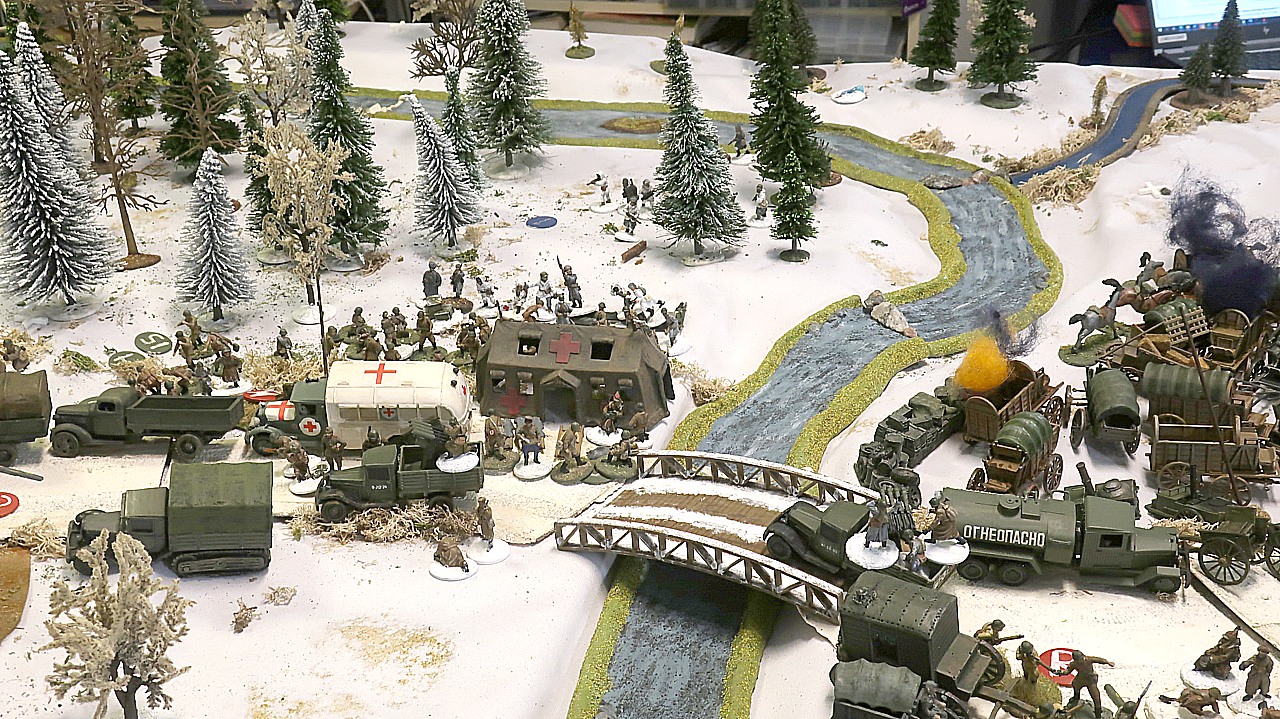
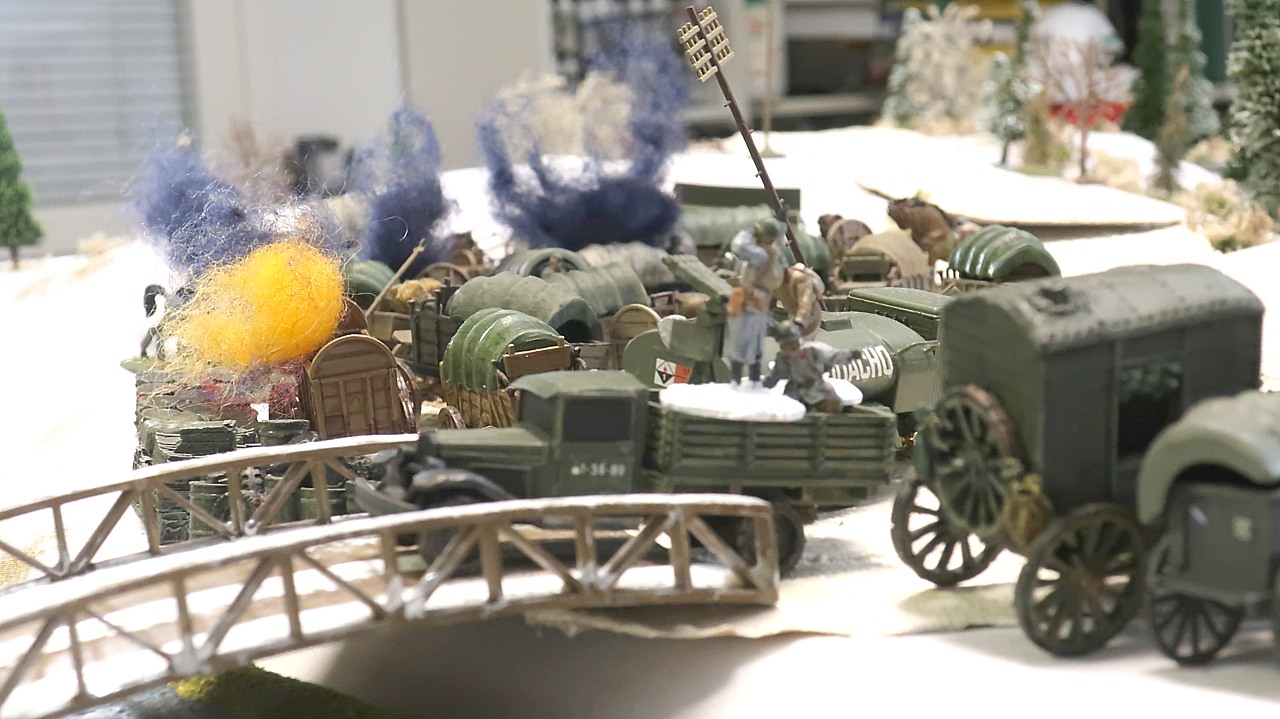
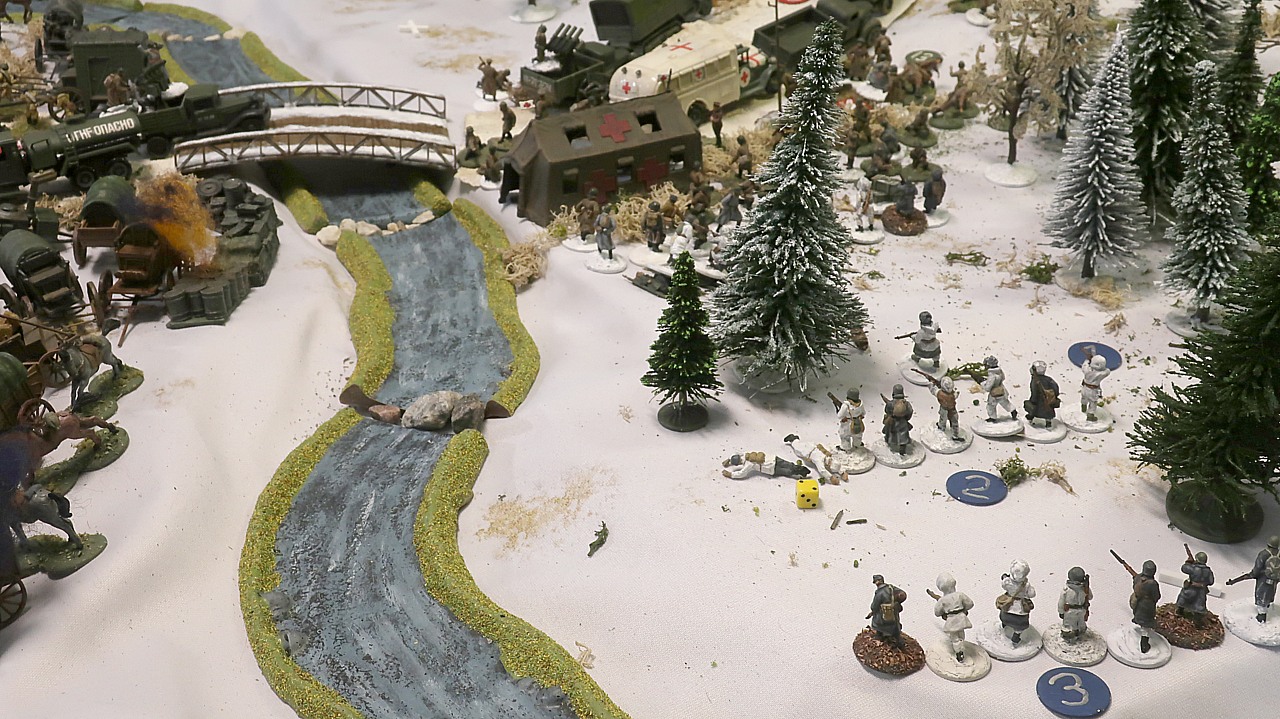
Following the success on Table L, Hallasenaho farm, Lt. Col Susitaival has decided to assault Table M., Mustajoki Bridge. Taking this strategic bridge should cause the enemy some further headaches.
Many roads lead off the table, but apart from the ones going north and south, none of them lead very far...
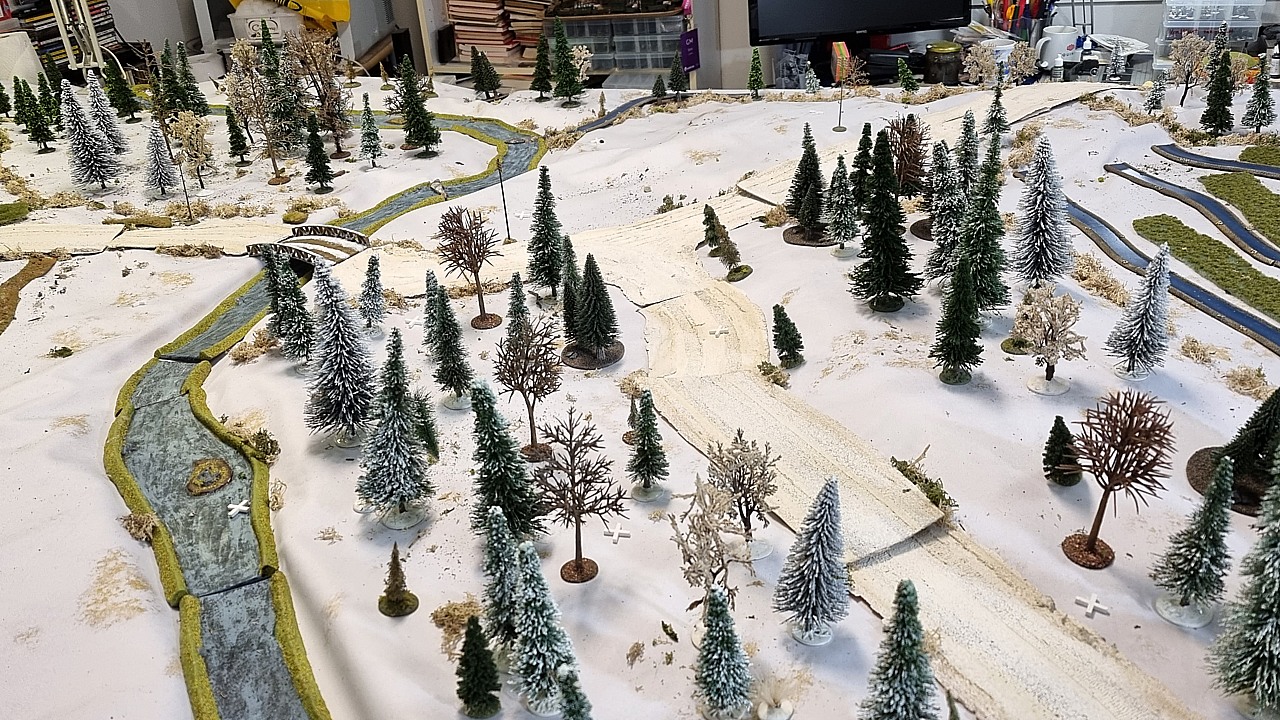
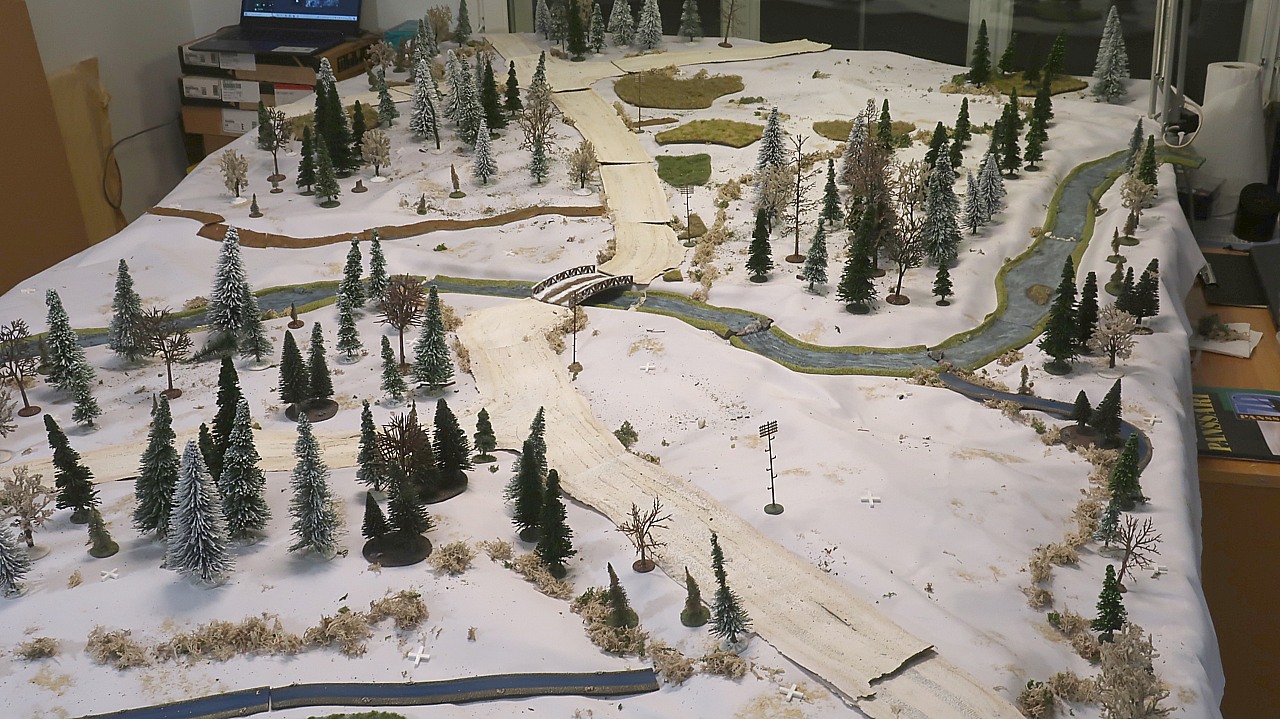
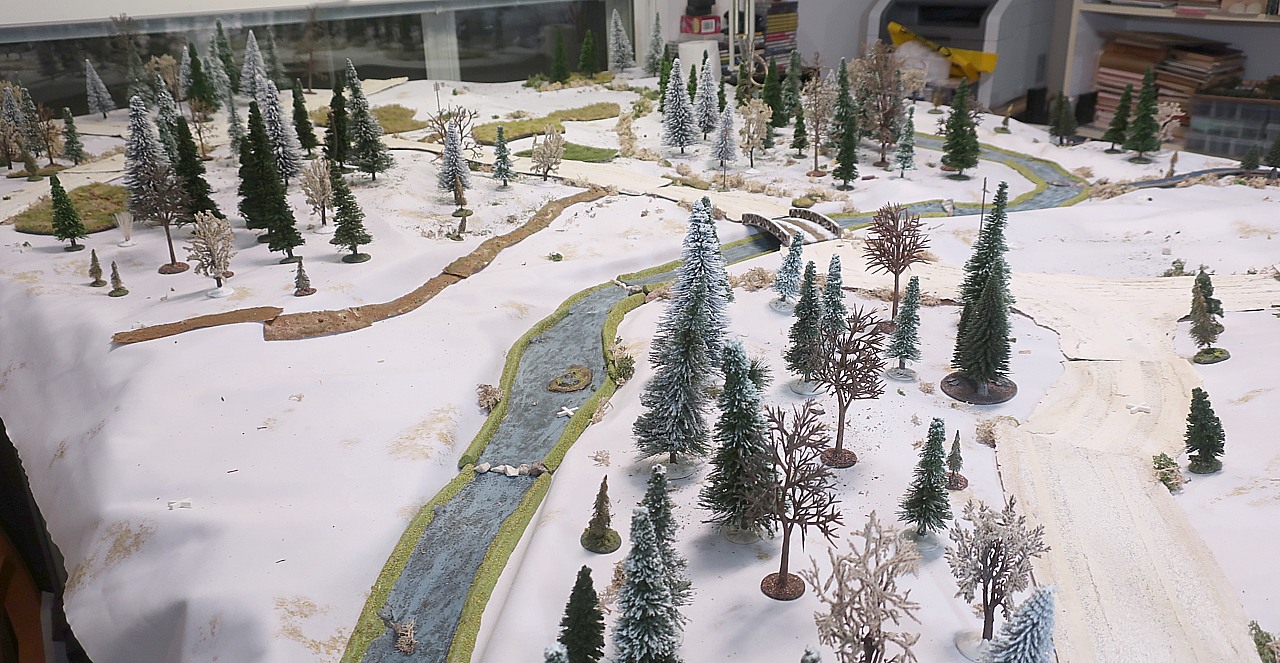
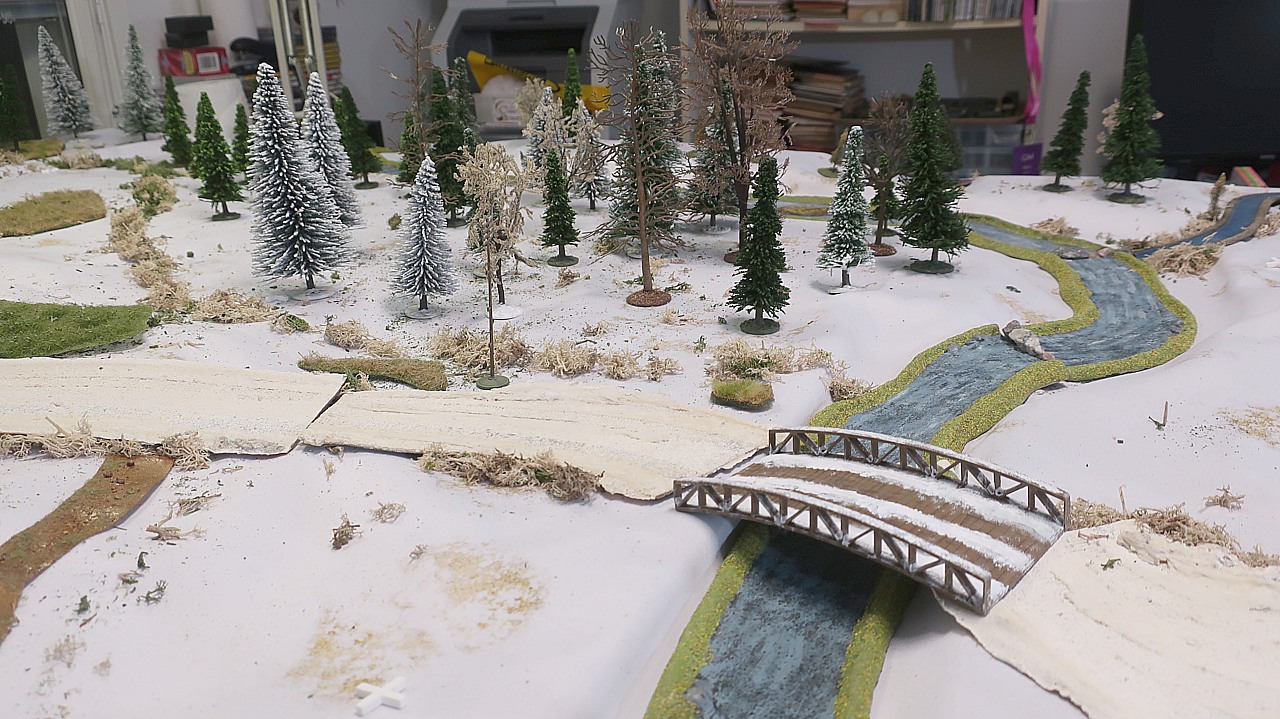
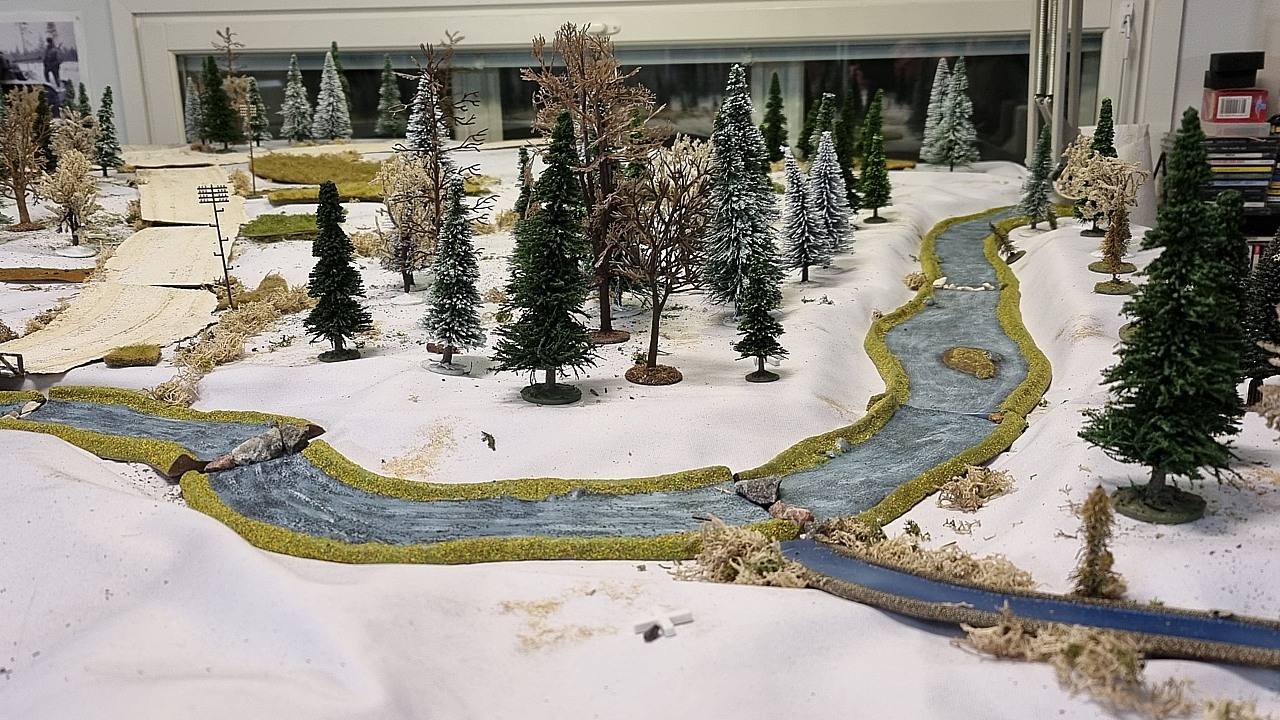
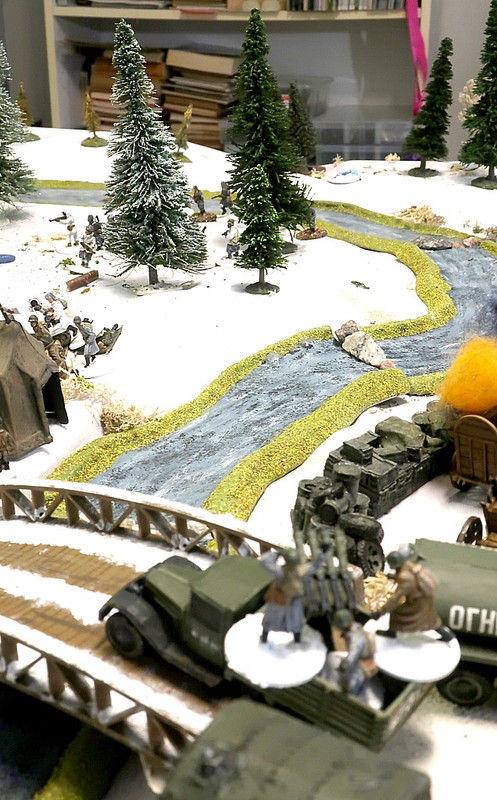
The ice-cold Mustajoki (literally Black River) runs from the northwest (upper right in the above picture) to the southeast. The Penkereenkoski rapids extend from the bridge to about 24 downstream and are completely unfordable.
Elsewhere the river is fordable by infantry, but doing so will take the entire phase for the unit. Only amphibious tanks can negotiate the still unfrozen river, but if the temperatures were to fall to -26 Celsius, the river will freeze.
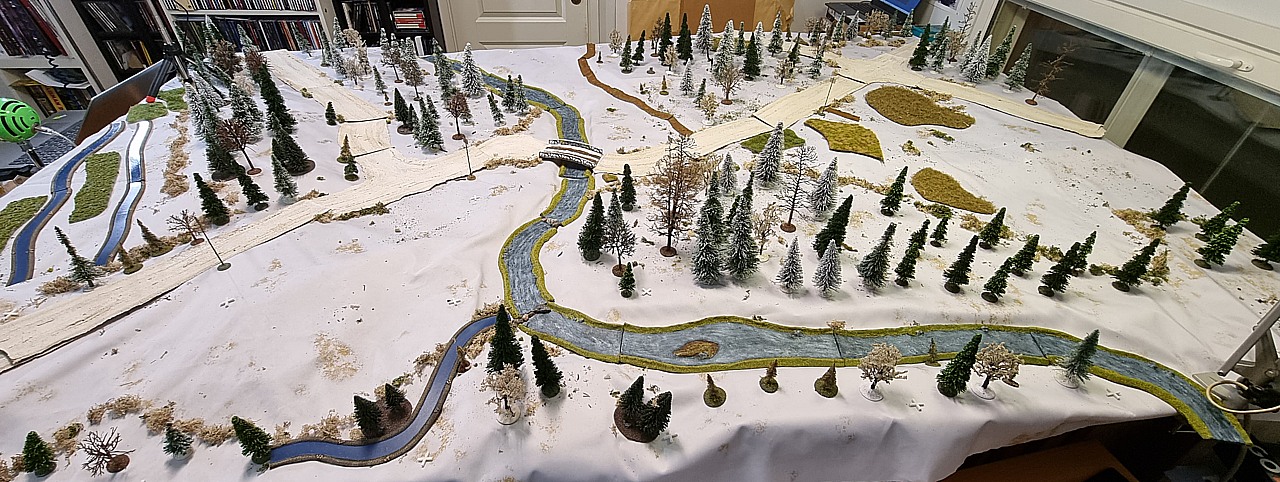
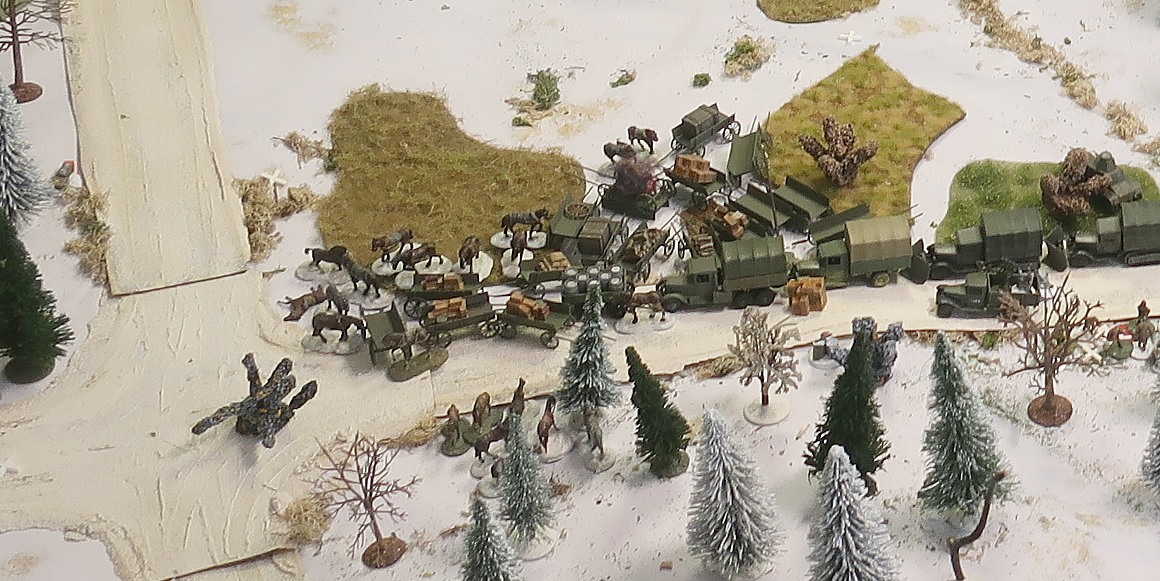
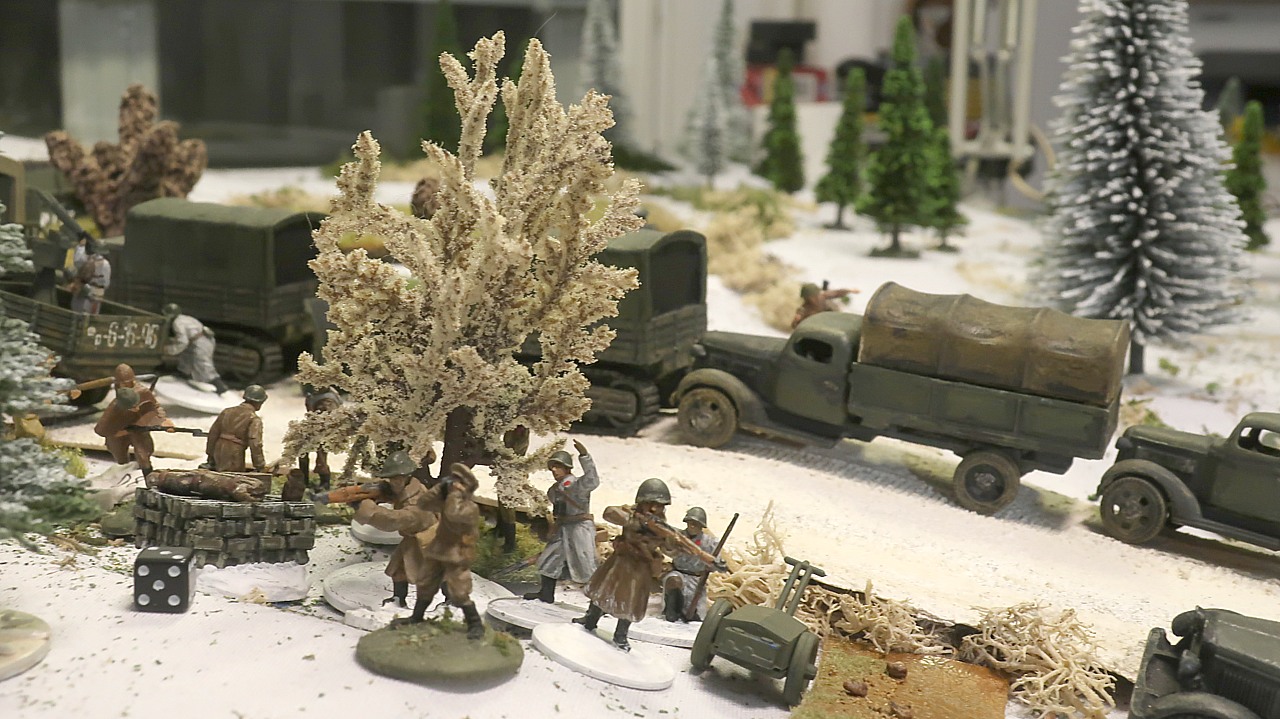
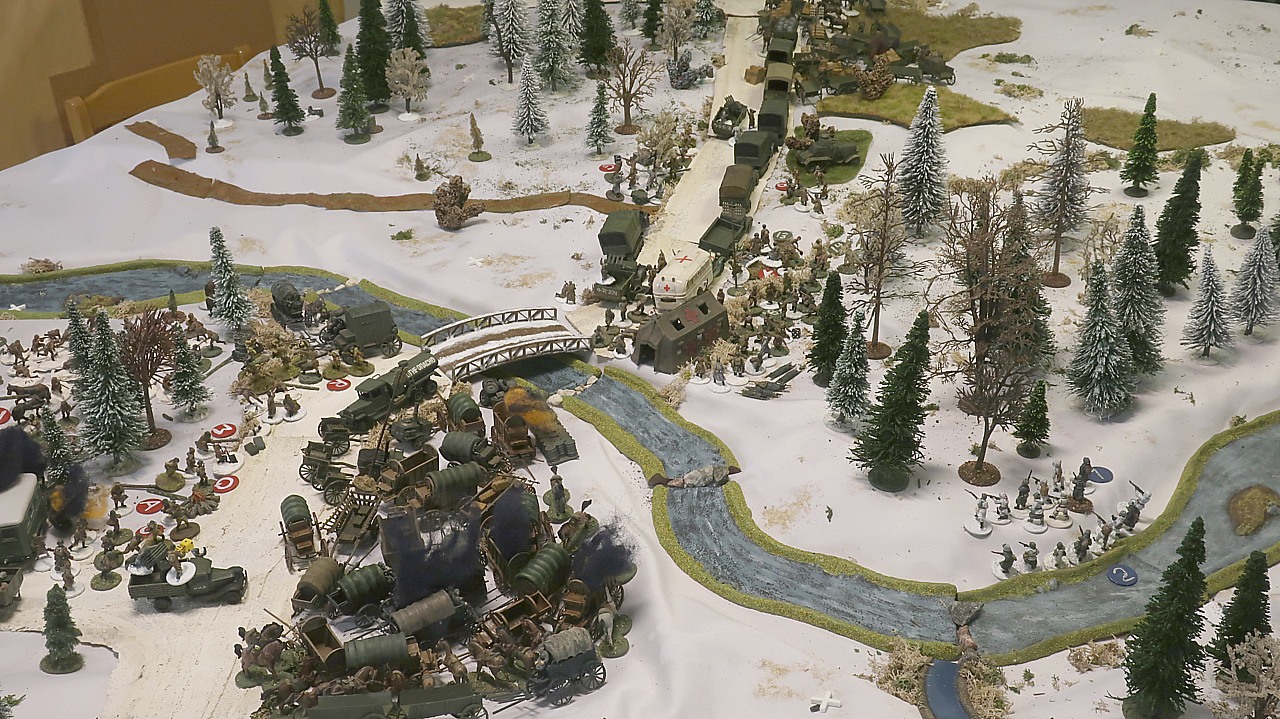
During peace time his is a forested, swampy area with no inhabitants...
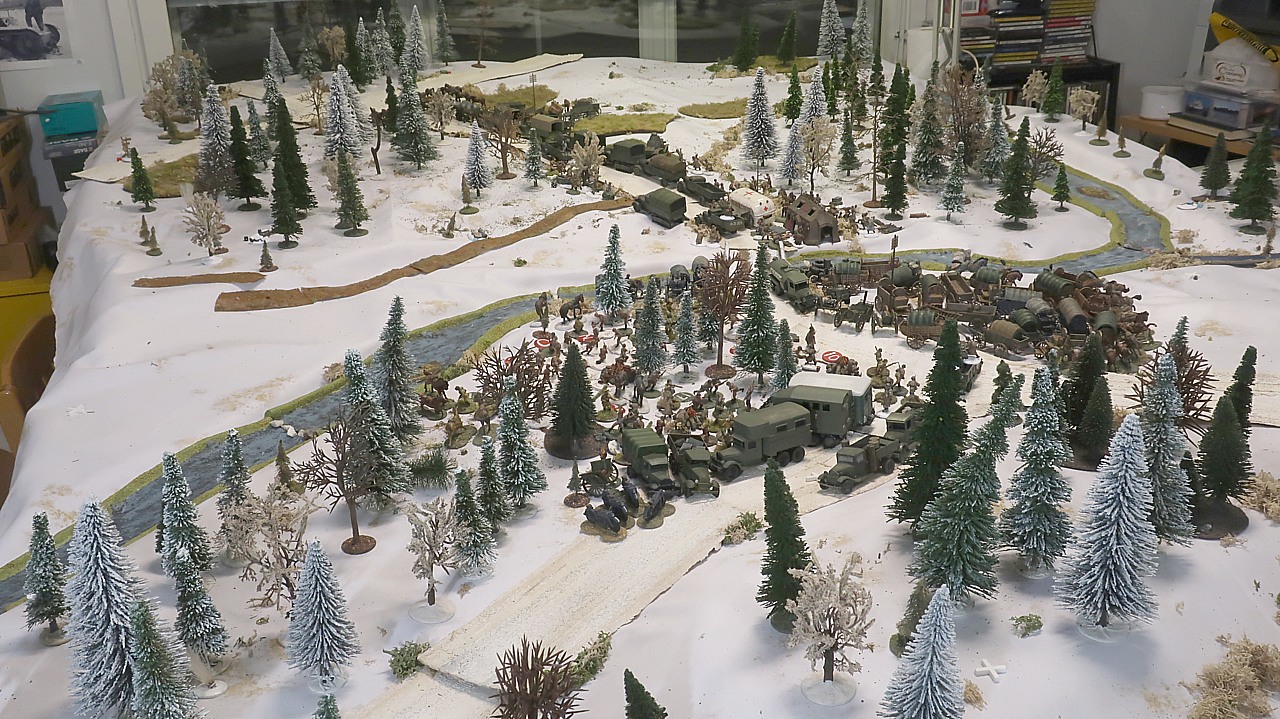
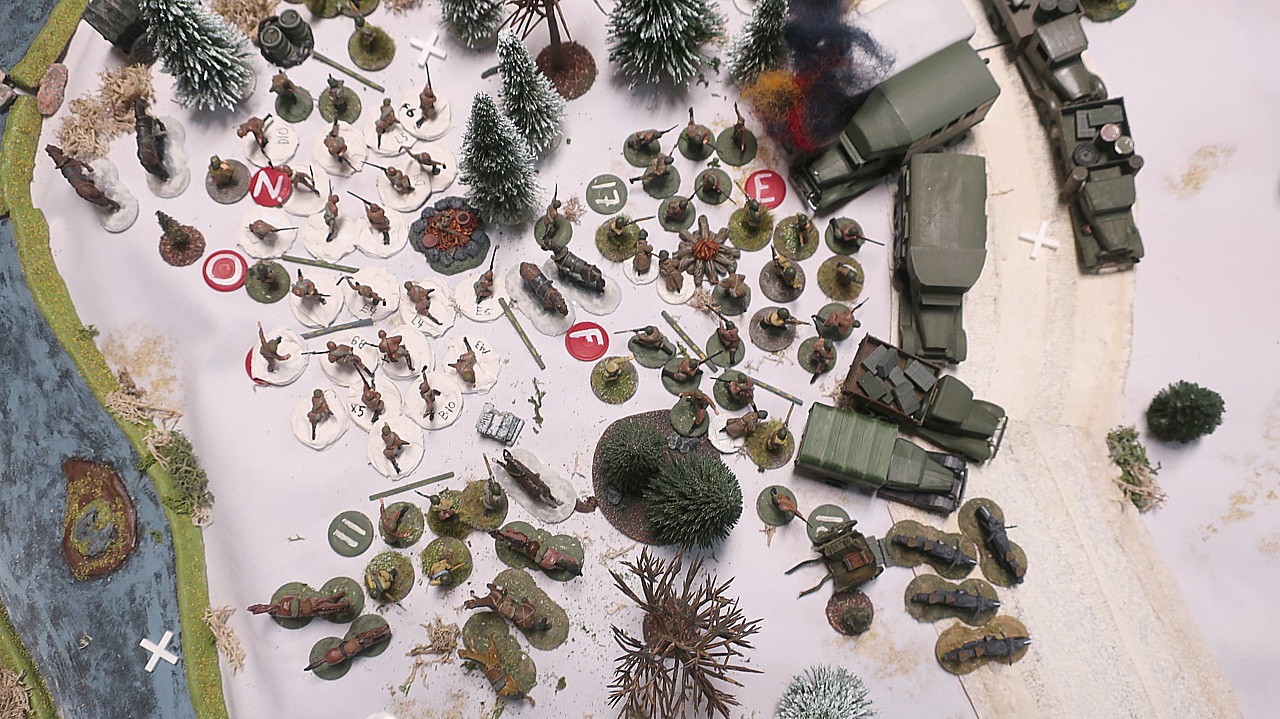
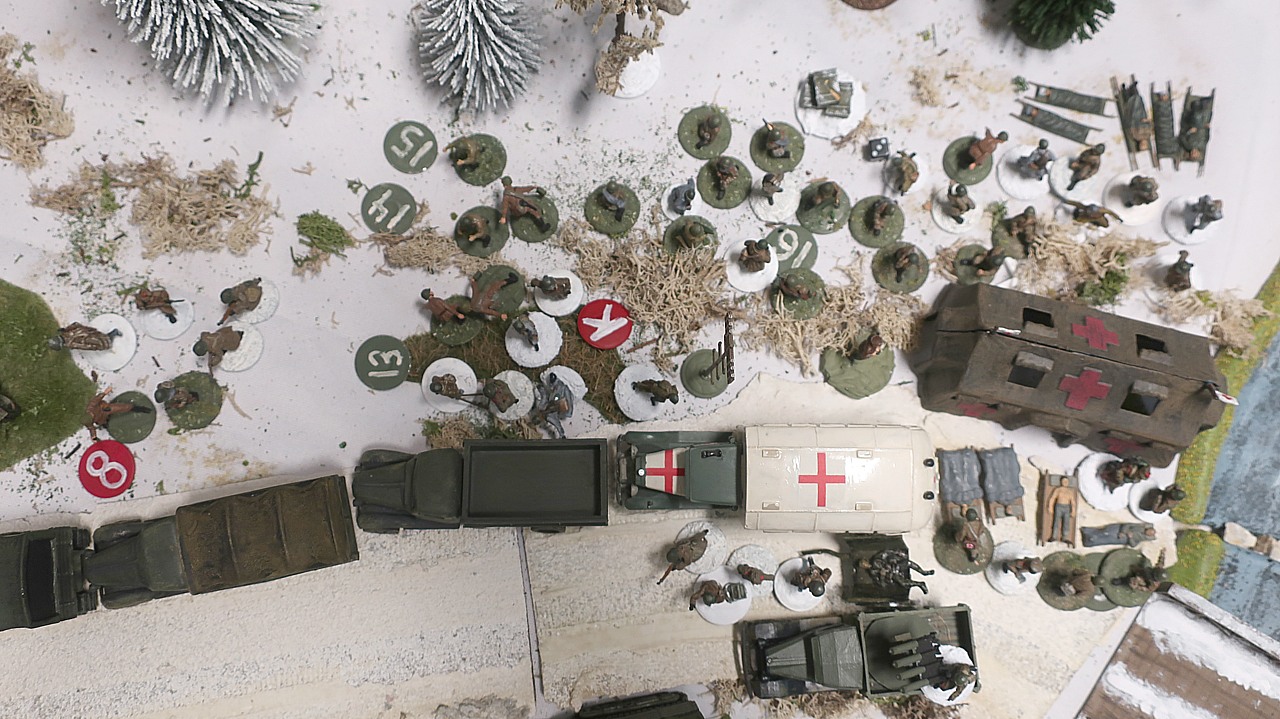
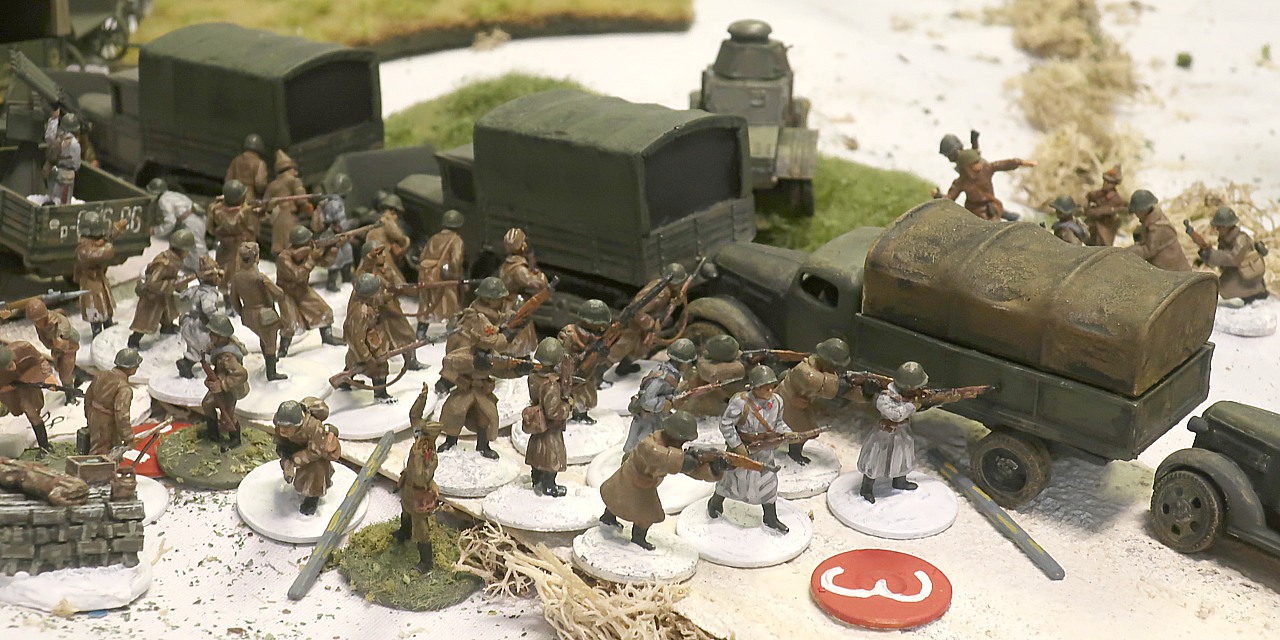
...but today, the situation is quite different, for there are several hundred Russians here!
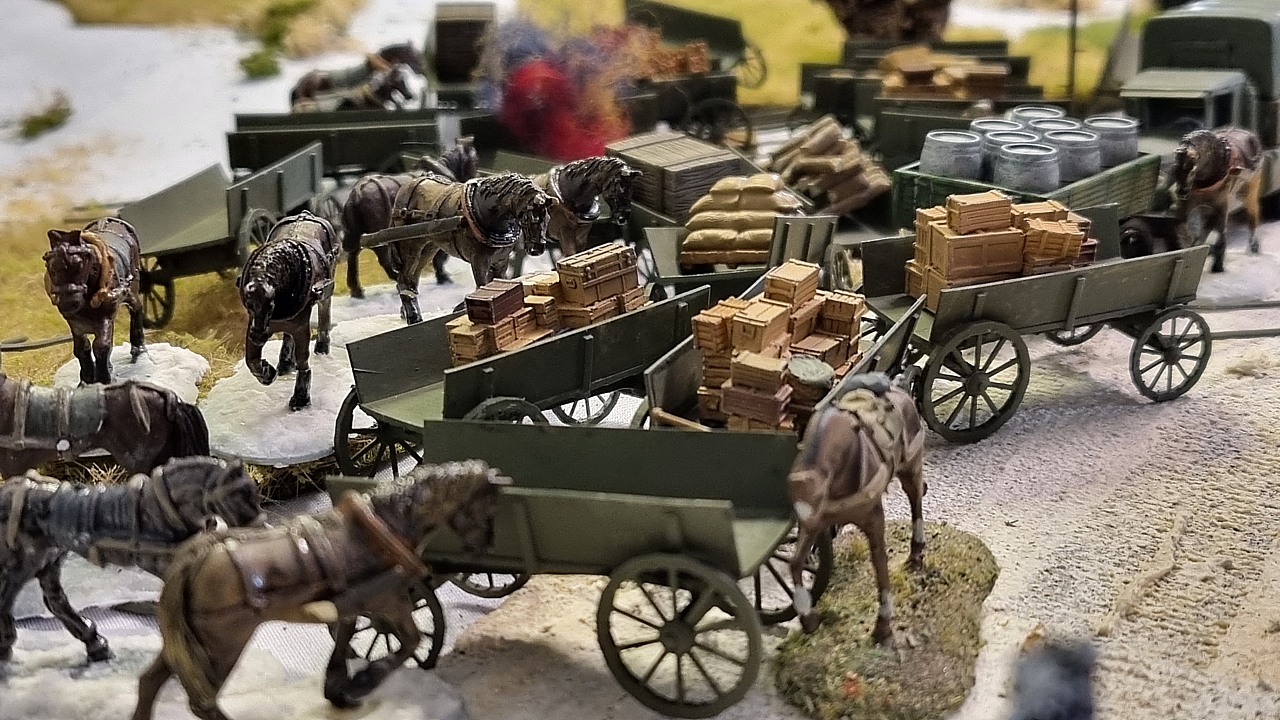
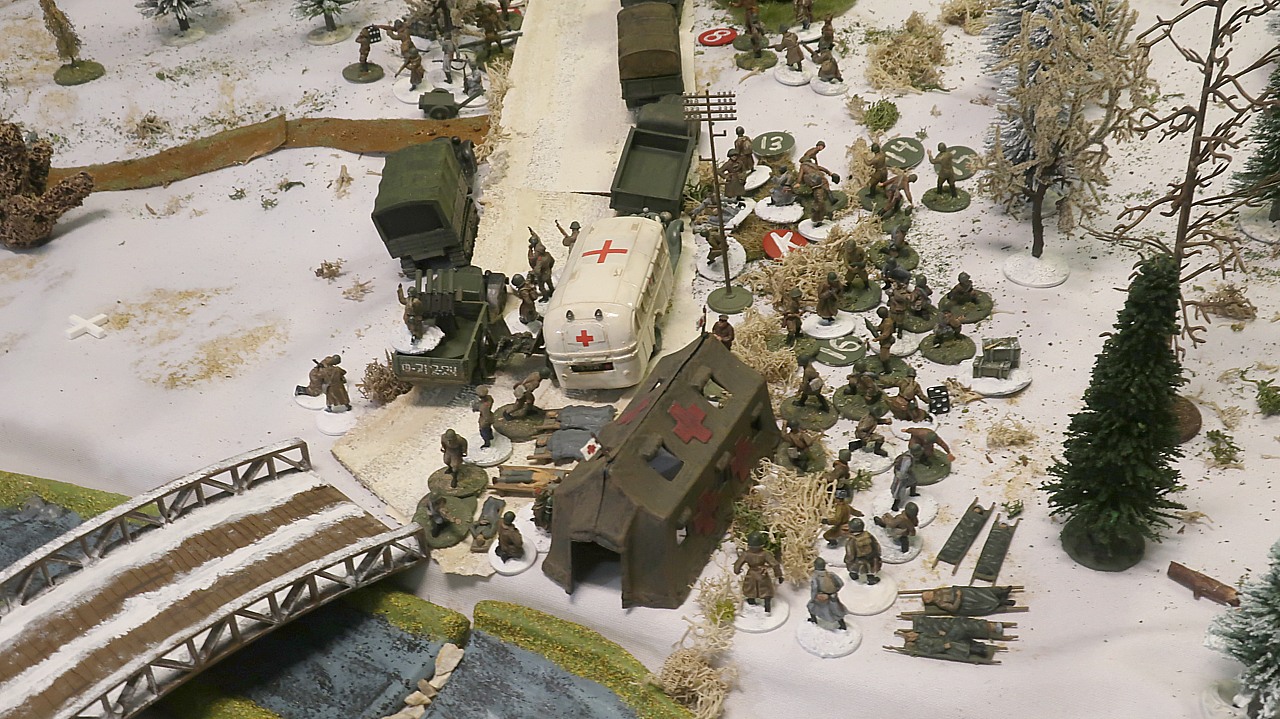
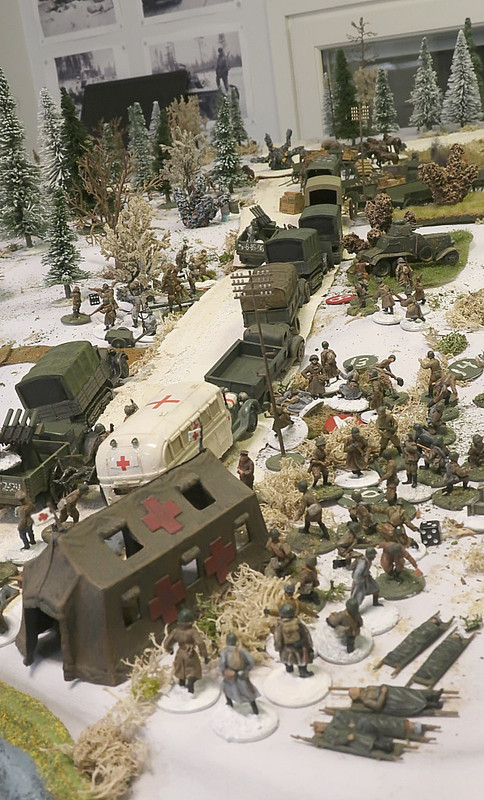
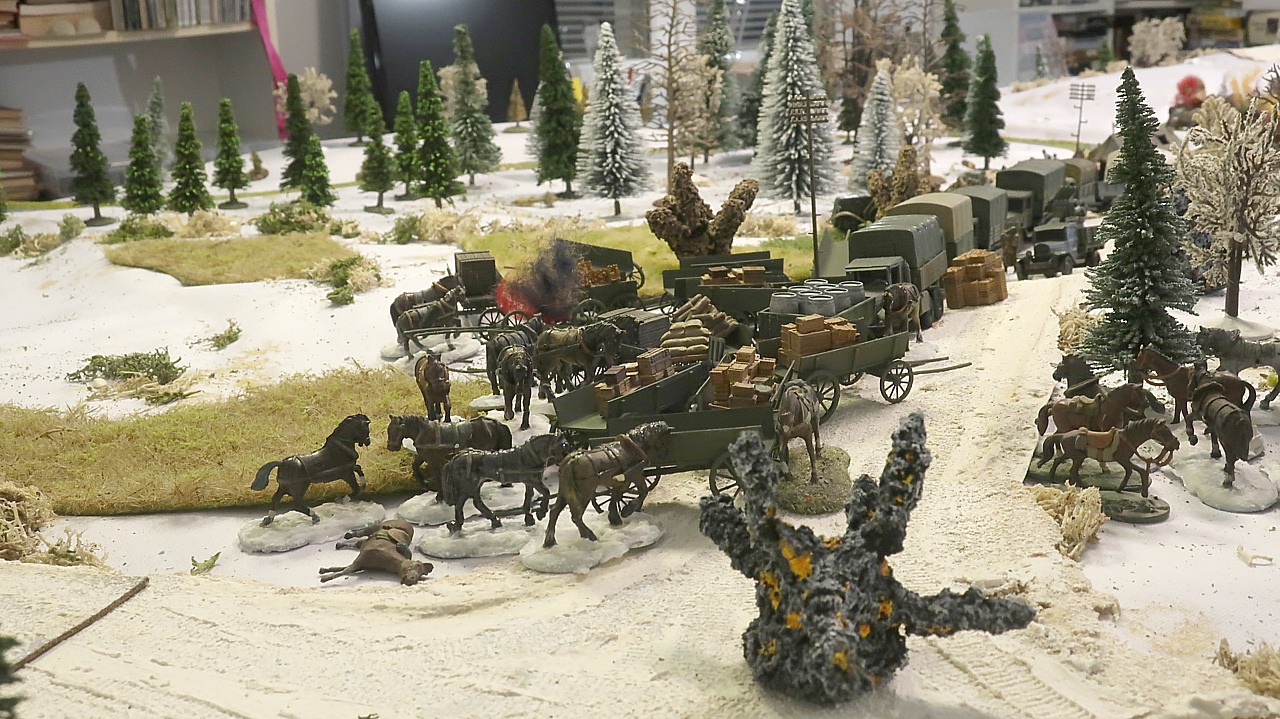
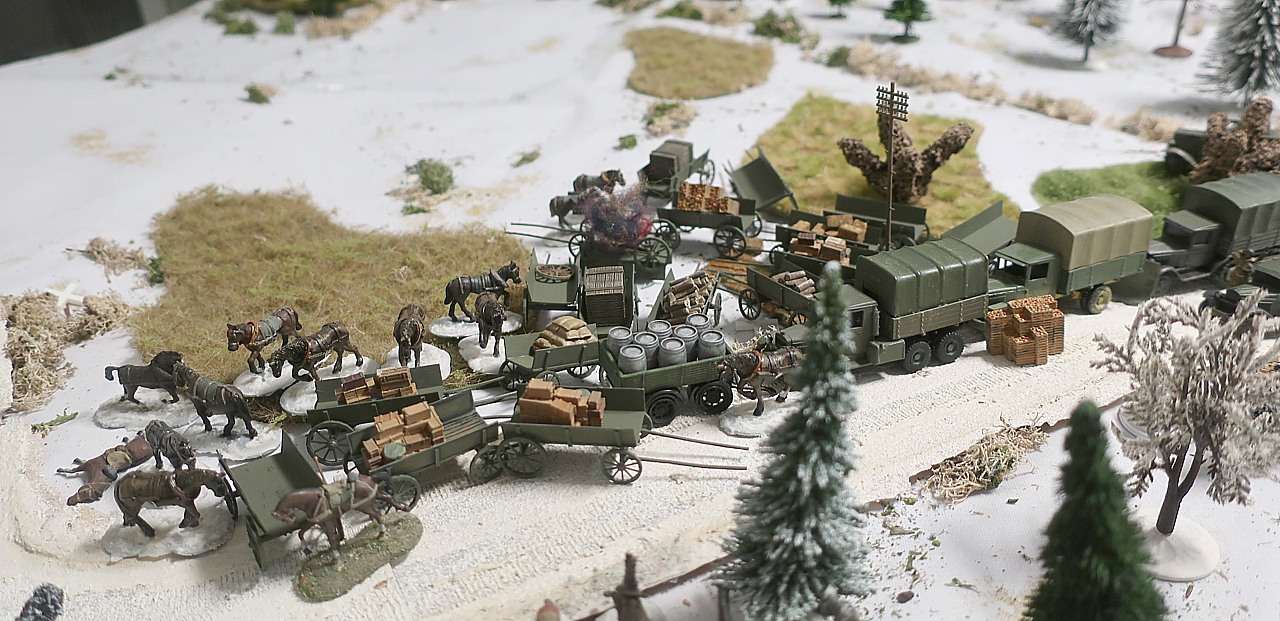
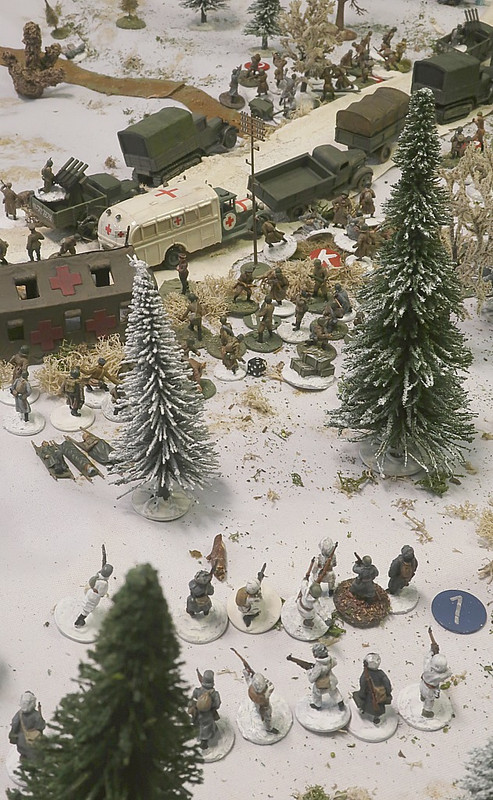
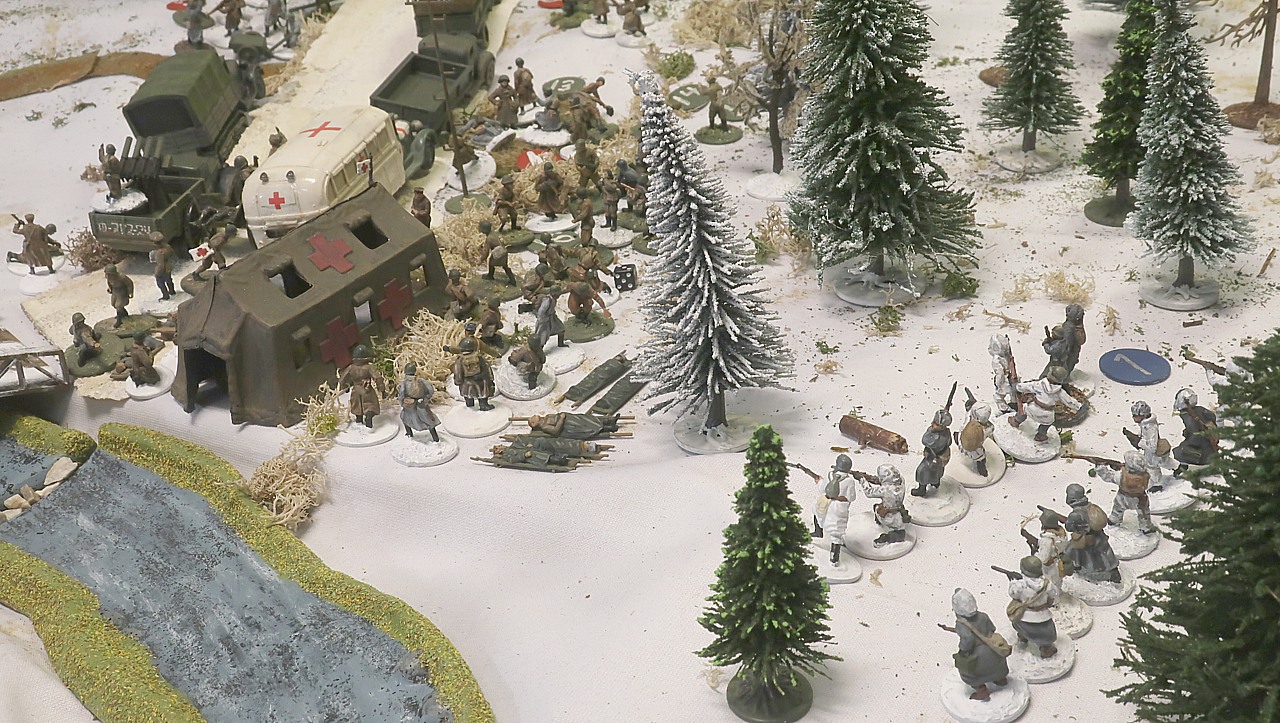
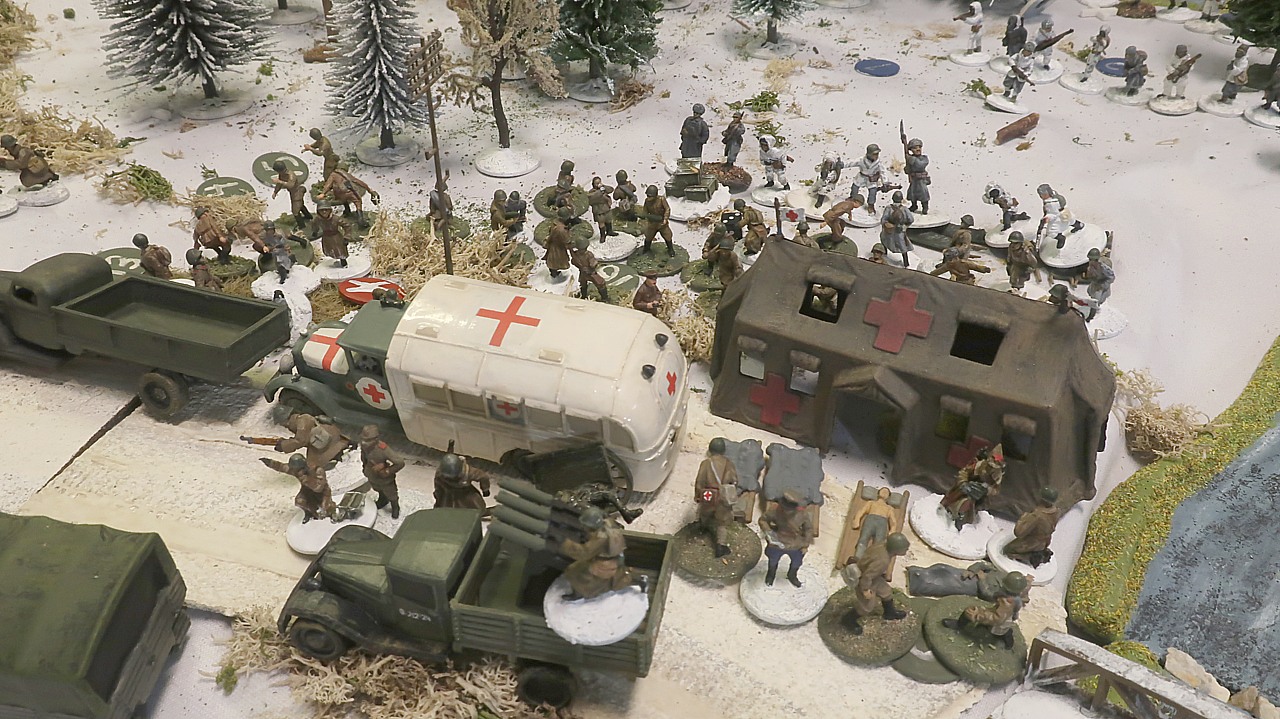
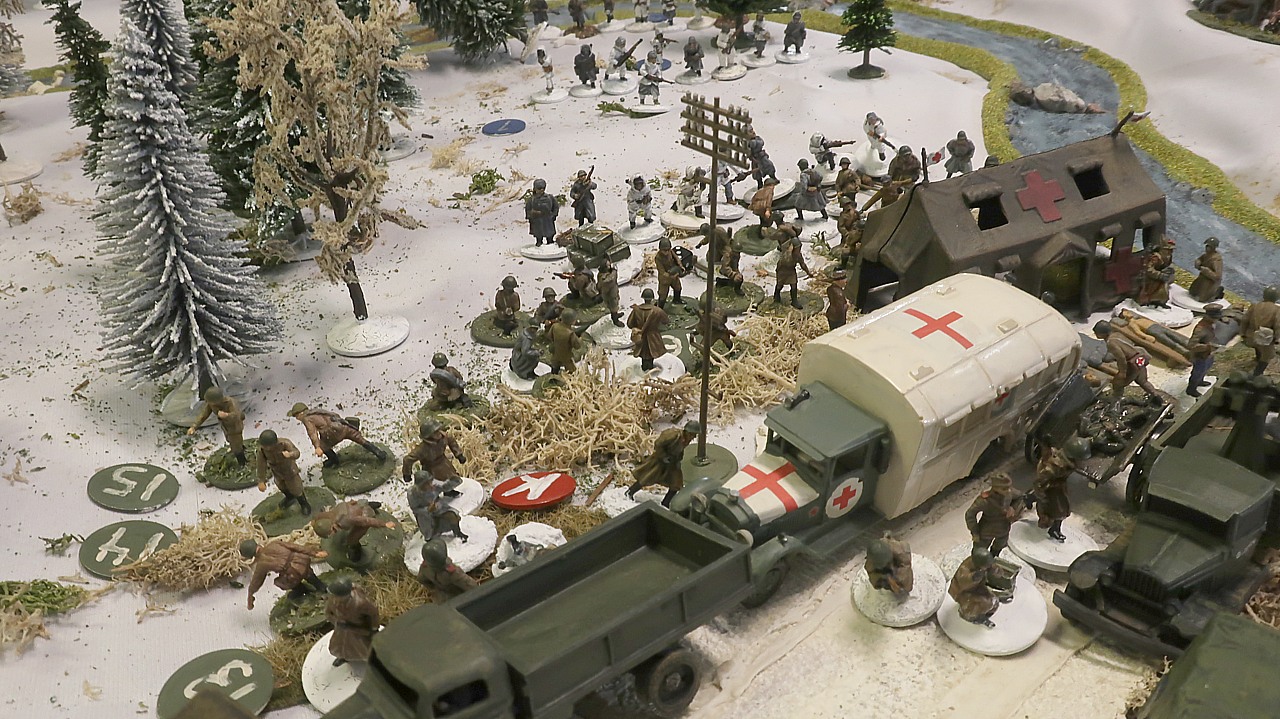
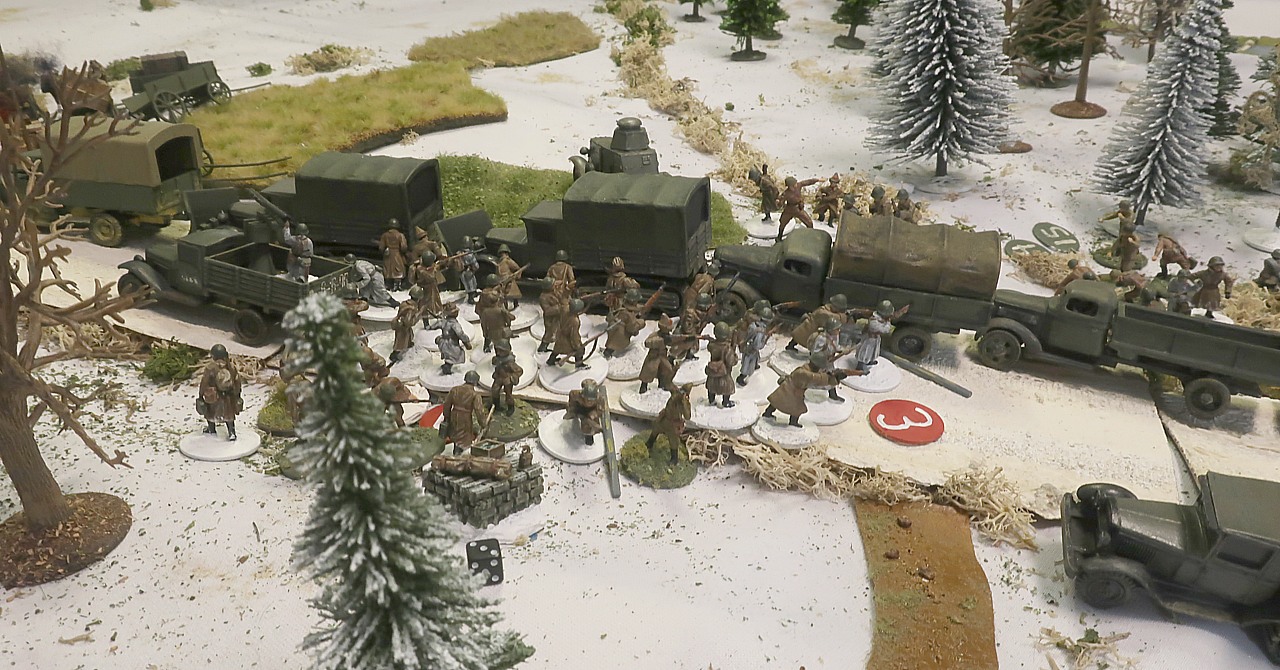
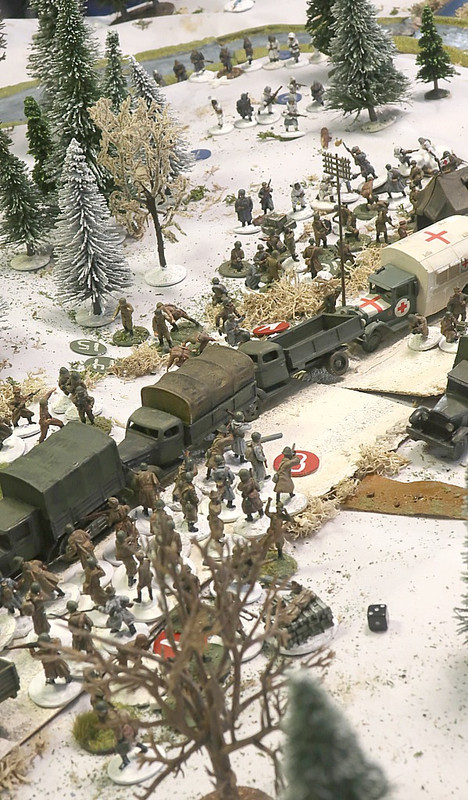
Indeed, Combat Group Sharov have chosen the banks of the Mustajoki River to station many of their supplies and logistics units.
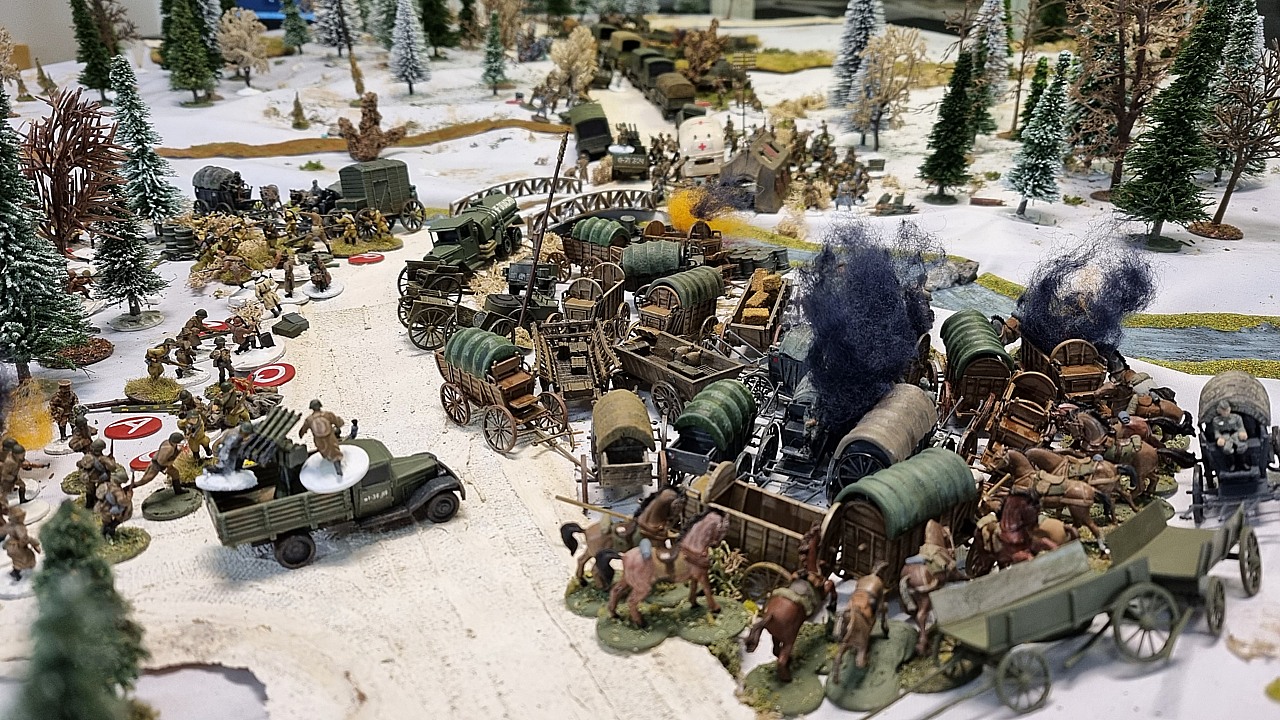
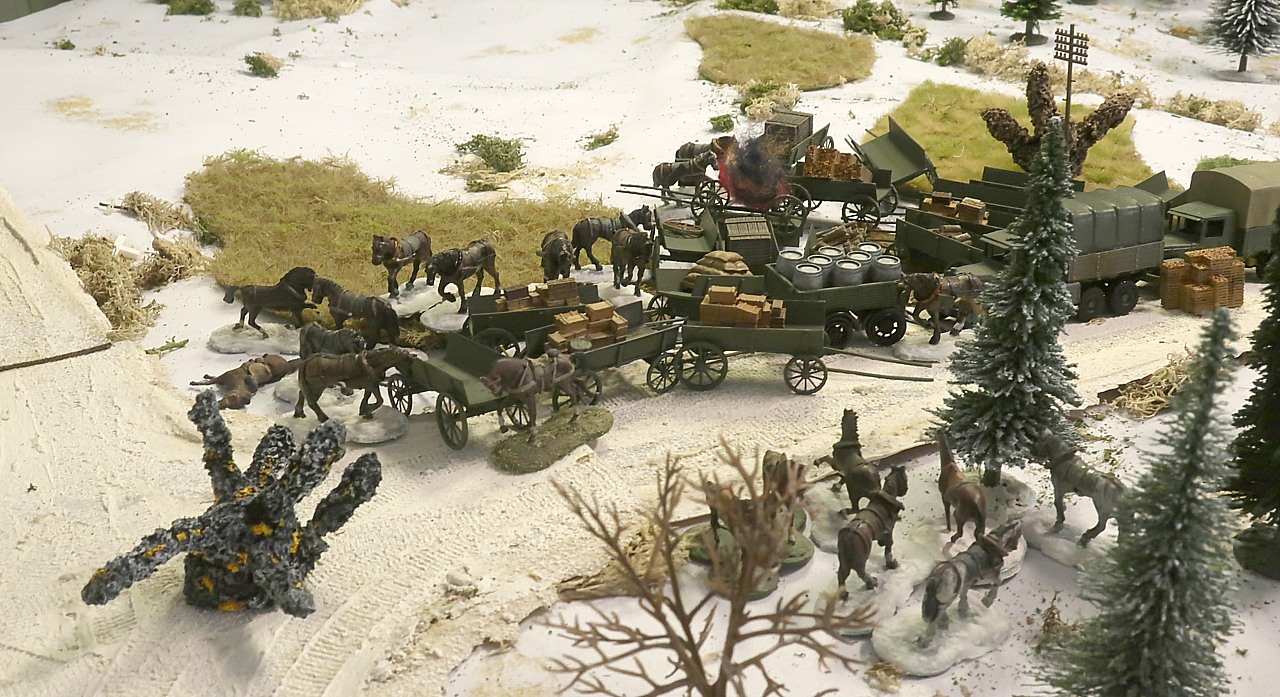
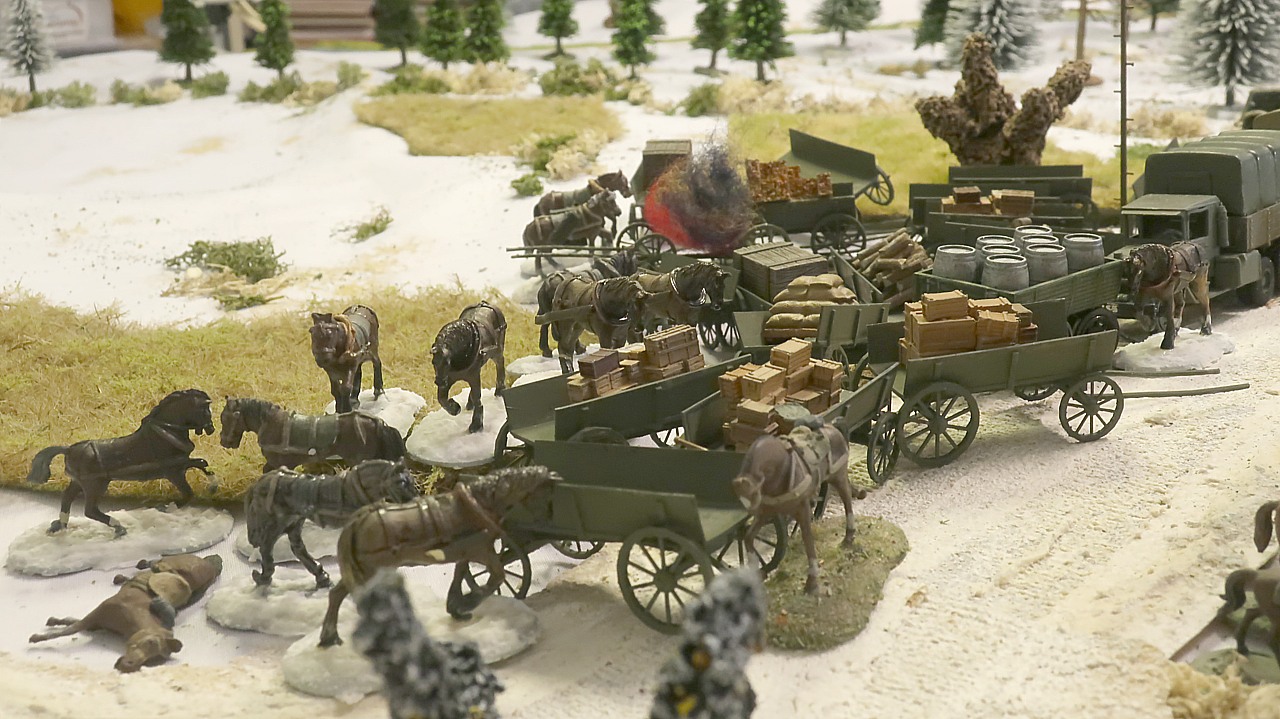
The Regimental Supply and Maintenance Battalion is a huge unit by itself. But luckily for me, most of it is in the south, out of this campaign, with Combat Group Tchaikovsky. Still, I would need about 95 wagon models to represent all those on this Table... and I've only got around 40. And I'd need about 170 more horses than I own...
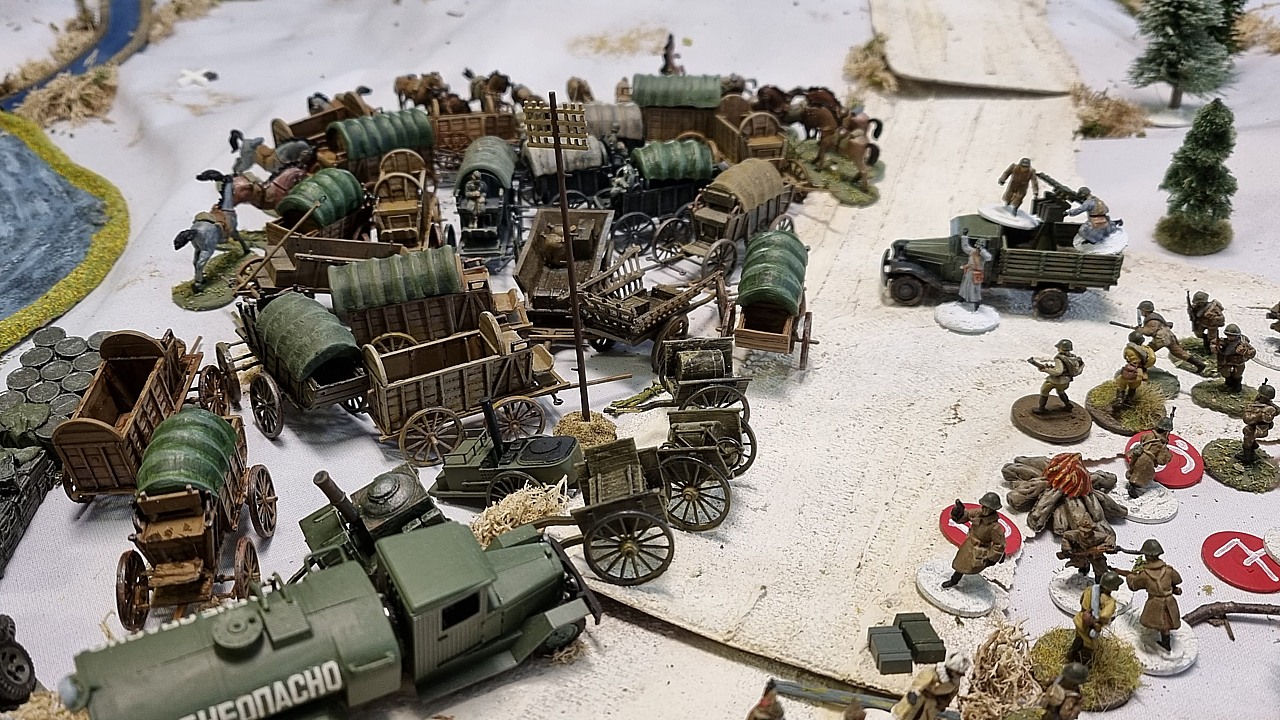
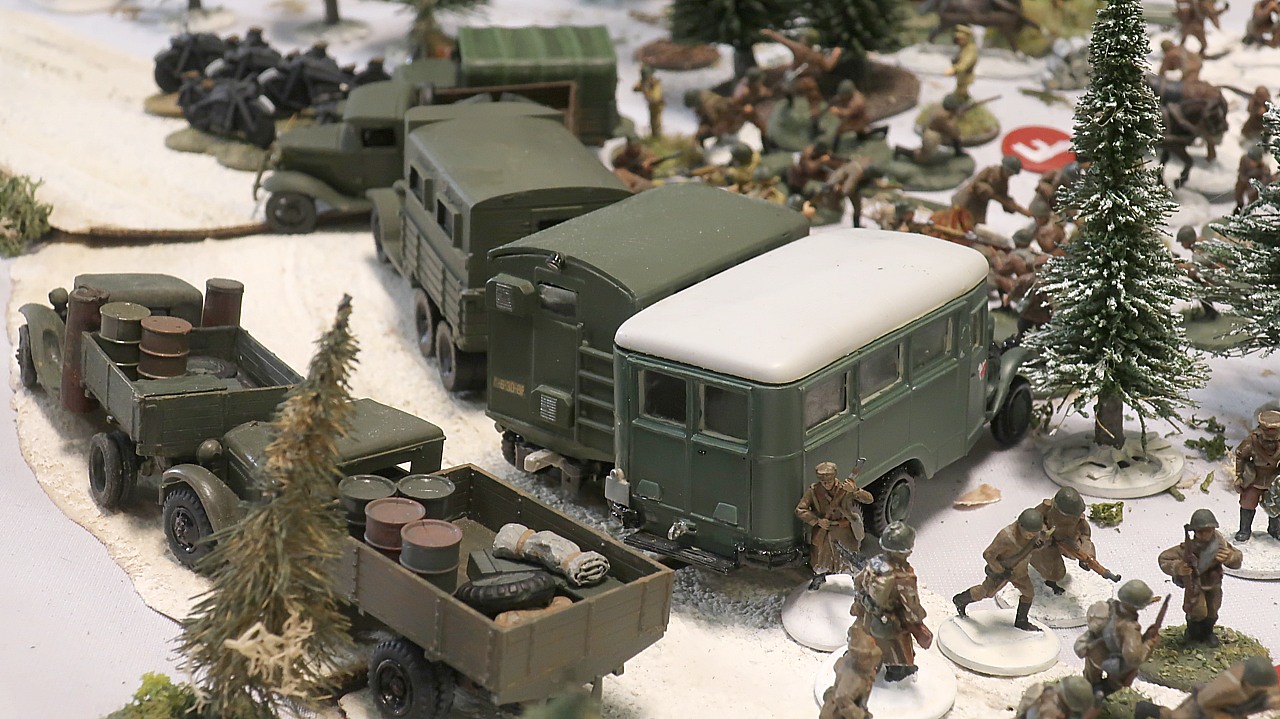
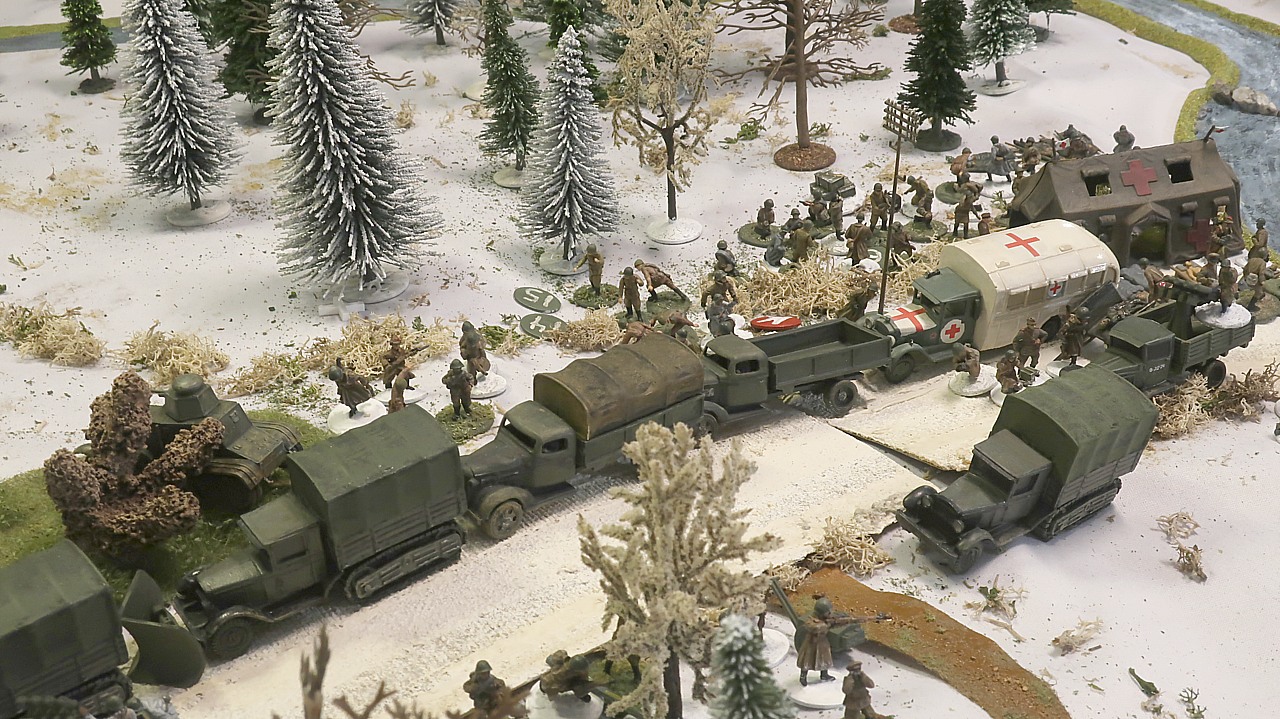
These are the wagons, field kitchens, trucks and horses of Tom's 2nd Transportation Platoon, east of the river.
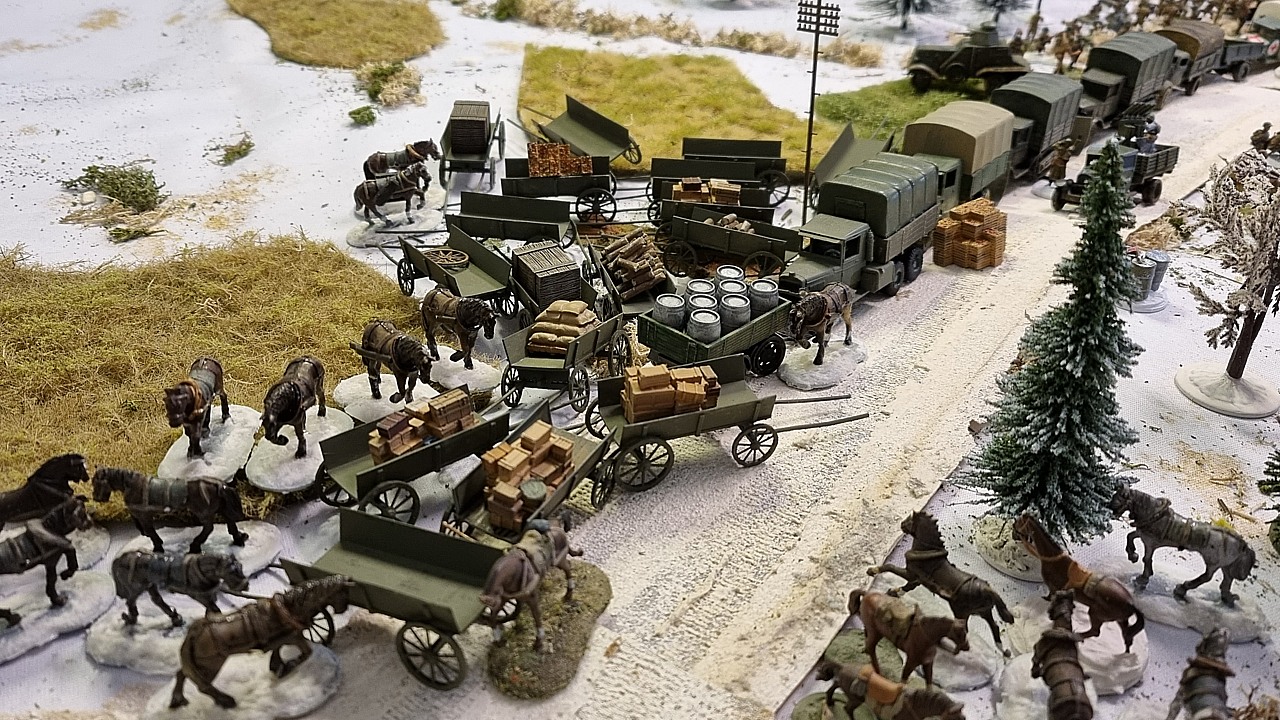
Tom's 1st Transportation Platoon's wagons, horses and snow plow trucks.
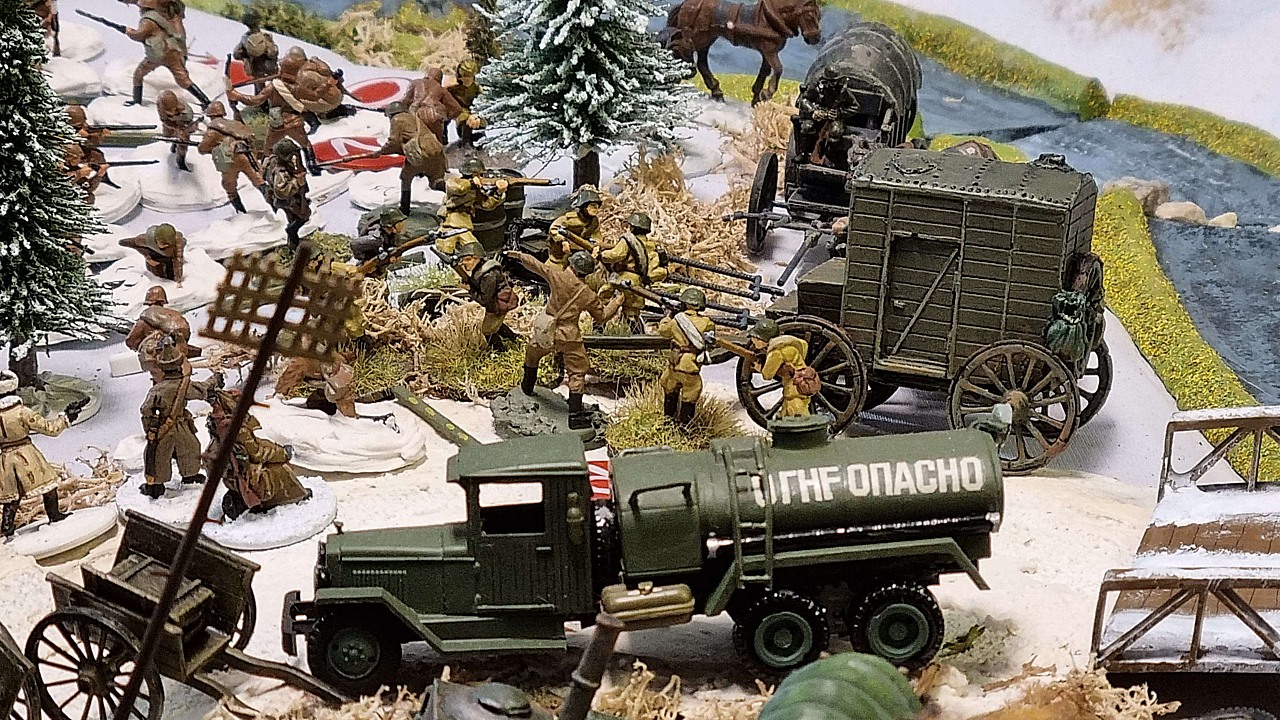
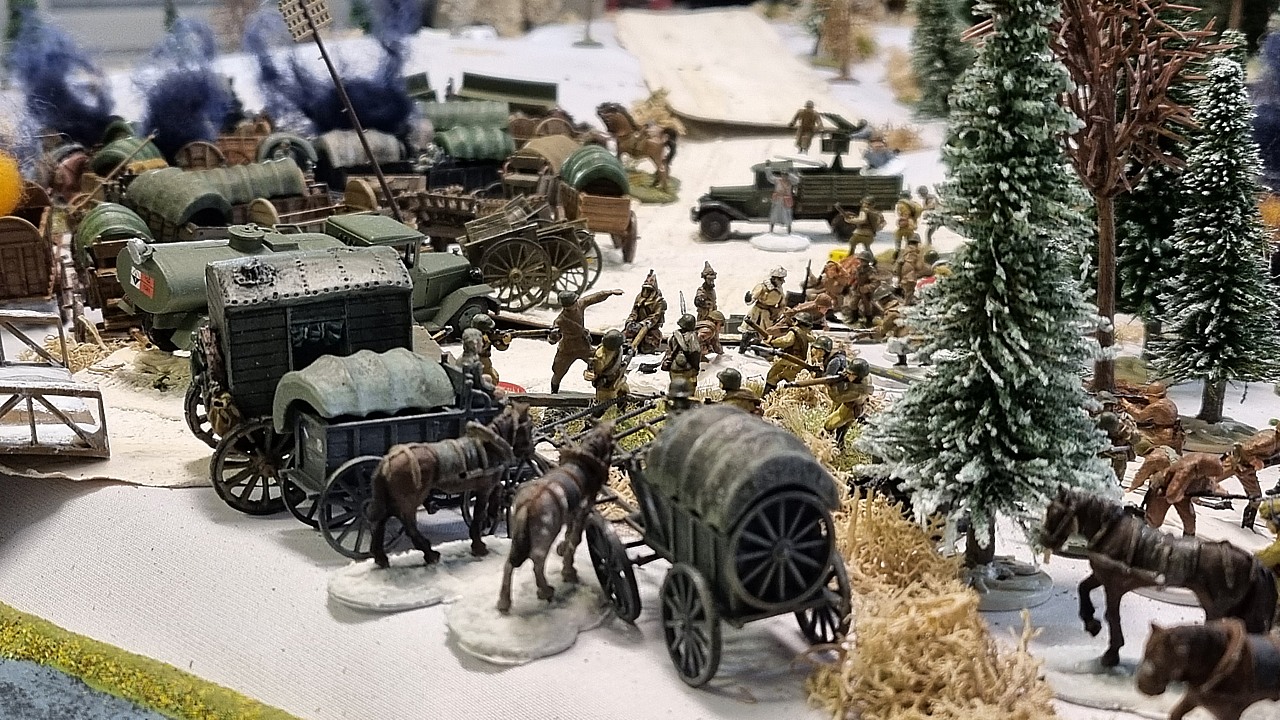
The Special Detachment's wagons.

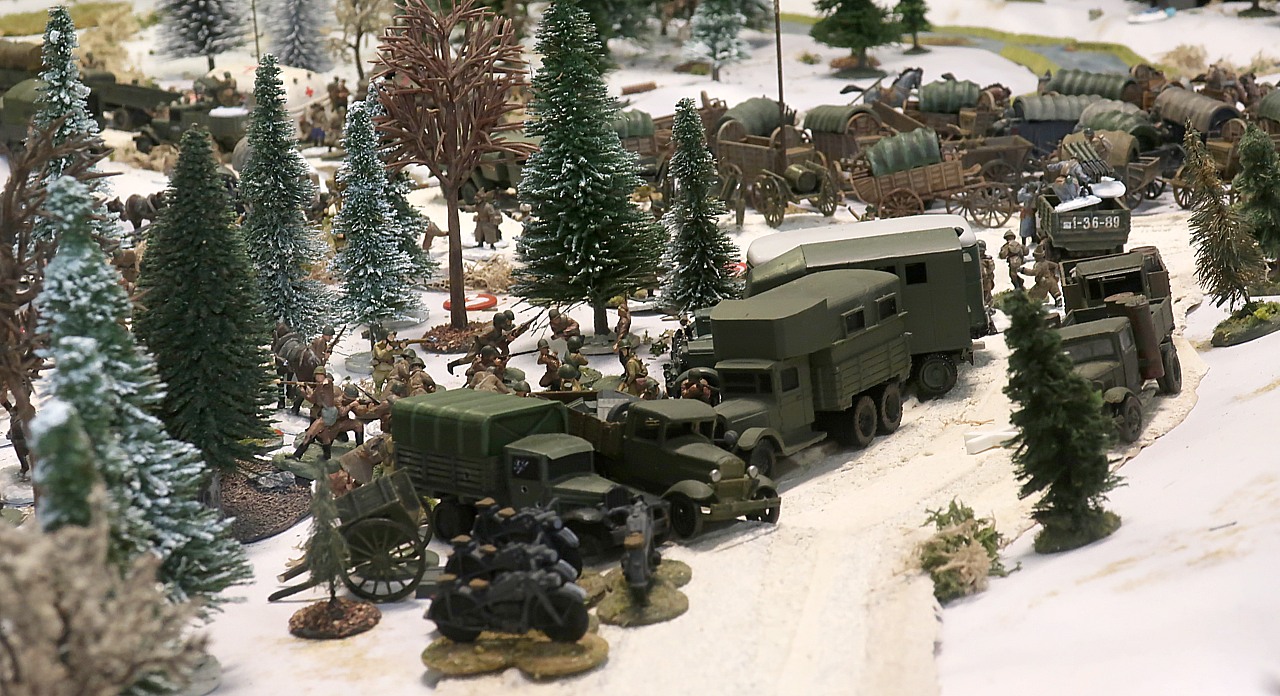
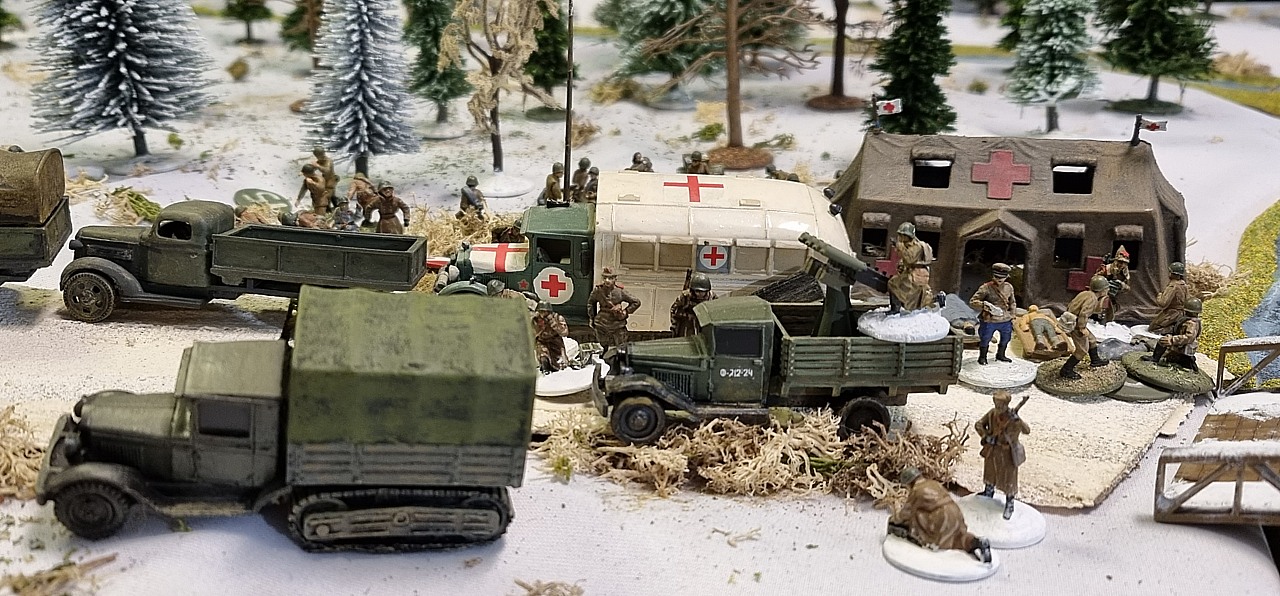
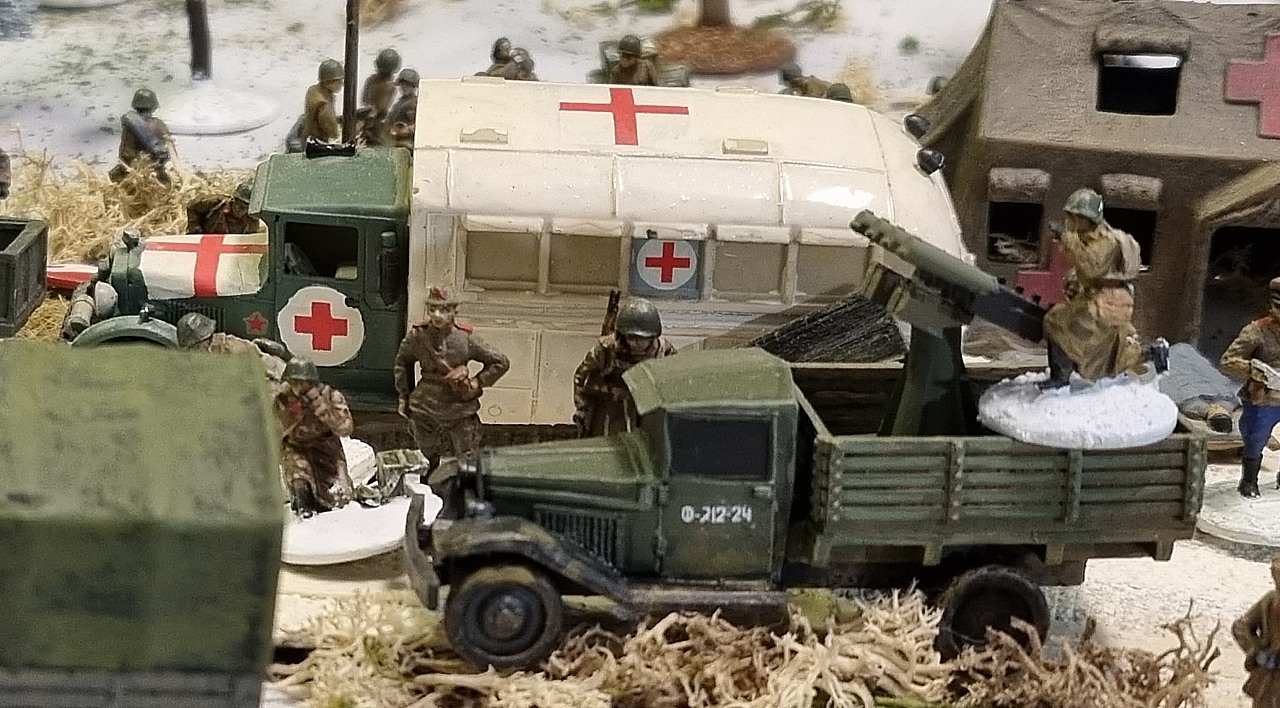
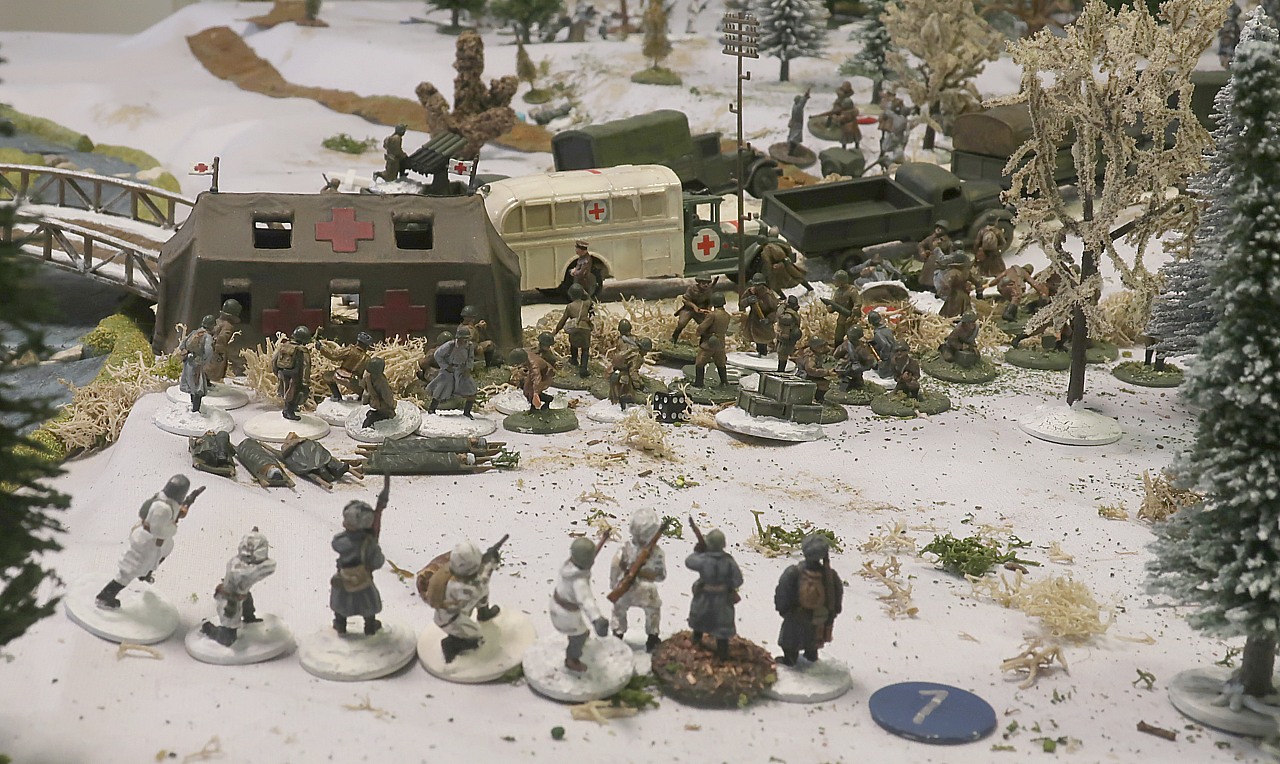
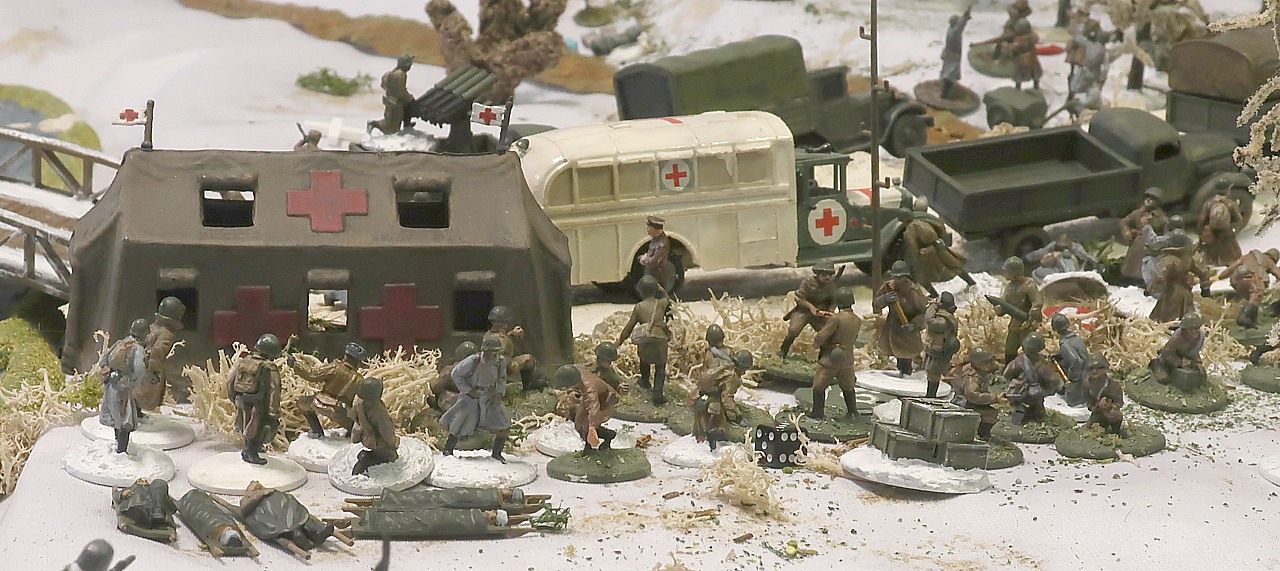
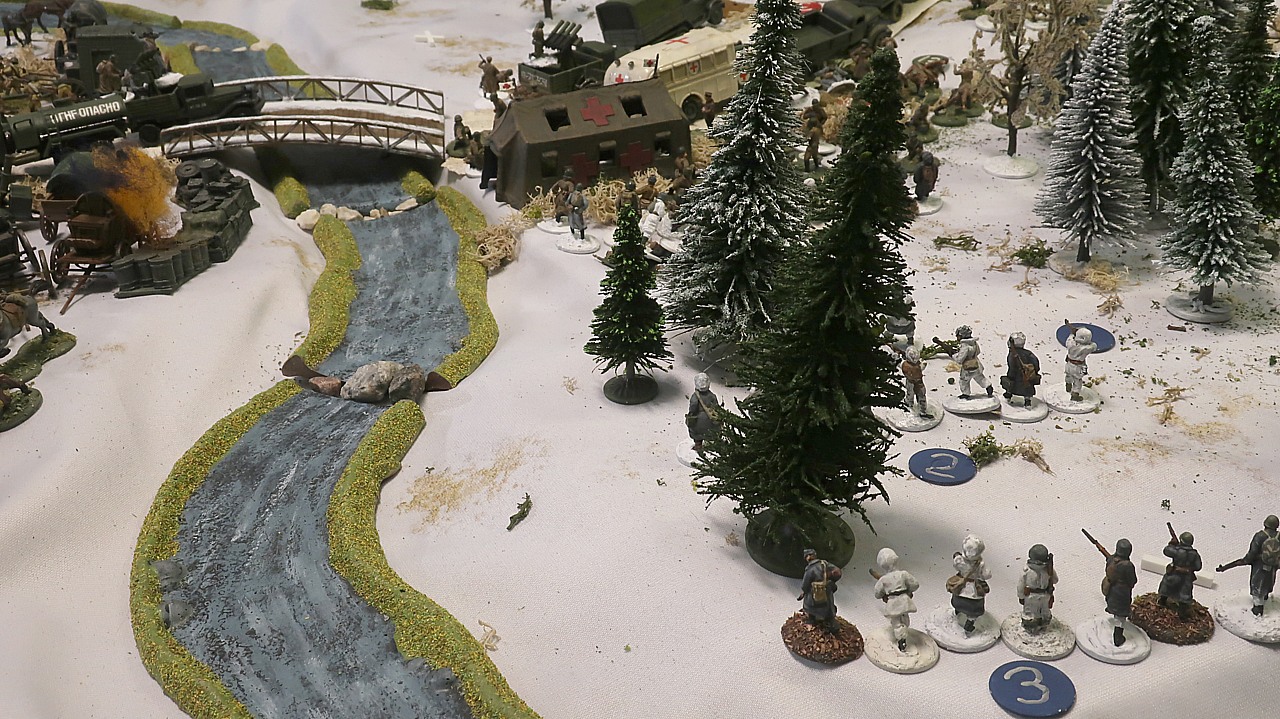
The table is also home for the Dressing Station, the closest thing to a field hospital that Combat Group Sharov has. Led by two doctors, the dressing station's complement includes a dentist, a pharmacist, several medical NCOs and ambulance drivers and teamsters, and of course also a politruk.
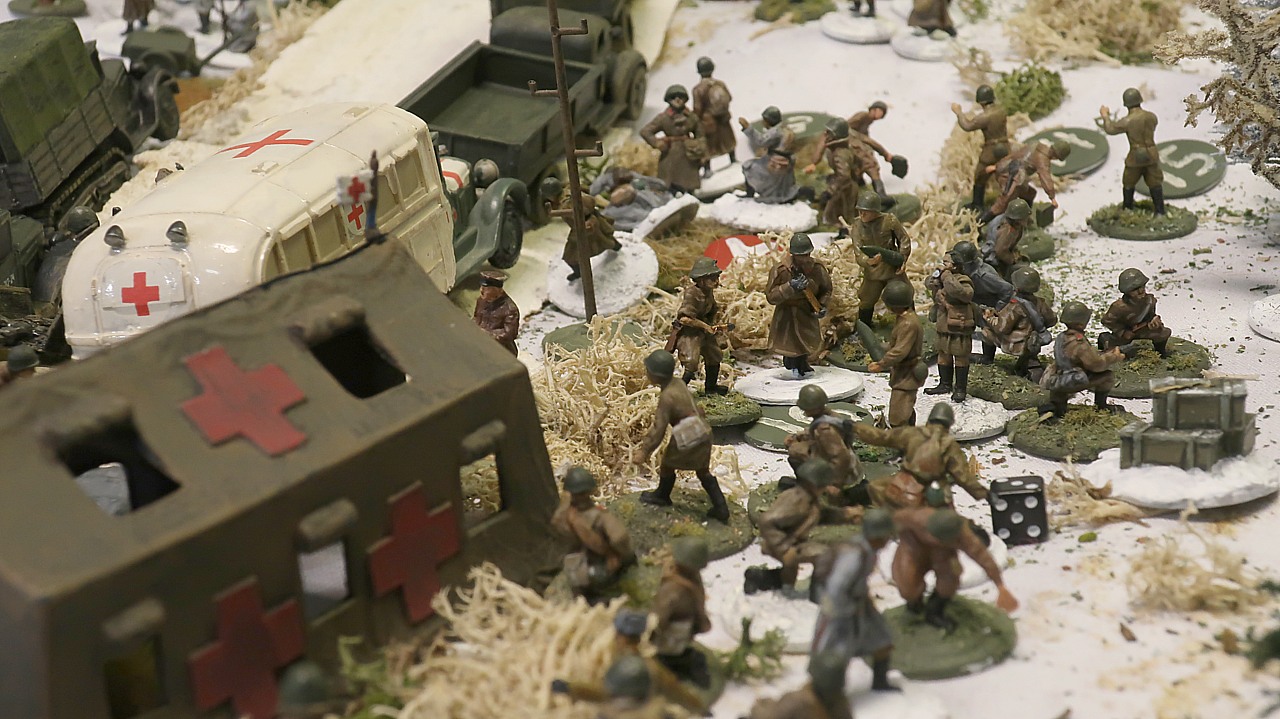
What's more, the dressing station is assisted by a whole platoon of stretcher bearers. Here my figure collection again fails me as I don't have 36 unarmed stretcher bearers. So if you see some stretcher bearers carrying artillery shells or something, just ignore it

In his campaign, the availability of the dressing station has an effect on the number of troops recovering from battle. Ordinarily we follow the standard campaign practice where only every third soldier lost in combat is actually out of the campaign, one of other two having to skip the next game and the third one being immediately able to return tot he fray. But in this campaign, troops who do not have access to the dressing station will lose men equal to 50% of the losses, and 25% miss the next game, and 25% are ok.

In addition, if the Russians were to lose the dressing station, it will have a negative effect on Colonel Sharov's Opinion.
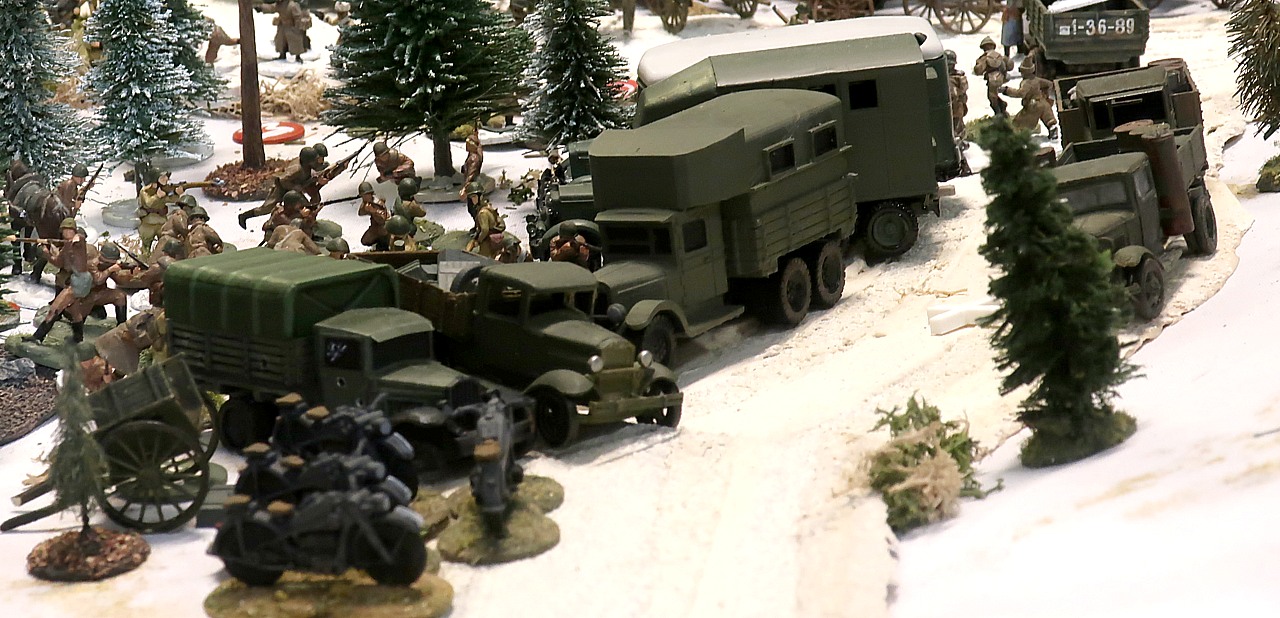
The Russians may have made a mistake in the initial placing of their forces... There are few if any actual combat troops on this table so Tom's and Don's platoons are both composed of teamsters and truck drivers in combat for their first time ever, not real combat troops.
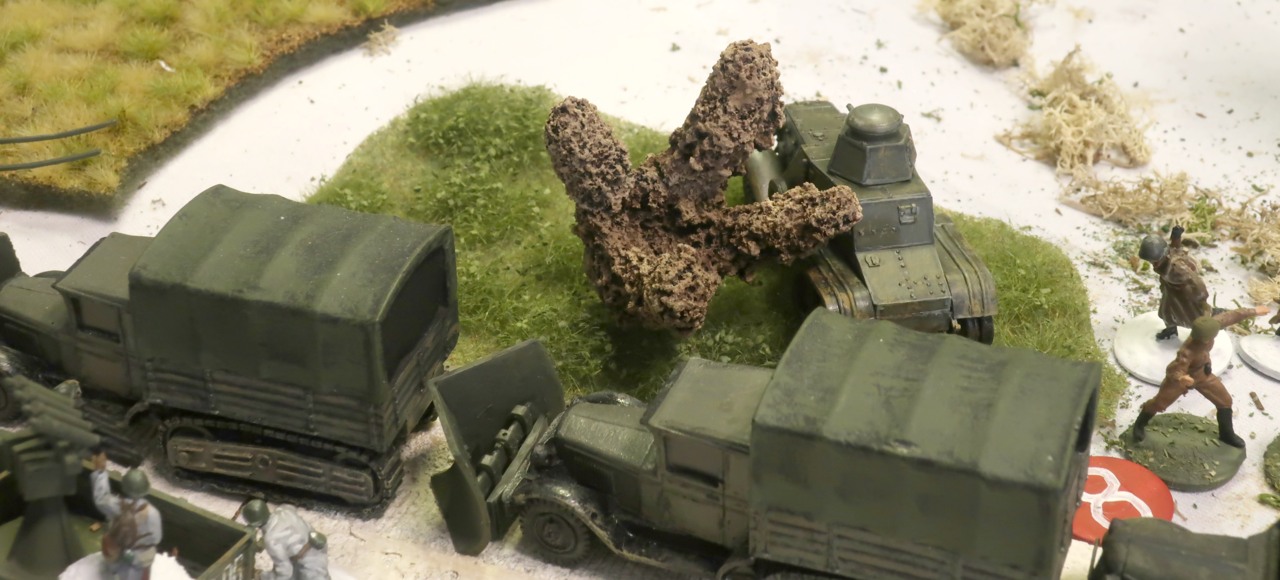
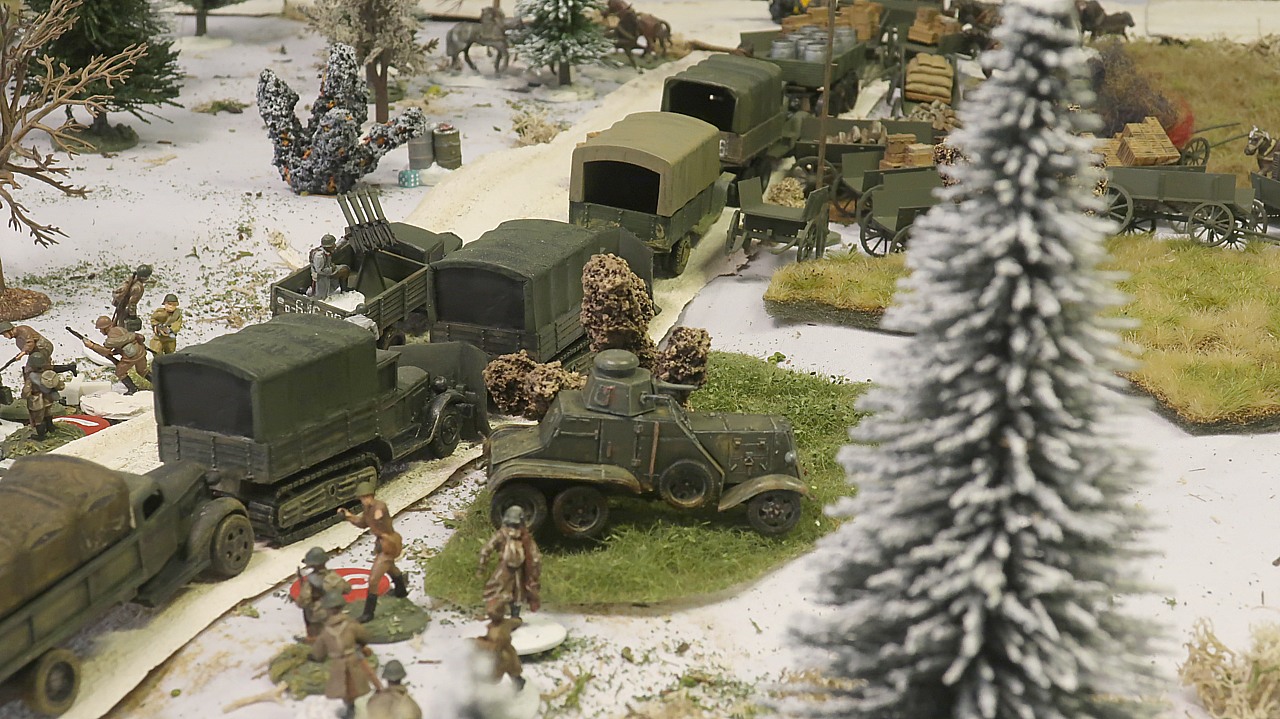
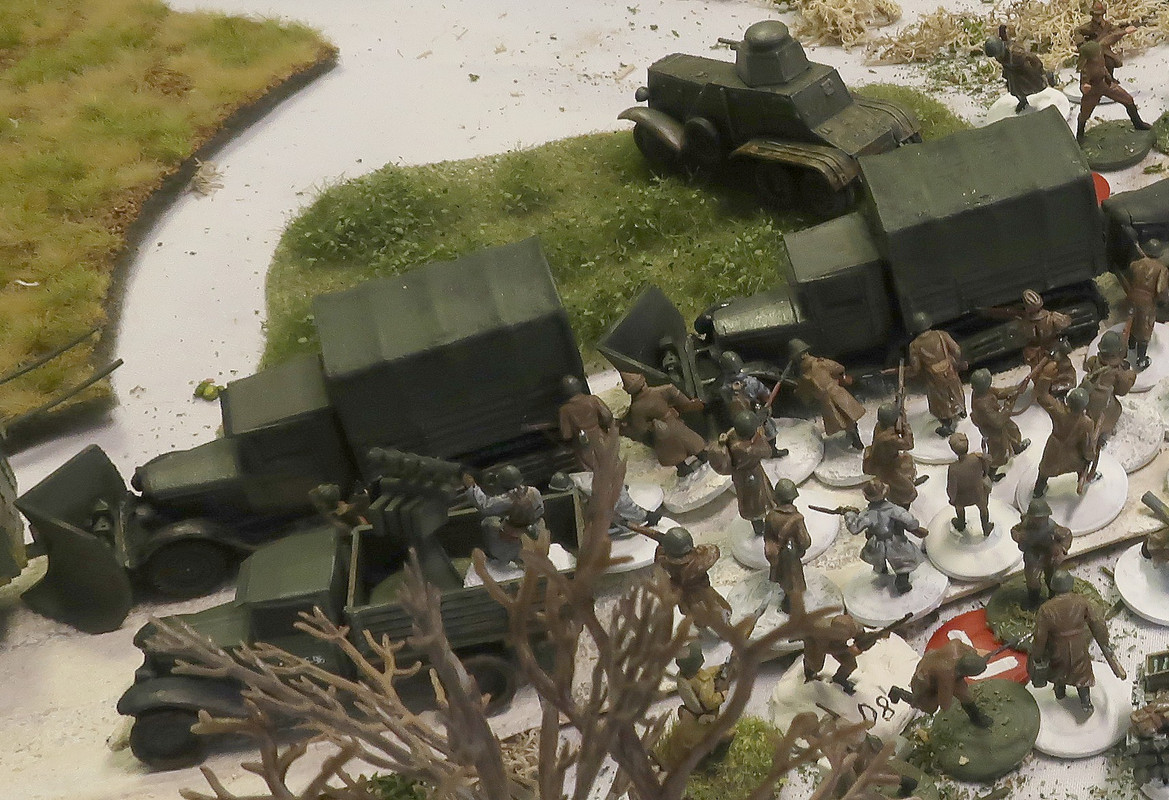
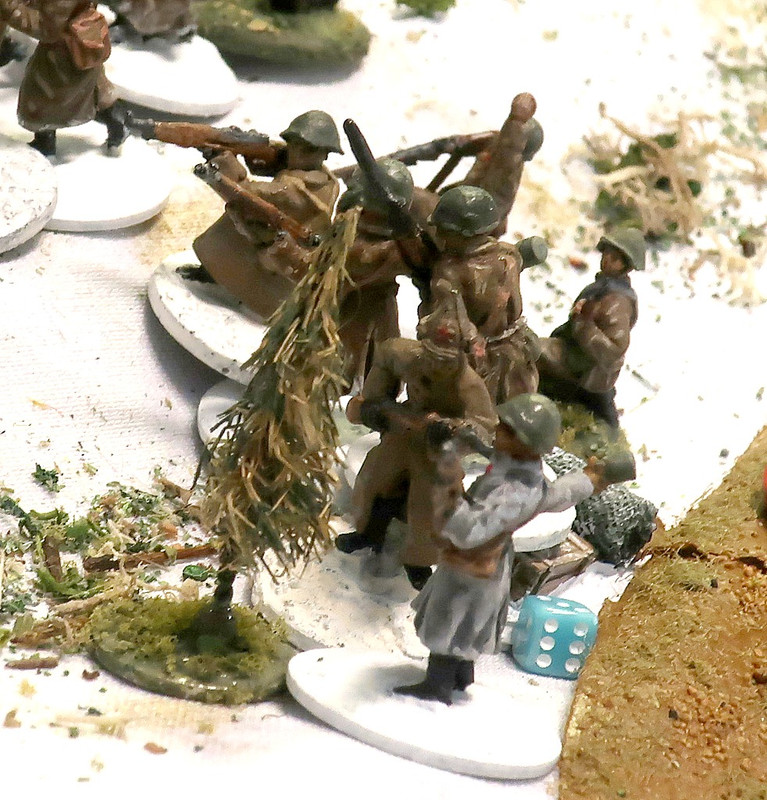
But one unit certainly capable of fighting off some Finns is the Regimental Anti-Aircraft Platoon. The Regimental Anti-Aircraft Company most of which does not feature in this campaign - is responsible for countering any enemy air units. Though not intended for fire support, the four-barrel AAMGs have lots of firepower when used against enemy ground units. The platoon has three of these truck-mounted weapons.
img]https://i.postimg.cc/brxfH3Y6/IMG-0207.jpg[/img]
Date: 21 December 1939, Day Twenty-Two of the Winter War, 1845 hours. Campaign Turn 7.
Location: Table M, Mustajoki, about 37 kilometers north of the village of Suomussalmi, in central-eastern Finland. About forty kilometers east from the border of the Soviet Union.
Weather Conditions: Cloudy skies, a high wind from south by south-east, -13 degrees Celsius (+9 degrees Fahrenheit). There is about 30 cm (12 inches) of snow.
The sun drops below the horizon at 1600 hrs and it is again dark. The cries of crows sound in the distance. Further away, there is the drone of bombers, the Red Air Force returning home after another murderous bombing of Finnish population centers...
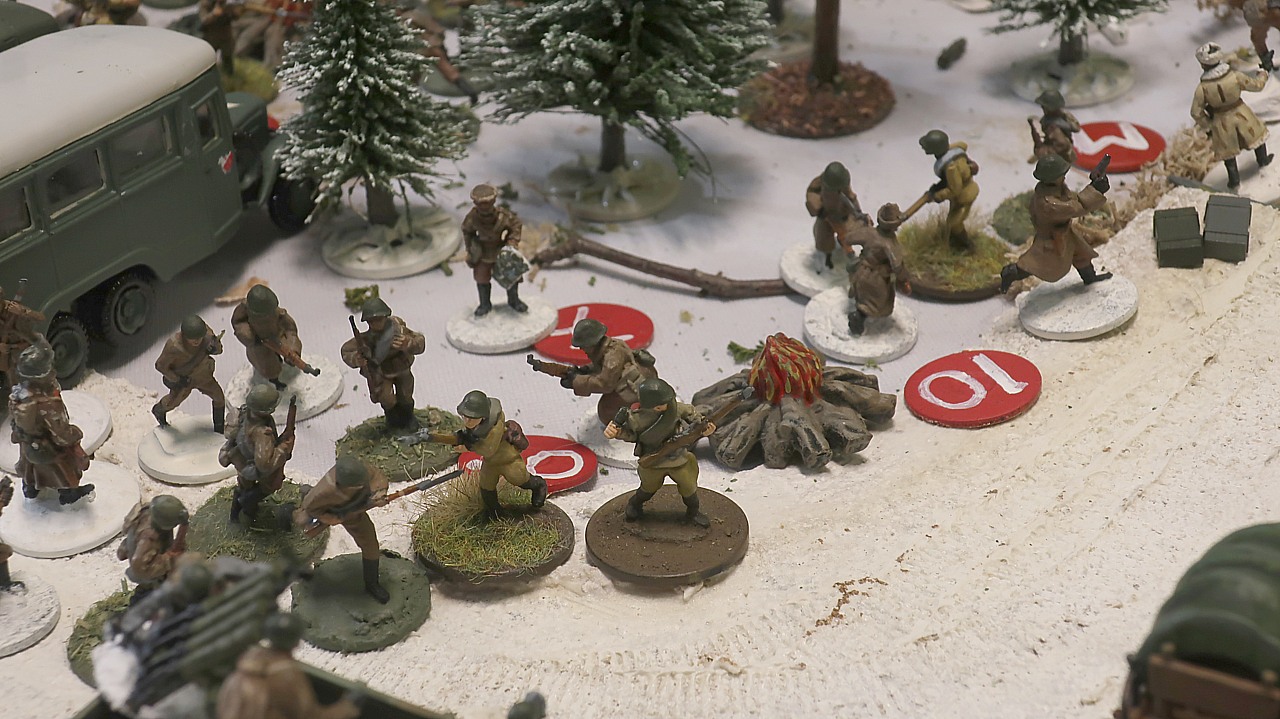
It is dark and the men are clustered around campfires, trying to keep warm in the freezing weather...

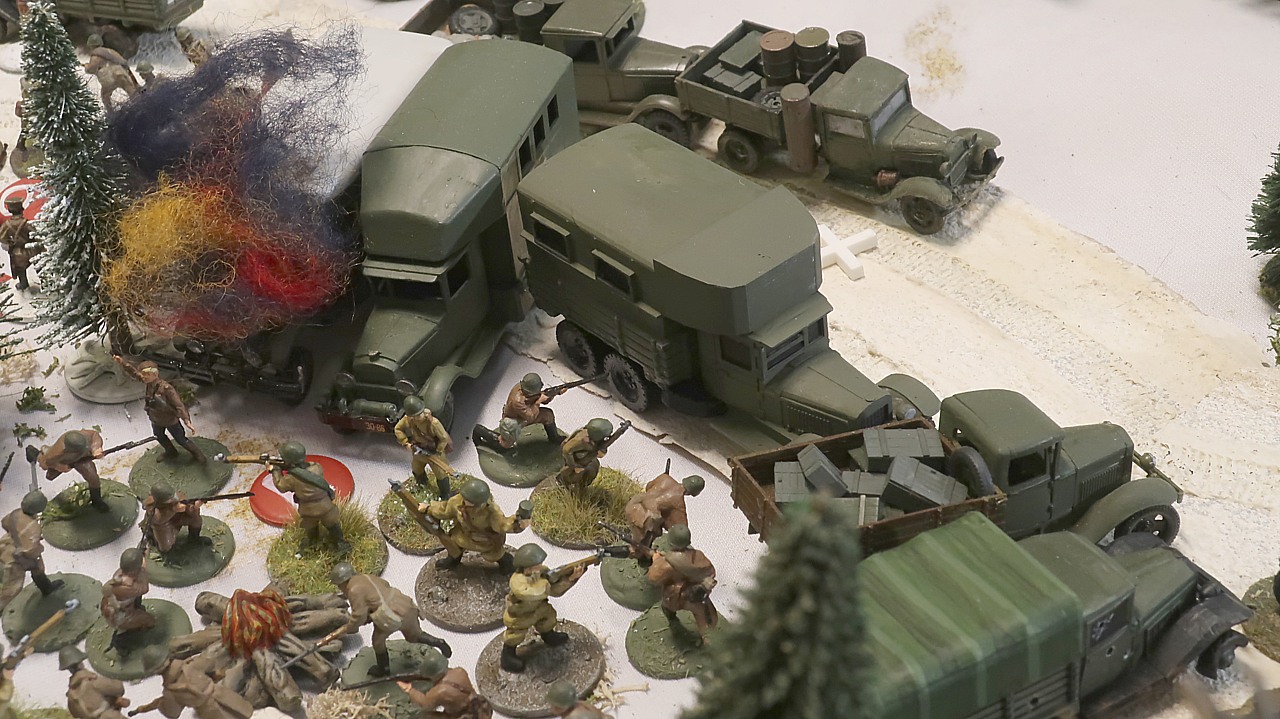
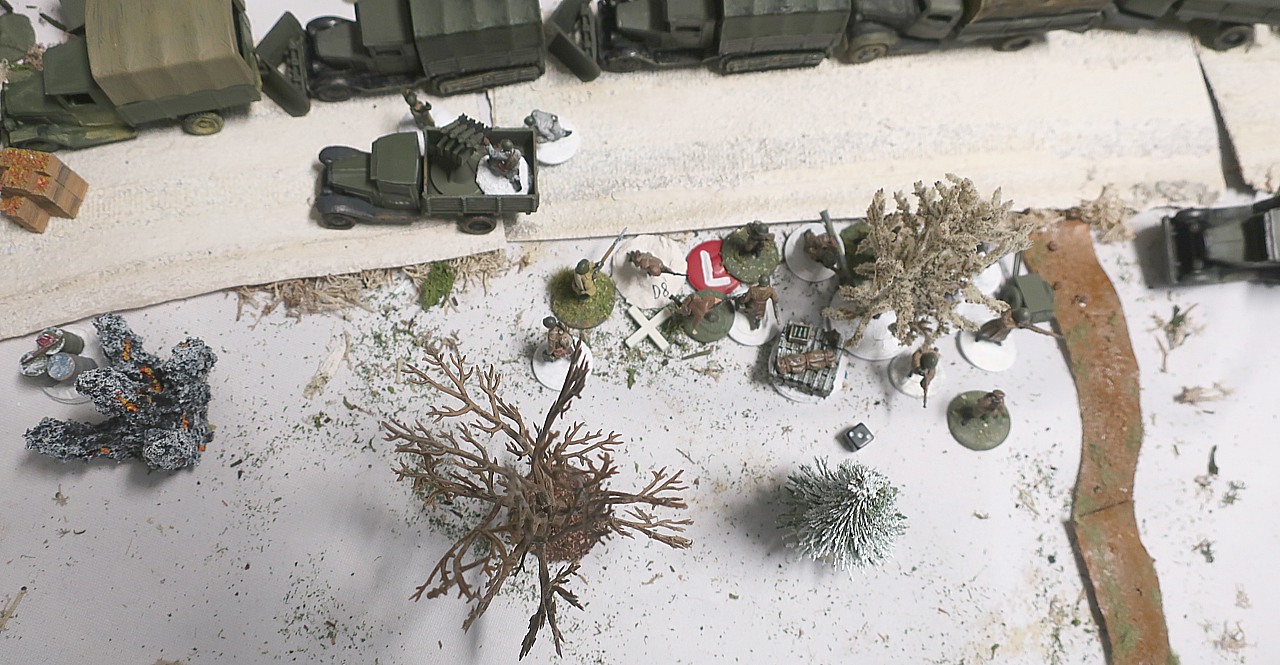
Workshop 2 consists of a foreman, ten cobblers, seven tailors, a saddle smith and a wheel smith. They have these five trucks and they are responsible for maintenance and repair of the regiment's combat gear other than weapons (which are the domain of Workshop 1, destroyed in Game 4).
The Automotive Inspection Detachment (F) is led by a lieutenant and a Workshop Manager. Their responsibility is to supervise the repair and maintenance of motor vehicles. The Detachment consists of a filer, an electrician and a tractor mechanic, plus two truck drivers.

The Regimental Signals Platoon is responsible for maintaining communications between the sub-units of Group Sharov, as well as with the 163 rd Division HQ. Should this unit not be within LoC of Colonel Sharov, he will be less active than normal as the HQ won't be able to prod him on.
The platoon's telephone centrals and cable form the regiment's field telephone net. They are
also the technicians who will be sent to fix the telephone line, if it doesn't work.
N is the HQ platoon of the Regimental Signals Company. Not really a platoon, it consists of a sub-lieutenant, his assistant sergeant, eight semaphore and signals men, plus three teamsters.
O is the Airspace observer section of the Signals Company. Composed of an NCO, three observers and a teamster. Their job is to keep an eye on the skies above, in case the White bandits bring some aircraft into the battle. Thus far they haven't seen a single enemy aircraft.
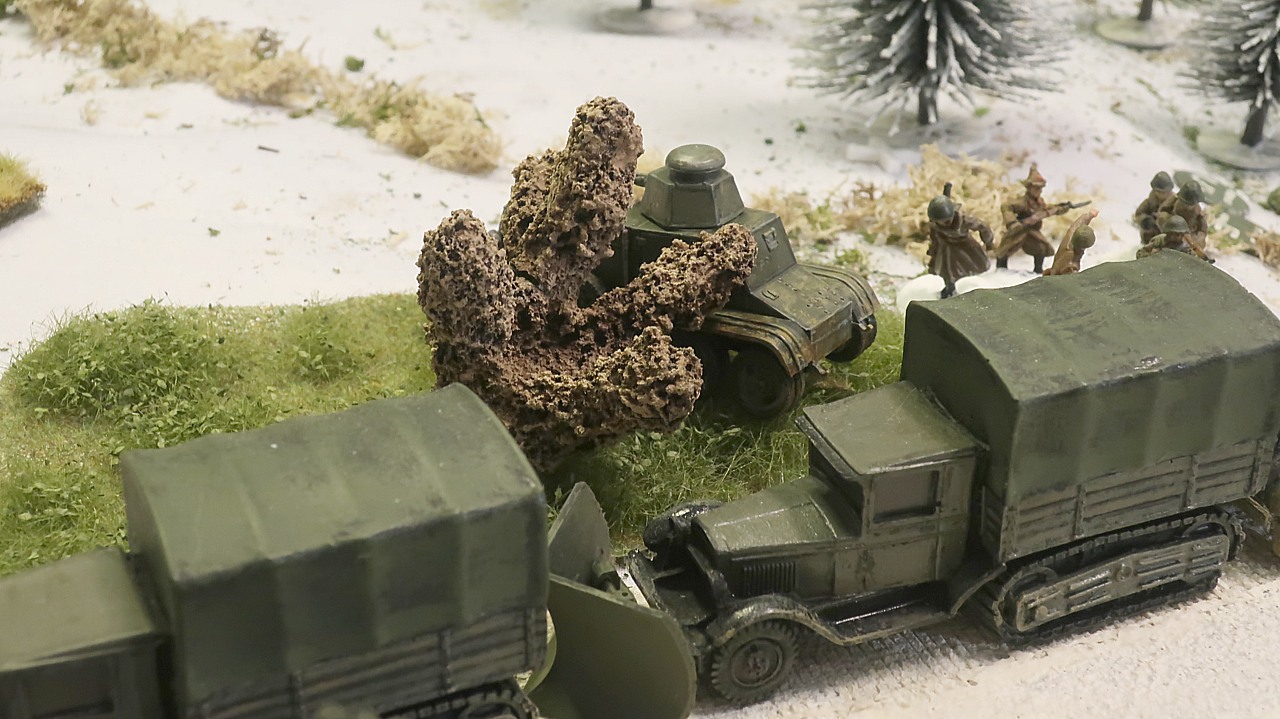
Suddenly, there is a tearing roar as an 81mm mortar bomb drops from the sky... exploding with a blinding flash and a humongous bang right next to the BA-27M armored car and the 1st Trasnportation Platoon's snow plow trucks.... showering them with shell splinters...
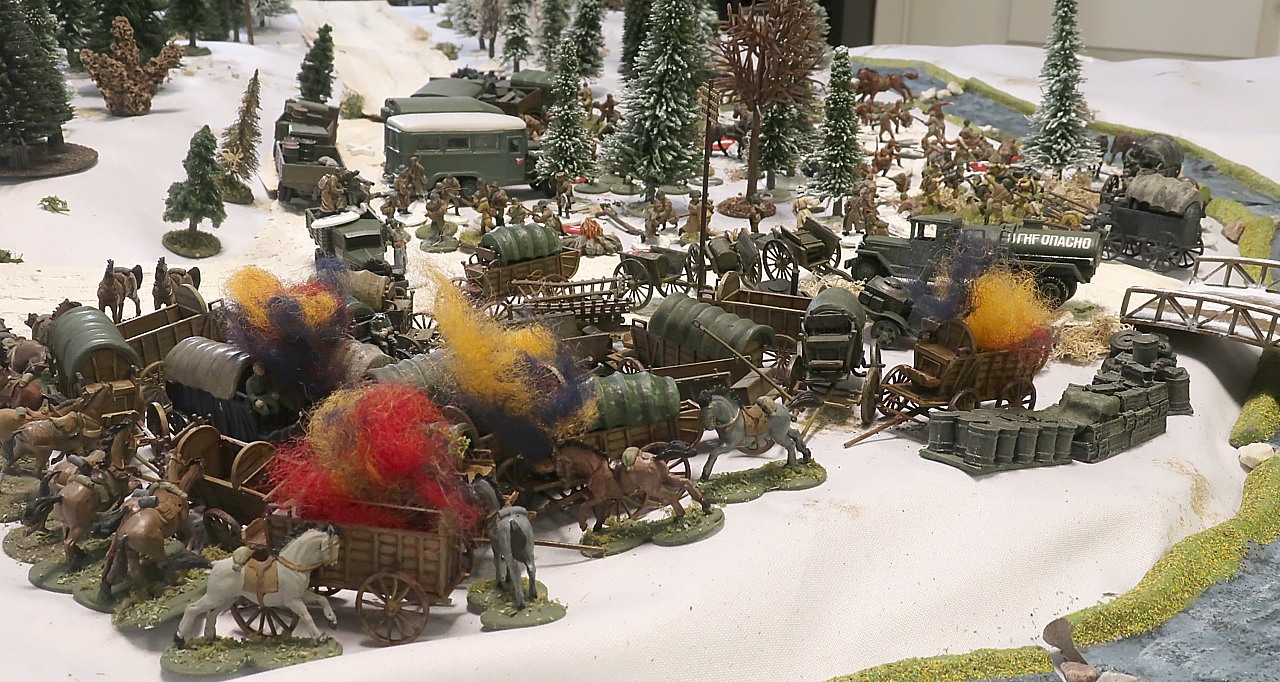
More bombs crash into the 2nd Transportation platoon's wagons...
More bombs are dropping onto the wagons of the 1st Transportation Platoon...
This is the pre-game barrage. In the campaign, the pre-game barrage can actually damage the units on the table. The Finns have only two 81mm mortars firing so this is not an especially powerful barrage... the Soviet units will be able to deploy unless they roll a 1 on the die.
Nevetheless, one of the horses dies and a couple of the wagons are destroyed...
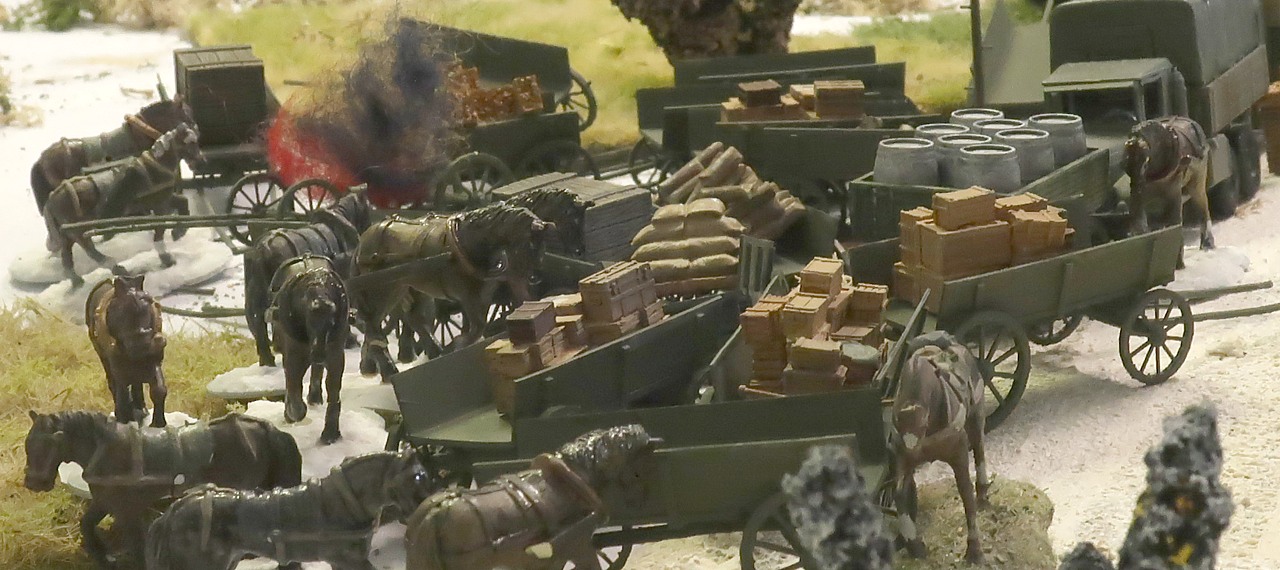
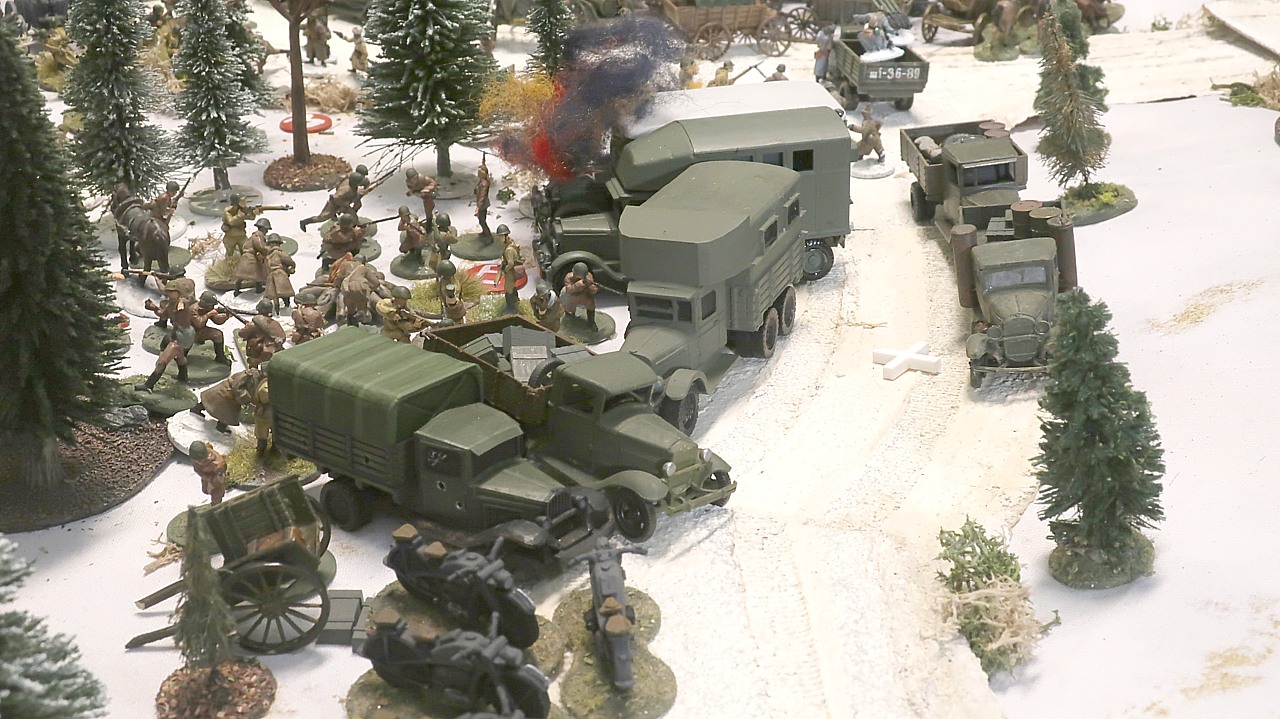
One of the Workshop 2's trucks is blown to pieces... Jarkko declares he wants to capture the Signals Company's messenger motorcycles and they are thankfully not damaged by the bombardment...

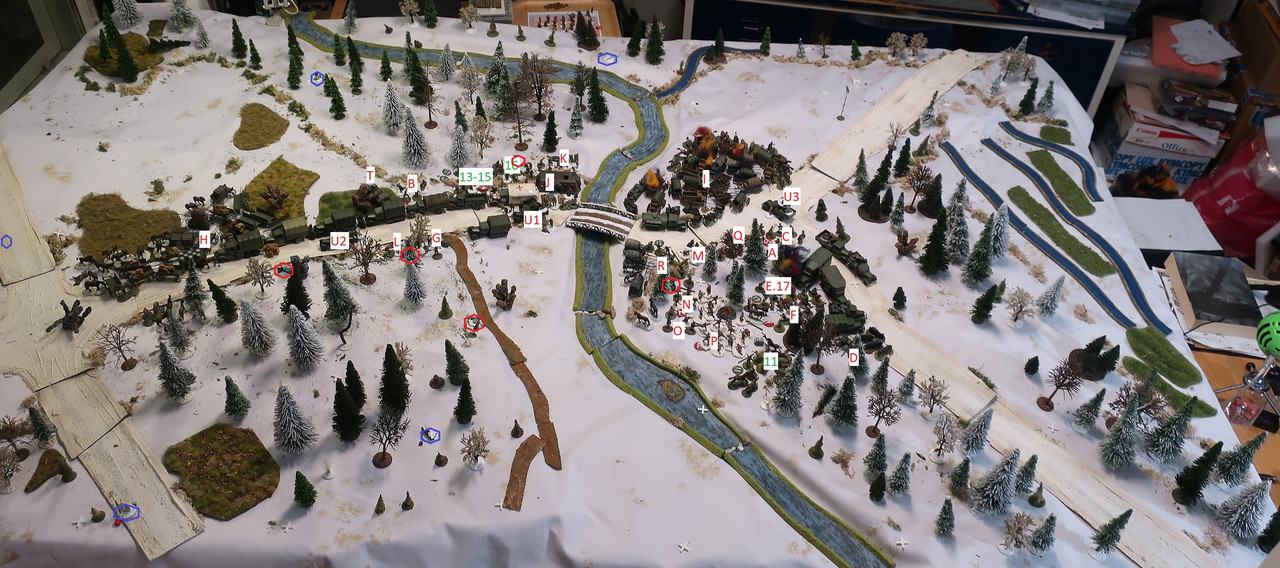
THE SOVIETS, RED and GREEN:
A. 5-RSM-1 Supply and Maintenance HQ
B. 5-RSM-2 Rations Supply Detachment
C. 5-RSM-3 Combat Equipment Maintenance Detachment
D. 5-RSM-5 Infantry and Equestrian Equipment Maintenance Detachment
E. 17 5-RSM-6 Workshop 2
F. 18 5-RSM-7 Automotive Inspection Detachment
G. 5-RSM-8 Transportation Company HQ Section
H. 5-RSM-9 1st Transportation Platoon vehicles
I. 5-RSM-10 2nd Transportation Platoon vehicles
J. 5-RSM-11 Dressing Station
K. 5-RSM-12 Stretcher Bearer Platoon
L. 5-RSM-13 Club
M. 6-RS-1 HQ
N. 6-RS-2 HQ Platoon
O. 6-RS-3 Airspace observer section
P. 11. 6-RS-4 Messenger section
Q. 6-RS-63 Section Seven
R. 6-RS-8 Special Detachment
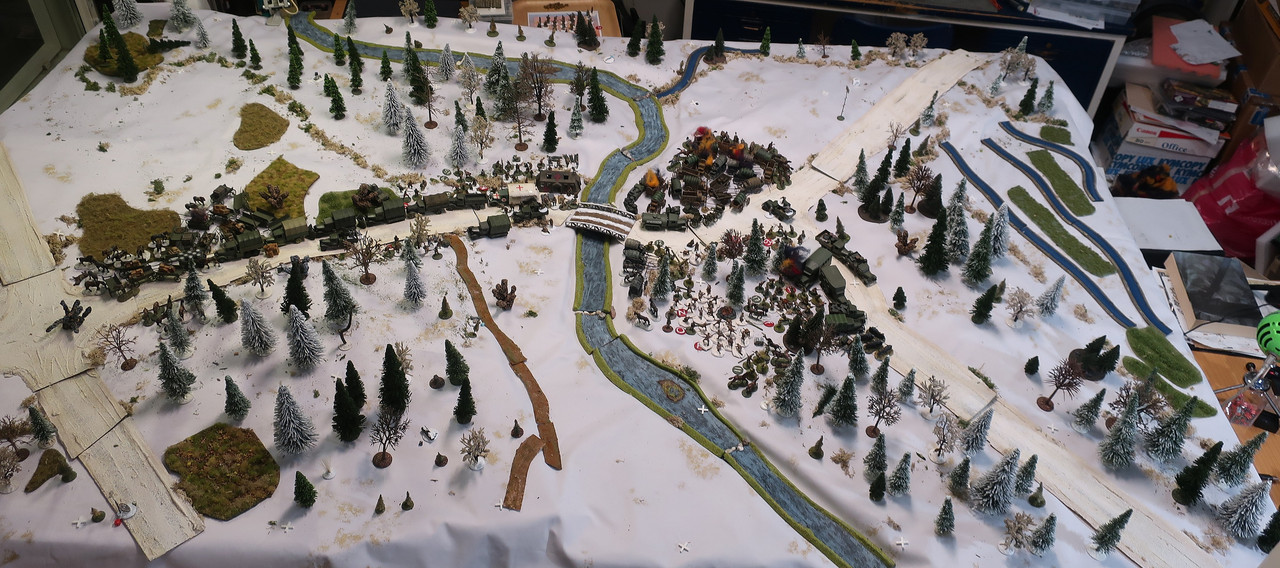
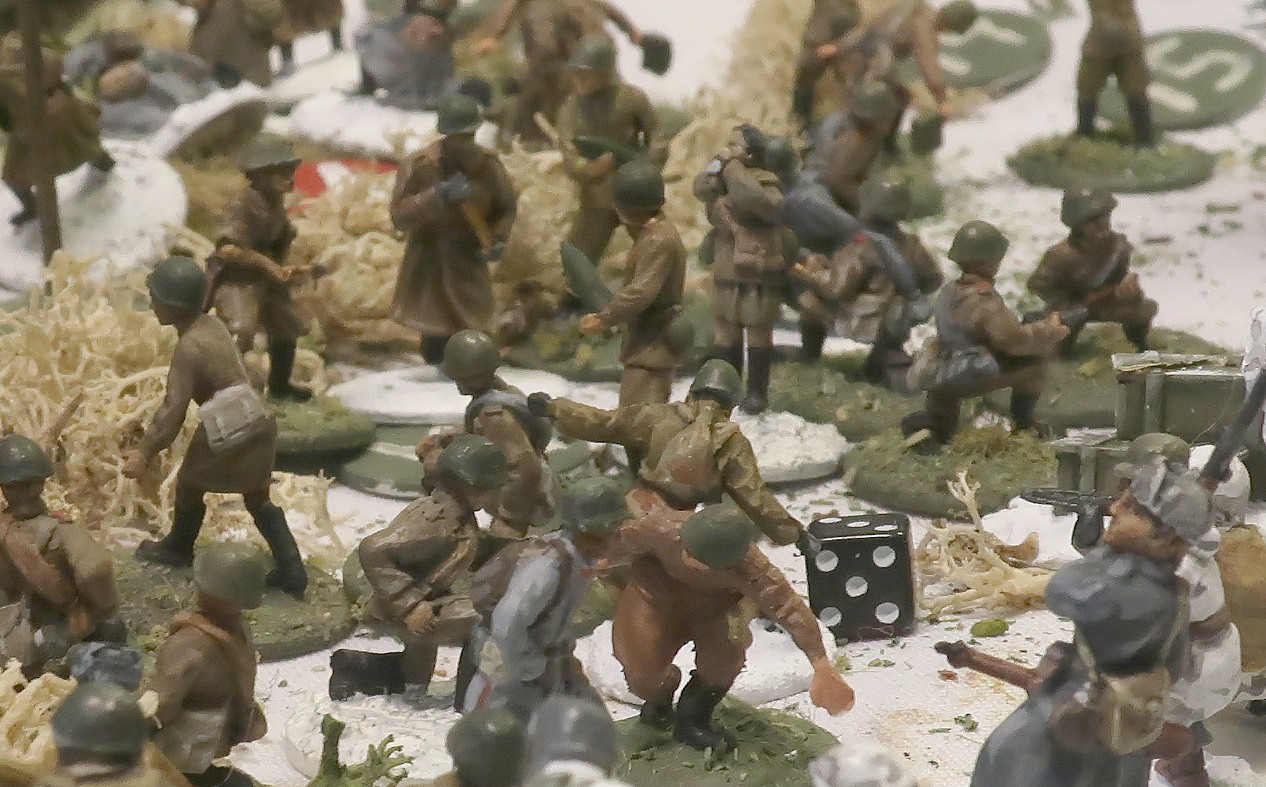
In the camps, the supply men are taking cover, hoping to not be hit by the razor-sharp shrapnel tearing through the woods...
Running the patrol phase and the bombardment etc. took one whole night of gaming! Well, like two and a half hours....
Now we roll Force Morale... The Soviets play their
Warm Tea campaign card and the men have just had an extra cup of
chai, the wonderful Russian tea beverage. There are few joys in the Soviet Union, but chai is one of them. The Soviet Force Morale results will be one greater tonight.
Don's 1st Transportation Platoon gets an FM of 10. They have two large sections and three regular and two Blue command dice. Blue command dice are like regular command dice, but only count if their result is a 5 or a 6. These troops are second-line teamsters and truck drivers.
Tomm's 2nd Transportation Platoon rolls a 9 for Force Morale, plus one for the chai, for a total of 10. They too have three regular and two Blue dice, as their platoon is composed of only two very large sections. His troops too are second-line teamsters and truck drivers.
John rolls an 11 for his and Miika's Anti-Aircraft platoon. They have four regular and one command dice.
Jarkko is fielding the 2nd platoon of the 3rd company. They are down two men from previous fighting. They start at FM 11 and have five command dice.
Mikko is playing two platoons in this game. The 3rd platoon, with FM 9 and a previous loss of two men. They too have five command dice.
His second platoon is the 1st MMG platoon from Group Wolf's machinegun company. They have four Maxim type machineguns but have lost one man in previous fighting. Mikko rolls an FM of 9 for this platoon who have five command dice.
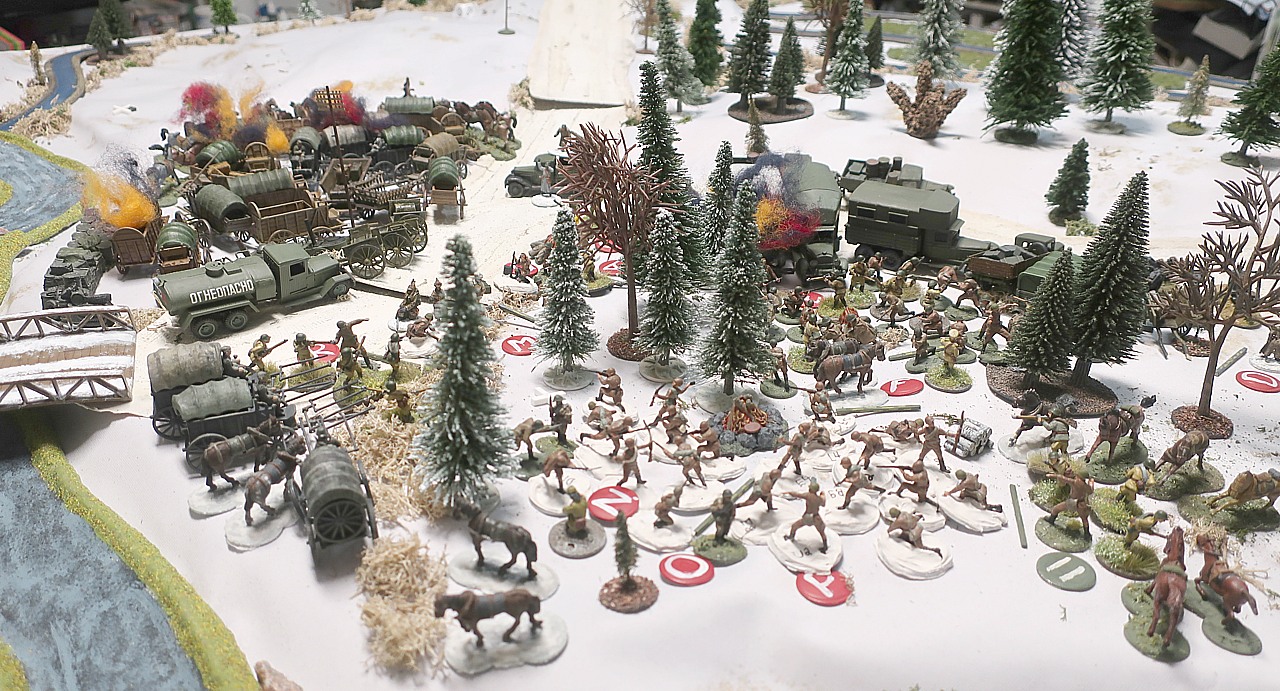
As the mortar bombs land here and there onto the table, the Russians brace themselves for the coming attack which they know will happen any second now!
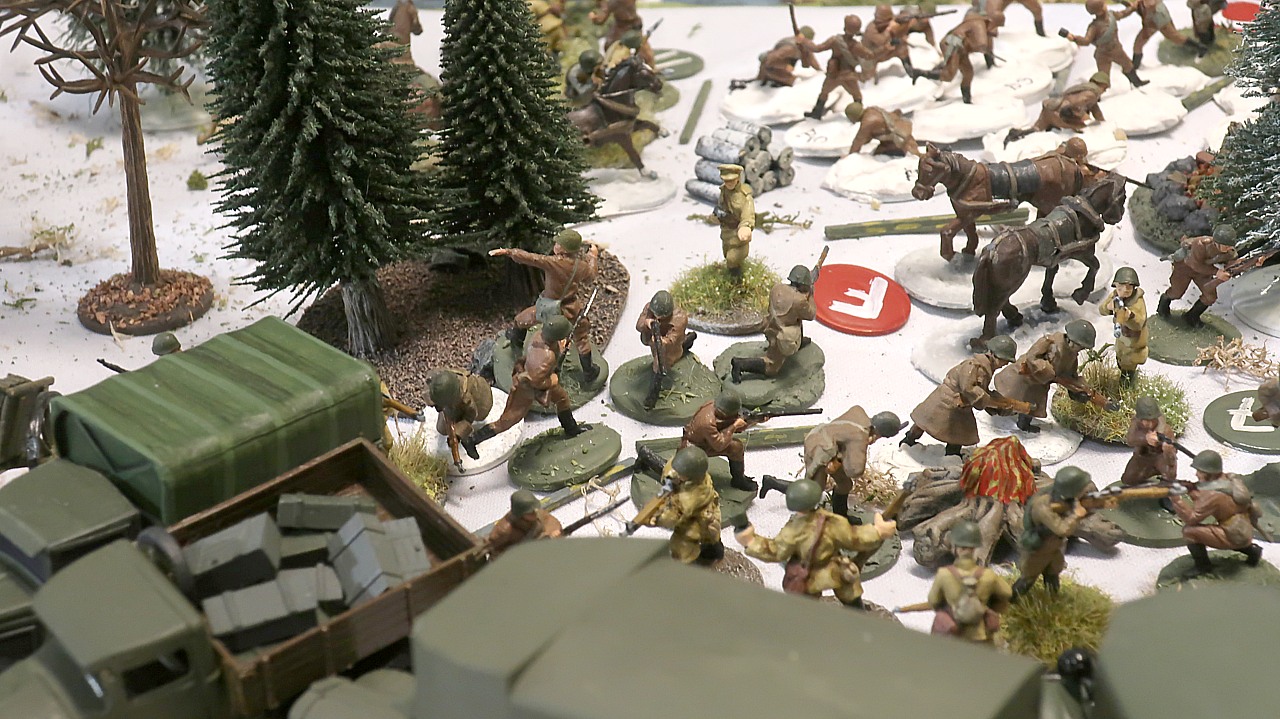
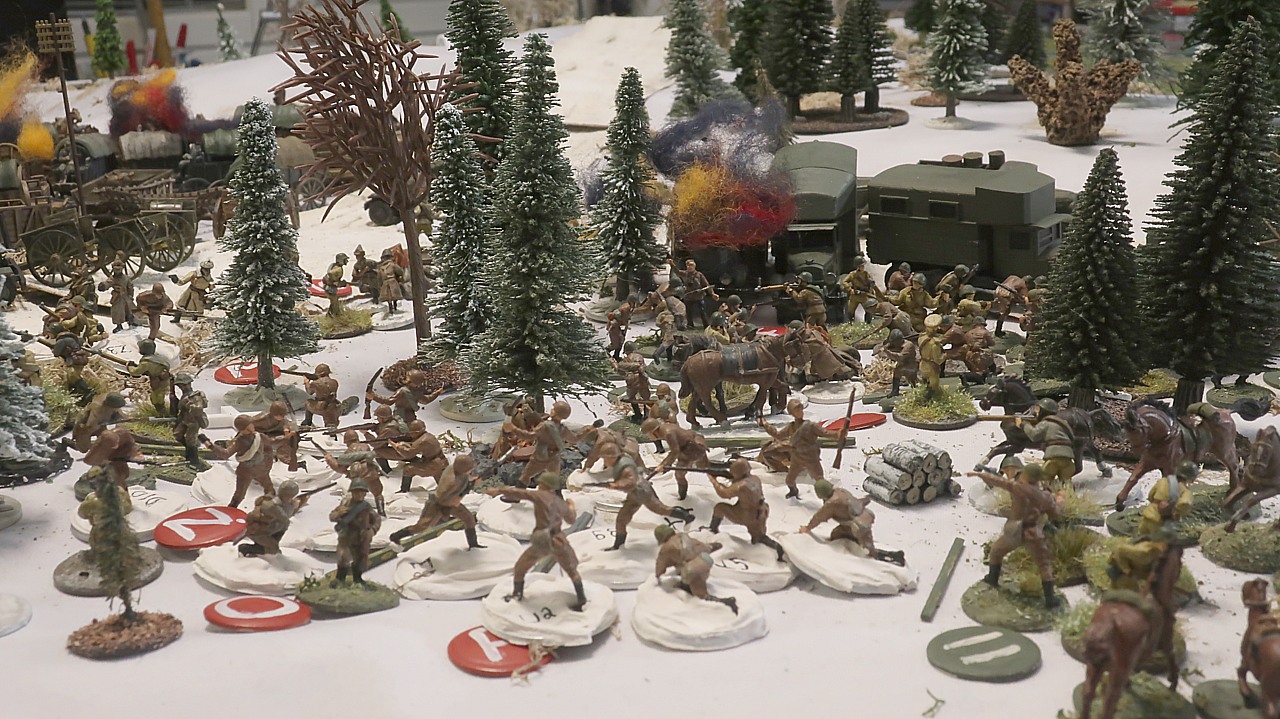
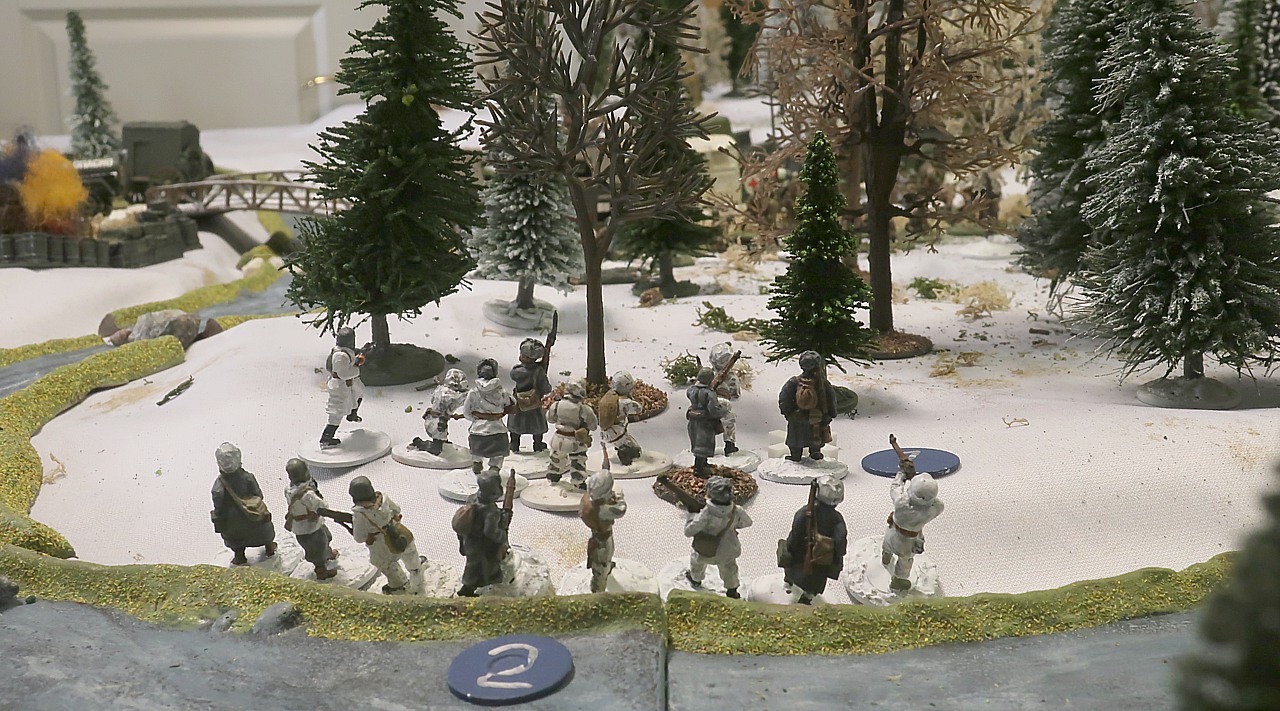
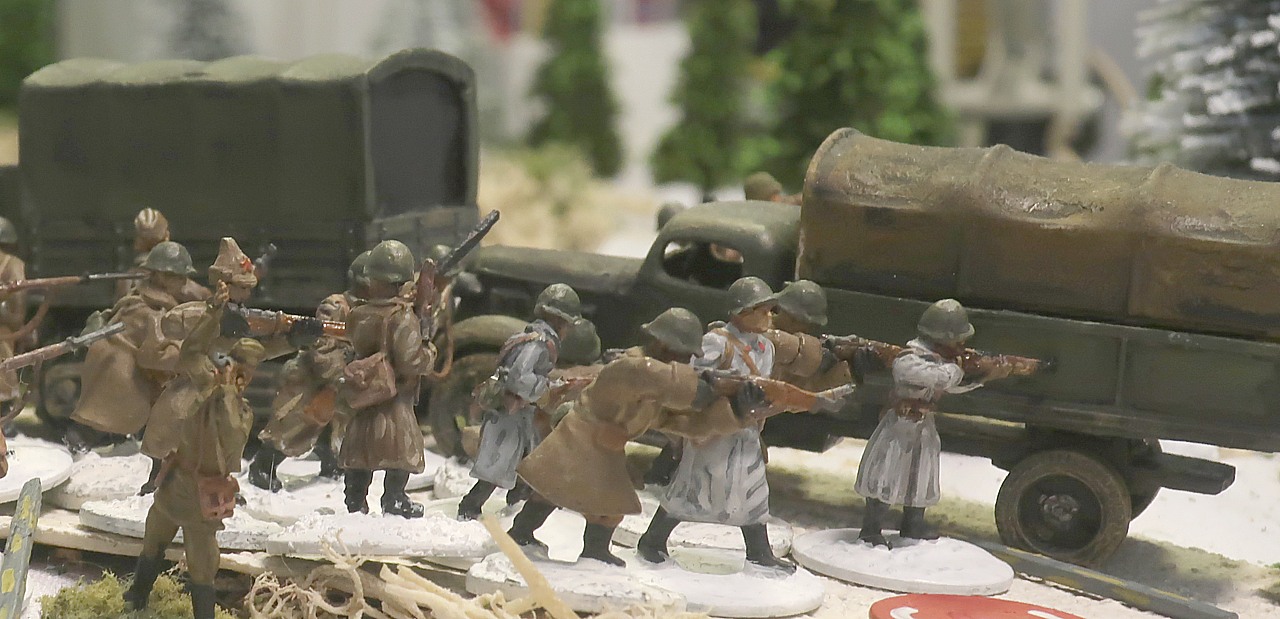
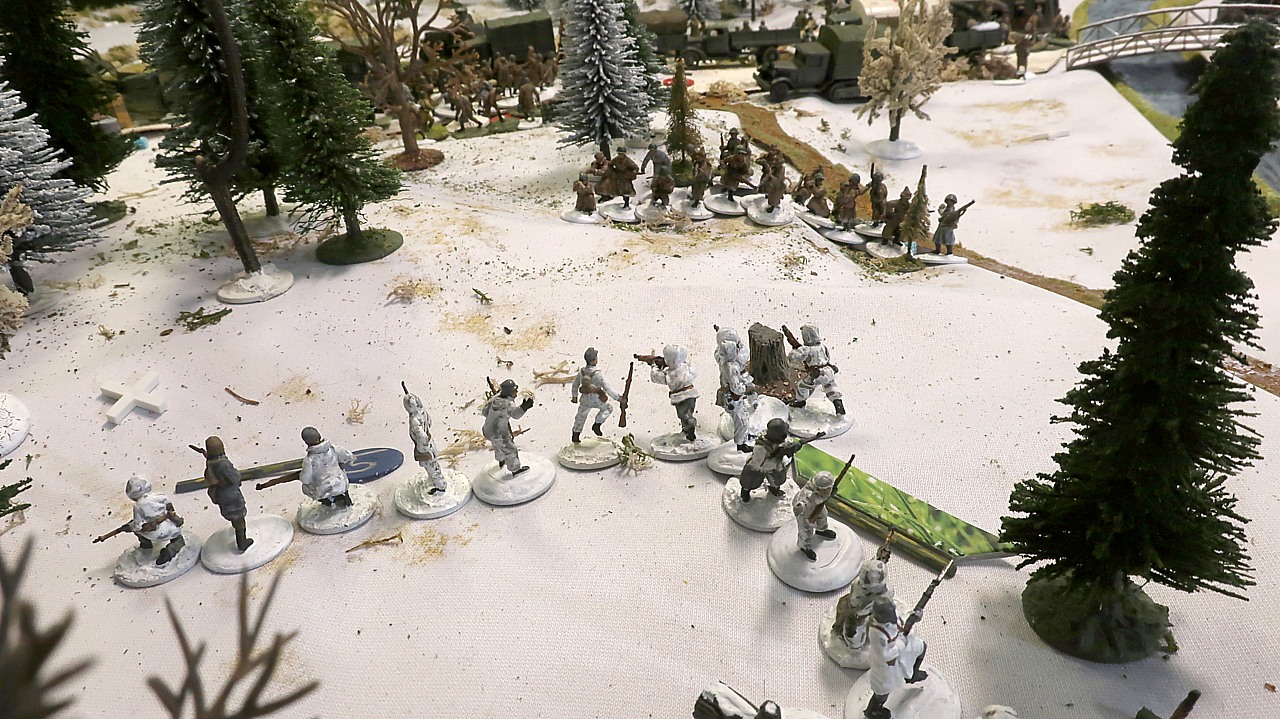
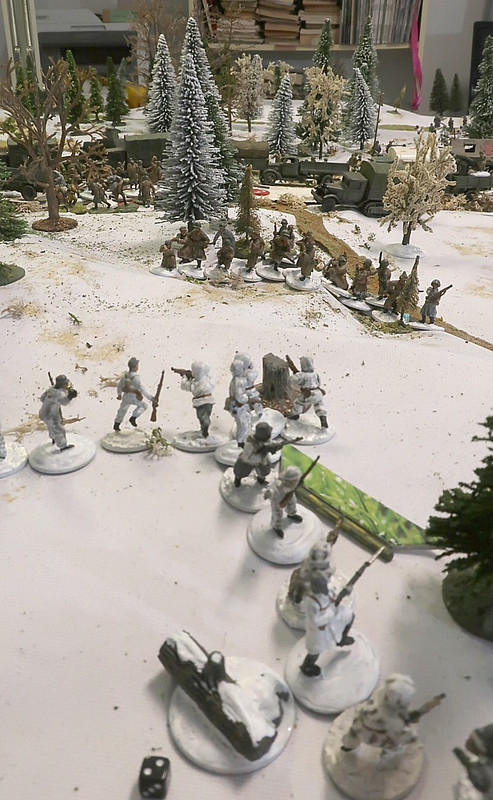
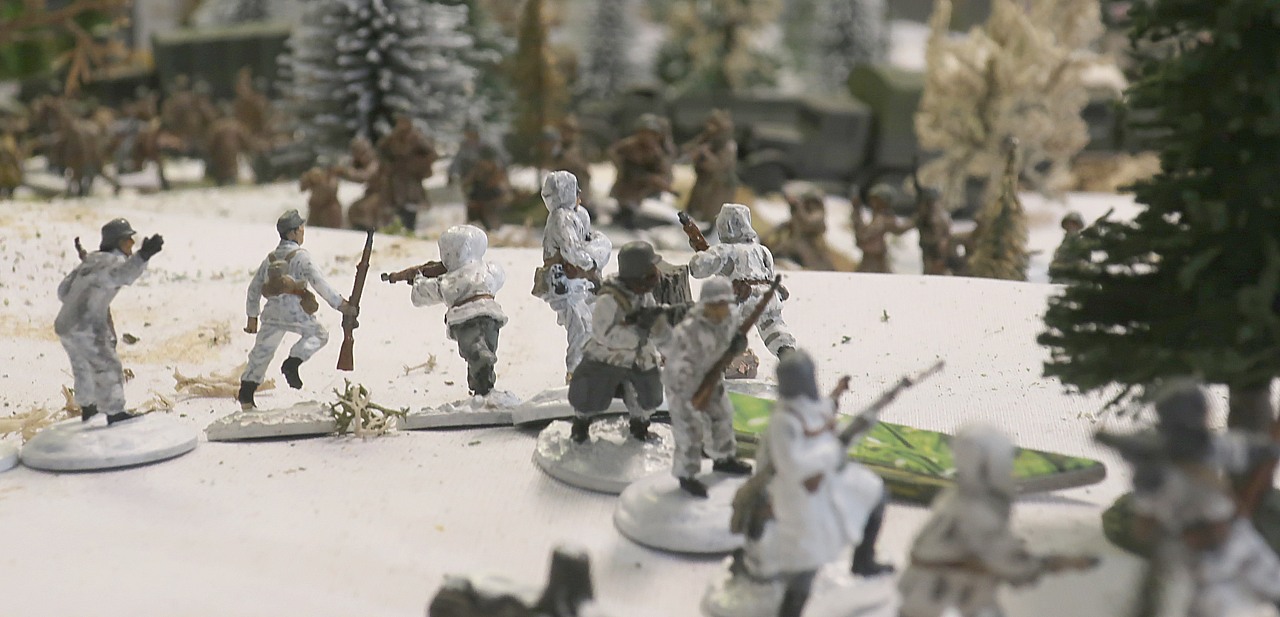
And here they come! Jarkko deploys two sections of infantrymen north of the dressing station...


Like always the Finns roll a double phase and the first section bursts out of the dark forest into the view of the flabbergasted stretcher bearers...
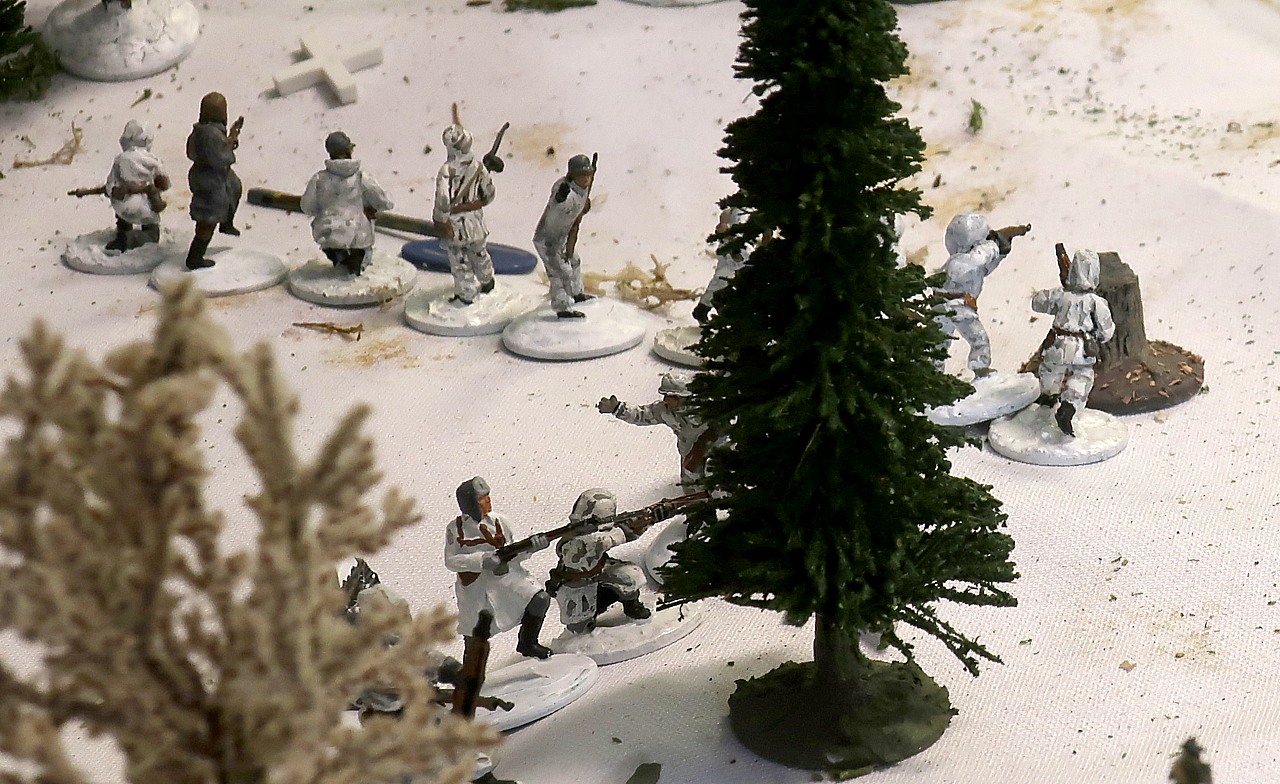
Unarmed, the stretcher bearers and other medical personnel have no desire to fight their enemies.
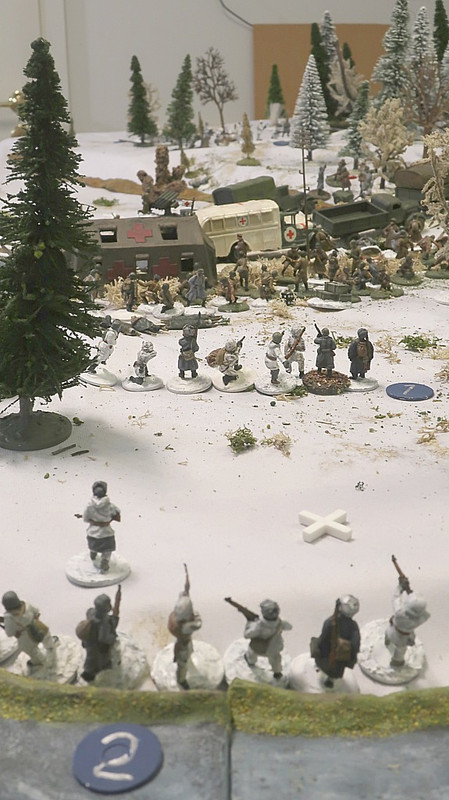
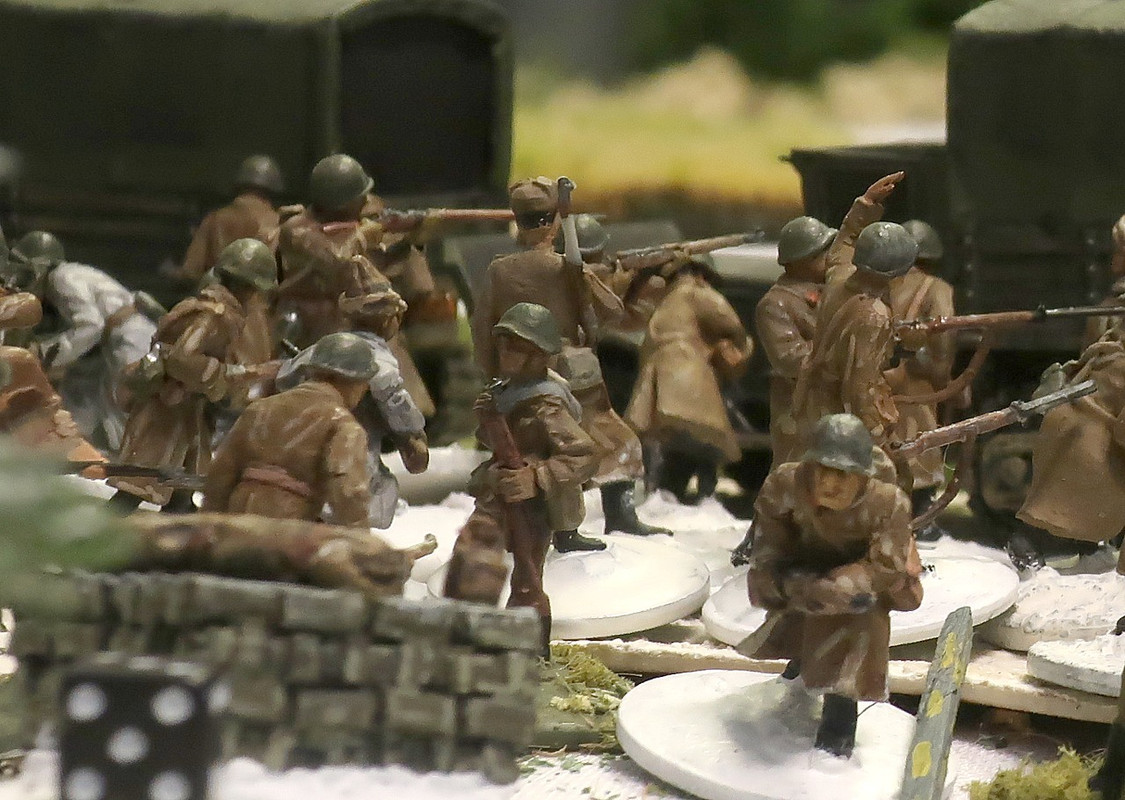
Jarkko deploys his platoon sergeant...
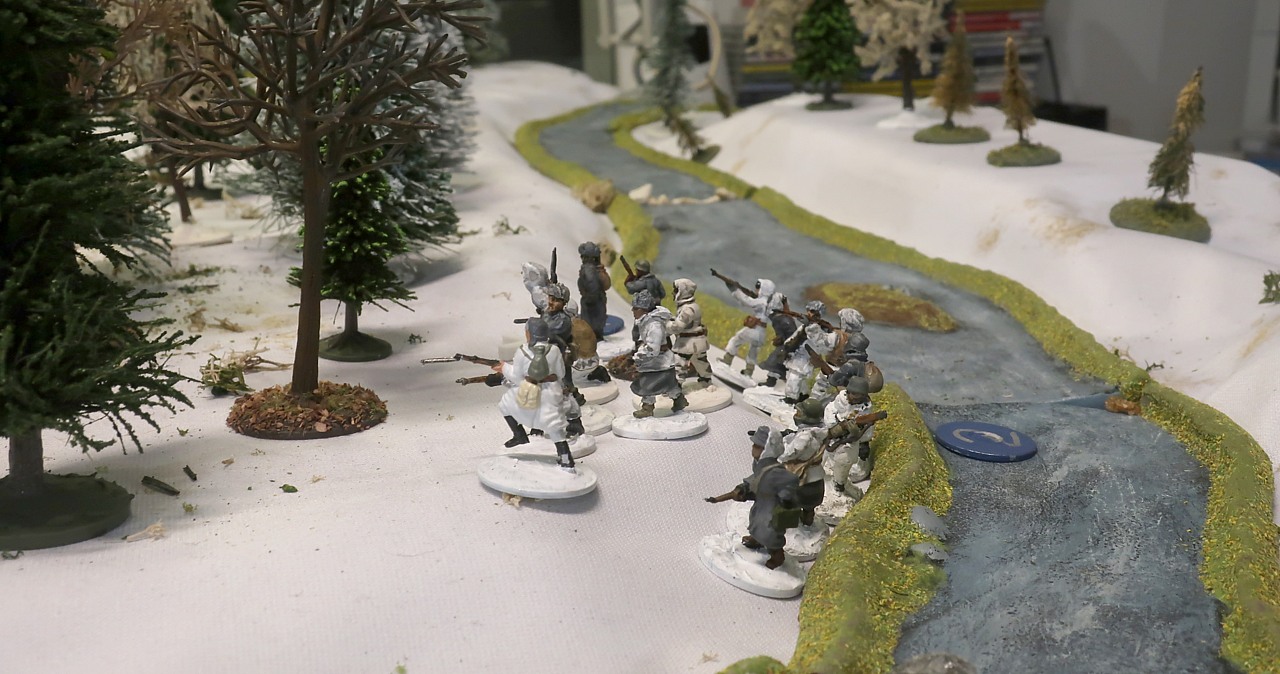
Covered by the rifle section, the LMG section leapfrogs their position. They are now very close to the closest Soviet jump-off point.
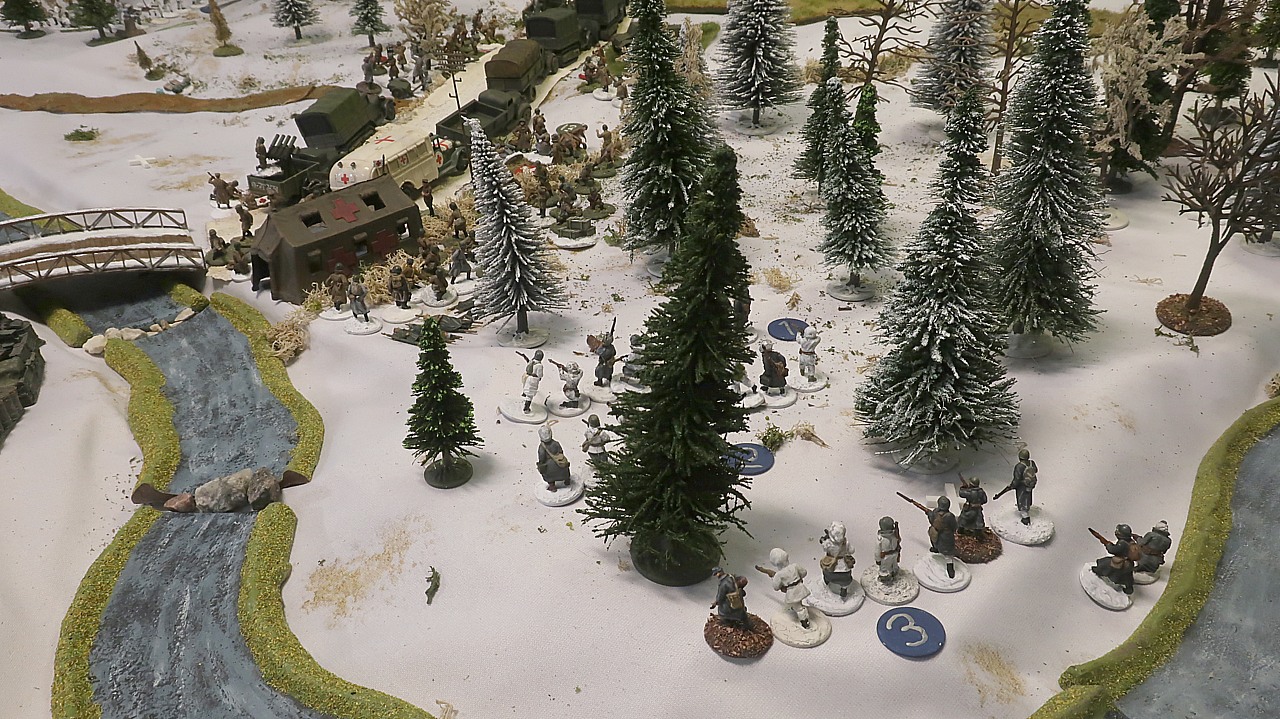
Not content with the progress thus far, Jarkko deploys a third section.
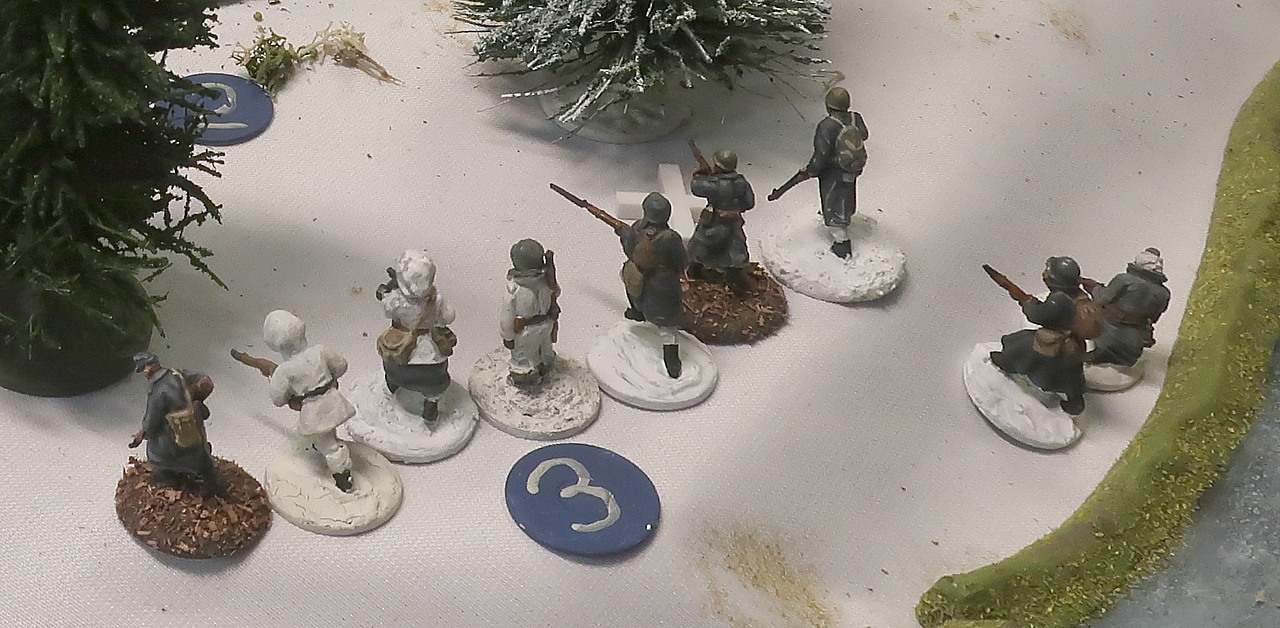
The sudden appearance of the white-clad, automatic-weapon-toting savages is terrifying to the medical personnel, who immediately expect to be savagely murdered by them....
There is no time to do anything... the Finns approach and the Soviets raise their hands, surrendering.

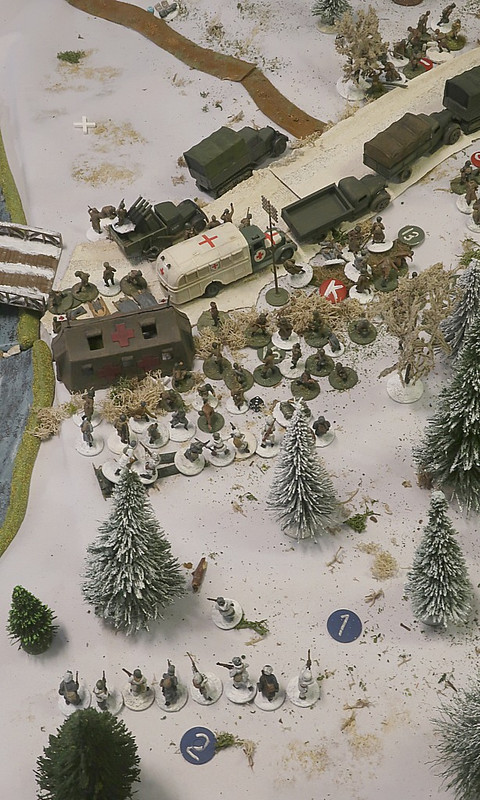
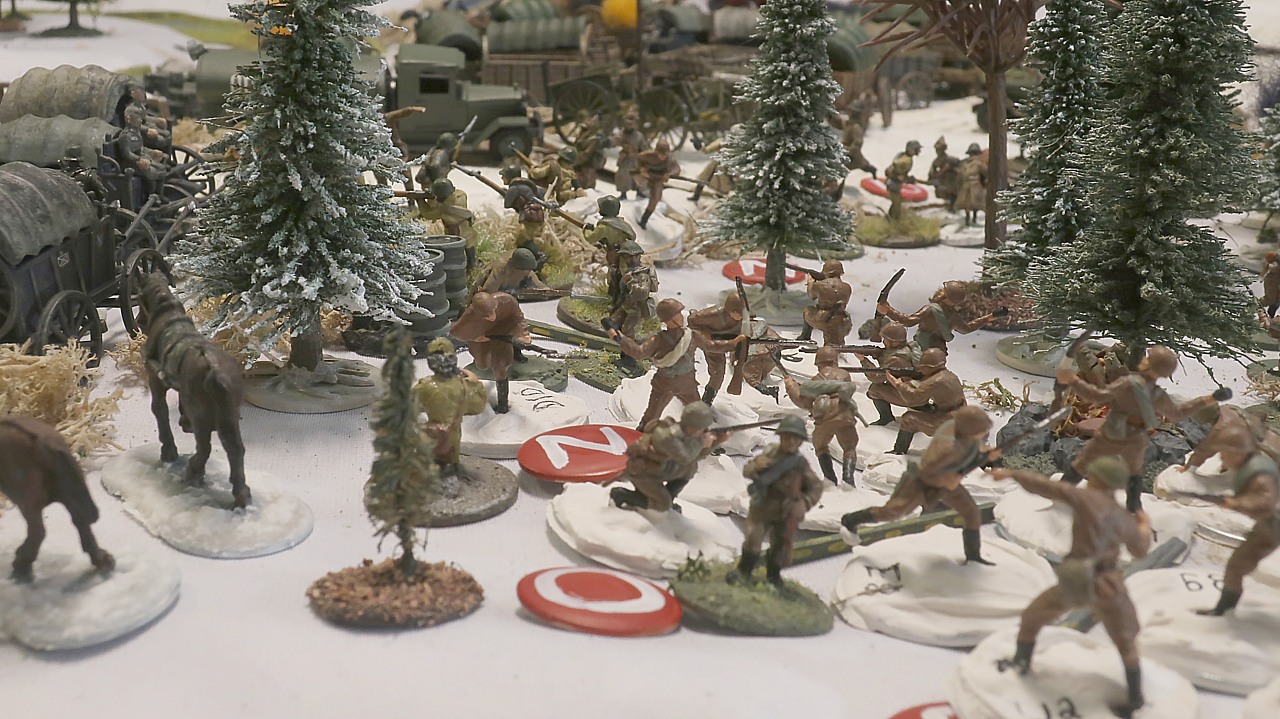
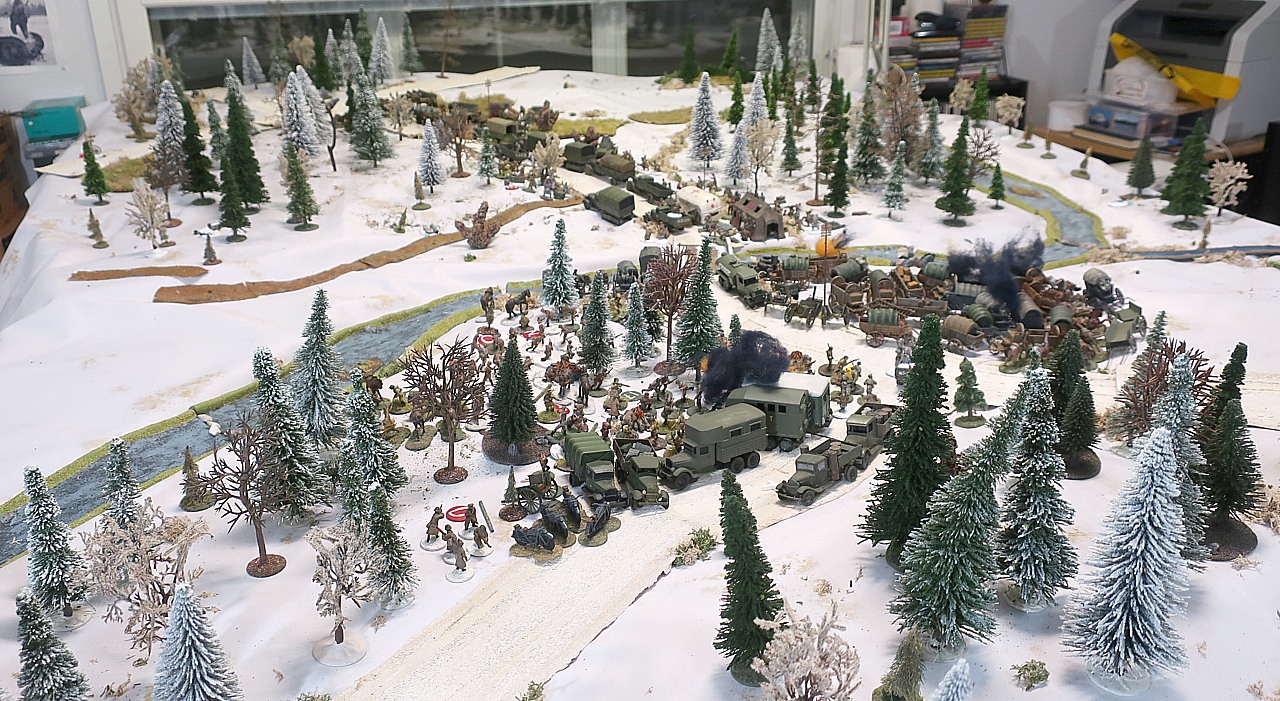
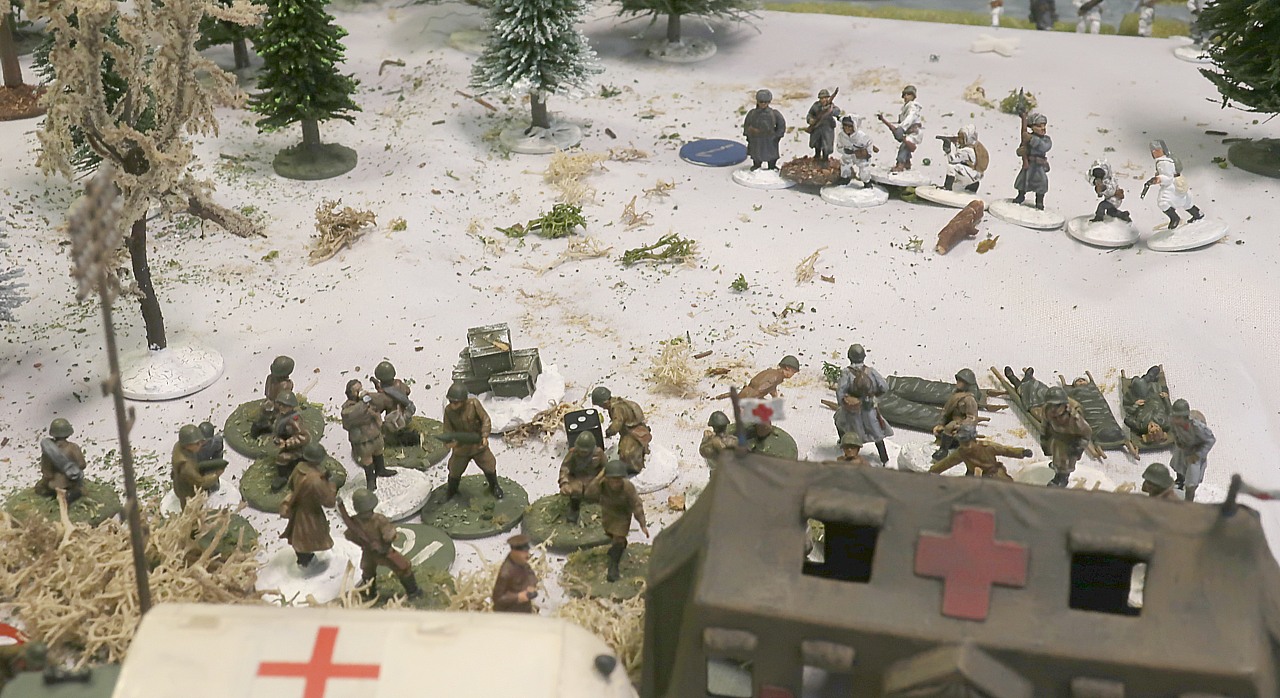
But though surprised, the Russians are not idle. Tomm deploys his

This is the 2nd Transportation platoon's first section (#3), 24 drivers and teamsters led by a warehouse manager (Junior Leader).

Here they are potentially within charging distance of the Finns...

In the south, Don deploys a section to defend the southern jump-off point from Mikko's rifle section 5 and LMG section 6.
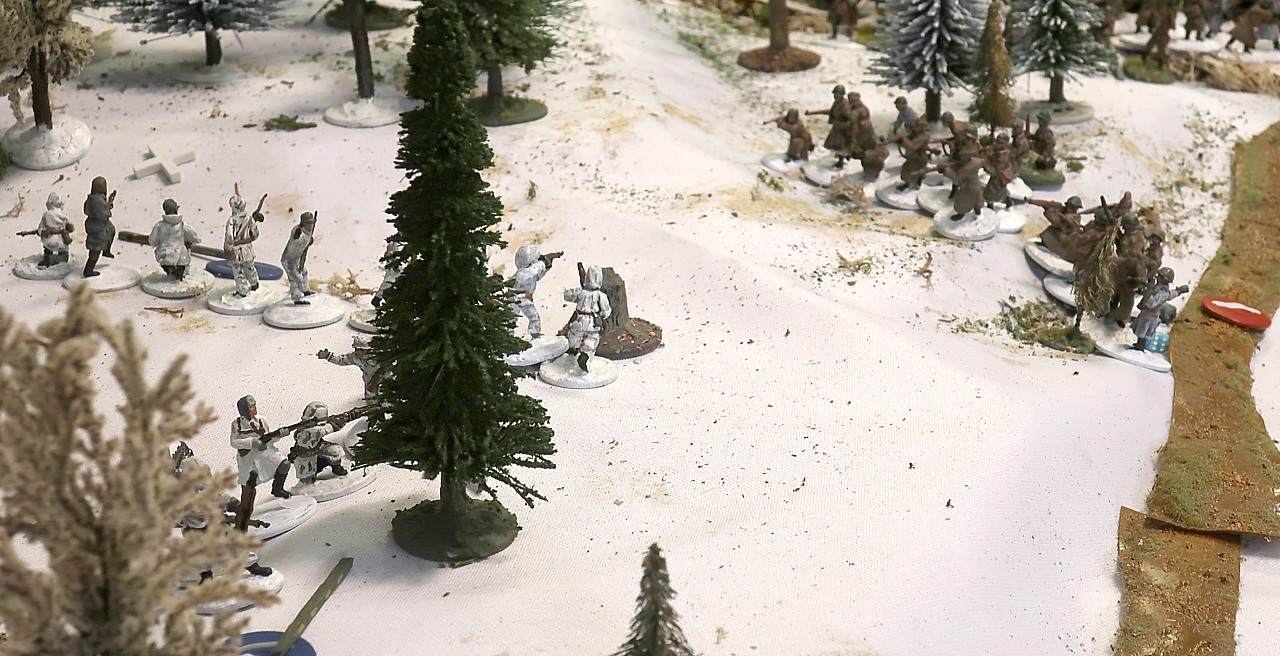
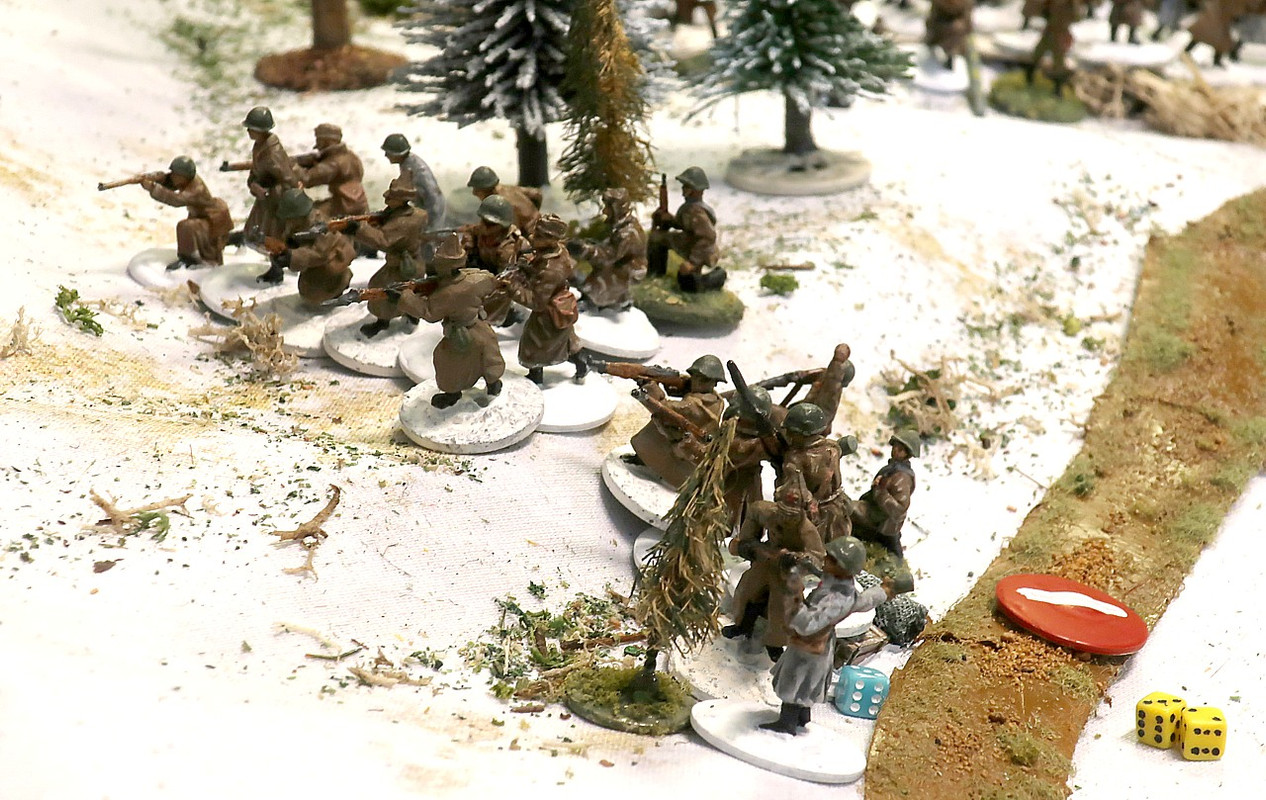
The initial exchange of fire is ineffective... the Finns shoot back, causing two points of shock.

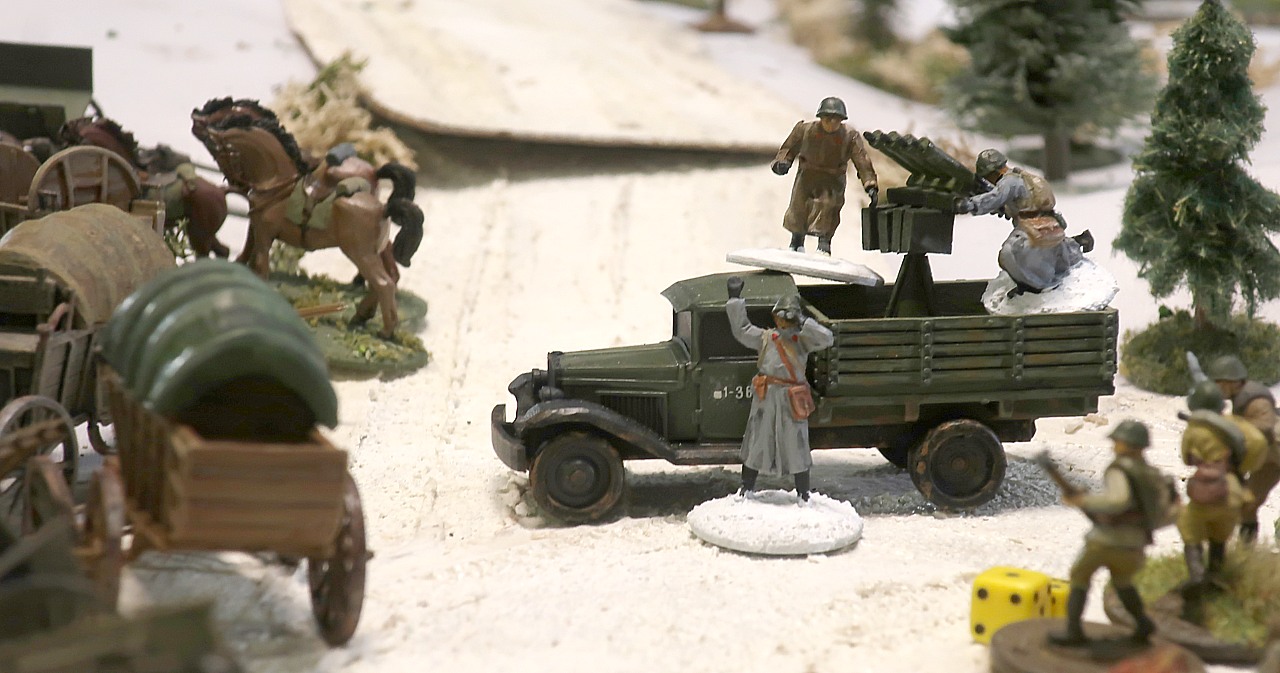
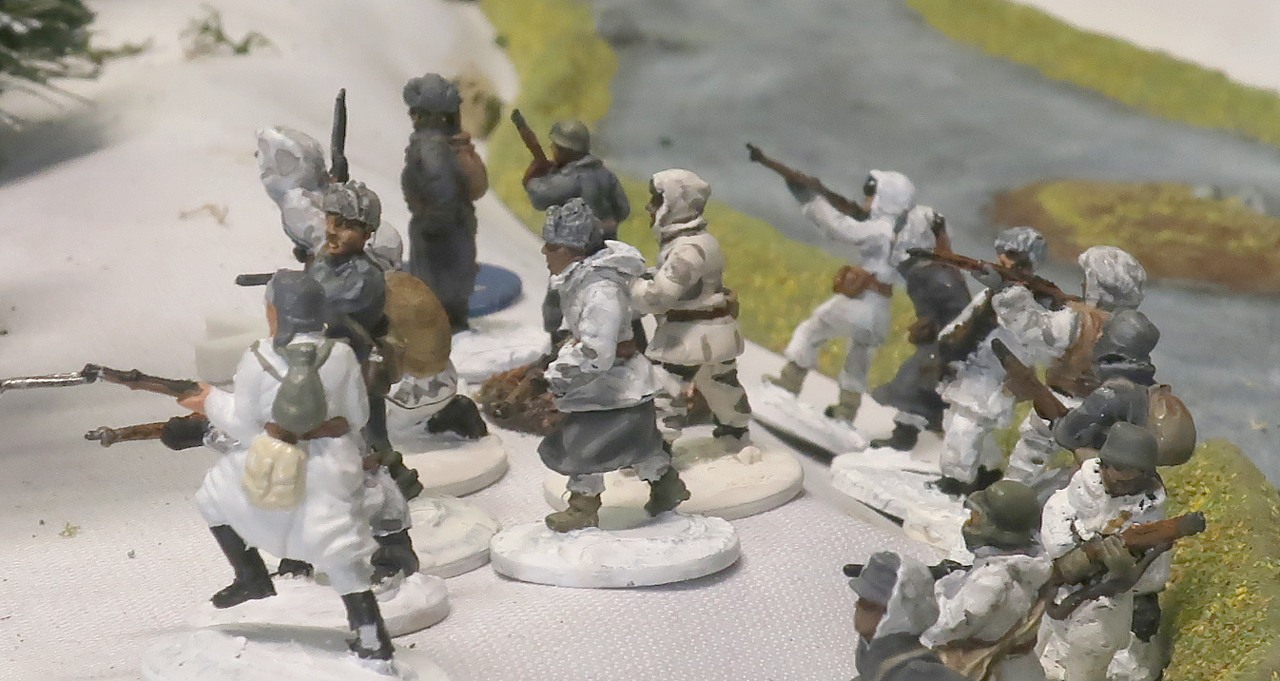
Meanwhile, at the crossroads, the leader of AA truck U3 has heard shouting in a foreign language from the direction of the dressing station...
They hop in the truck and drive to the bridge. From there they see some white shapes moving in the darkened forest, they open fire!
The four-barreled Maxim anti-aircraft machinegun has a combined rate of fire of 2400 rounds per minute... even a short burst while moving has a firepower of eight dice!
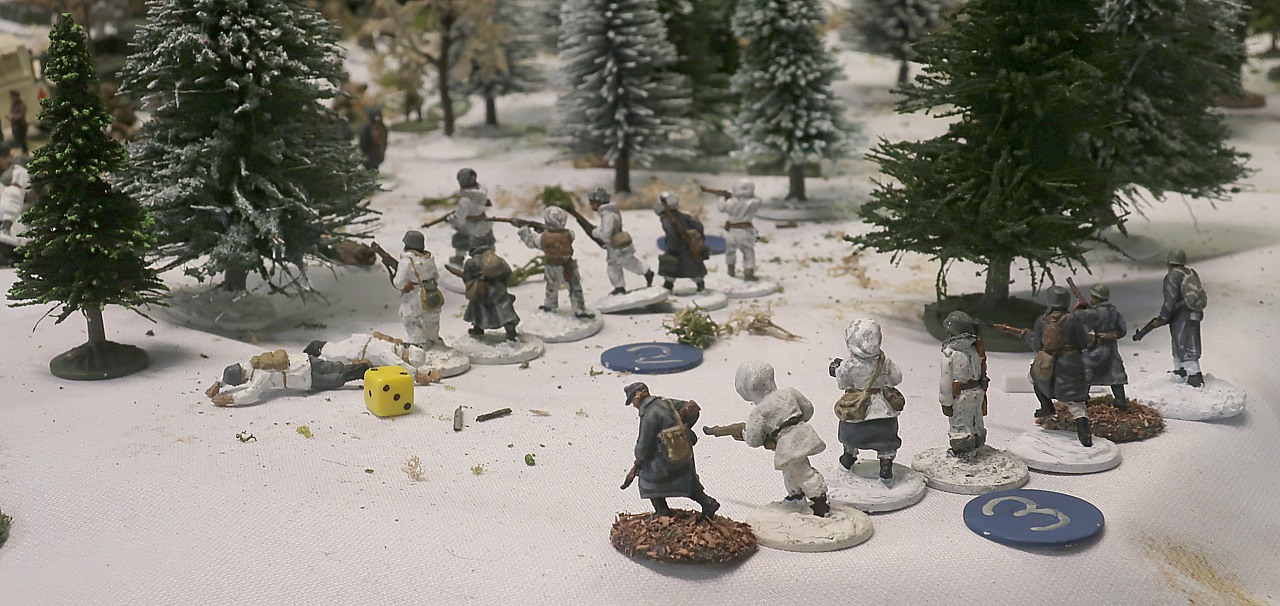
The LMG team of the LMG section is wiped out.
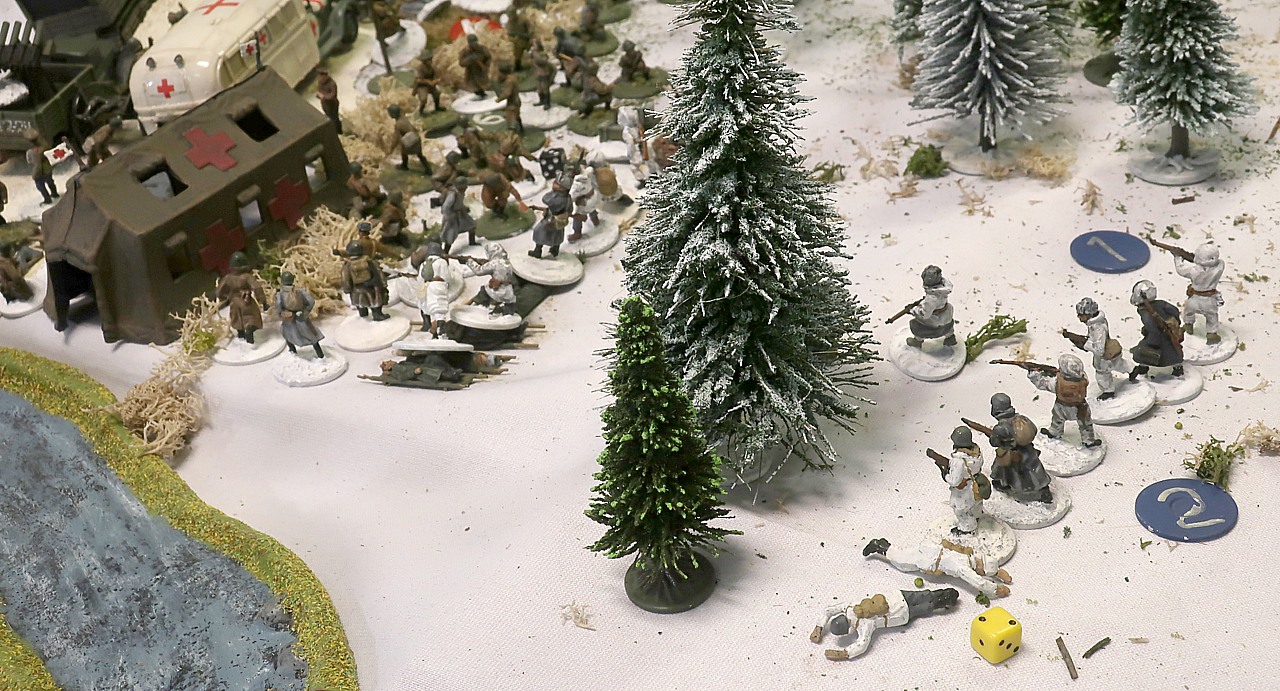
Fortunately for Jarkko, his Force Morale holds steady,,,


 Welcome, Guest. Please
  April 25, 2024, 07:52:59 AM

