The Quatermass Run - Part 1: Ticket to Ride
This scenario is a variant of one from the Black Dawn campaign. The game was run at TL2 with a 12k team (Fletcher and Lukewarm were Veterans, the other three were Hardened). As usual, details of the game can be found in the photo captions.
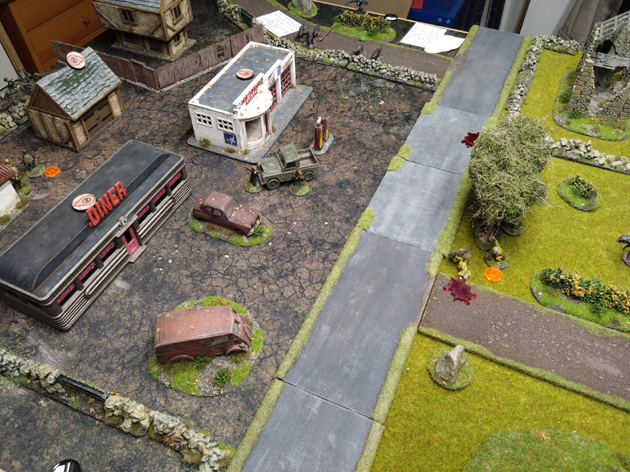
Despite the Landrover being stuck in low gear, they had made it to the service station at Staggered Cross in good time. Ingrid parked the landy on the forecourt of the service station and Fletcher's crew scanned the buildings for signs of trouble. All quiet, so far so good.
Next to the delapidated service station building stood an American style diner and to the rear of these stood a couple of garage buildings, one of which contained the fuel they were looking for. Although the landy provided them with a means of getting about the Zone, Fletcher was concerned that the sound of its engine would alert hostiles. Best they moved quickly to get the fuel and head for the first instrument.

Game setup. The stalkers start on the service station forecourt.

The crew could barely see any distance through the thick mist (just my luck to pull a Zone Event card in the first turn). Lukewarm hefted his SLR and powered up his starlight sight. Scanning the perimeter he caught sight of moving creatures. Then the crew heard them, all around; a mix of barking dogs, shrieking hobgoblins and the unearthly neighing of mutated moorland ponies. They better move fast to secure the fuel.

Fletcher, Ingrid and Heslop headed for the garage building containing the fuel. Across the perimeter wall they saw a pair mutated moorland ponies rapidly advancing on them. Fletcher opened-up with his Sterling and 9mm hot load ammunition tore through the ponies. As Fletcher's magazine emptied his gun jammed (critical failure roll).
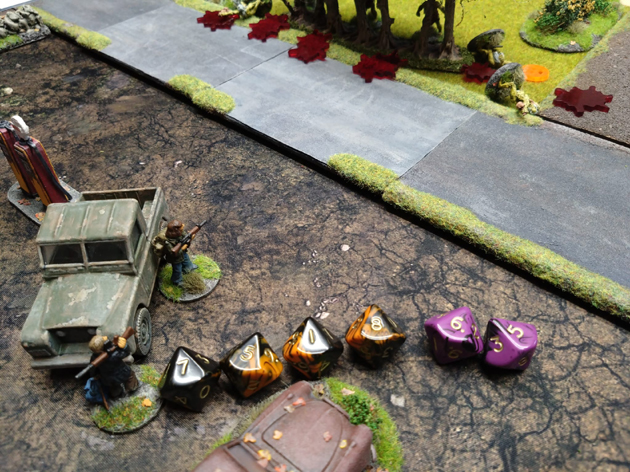
The Hobgoblins advanced to the treeline across the road from the forecourt. Unfortunately for them Godber and Lukewarm were waiting for them with their SLRs. Godber killed one, while Lukewarm got a second and pinned a third.
More hostiles arrived on the perimeter, in the form of another pack of dogs, a horde of revenants and a particularly nasty looking mutant. Things were going to get messy.
Using his starlight sight, Lukewarm took down two of the first pack of dogs. He then turned and gave his full attention to the hobgoblins, killing all of them (2 actions worth of battle rifle fire including a critical hit, for a total of 5 lethal hits). With no targets remaining that could be seen in the mist, Godber went on alert.
A lot of growling heralded the first pack of dogs charging across the forecourt. However, Godber was ready. He leveled his SLR and let off two shots for a hit and a critical hit. With his free action he let off a couple more rounds, giving him a total of two kills and a pin.

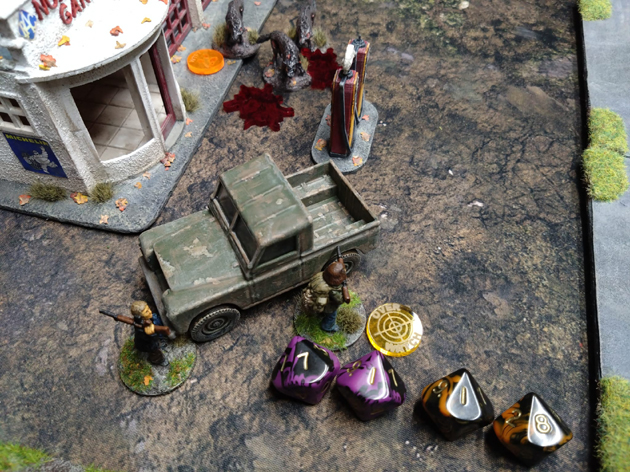
Over at the garage, Ingrid went inside and recovered the jerrycan, while Fletcher and Heslop provided cover.
Heslop opened fire on the Revenants, killing one with his shotgun but also getting a jam (critical failure) so had to waste time clearing it. While he was sorting that out Fletcher encouraged Ingrid to bring the fuel out (transferred action using his Leader skill). He then went on alert.

Just as the stalkers were getting confident things went pear-shaped. More hostiles arrived in the form of another mutant and two groups of four bandits (I rate my bandits as Hardened, so they can be particularly dangerous).
Time to change plan. While Ingrid lugged the jerrycan to the Landrover, Fletcher and Heslop covered her back. The revenants were slow and could be ignored. However, the mutant was another matter (2 actions, so not to be ignored). Heslop moved to were he could get a shot at the mutant and let rip with his shotgun. Two shots missed but one hit. However, the mutant kept on coming. Jeez it was tough. Fletcher then moved up and finished off the mutant with a burst of 9mm hot load from his Sterling. Once again his gun jammed. Fletcher was going to have to have serious words with Camp Tony about the hot loads he sold him.

The second pack of dogs had now reached the treeline, but Godber was waiting for them. The dogs were met by a hail of 7.62mm, that tore through the trees and undergrowth. Four hits including a critical, which produced two more hits, taking out the entire pack.

Not to be outdone, Lukewarm watched the first group of bandits approach through the mist. They couldn't see him but, with his starlight sight, he could see them all. He opened fire. Four hits including a critical, that gave him another hit and a jam. Although the intervening cover foiled two hits, three of the bandits still met their maker.

Meanwhile the second group of bandits advanced to the cover of the treeline and a dry stone wall. As they took up their positions the bandit on the left opened fire on Godber, scoring two hits with his SMG. Fortunately for Godber his flak jacket stopped the SMG rounds.

To their surprise, another mutant bounded round the corner of the garage building next to Fletcher and Heslop. This one was once a ... sheep! It immediately charged Heslop, Fortunatly Heslop had the presence to stand as it hit him. He emptied his shotgun into the mutant, killing it, However, the dying mutant knocked him to the ground (Pin result). To add insult to injury, Heslop's last shot was a critical failure (a second Pin).

More hostiles arrived, in the form of a pack of Hobgoblins and more Revenants (I drew a Nothing of Interest card for the third hostiles arrival). The stalkers were now facing two groups of revenants and pack of hobgoblins, with the prospect of more hostiles still to arrive. Time for an exit plan.

Fletcher moved onto the forecourt. The surviving dog from the first pack had stopped cowering by the service station garage doors(shaken off its Pin) and now growled menacingly at him. He cut the dog's growl short with a burst from his SMG.
Across the road Fletcher could make out one of the bandits in the treeline. Another burst of 9mm hot load, another kill.

Godber took out the bandit on the other end of the treeline. That left two more bandits behind the wall. They thought they were safe in the mist, but hadn't counted on Lukewarm. His starlight sight picked them out easily and he got a hit and a critical hit, followed by two more hits. Dry stone walls do not provide much cover against 7.62mm NATO ammunition!

Just as it looked like the stalkers should get a clear run out of the area, another unwelcome surprise faced them. The survivor of the first bandit group cut down by Lukewarm had now worked his way behind the service station. Poking his shotgun around the corner of the building, he opened fire at Fletcher, the nearest target on the forecourt. One of the shells hit and wounded Fletcher.

Things were looking decidedly dodgy. Fletcher had taken a hit and the revenants and hobgoblins were approaching and threatening to cut the stalkers off. They could also hear more approaching hostiles further out into the mist.

Standing next to the landy, Ingrid quickly leveled her SMG at the bandit that shot Fletcher. Four hits including a critical sorted the bandit out. She then got into the Landrover and (using her free action) tossed the starting handle to Lukewarm standing in front of the landy.
Lukewarm turned the starting handle and the Landrover engine spluttered into life. He then ran to Fletcher and applied a med-kit.
Godber and Heslop clambered into the landy and Fletcher told to Lukewarm to get in too (transfer of action using Leader skill). Fletcher then climbed into the back, banged on the cab roof and shouted to Ingrid to go. She didn't need any further encouragement.

Shouting to everyone to hang on, Ingrid reversed the Landrover to clear the forecourt's pumps, then spun it towards the exit as hostiles approached the forecourt from all sides. However, the Zone had one last surprise.
Charging out from behind the treeline, a mutant leapt at the manoeuvring Landrover. Its frenzied attack ripped the landy's bonnet off. Coolant spurted out as a hose came free.

Leaning out from the back of the Landrover, Fletcher emptied his last magazine of 9mm hot load into the mutant, which exploded into a bloody mess. Ingrid gunned the engine and they were out of there.
Epilogue:
Well that was a bit of a rollercoaster ride. The stalkers secured the fuel and racked up a lot of kills. However, both Fletcher and Ingrid used up all their hot load ammunition. Fletcher, Heslop and Godber also had close calls.
Hiding up in the shelter of a ruined farmhouse, Ingrid did the best she could to repair the damage to the landy's engine. Meanwhile Fletcher, Heslop and Godber set to patching their wounds and repairing their flak jackets.
The stars of the show had to be Lukewarm and Godber calmly standing on the forecourt and taking out all comers before they could get close or, in Lukewarm's case, before they could even see the stalkers in the mist.


