Gemigabok presents...
Winter of No Surrender
Campaign Eleven – Fangs of the Wolf
Game Five – Parts Four, Five and Six
 Winter of No Surrender
 (WoNS) is a series of Winter War campaigns for Chain of Command and other game systems. This is our playthrough of the eleventh
WoNS campaign –
Fangs of the Wolf. The campaign is currently in playtest and will be released... later.
We're using Chain of Command rules with the At the Sharp End supplement, loads of special campaign rules, and 20mm figures on an 8x5 ft table. We're conitnuing our previously started game, with John as Colonel Sharov and our new guys Don and Tom leading platoons. Jarkko still stars as Lieutenant-Colonel Susitaival, with Mikko as his assistant command. We're playing on Discord using three 720p HD cameras as most of the players are located at least 600 km from me.
Previously on Fangs of the Wolf:
Campaign Introduction:
https://thewargamersforum.com/viewtopic.php?f=13&t=4954Game One, Part I:
https://leadadventureforum.com/index.php?topic=137031.0 Game One, Part II:
https://leadadventureforum.com/index.php?topic=137317.0Game Two:
https://leadadventureforum.com/index.php?topic=137428.0 Game Three, Part I:
https://leadadventureforum.com/index.php?topic=137800.0Game Three, Parts II & III:
https://leadadventureforum.com/index.php?topic=138177.0Game Three, Part IV:
https://leadadventureforum.com/index.php?topic=138510.0Game Four, Parts I & II:
https://leadadventureforum.com/index.php?topic=138831.0 Game Four, Parts II and IV:
https://leadadventureforum.com/index.php?topic=139313.0Game Five, Parts I, II and III:
https://leadadventureforum.com/index.php?topic=139945.0 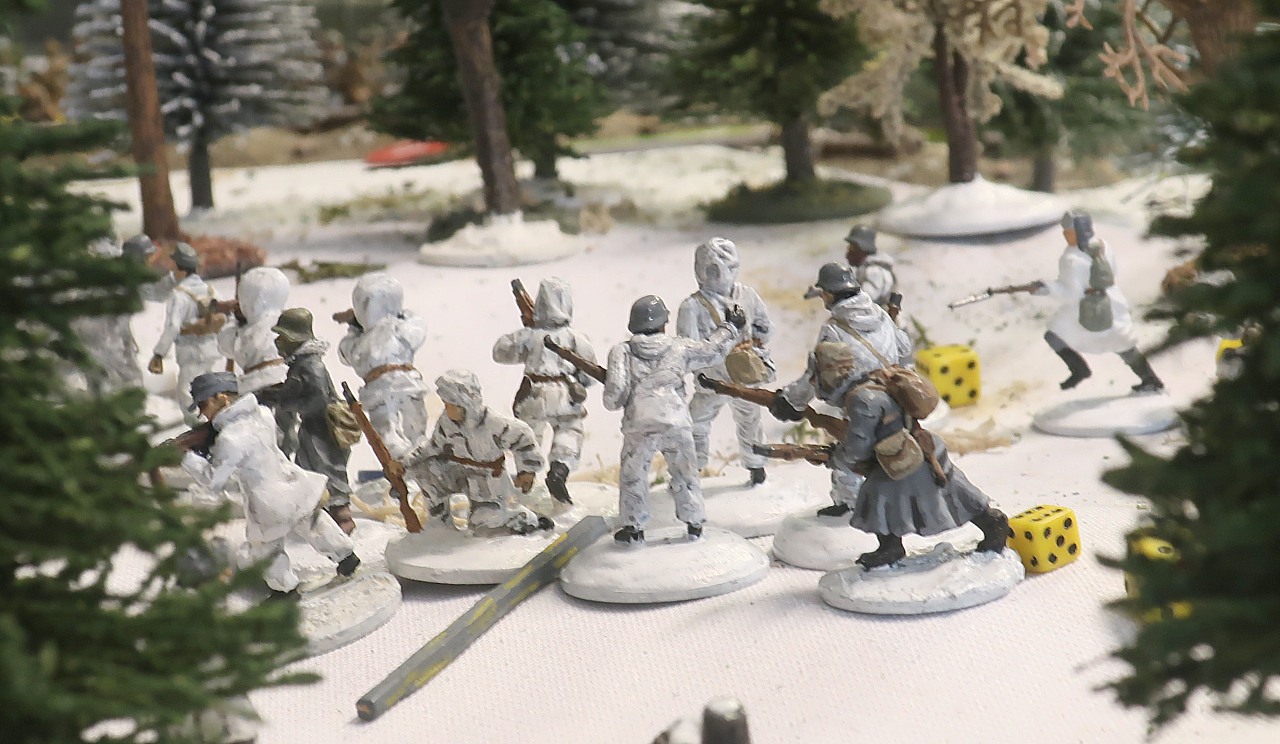
As you may recall from our previous report, many months ago, Group Wolf has split the Red Army forces into three distinct encirclements:
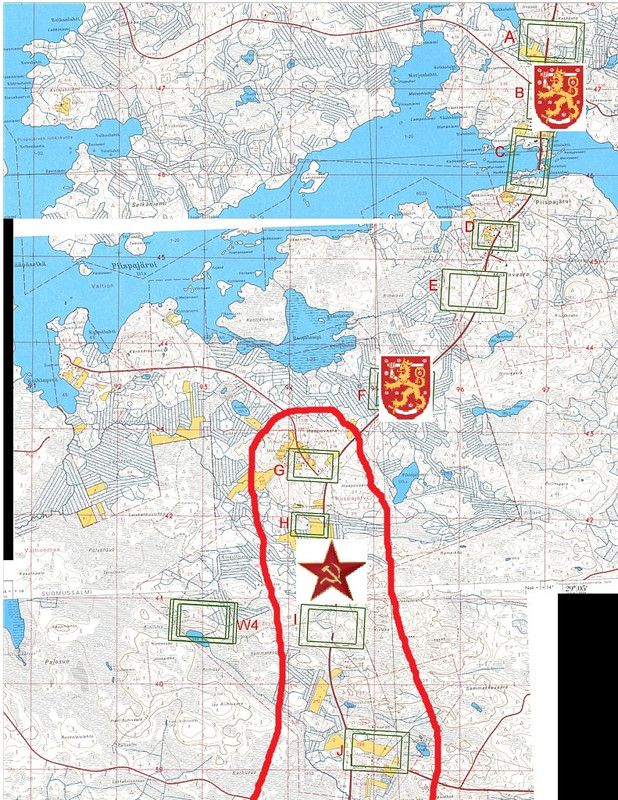
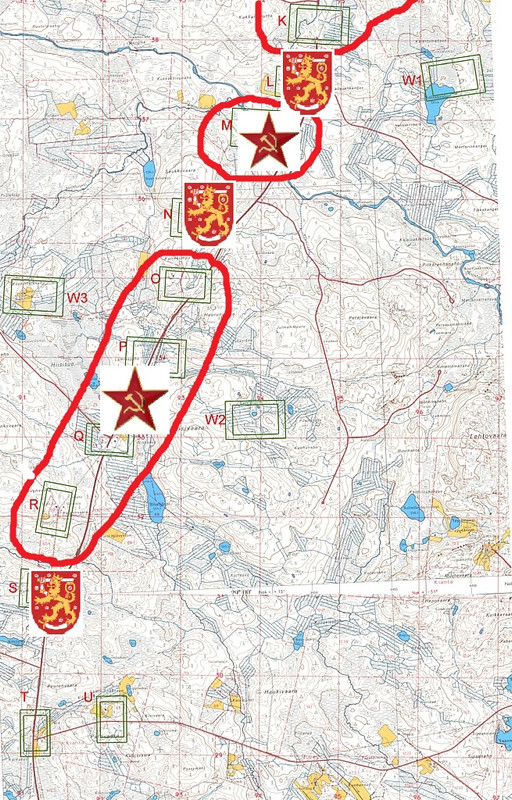
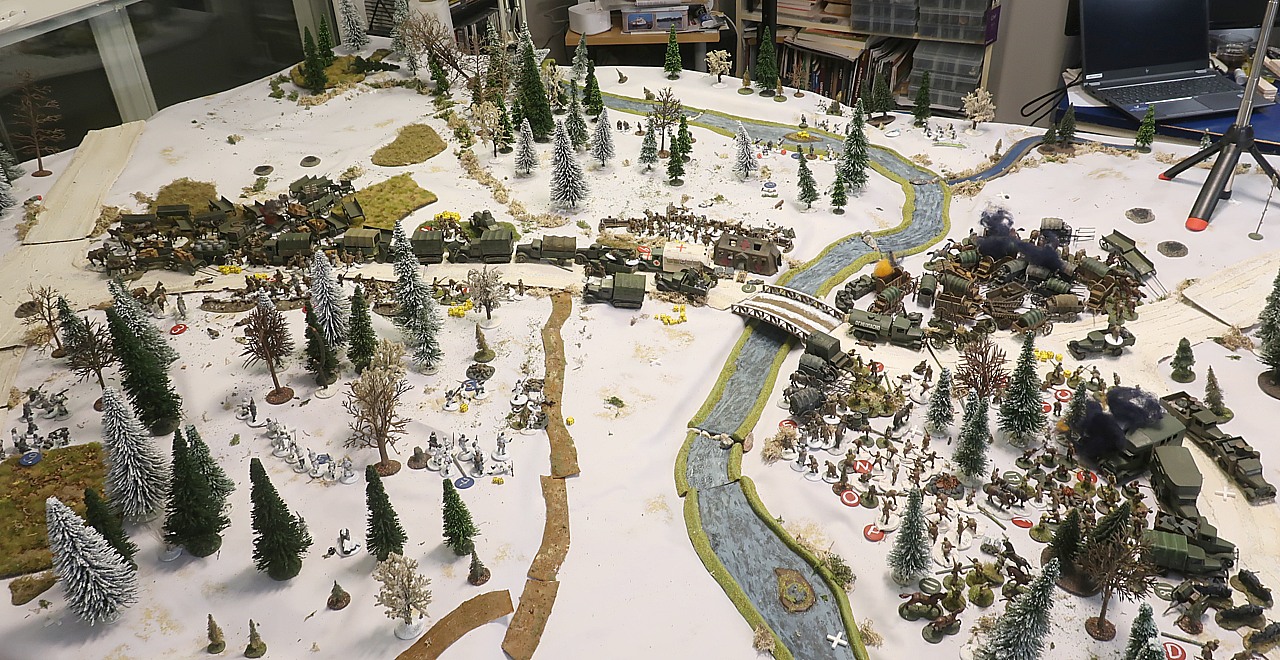
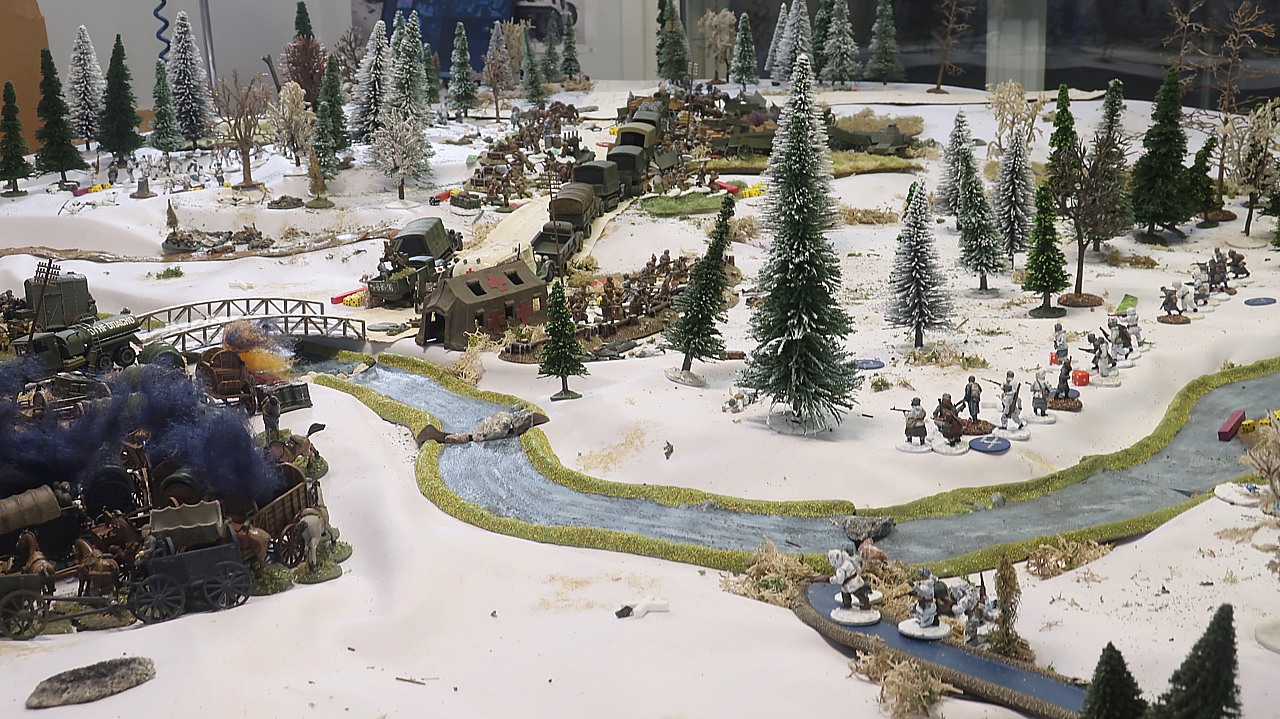
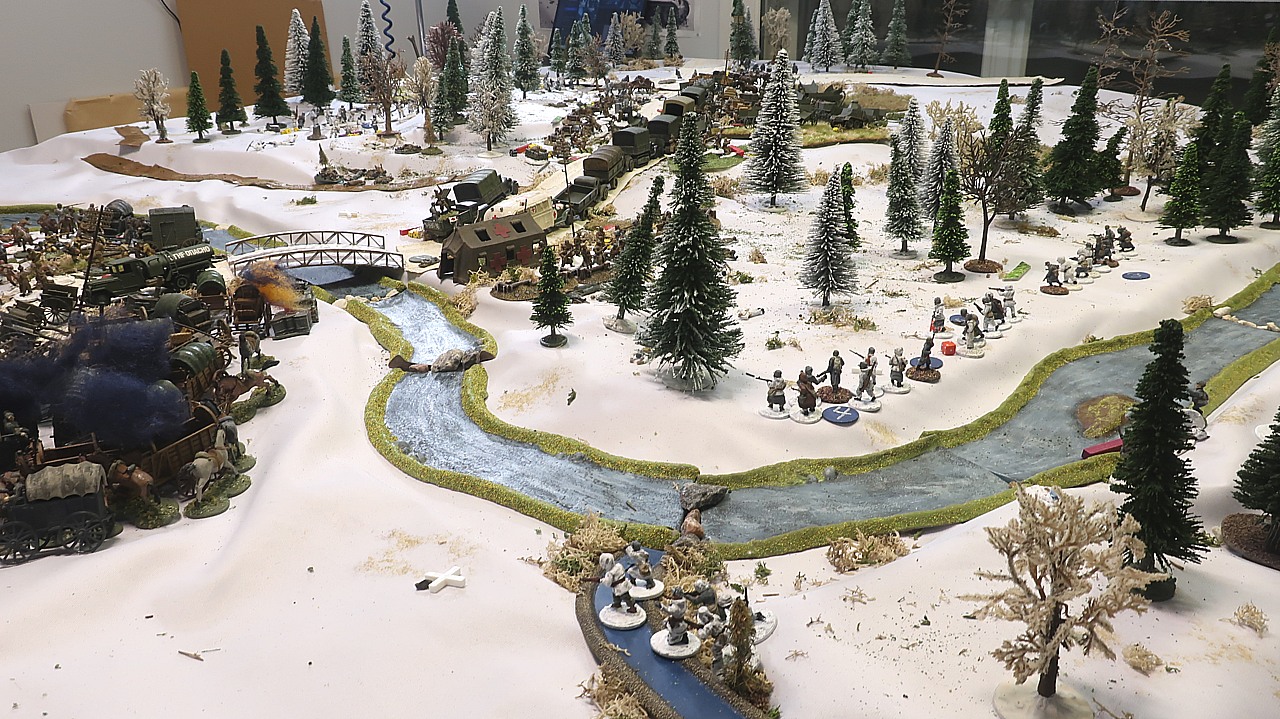
Now, Lt. Col Susitaival's men are assaulting Table M., Mustajoki Bridge. Taking this strategic bridge should cause the enemy some further headaches.
For the Soviets, this battle is particularly desperate as there is nowhere to escape from here! The Finns hold both the northern and the southern adjacent tables... if the Red Army loses this fight, the troops on this table will surrender or disperse into the very hostile woods where few of them will survive. Either way, they will be out of the campaign.
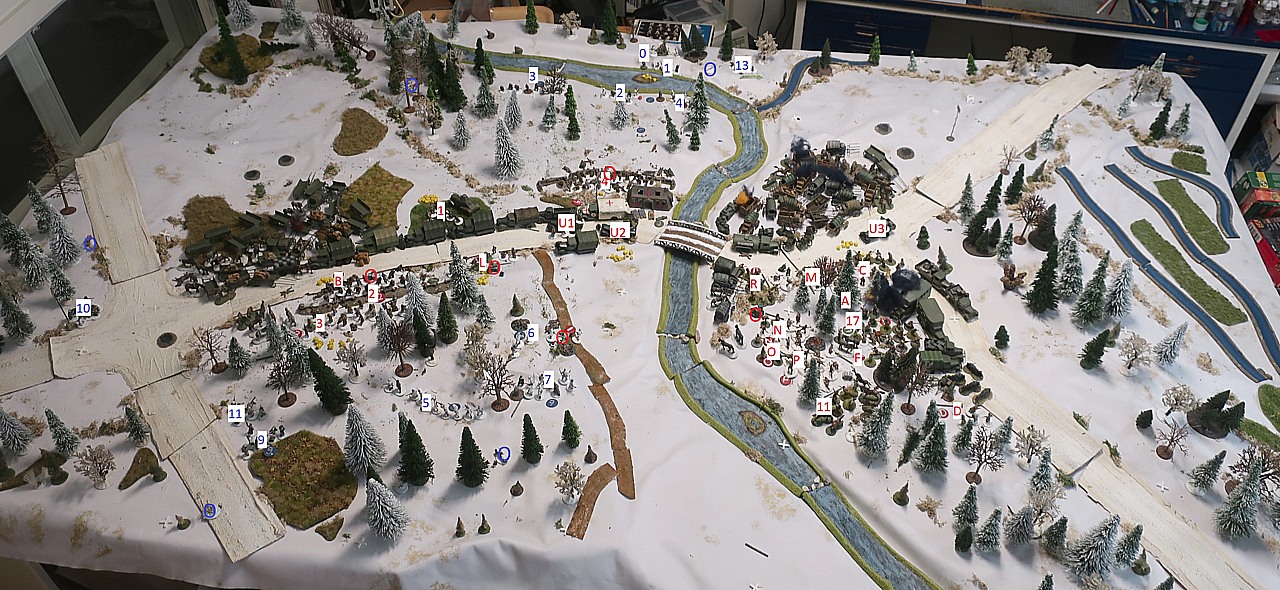
THE SOVIETS, RED and GREEN:
5-RSM-9 First Transportation Platoon (Don)
1 -1st Section
2 - 2nd Section
5-RSM-10 Second Transportation Platoon (Tom)
3 -1st Section
4 - 2nd Section
10-RAA Regimental Anti-Aircraft Plaroon (John)
U1 – 1st AA Section
U2 – 2nd AA Section
U3 – 3rd AA Section
T. BA-27M armored car from HACP Heavy Armored Car Platoon
A. 5-RSM-1 Supply and Maintenance HQ
B. 5-RSM-2 Rations Supply Detachment
C. 5-RSM-3 Combat Equipment Maintenance Detachment
D. 5-RSM-5 Infantry and Equestrian Equipment Maintenance Detachment
E. 17 5-RSM-6 Workshop 2
F. 18 5-RSM-7 Automotive Inspection Detachment
G. 5-RSM-8 Transportation Company HQ Section
H. 5-RSM-9 1st Transportation Platoon vehicles
I. 5-RSM-10 2nd Transportation Platoon vehicles
J. 5-RSM-11 Dressing Station
K. 5-RSM-12 Stretcher Bearer Platoon
L. 5-RSM-13 Club
M. 6-RS-1 HQ
N. 6-RS-2 HQ Platoon
O. 6-RS-3 Airspace observer section
P. 11. 6-RS-4 Messenger section
Q. 6-RS-63 Section Seven
R. 6-RS-8 Special Detachment
THE FINNS, in Blue:
0 - 3rd Company Commander Ltn Keränen and his messenger team (JL + 4 messengers) (Jarkko)
2nd Platoon (Jarkko):
1 - 1st rifle section
2 – 1st LMG section
3 - 3rd rifle section
4 – 2nd LMG section
3rd platoon (Mikko):
5 - 1st rifle section, with platoon sergeant
6 - 2nd LMG section
7 - 3rd rifle section, with platoon leader
1st Machinegun Platoon of Machinegun Company (Mikko)
9 – 1st MMG section
10 – 2nd MMG section
11 – 3rd MMG section
13 - MMG section from 2nd Machinegun platoon of Machinegun Company (Jarkko)

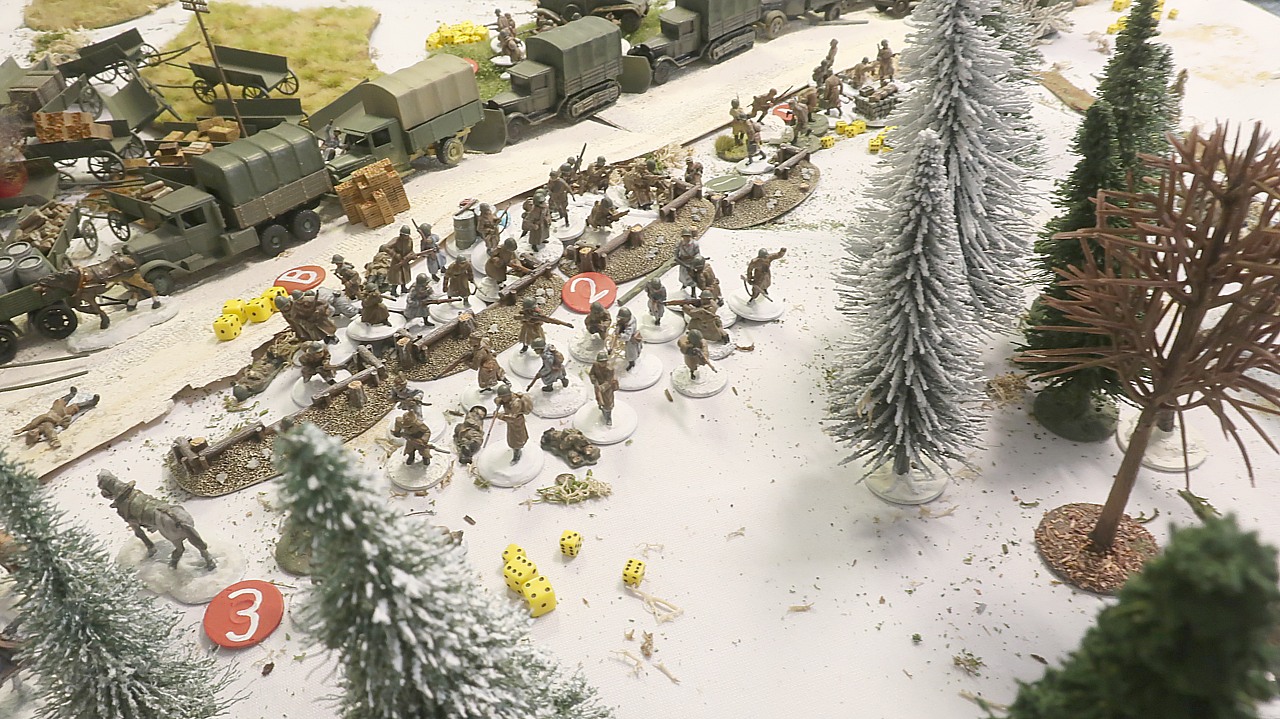
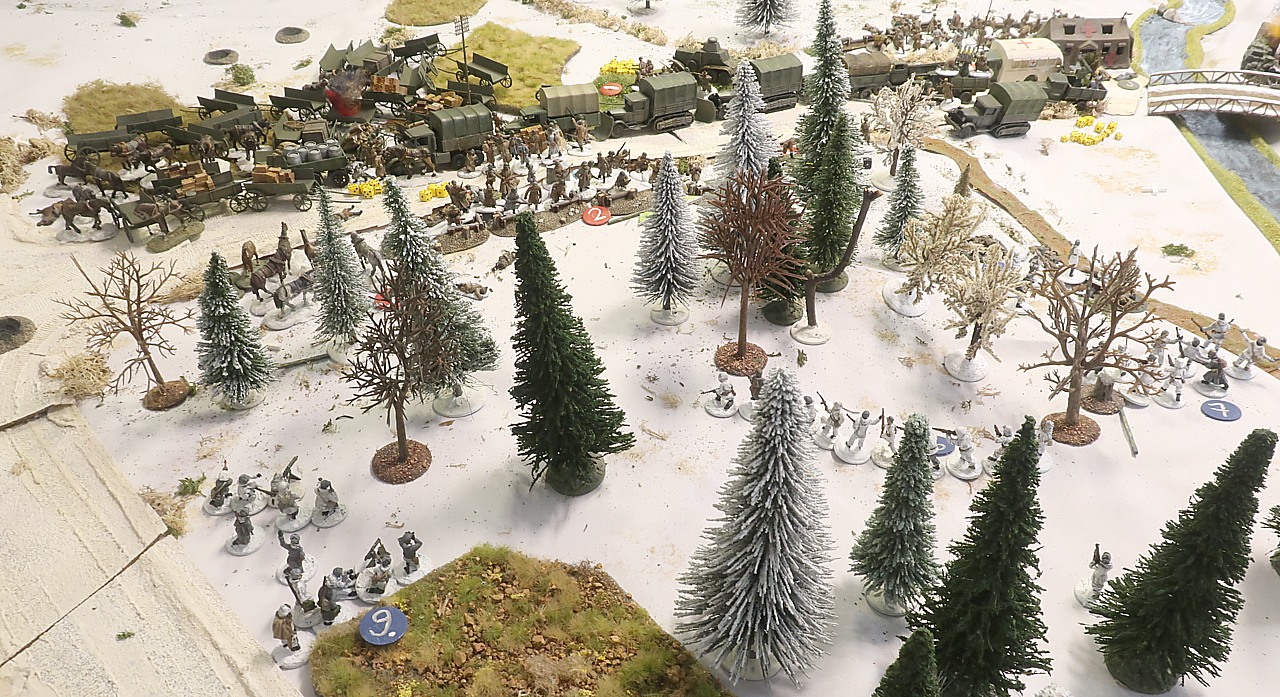
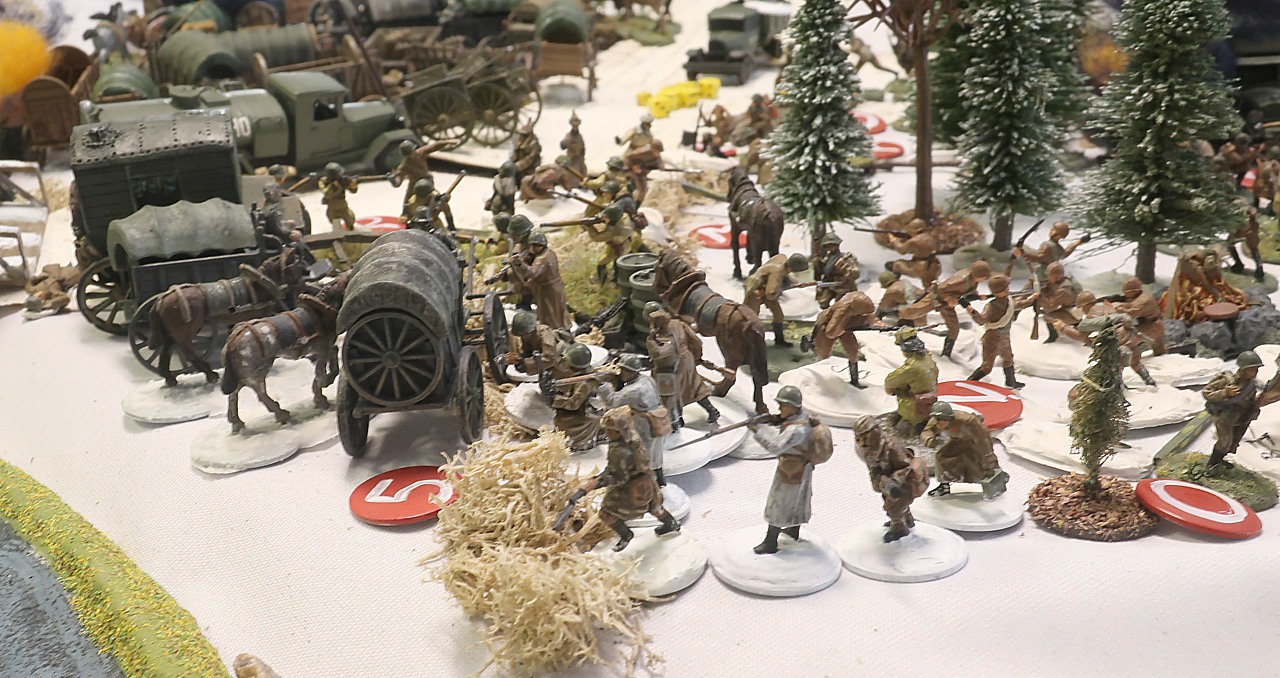
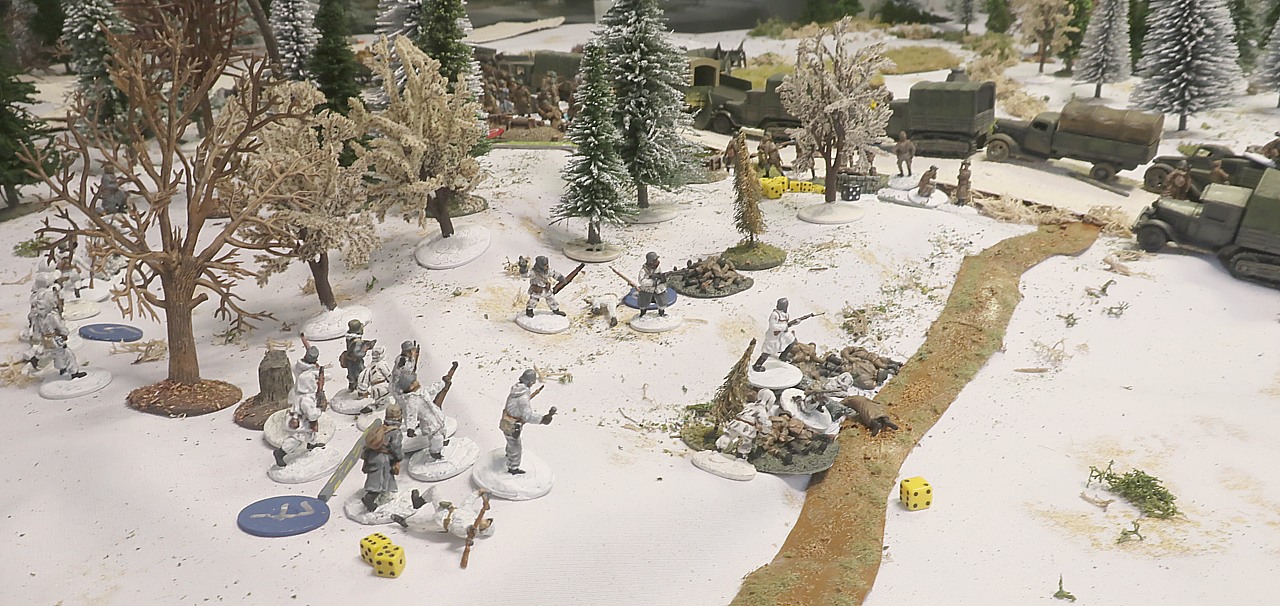
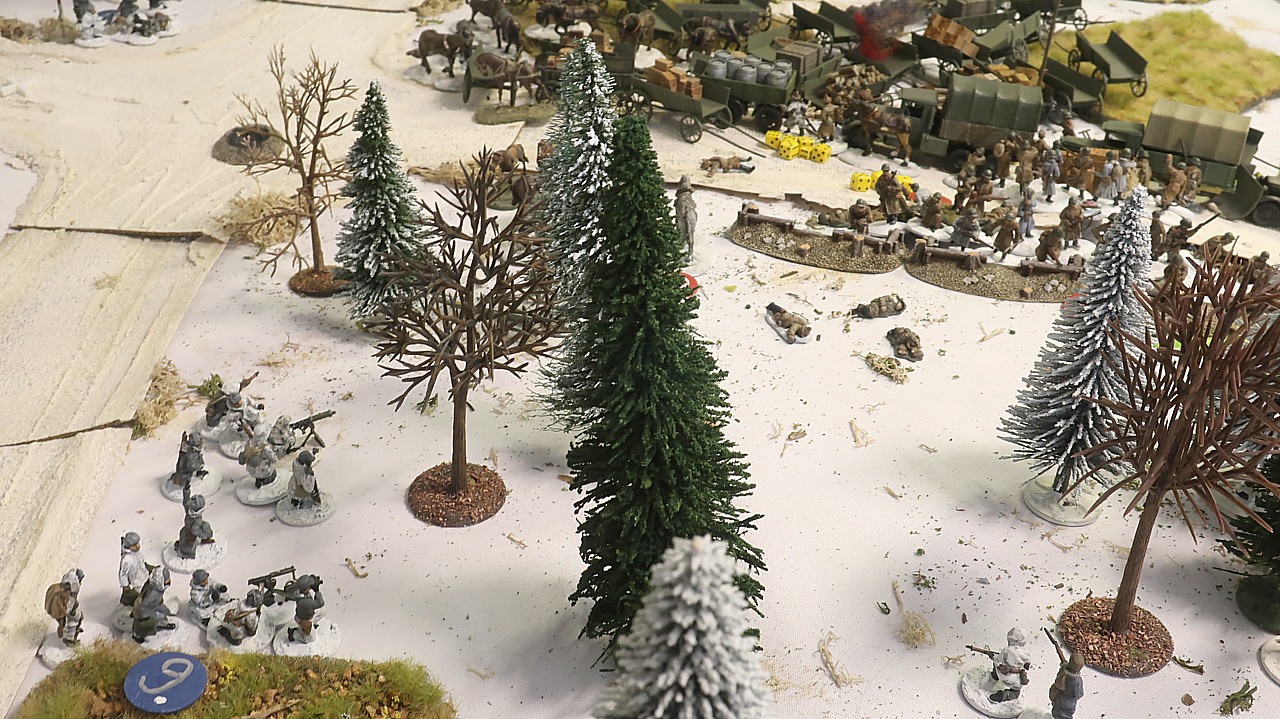
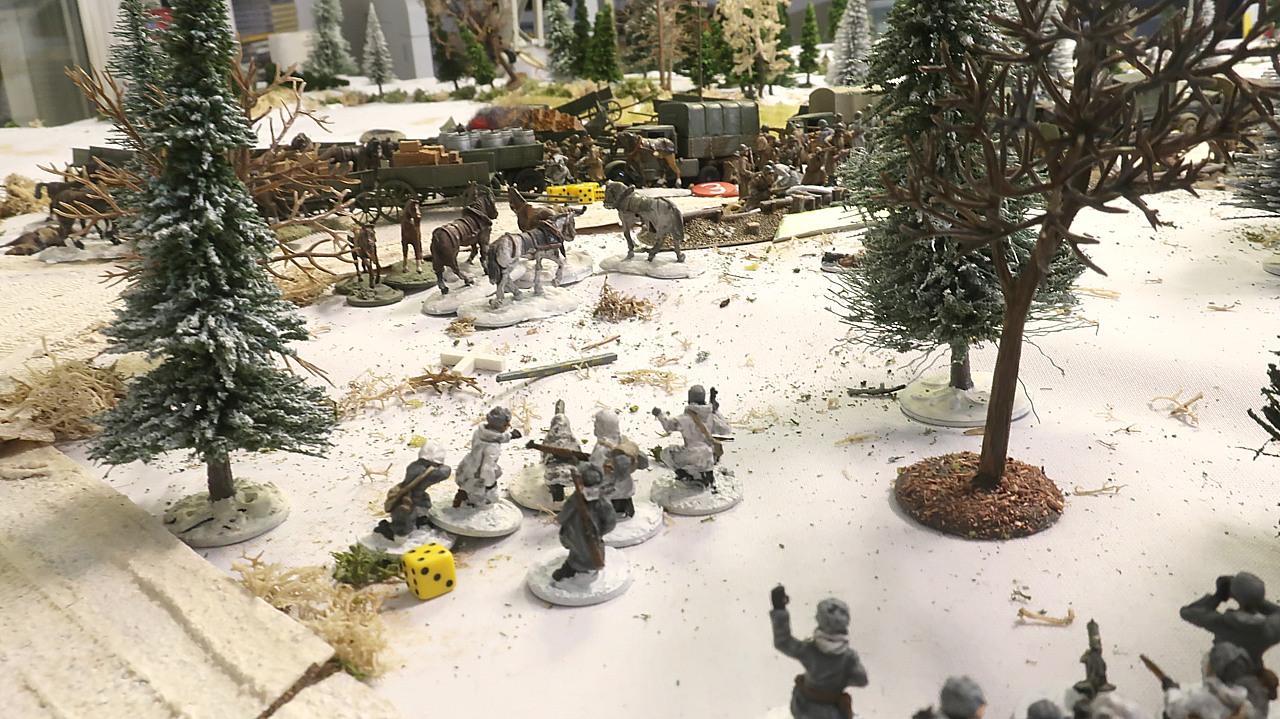
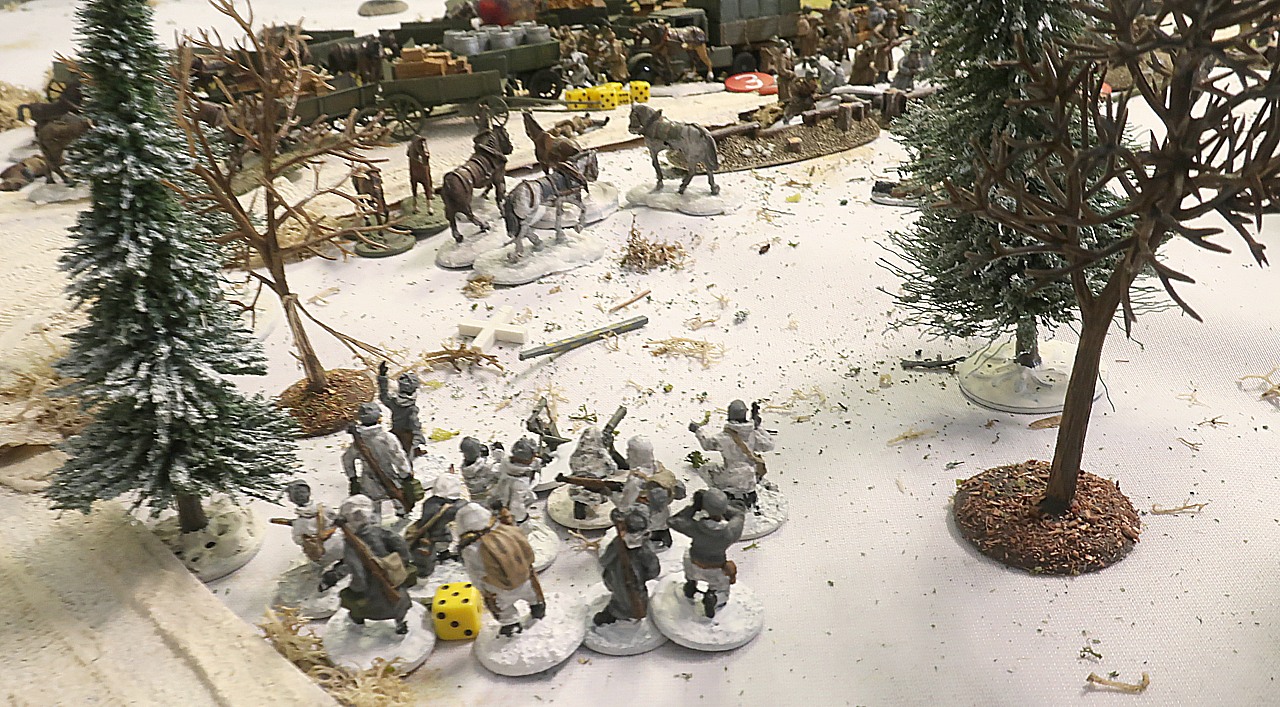
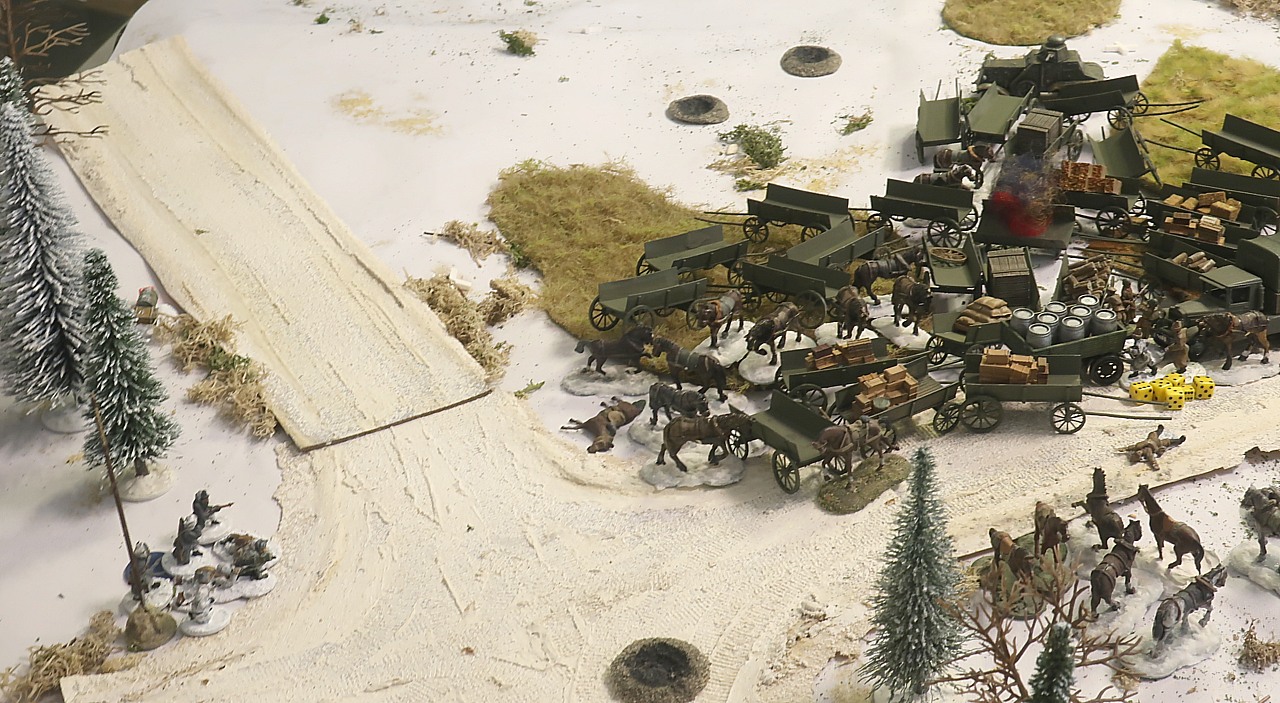
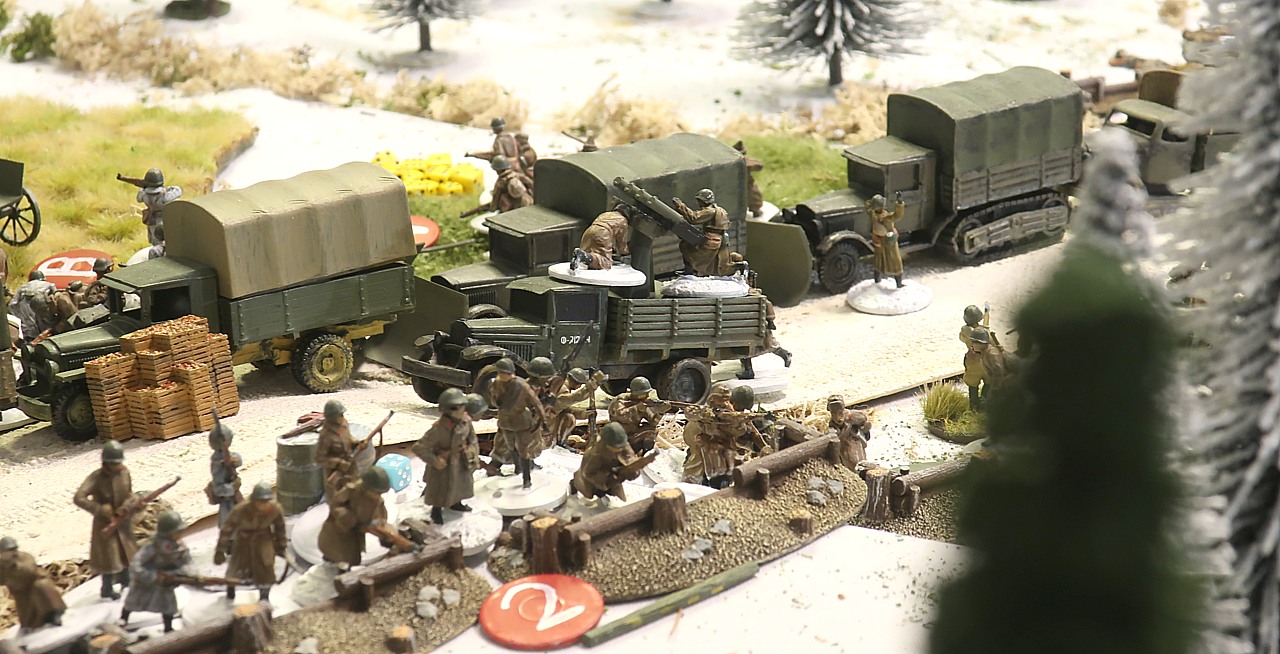
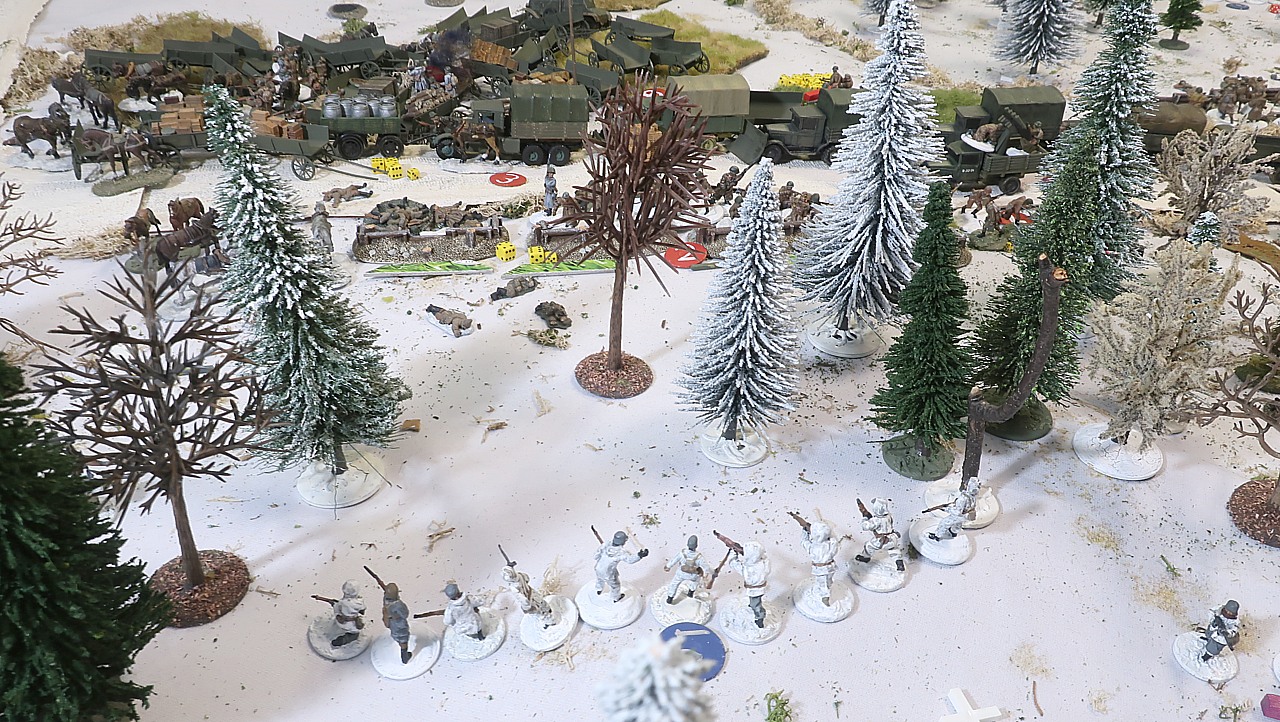
In the central woods, Tom's section #3 is receiving fire from the Finnish machineguns in the west...
Another man is brought down by the bullets and several more points of shock are accumulated... but there are 17 men left in the section and they have 9 points of shock.
WoNS rules permit a unit to move away from the enemy without being impeded by shock. Tom decides to withrdaw his section north... they do not quite make it over the road but they should be out of the line of fire, especially as they will be protected by Don's section in the entrenchment.
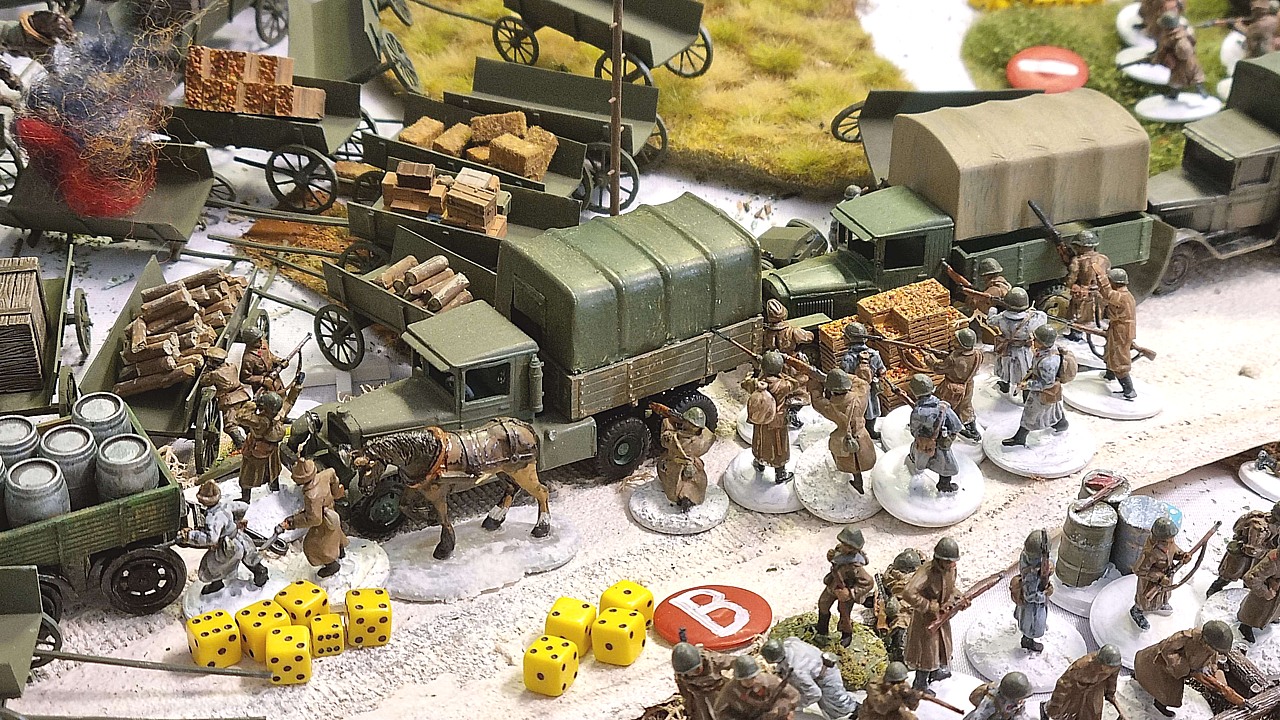
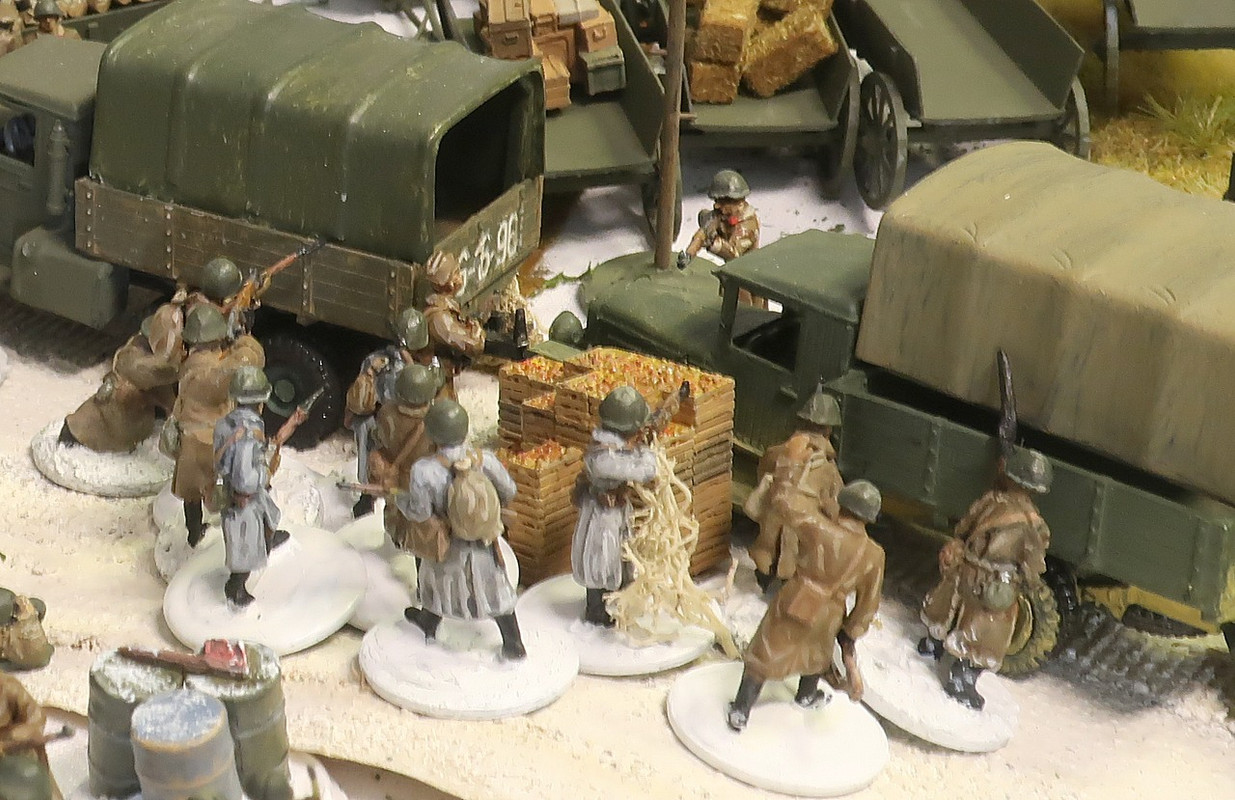

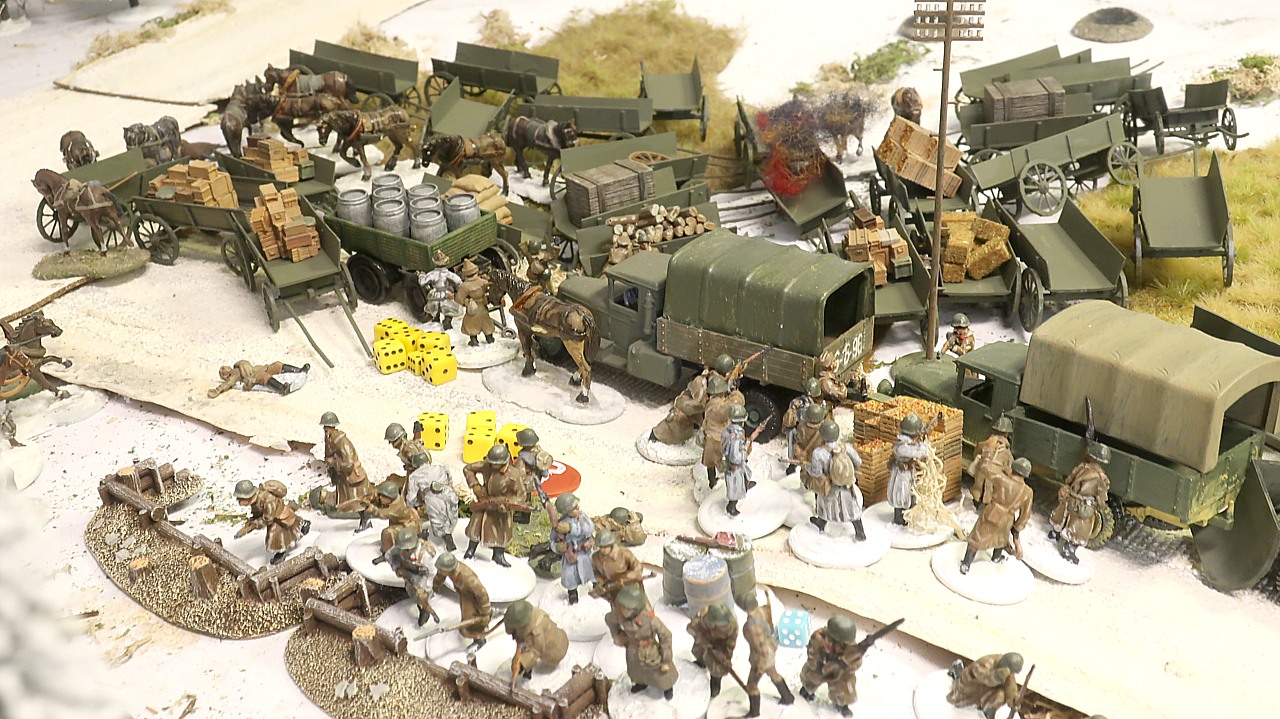
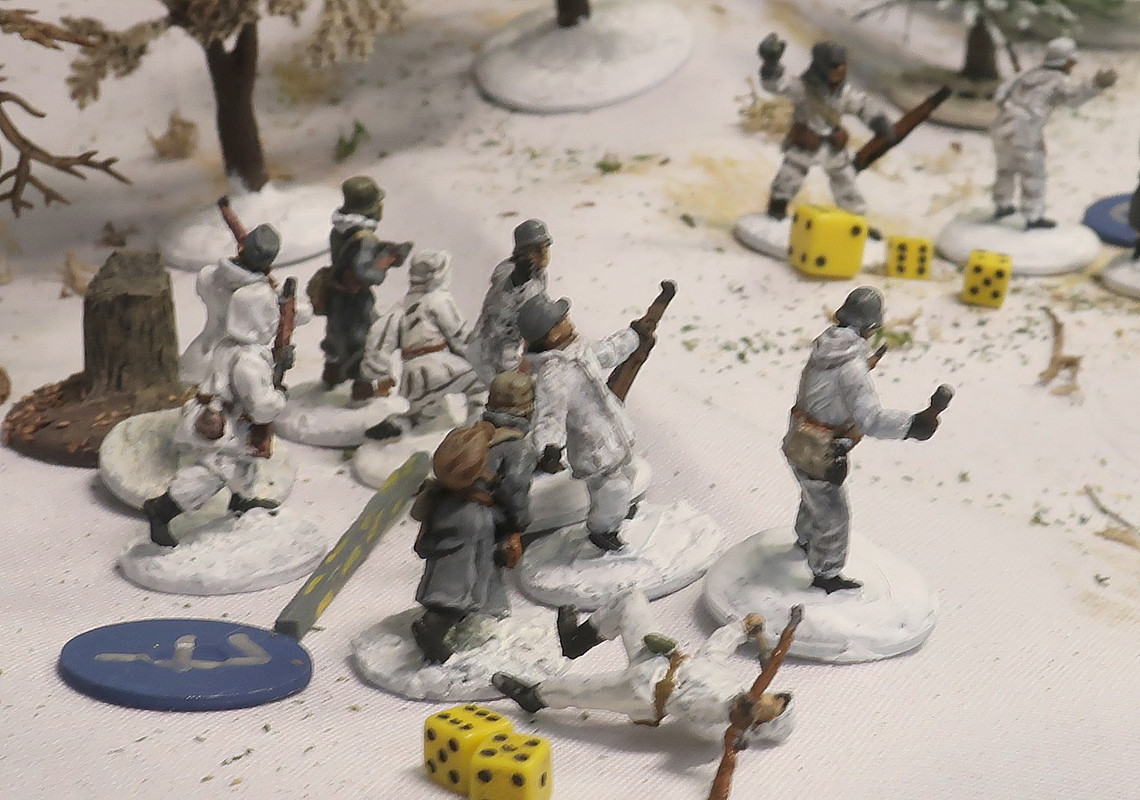
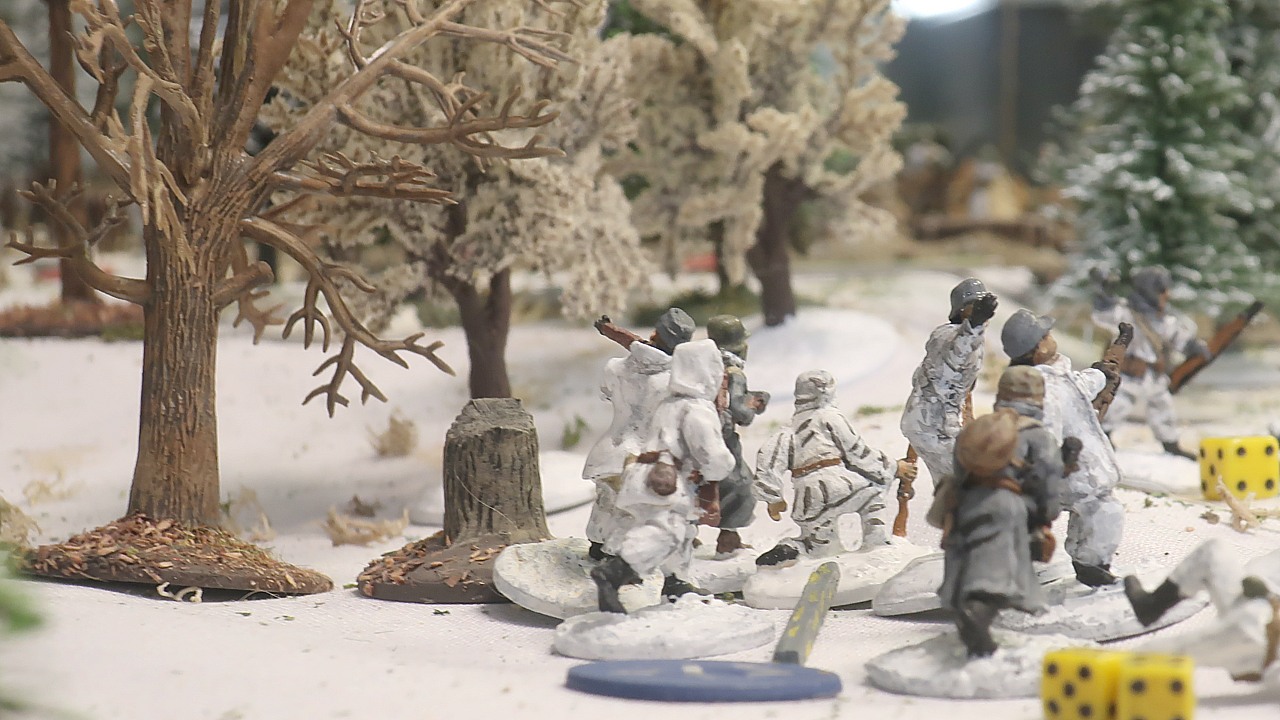
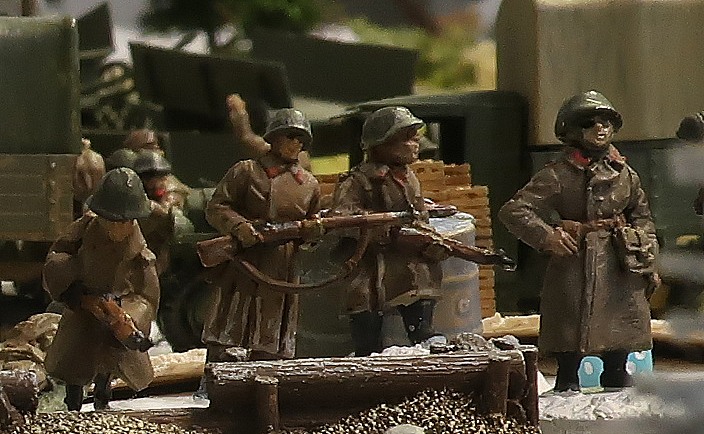
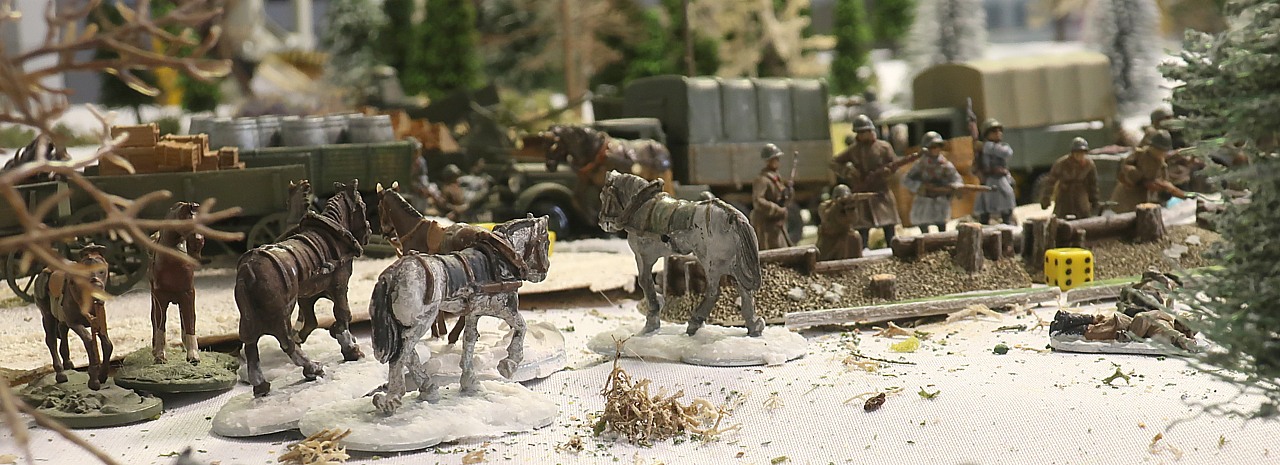
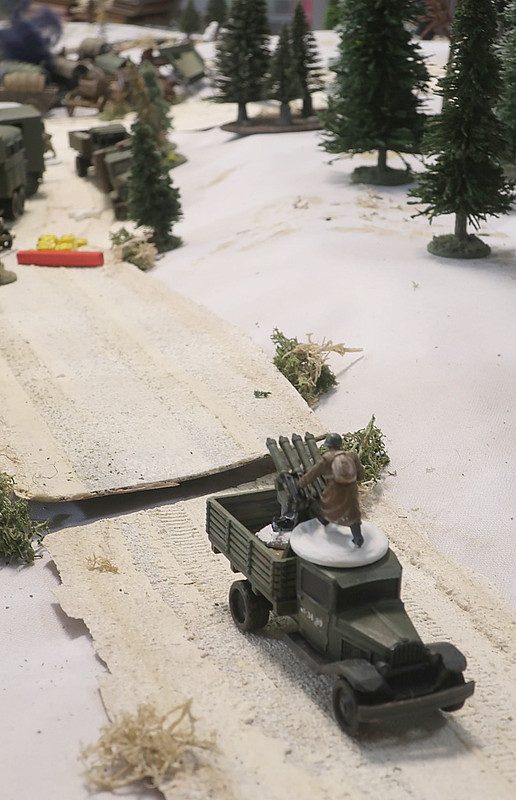
If you recall, last time Mikko's Finns were able to disable a Soviet jump-off point, seen in the above picture on the right, by the path. Three of the LMG section's men are presently on it.
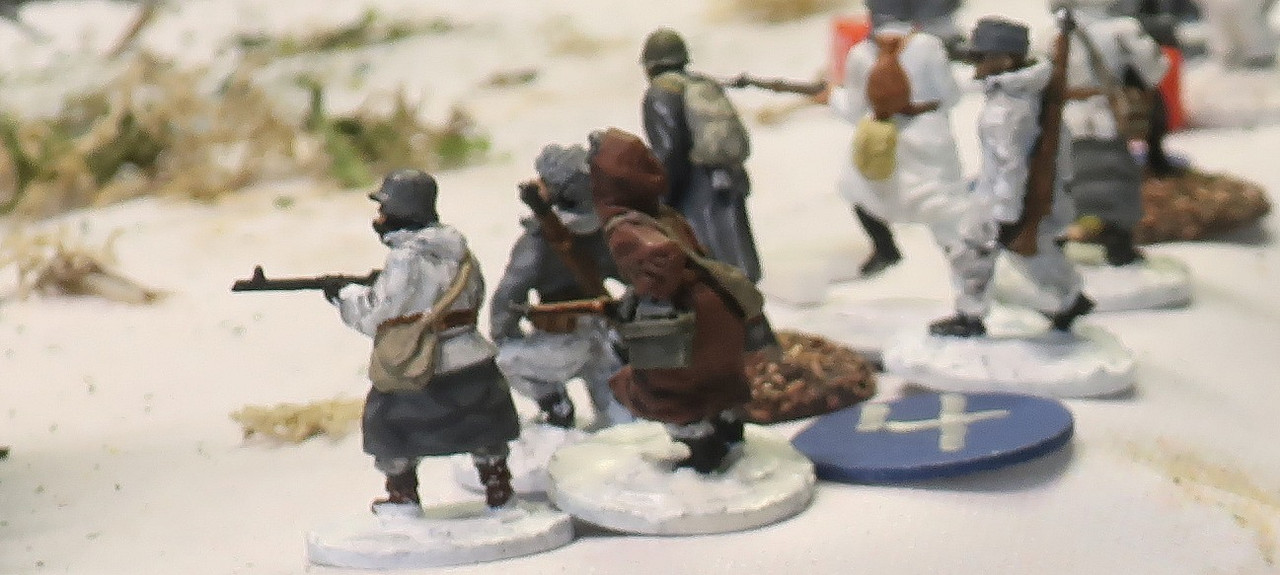
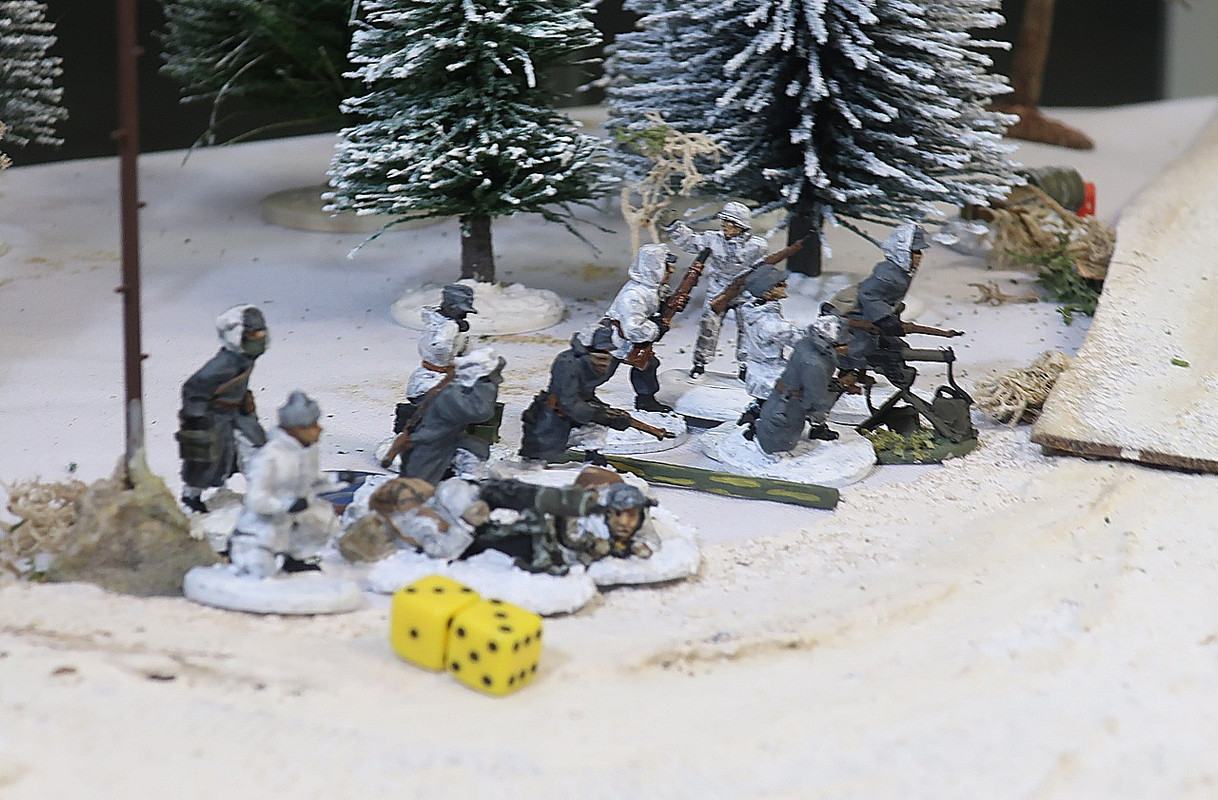
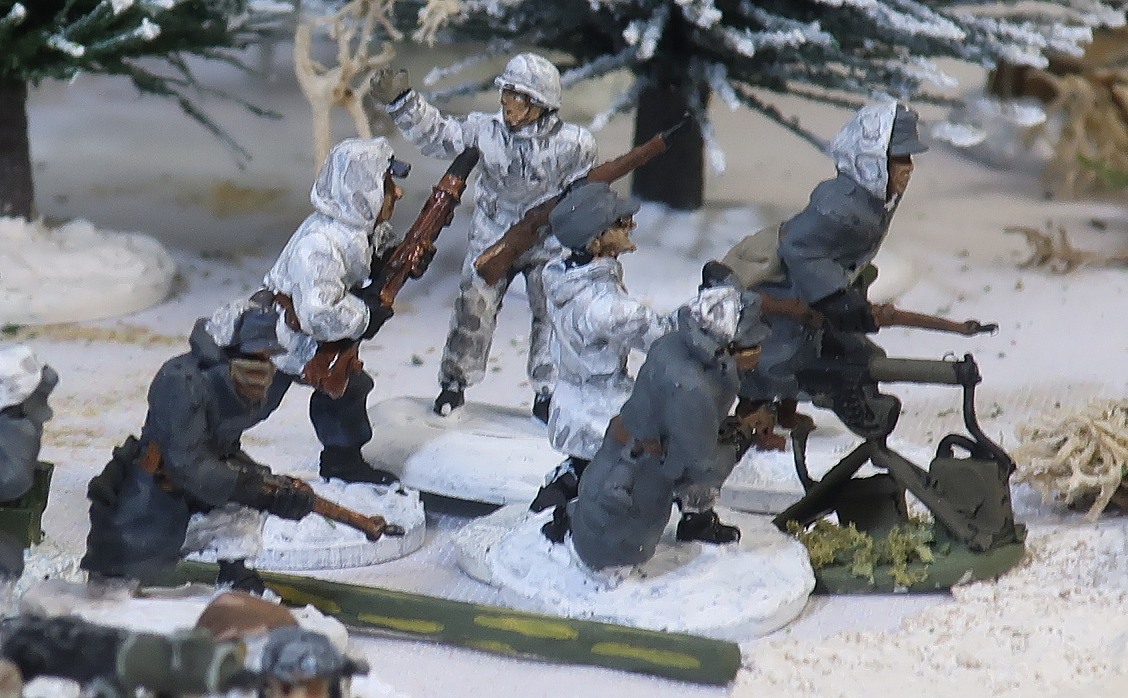
John sees his moment come... he now deploys what he calls his Assault Squad, in fact this is a section from 4th Company 22nd Platoon, whom we already saw fight in Games One and Two, but now John has reinforced them. He has bought them a heroic section leader, sergeant Yakolev, plus six semi-automatic SVT-38 rifles! In the narrative they've always had the leader and the rifles, but only now has the leader been recoginized as a hero. And the rifles, well thay've just now learned to use them.

Sgt Yakolev is an experienced leader whose men are considered to be Regulars (all other Soviet troops are Green in this campaign).

These are the only Red Army infantry fighting forces on this table! Everyone else is from the supply or anti-aircraft units.
They fire their semi-automatic rifles and their LMG at the Finns at the jump-off point, and then add a Dyakonov rifle grenade for good measure...

One of the Finns is killed...and the section suffers seven points of shock.
John has a double phase.
He continues peppering Mikko's Finns with his automatic and semi-automatic fire...

Mikko's LMG section suffers two additional shock and the section leader falls down, killed by one of the many bullets...
Fortunately for the Finns, their Force Morale is unaffected...

THE SOVIETS, RED and GREEN:
5-RSM-9 First Transportation Platoon (Don)
1 -1st Section
2 - 2nd Section
5-RSM-10 Second Transportation Platoon (Tom)
3 -1st Section
4 - 2nd Section
10-RAA Regimental Anti-Aircraft Plaroon (John)
U1 – 1st AA Section
U2 – 2nd AA Section
U3 – 3rd AA Section
T. BA-27M armored car from HACP Heavy Armored Car Platoon
A. 5-RSM-1 Supply and Maintenance HQ
B. 5-RSM-2 Rations Supply Detachment
C. 5-RSM-3 Combat Equipment Maintenance Detachment
D. 5-RSM-5 Infantry and Equestrian Equipment Maintenance Detachment
E. 17 5-RSM-6 Workshop 2
F. 18 5-RSM-7 Automotive Inspection Detachment
G. 5-RSM-8 Transportation Company HQ Section
H. 5-RSM-9 1st Transportation Platoon vehicles
I. 5-RSM-10 2nd Transportation Platoon vehicles
J. 5-RSM-11 Dressing Station
K. 5-RSM-12 Stretcher Bearer Platoon
L. 5-RSM-13 Club
M. 6-RS-1 HQ
N. 6-RS-2 HQ Platoon
O. 6-RS-3 Airspace observer section
P. 11. 6-RS-4 Messenger section
Q. 6-RS-63 Section Seven
R. 6-RS-8 Special Detachment
THE FINNS, in Blue:
0 - 3rd Company Commander Ltn Keränen and his messenger team (JL + 4 messengers) (Jarkko)
2nd Platoon (Jarkko):
1 - 1st rifle section
2 – 1st LMG section
3 - 3rd rifle section
4 – 2nd LMG section
3rd platoon (Mikko):
5 - 1st rifle section, with platoon sergeant
6 - 2nd LMG section
7 - 3rd rifle section, with platoon leader
1st Machinegun Platoon of Machinegun Company (Mikko)
9 – 1st MMG section
10 – 2nd MMG section
11 – 3rd MMG section
13 - MMG section from 2nd Machinegun platoon of Machinegun Company (Jarkko)
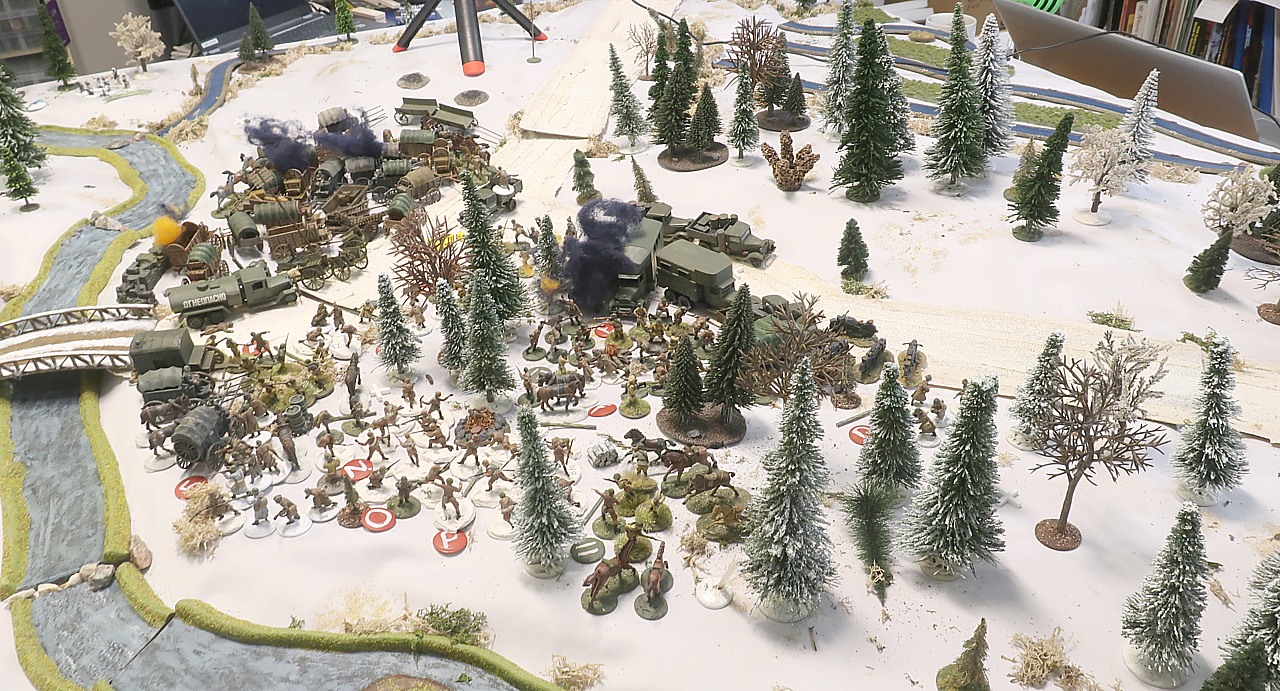
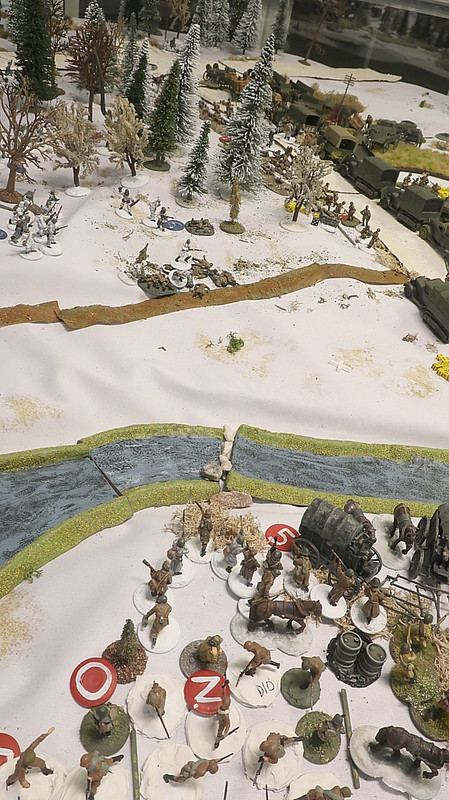
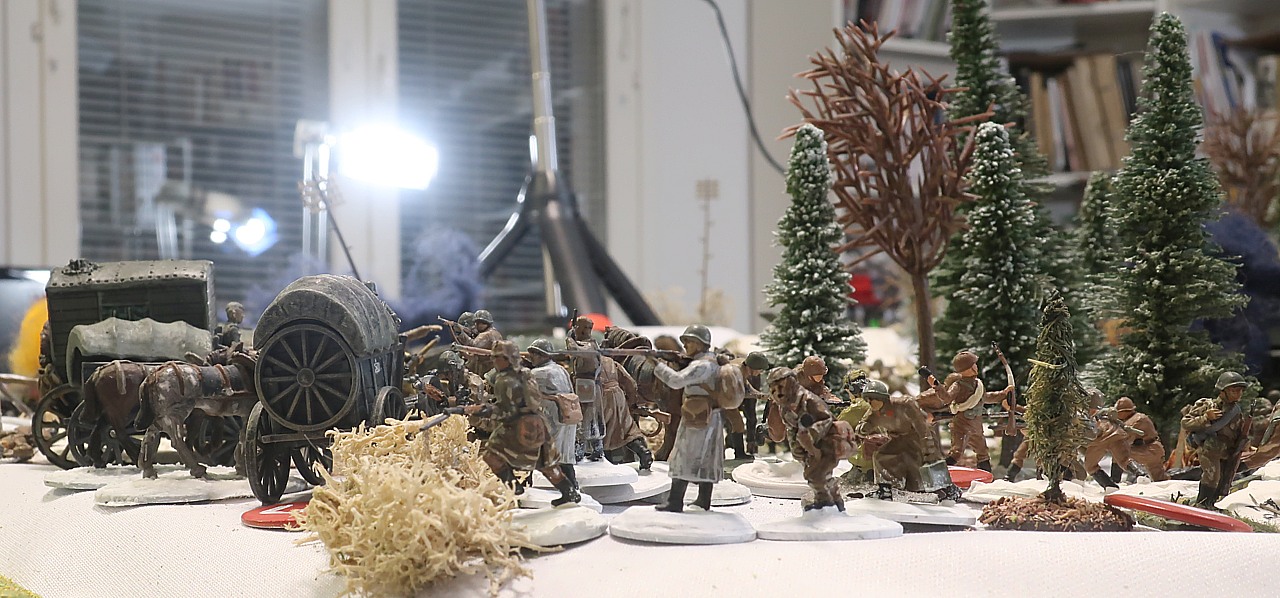
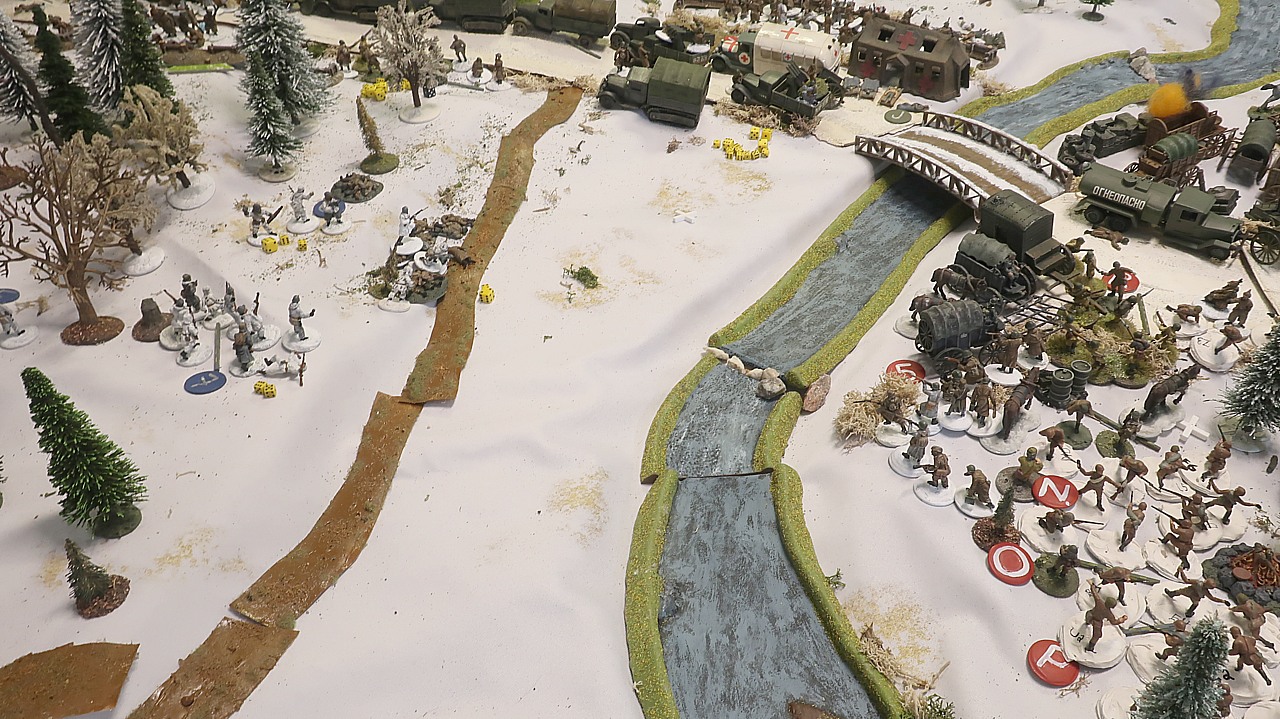
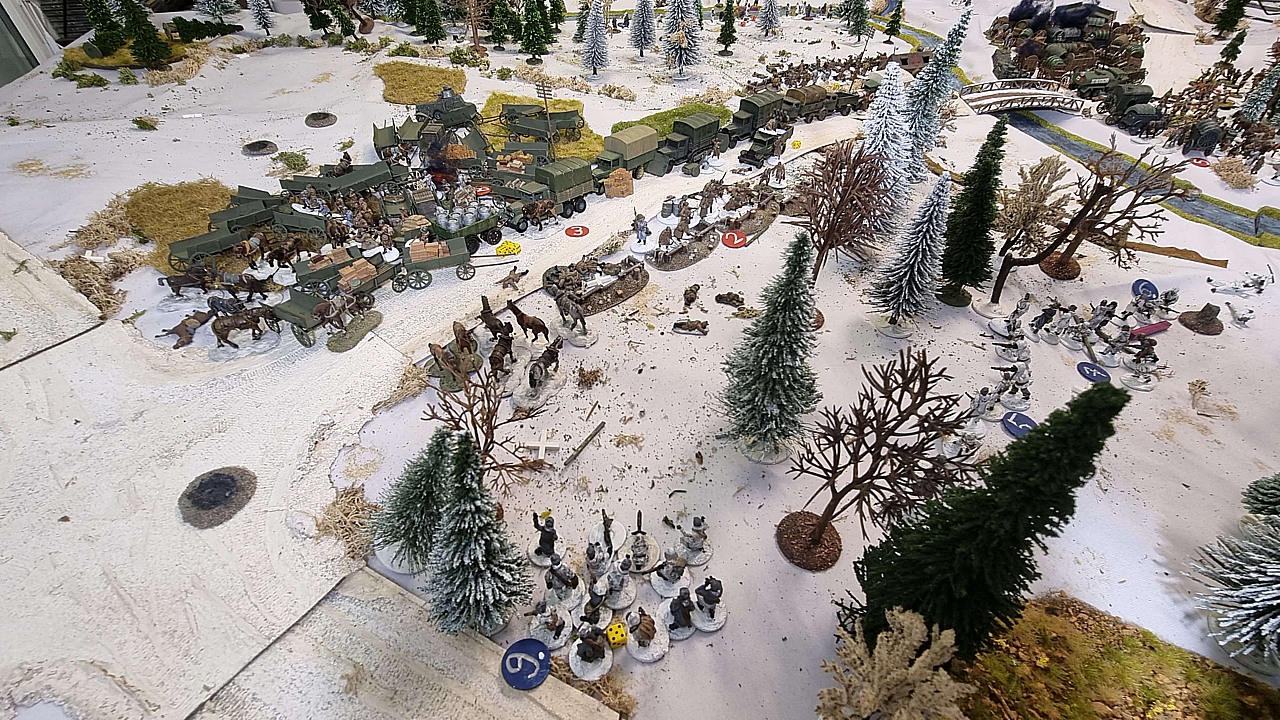
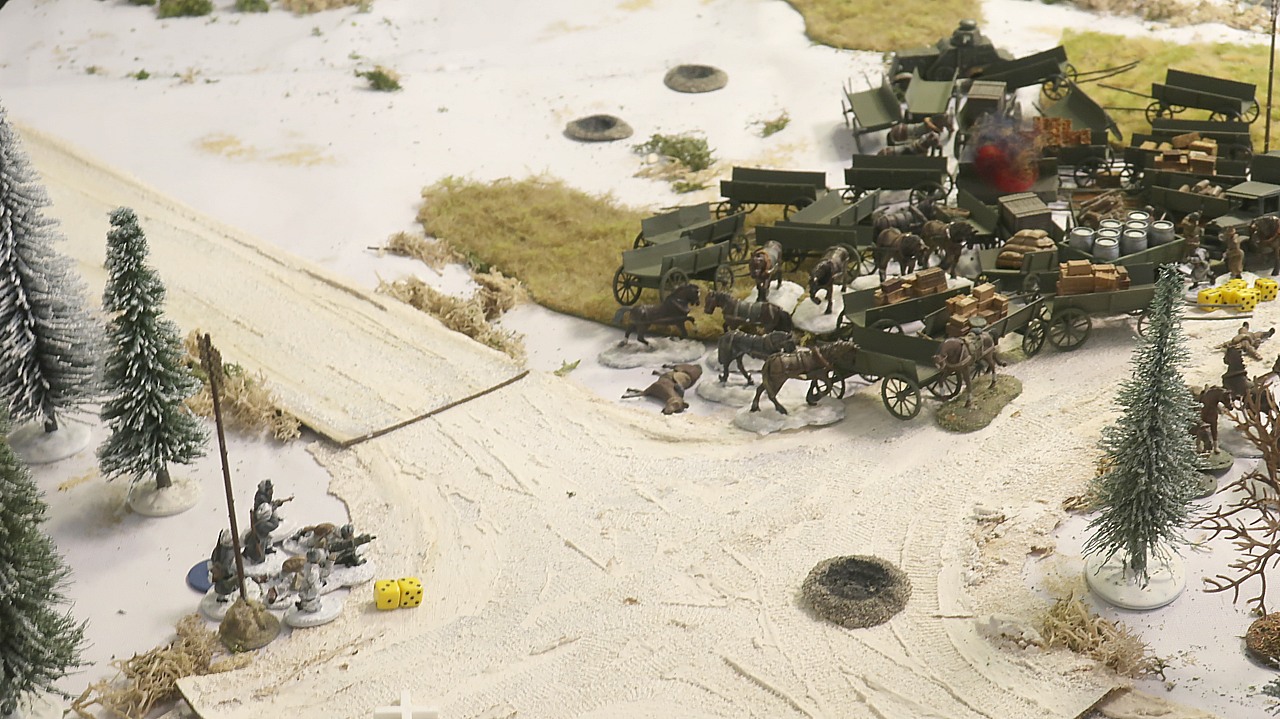
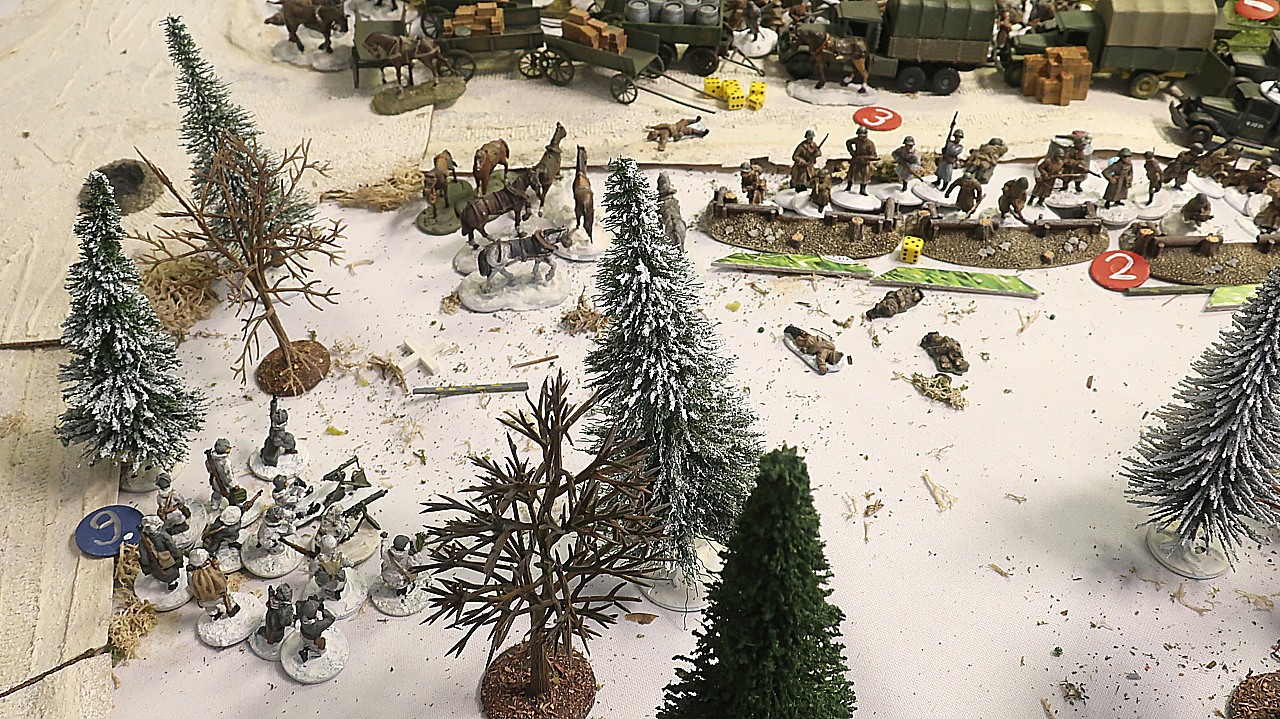
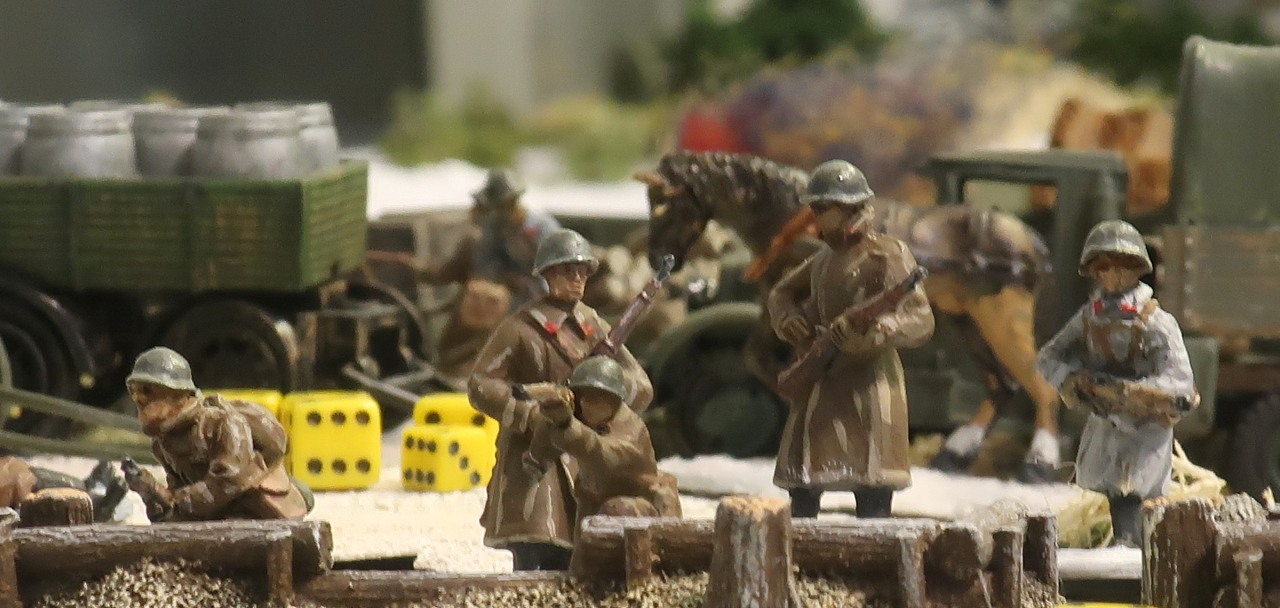
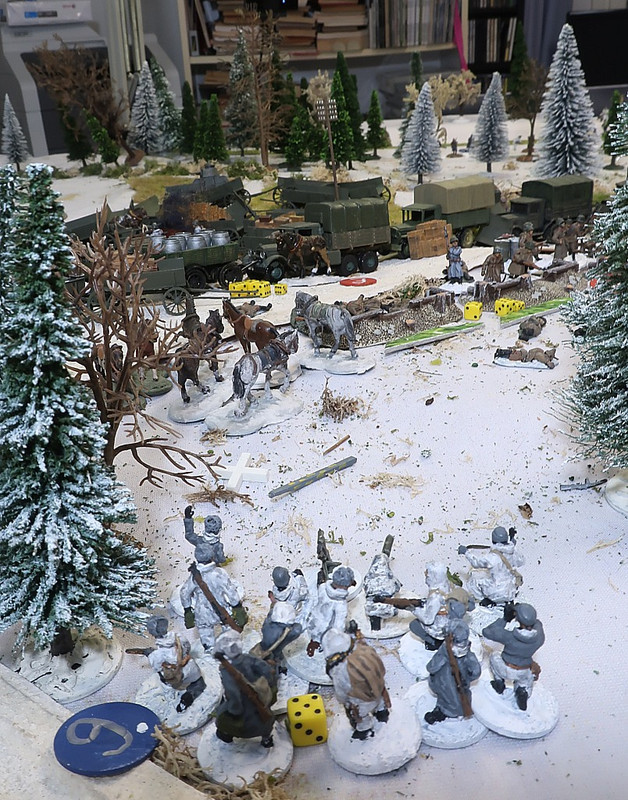
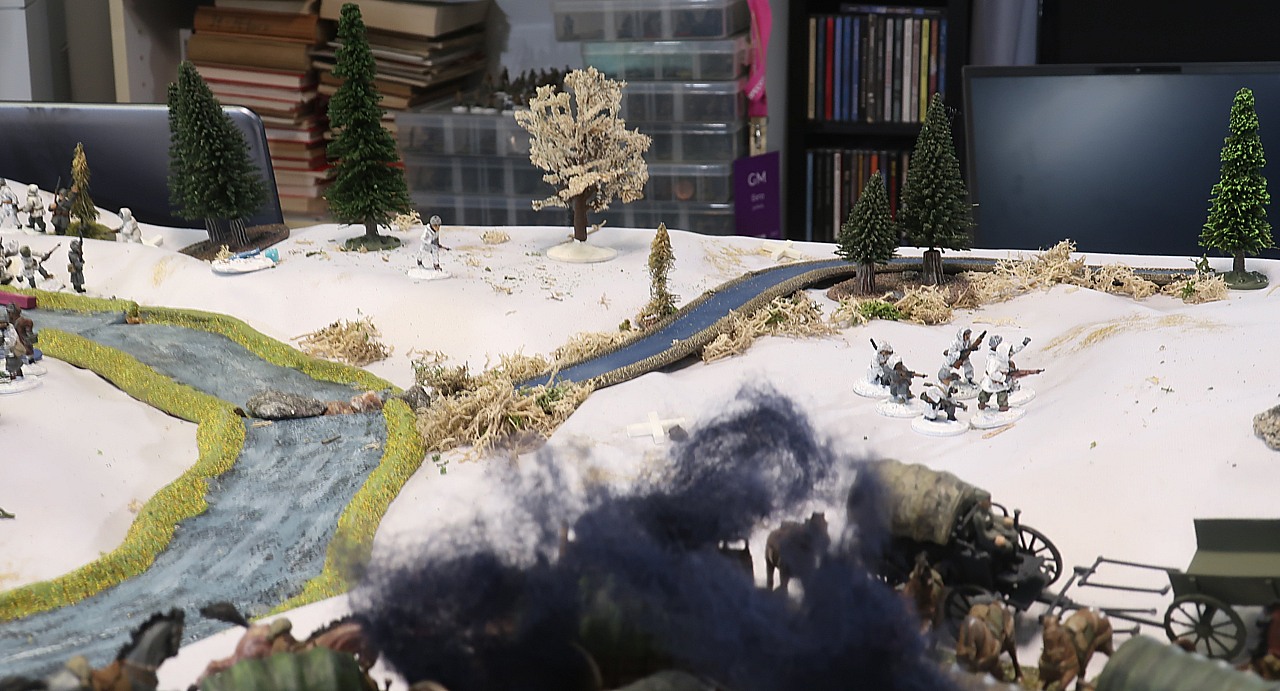
Meanwhile in the north, Jarkko's men have been recovering their fighitng ability. Jarkko knows that if he were to move his forces directly towards the dressing station, the results might not be pretty.
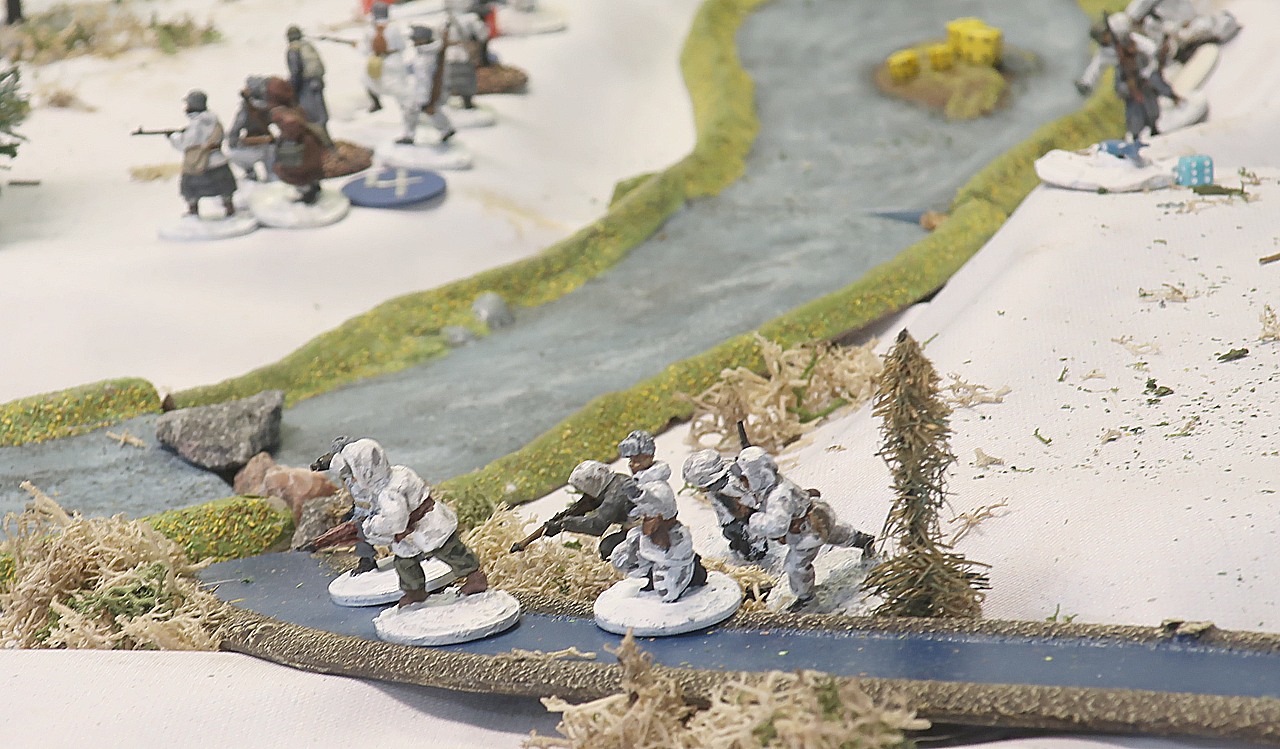
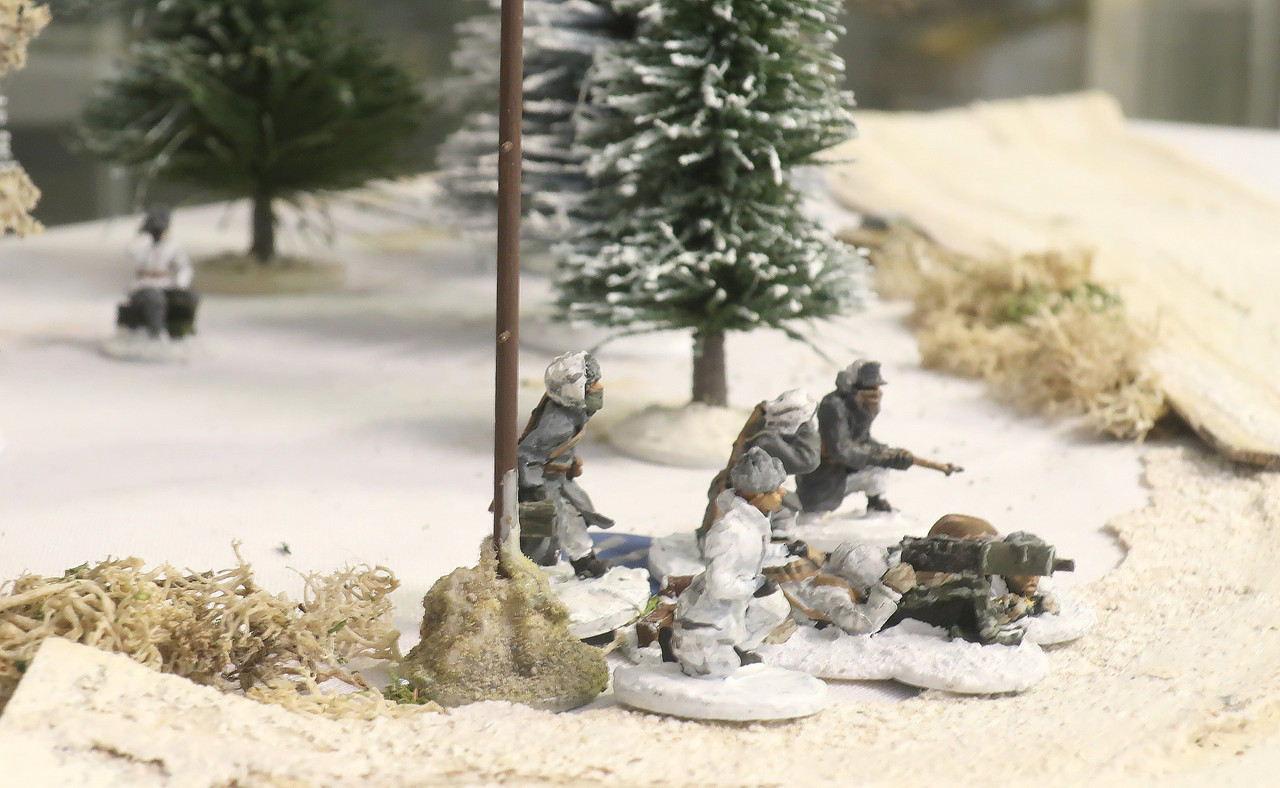
He decides to move his MMG team to a new place on the eastern flank. He hopes that from there they'll be able to target some of the teamsters holed up in the entrenchment just north of the dressing station.
Pulling their heavy machinegun behind them, the MMG team moves over the little frozen stream.

South of the road, John turns around his AAA MG and hoses the Finns at the forest's edge, but to no effect.
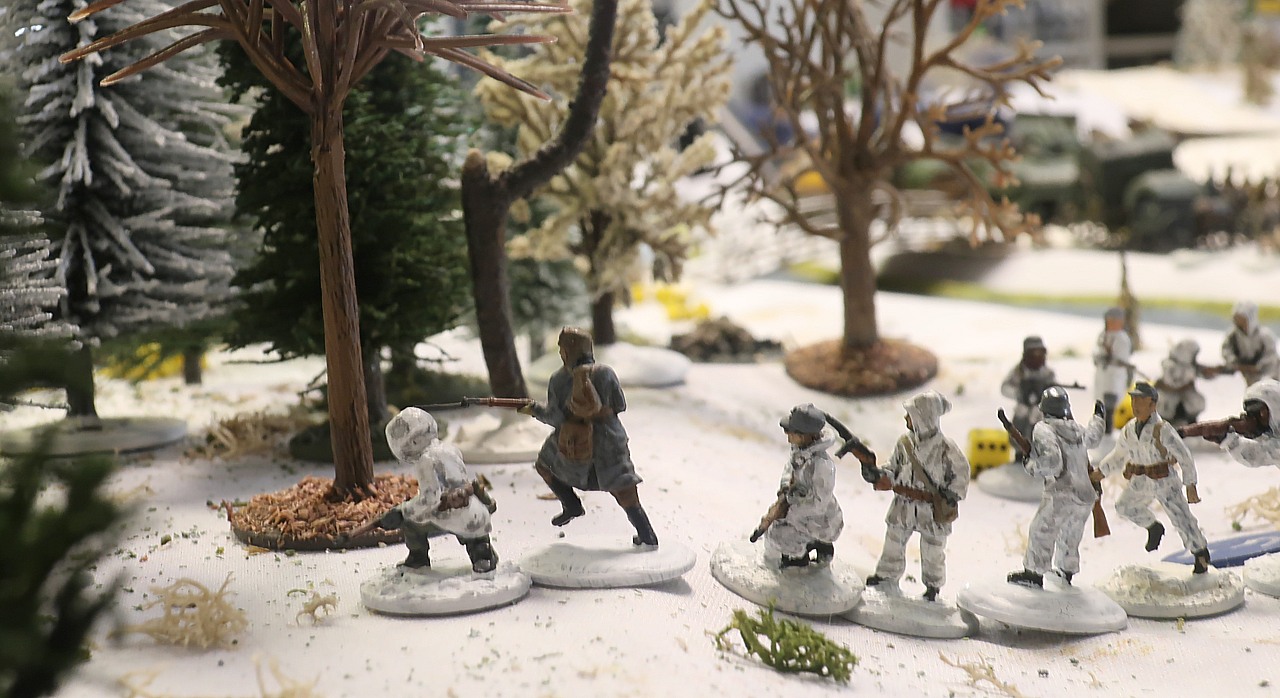
Realizing that he cannot prevail over this much firepower, Mikko decides to withdraw his men from the forest edge. Fighting John's best forces is not really a priority for him. He first needs to take care of Don's men in the trench just south of the road...

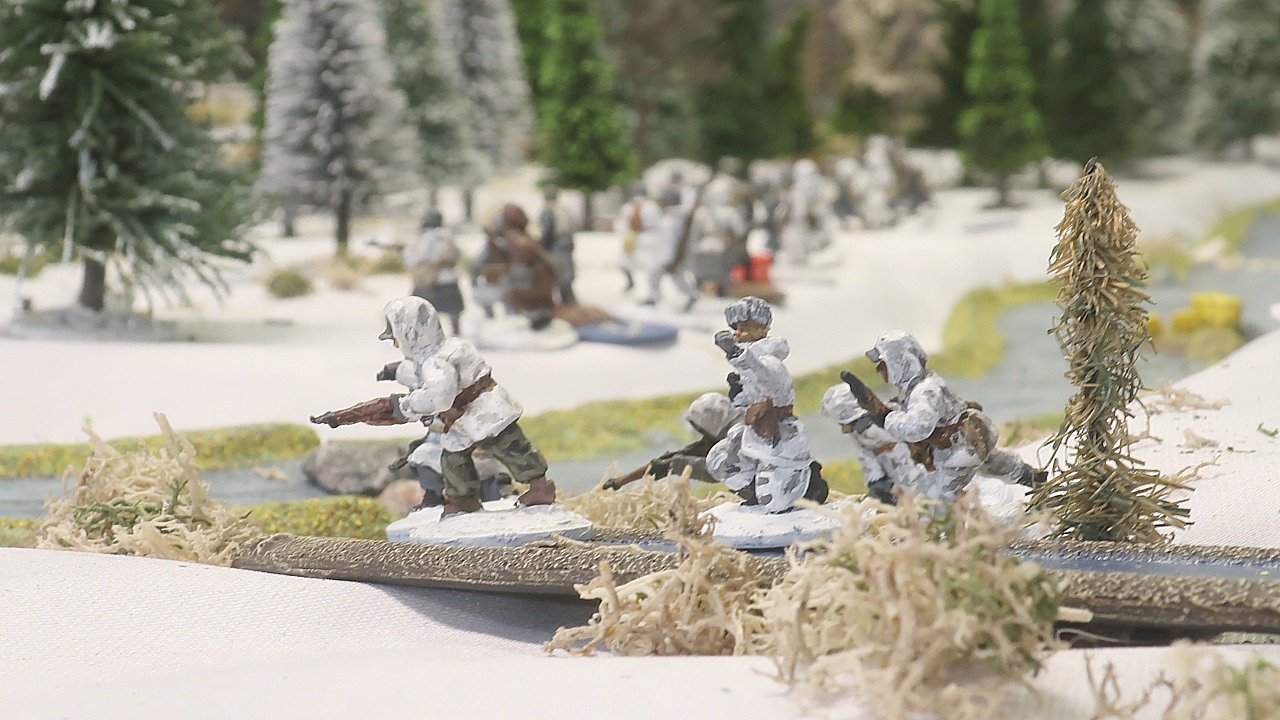
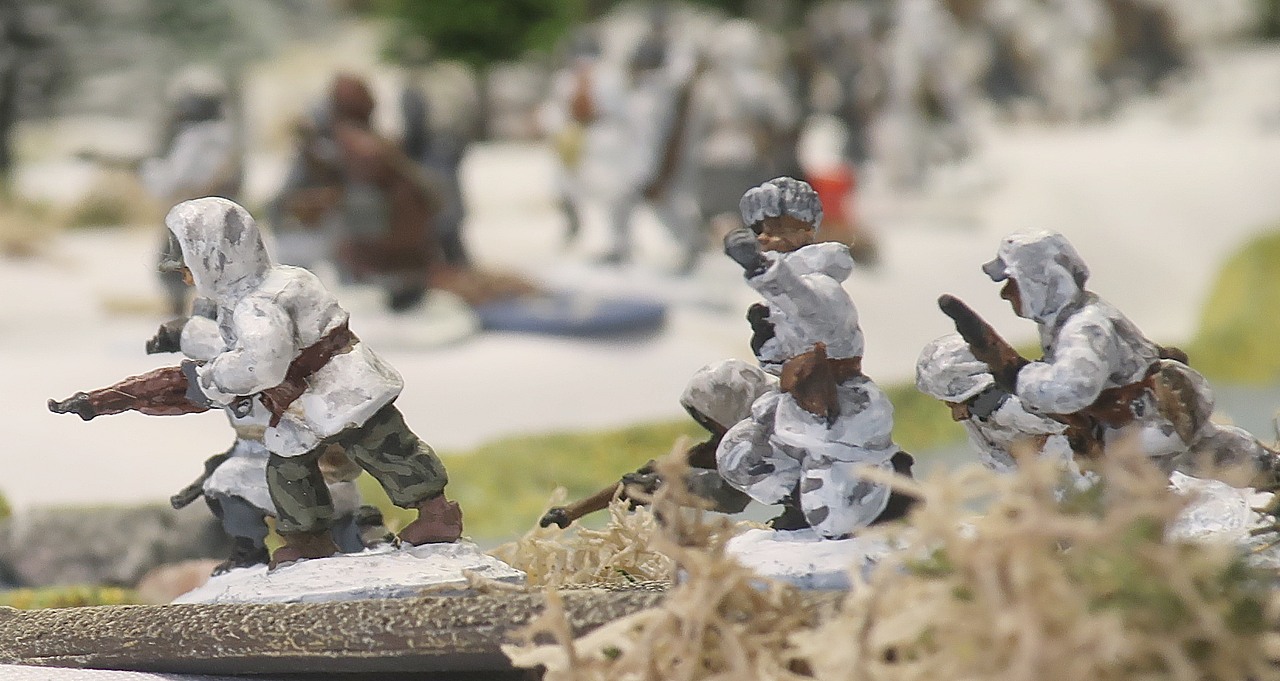
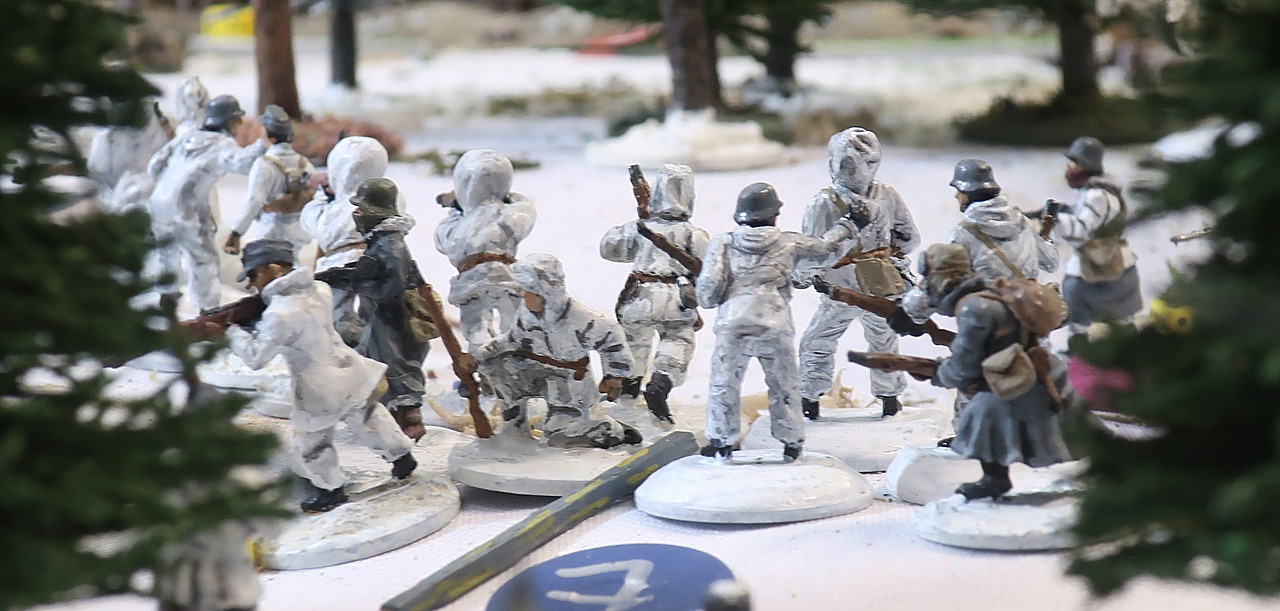
The white-clad fighters disappear into the woods...

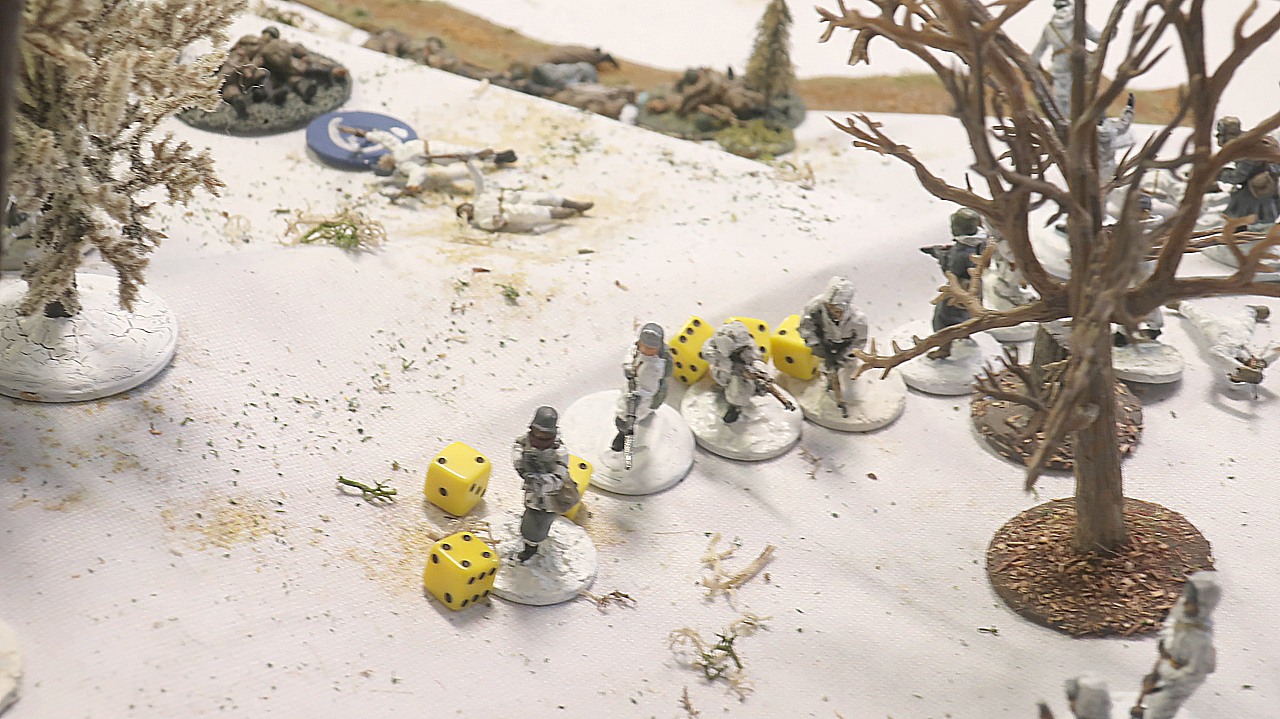
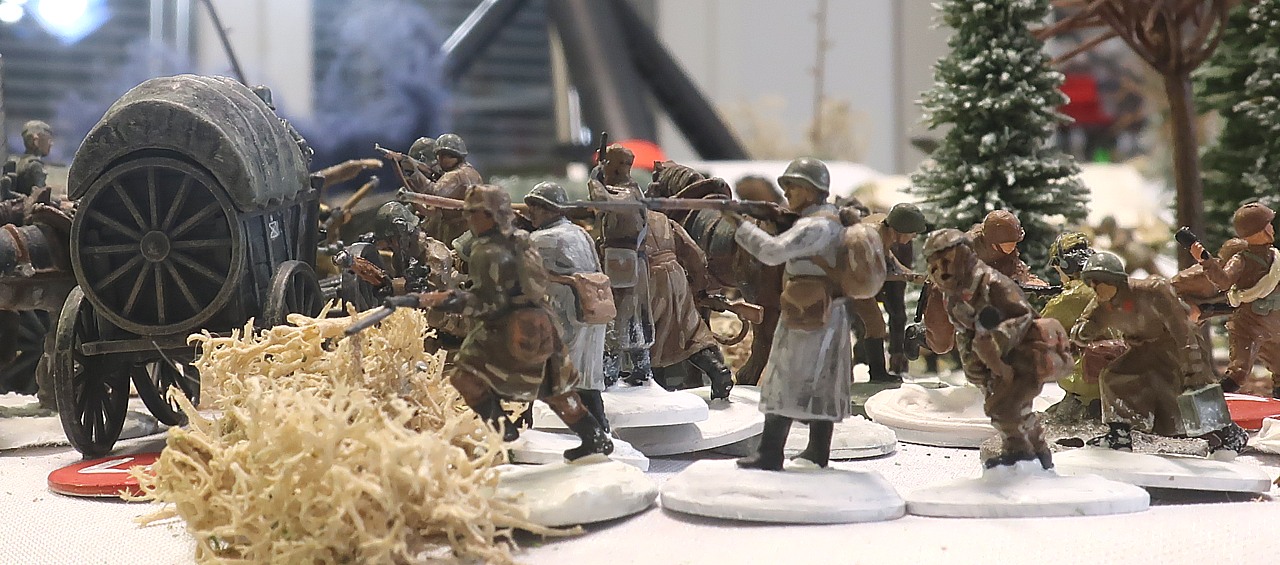
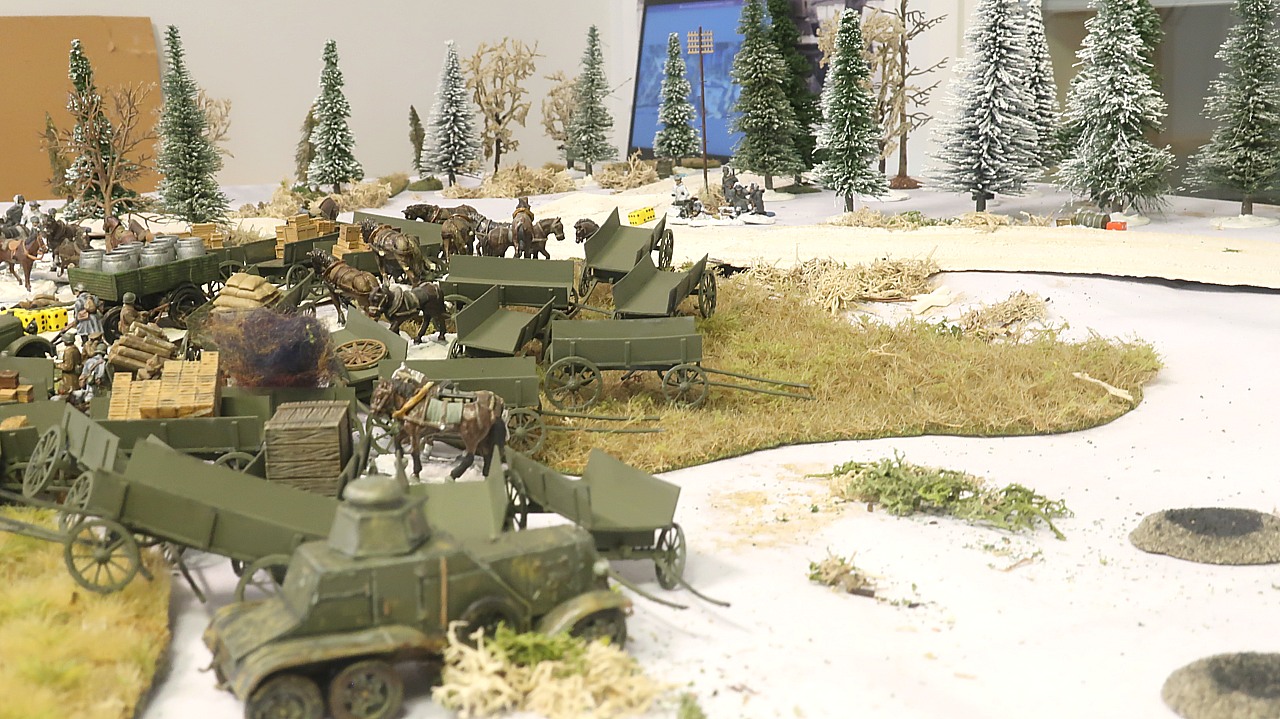
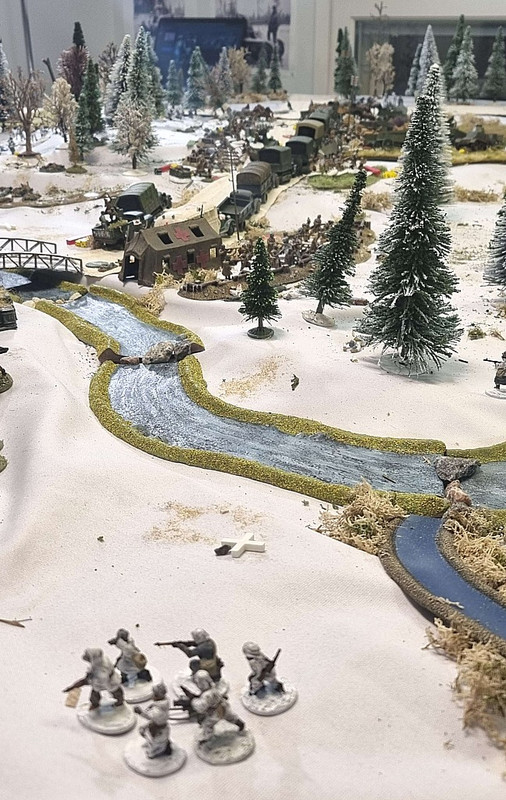
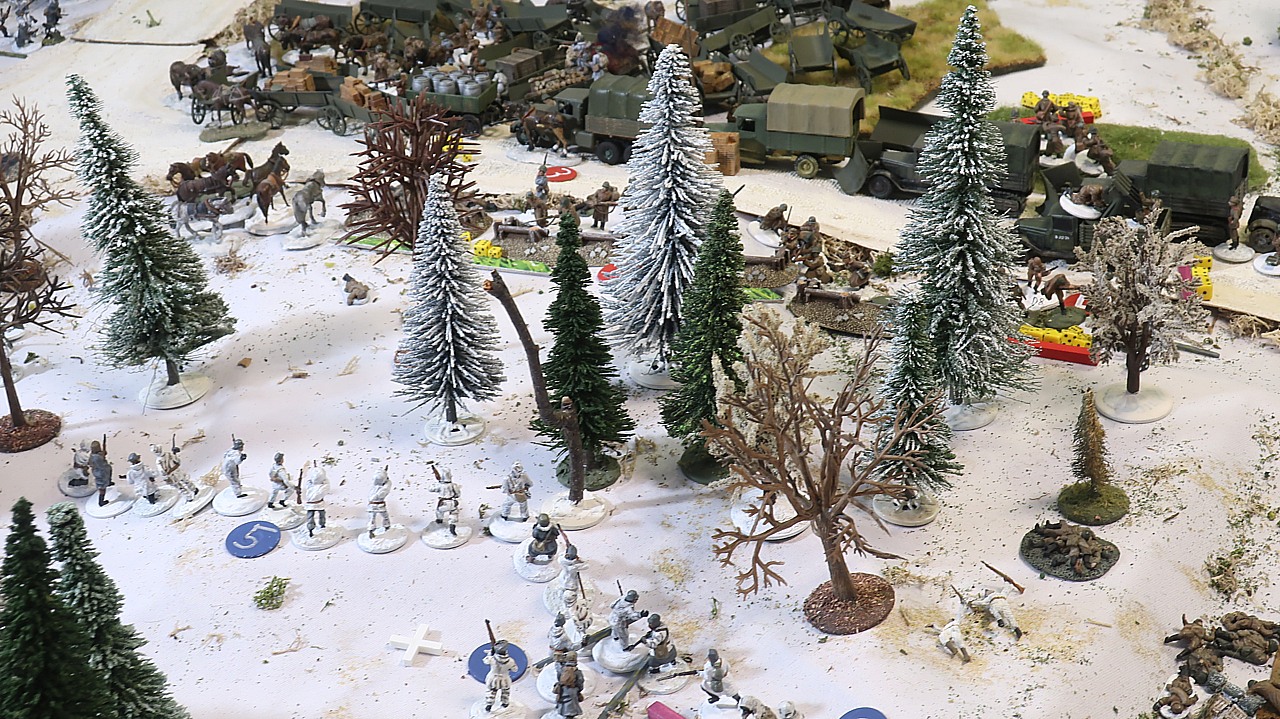
Meanwhile in the west, Mikko has been edging his MMG teams closer and closer to the Russian trench...
He bunches up his MMG teams. In a forest fight such as this an MMG team actually has advantages over rifle sections. One of them is that while only those members of a rifle section who can see the enemy can fire their weapons, the MMG can shoot with all its firepower at whomever the gunner sees. This makes a slow assault by an MMG very difficult to counter, if you want to stay in your entrenchment. The MMG moves in, and fires at two or three of your men with its full firepower... even if your men survive, they can only fire back two or three rifles, hardly enough to take out the MMG.
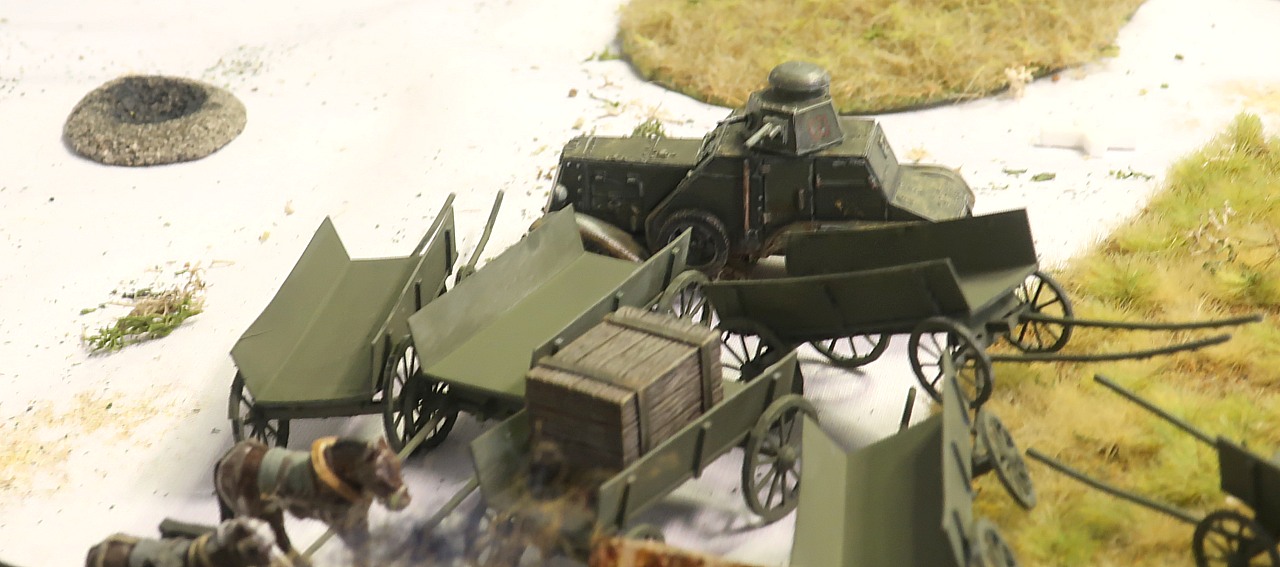
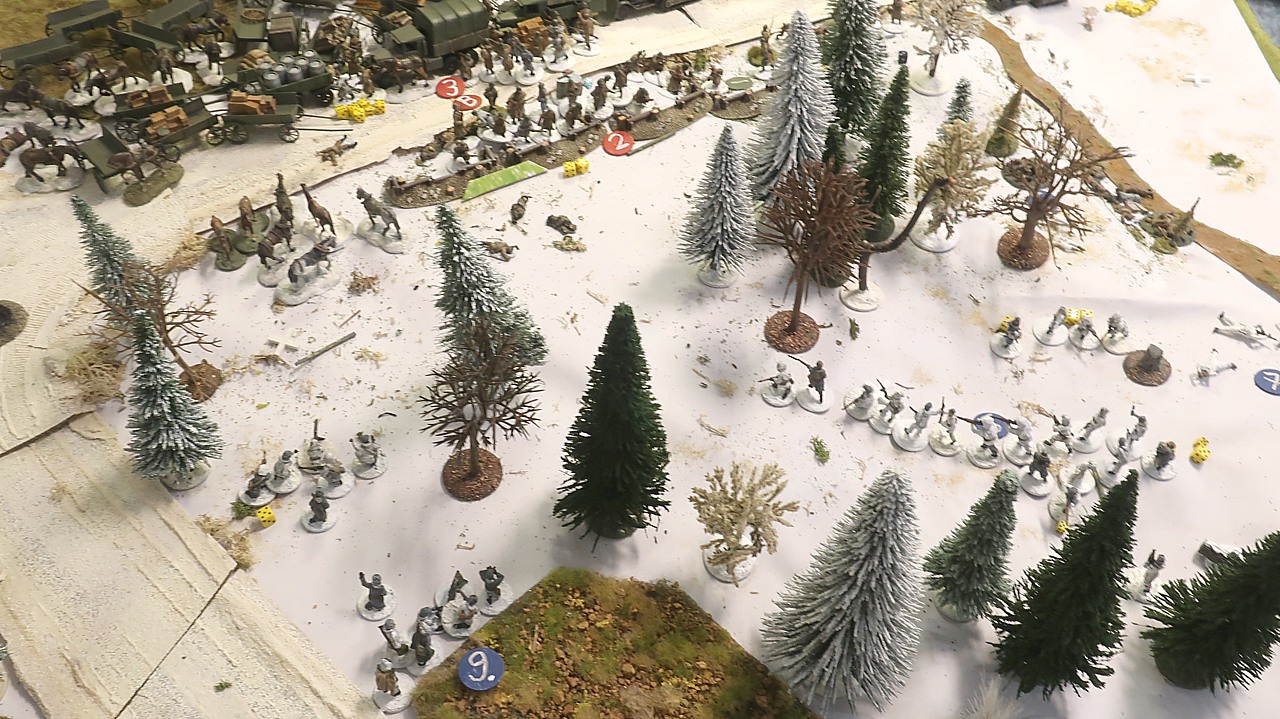
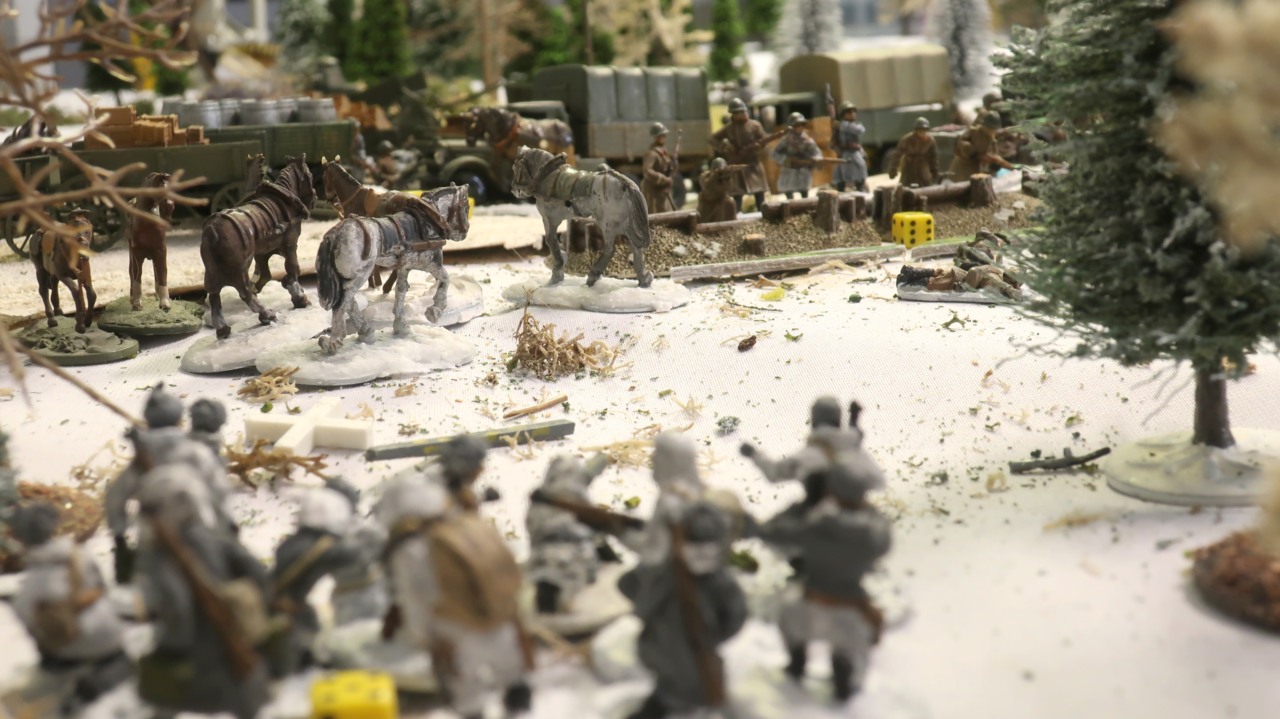
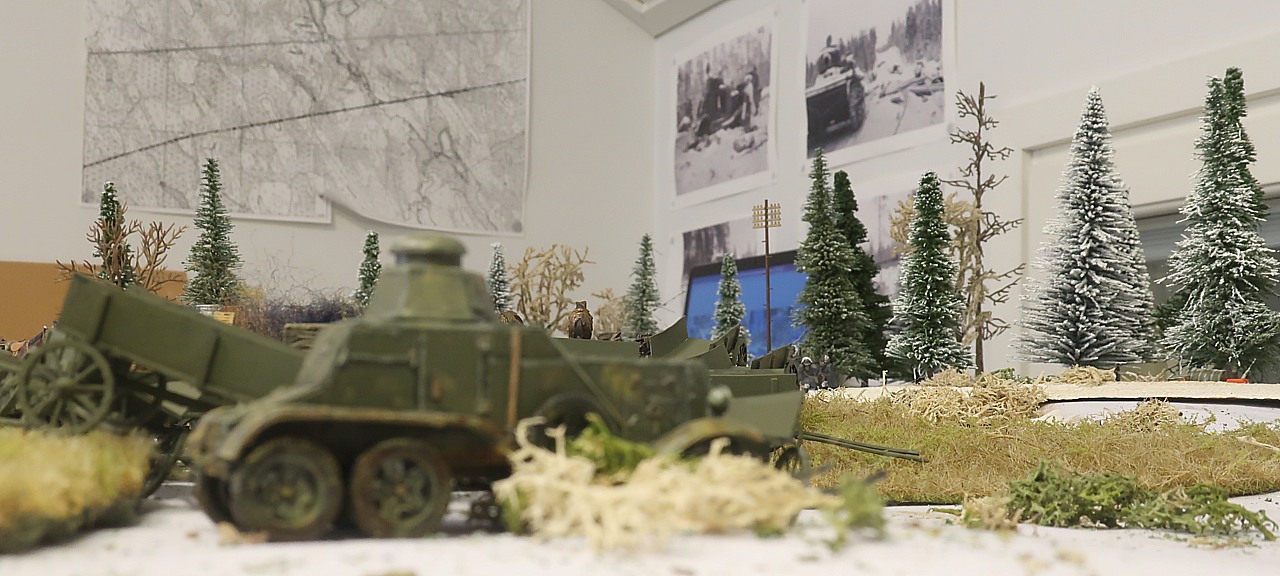
Then it is again the Soviet phase. In the north-western quadrant of the battlefield, Tom finally has rolled a three on his command dice, meaning that he can actually do something with his armored car...
The BA-27M trundles forward over the frozen marsh and – despite seeing only muzzle flash - targets the Finnish MMG team in the intersection with its DT LMG...

The result is two points of shock, much better than anticipated.
The team does have a Junior Leader and five gunners, but two points of shock cannot be ignored, especially as the MMG platoon have no anti-tank weapons.
Tom moves the remains of his section north, behind the many wagons. Here they cannot immediately be targeted by enemies.
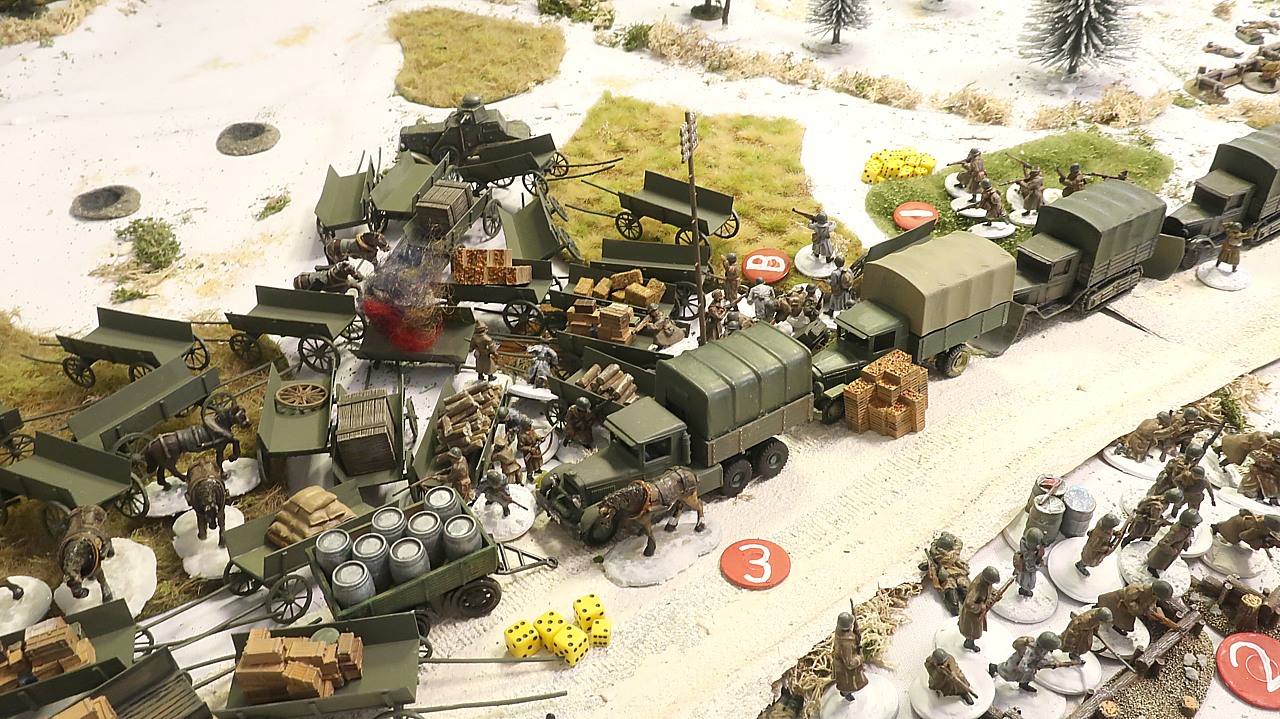
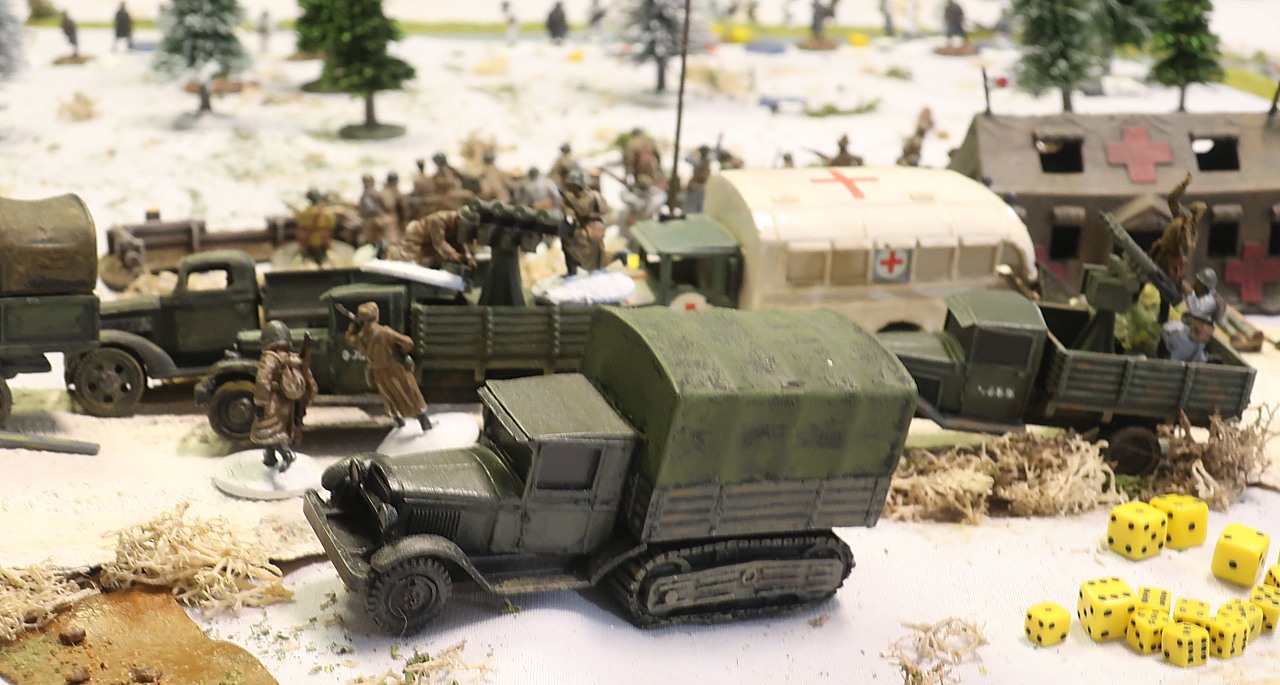
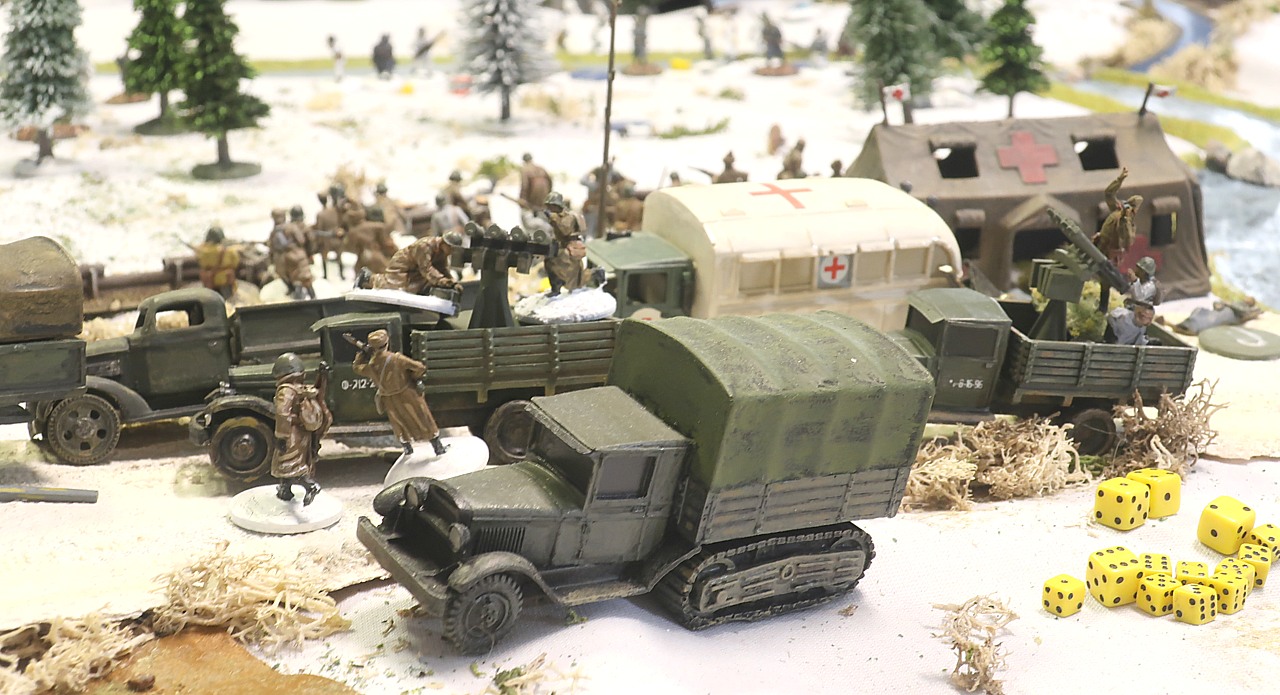
John moves his last, unpinned AAA truck forward, hoping to start reducing the Finnish MMG in the intersection. But the driver has some trouble negotiating the slippery uphill and the truck moves very slowly...

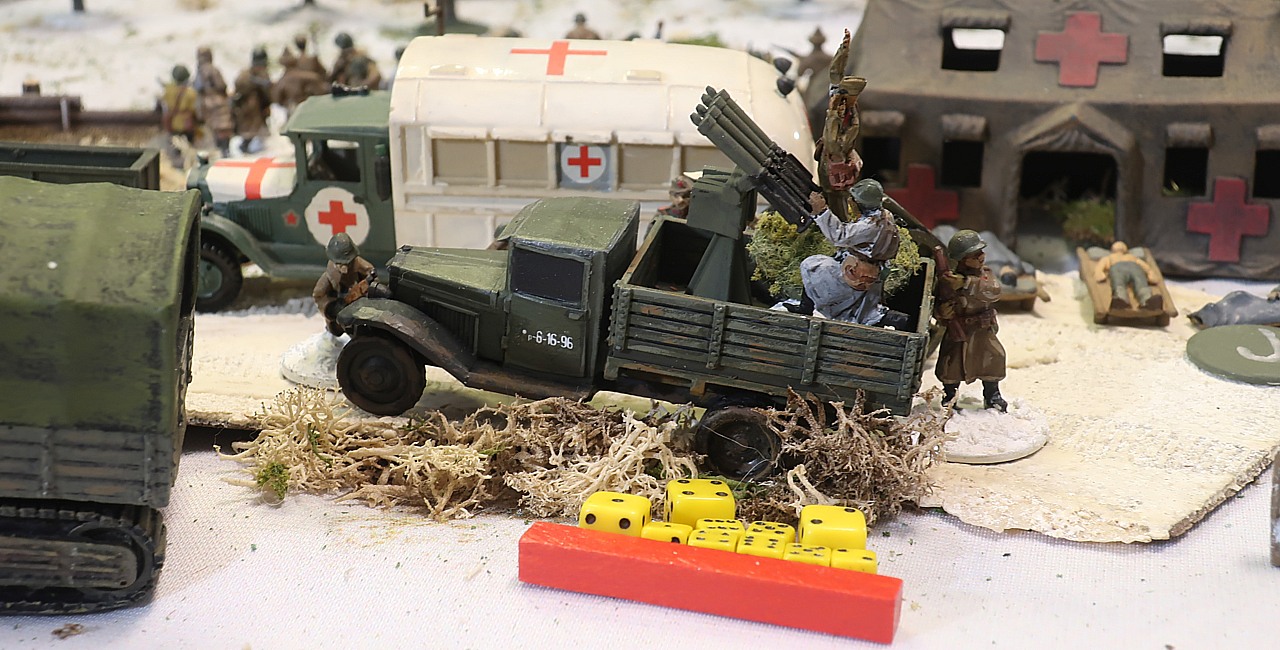
Closer to the intersection, John's second truck no longer has a visual on the enemy so the AA platoon leader (hand on belt, leaning on the ambulance, with his radio team next to him) is able to rally a couple of points of shock off them.
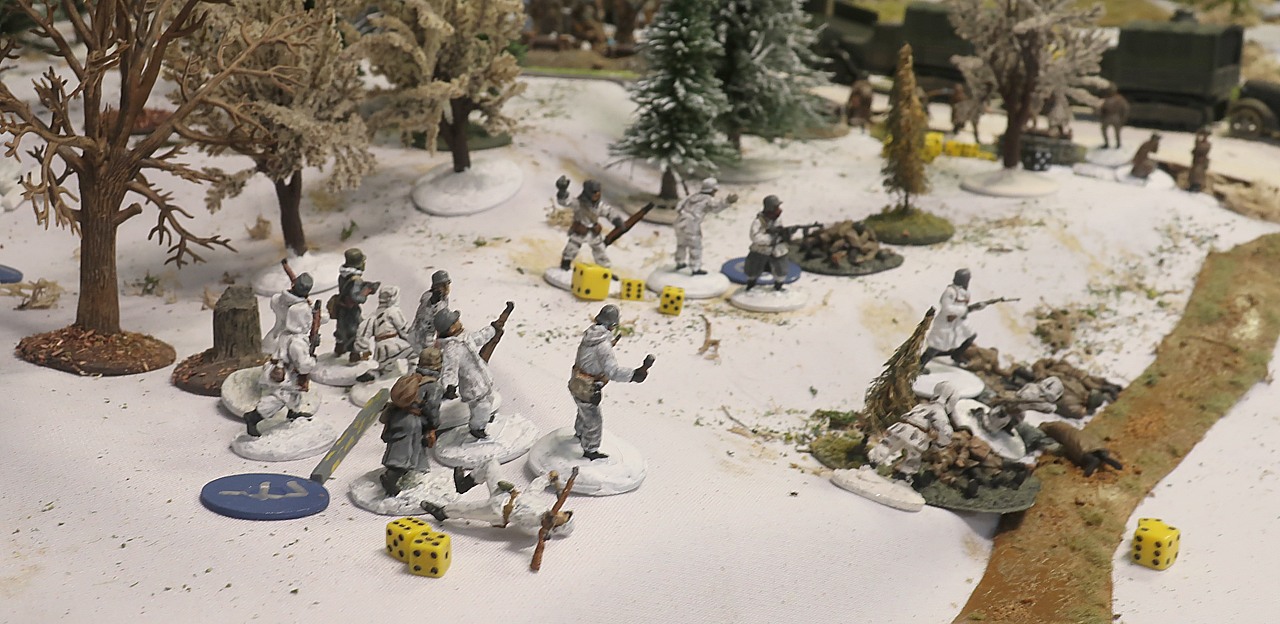
In the trench just south of the road Don, conscious of the approaching White mercenaries, places his men on overwatch.
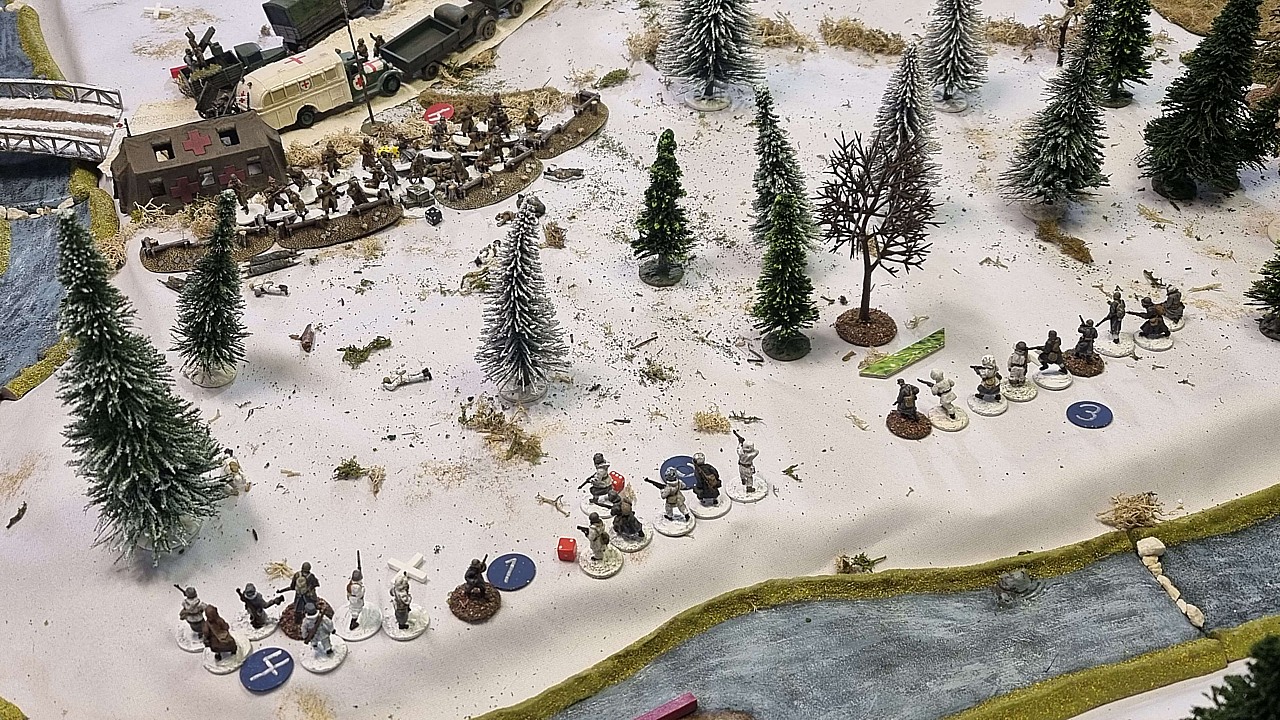
North of the dressing station, Jarkko's Finns have been collecting their resolve. It will be impossible to approach the trench near the tent without considerable risk so Jarkko starts to put them on overwatch...
And then we continue the game several weeks later. With five players plus me, it's difficult to find a time suitable to all.
Despite multiple setbacks, the Soviets are far from beaten, Tom's transportation platoon has an FM of 9, as does Don's. John's AA truck platoon is down to 8.
The Finns are also in prime fighting conditon: Jarkko's platoon still has an FM of 8, even though he lost a number of men in the battle near the dressing station. Mikko's rifle platoon is at 11 and his MMGs at 9.
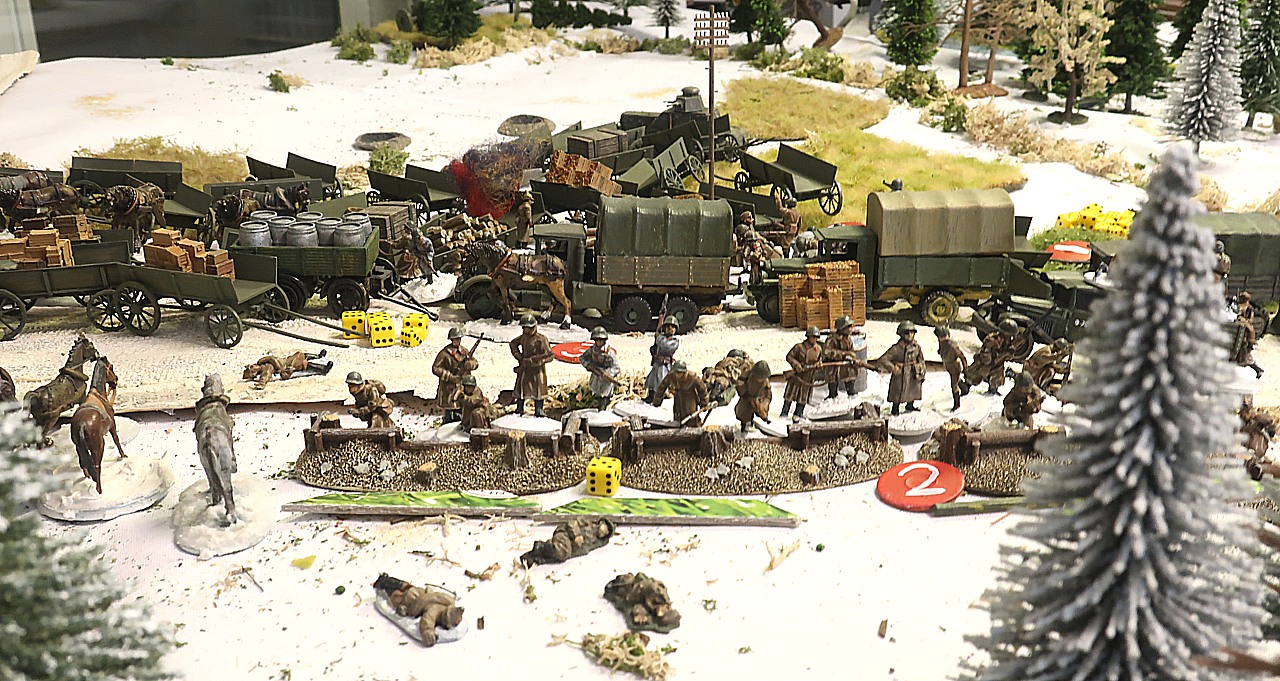
In the intersection, Mikko has deployed another one of his MMG sections. Close together, they are able to share hits, which is one of the unrealistic aspects of CoC. In real life, you'd want your troops as far apart from each other as possible, so that they
won't share hits...

...especially by something as dangerous as this BA-27M which can fire explosive shells with its frightening 37mm gun!
One of the MMG teams fires a burst at the armored car, hitting it. The driver panics and hits the car into reverse... the crew suffers a point of shock!
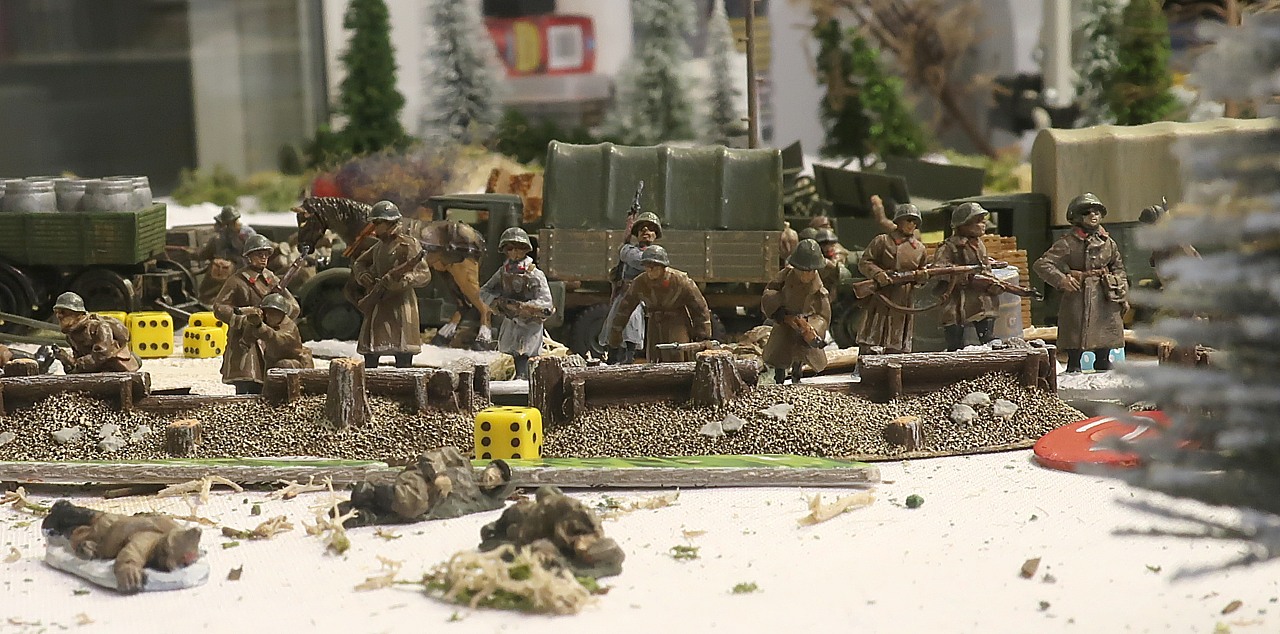
The two MMG teams close to the trench open fire on the three or four Don's men that thay can see, and kill all of them!

Don's section is on overwatch but they cannot reply to this attack as all of their men who have line of sight to the MMGs are dead!
And perhaps Don anyhow needs to keep the overwatch ready in case Mikko's infantrymen decide to close in to either line of sight or close combat range?


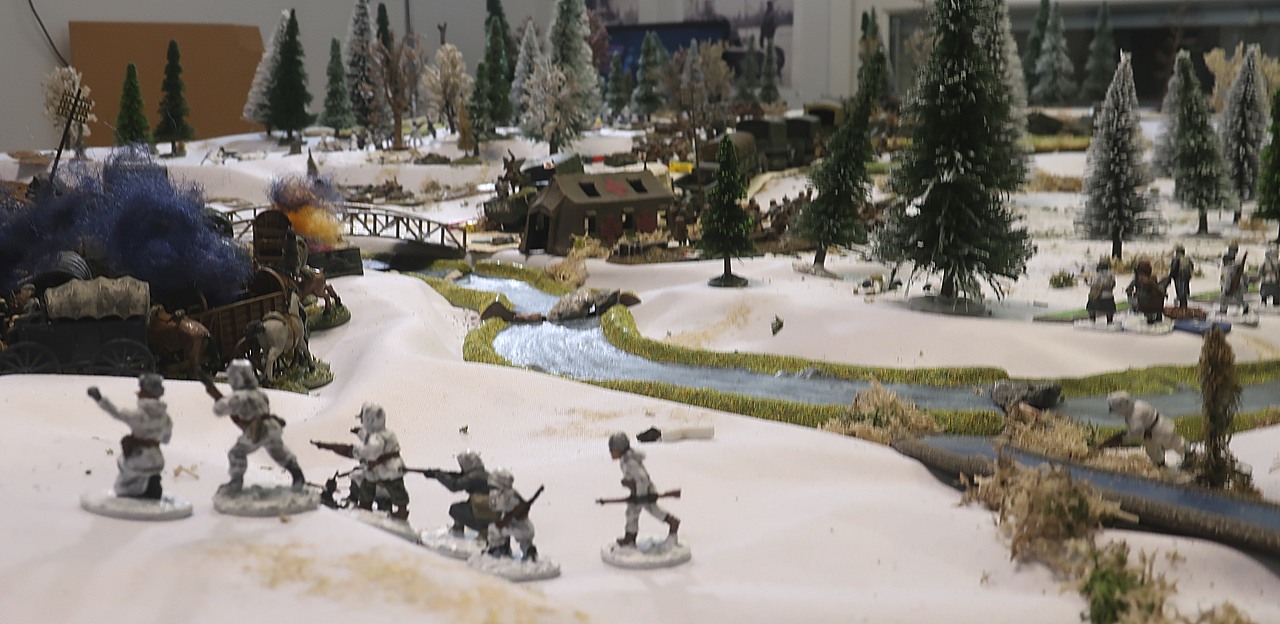
Without the overwatch one double phase might be enough to annihilate Don's men... the woods here are indeed crawling with White Bandits.
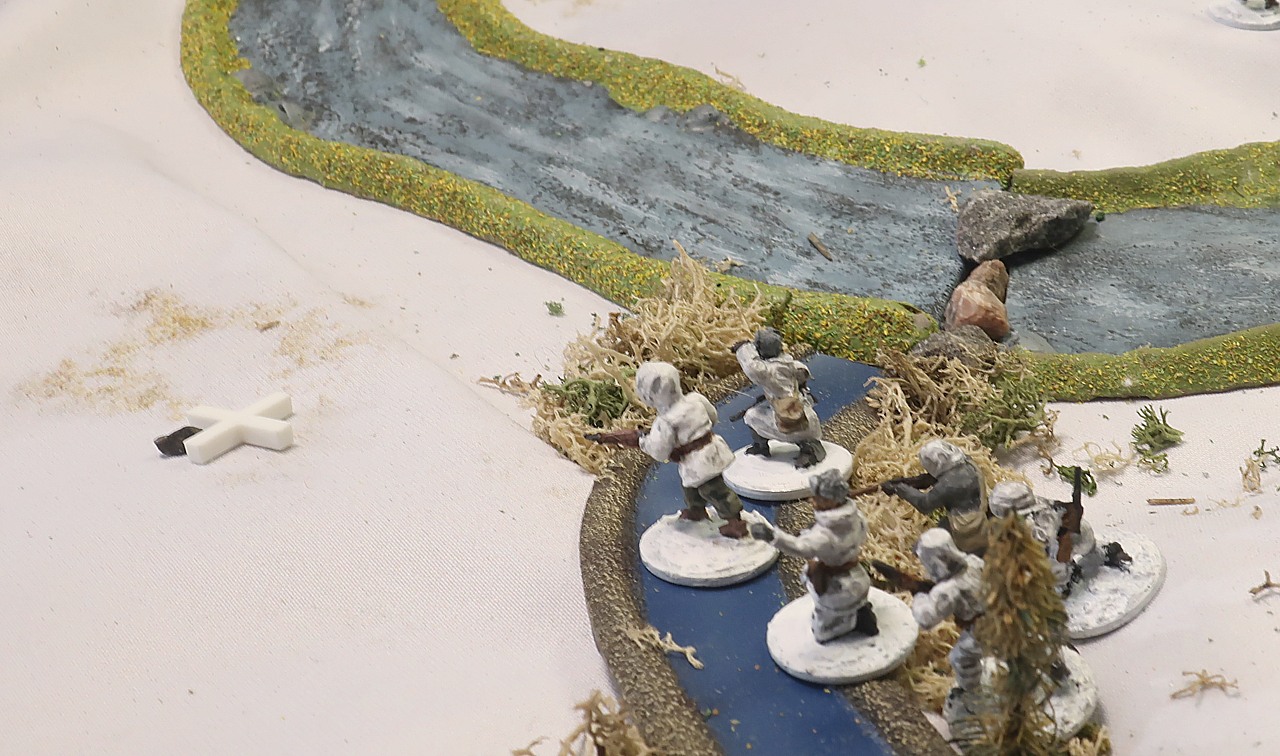
Meanwhile in the north-east, Jarkko's machinegunners are taking their good time climbing up the hill. Frustrated, Jarkko's company commander sends a messenger to tell them to get a move on!

Jarkko is uneasy about advancing without MMG support so his men just stay put, aiming their weapons
The messenger reaches the MMG troops with the second lieutenant's orders, but unfortunately they only move another three inches...

Then Mikko plays his CoC die, ending the Turn... this has many effects... First, Don loses one of his Jump-Off points, bringing his Force Morale down two points to 7.
On the other side of the table, John has two Broken AAA trucks...
Seeing that the dreaded Capitalist Finns are everywhere, they turn their vehicles around and speed off-table... This also wreaks havoc on John's FM which drops to four!


