Im starting in on another quite big terrain project - this time for a colonial setting.
If youve looked at my previous terrain projects, you'll recognise the steps and materials used, because its basically just more of the same!
Hopefully it wont prove too boring though, since this time the end product will look distinctively African. Which is a bit more of a challenge.
For the purposes of the planned game, the table is long but narrow.
So as a base Im using 4 x 50mm pink foam insulation boards (each 1200mm x 500mm) to provide a playing area 2400mm long by 1000mm wide (thats about 8 feet long by 3.5 feet wide for the non-metric)
Here are the boards laid out and marked with the plan of where the tracks, hills and features are

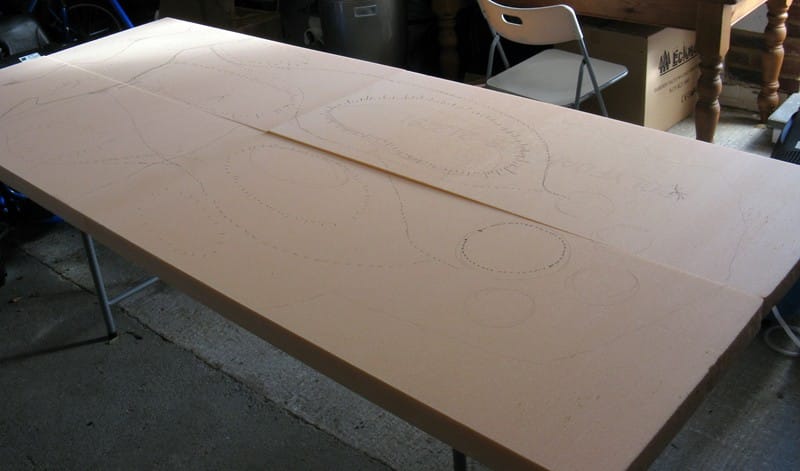
Basically the terrain is a series of ridges and tracks rising from East to West. At the Eastern end of the board is a small native village with a few huts and an animal pen, partially surrounded by a forest of tall tambookie grass. At the Western end of the board, the high ground is bisected by a ravine or donga basically a dried up river bed.
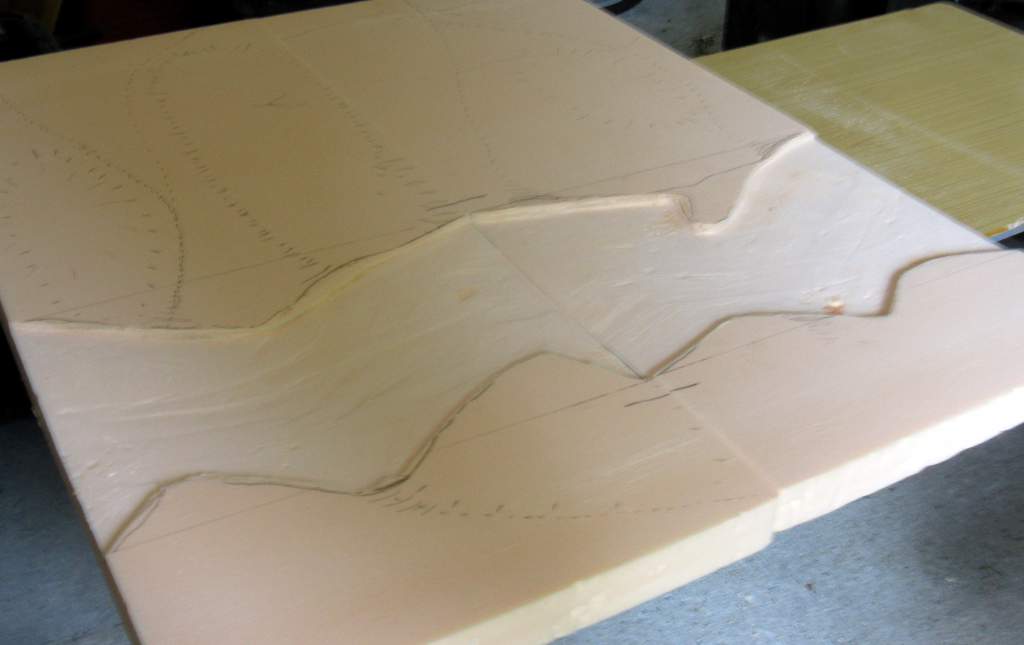
The first job is to sand out all the trackways slightly to a depth of a couple of mm. This helps to break up the flat areas on the finished product and adds visual interest. I did this using my Dremel. Then I smoothed everything off by hand with a bit of sandpaper.

Using a flat bed DIY sander I also completely sanded out the bed of the ravine to a depth of around 6mm/7mm. This small depression will accentuate the height of the cliffs once I add them, and create an impression of greater depth
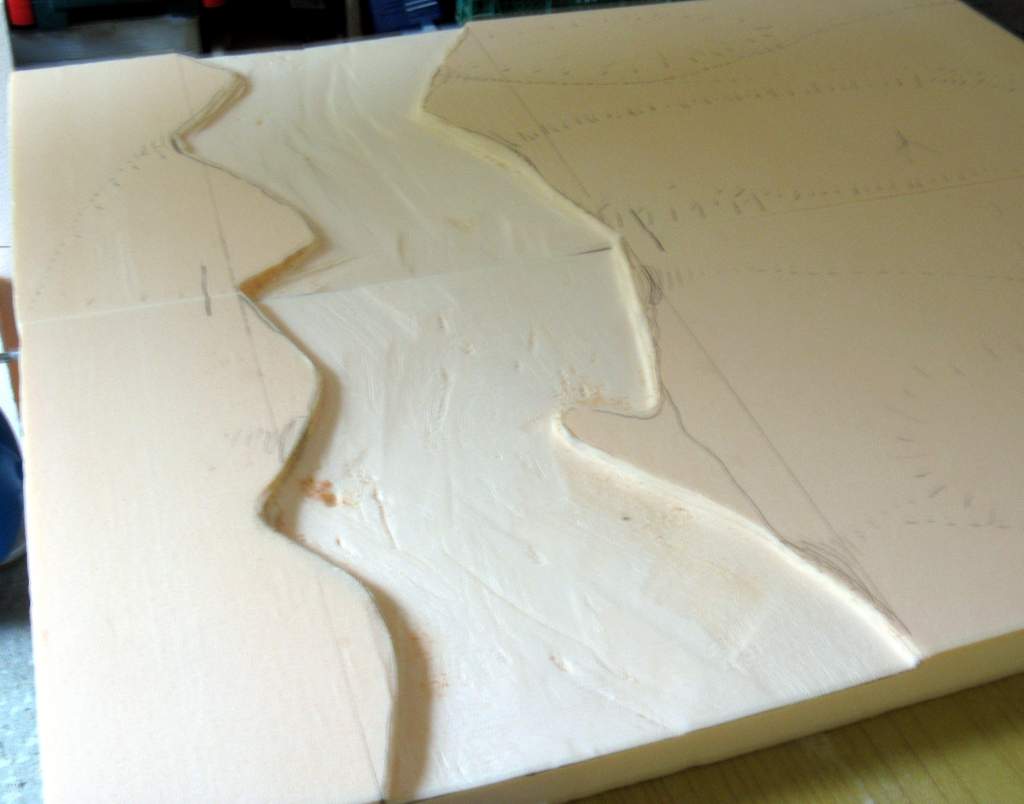
Ive then kicked off in earnest with two boards, one of the ravine boards and one of the village boards.
The first task is to build up the superstructure of the hills and raised areas using offcuts of foam from previous projects although you could just buy an extra foam board and cut it up into pieces. All youre trying to do at this stage is get the approximate shape you want. I dont worry too much about gaps, corners or rough edges. All these can be dealt with later by filling and sanding. And eventually everything will be covered by a smooth icing of filler, then by a coarse texture coat of groundwork, then with added patches of rubble, scree, grass, etc all of which will completely cover up any surface inconsistencies in the underlying foam shapes

On the ravine board, I added the cliff edges first, gluing these into place along the (now raised) edges of the ravine. The cliffs are made of cork bark, sawn up into strips roughly 3 4 inches high and in an assortment of irregular lengths. You want them to look high enough to be a realistic barrier to 28mm figures, but resist the temptation to make them too high.
For one thing, if you make the cliffs too high, then you have to create ground sloping dramatically up to the cliffs which is unrealistically steep - not to mention impractical for standing your figures on!
The trick here is to fix the cliffs first, then build up the hill superstructure behind them at a realistic looking gradient.

When youre putting your cliffs together, dont worry if there is a bit of a gap here of there. A few fissures in the rock face look fine, and you can always plug any big gaps later with wall filler or rubble / rock debris
As you can see, Ive built several deliberate gaps in the cliffs, as I need to have some paths cutting down into the ravine
All the foam and cork is glued in place using UHU Por which is a specialist styrofoam glue, inexpensively available online (£1.40 a tube in the UK) although you dont often see it in the shops. Or you can use wood glue, although this takes quite a time to dry
The next stage is to sand down the rudimentary hill superstructures to slighly more rounded shapes, knock off any obvious corners and irregularities, and so on. Once again, I used the Dremel to do this, basically carving away the bits I didn't want. Then plugged any big gaps using small slivers of foam and a dab of glue.

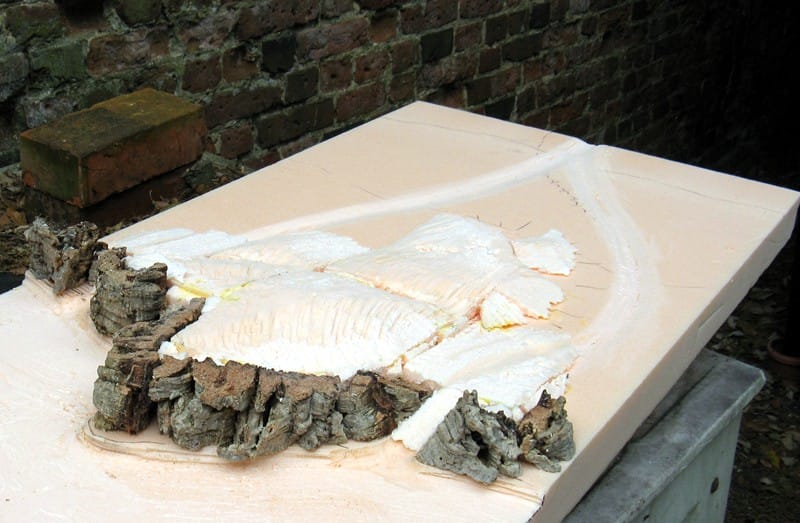
Now comes the first fix of groundwork, which basically entails icing your hills with wall filler.
I use ready-mixed wall filler from UK DIY chain, B&Q. Its cheap, fairly lightweight and aereated, quick drying, and has a slightly elastic quality which I like. Like bread dough.
I use an old knife to apply the filler.
This is where you can really start to shape your terrain to your taste. If you find you need to significantly build up any areas, its best to add small slices of foam and then a skim of filler rather than trying to slap on two or three inches of filler, because this will take several days to dry possibly never!


Ive also added a couple of random rock pillars standing in the ravine, using offcut bits of cork bark.
And meanwhile I've added a simple ridge to the first half of the 'village end' board...

Providing the filler is applied in a thin layer up to 15mm, it dries rock hard within 24 hours. At which point it can be sanded if needed. Or of course you can build up any spots you need to with further layers. Patience, unfortunately, is essential

The second fix of groundwork is the texture layer a mix of coarse sand, paint and PVA mixed up in a big tub to a pastelike consistency, and generously applied with an old brush to give a nice rough finish. When dry, this forms a tough, hard, plasticised skin over the foam and filler underneath, protecting it from anything but bullets!


Once the texture layer has dried, the third and final fix of groundwork is to add detailing of rock rubble and scree. Ive used four grades of material here
Some actual pieces of slate for large pieces of fallen rock and outcrops. Some aquarium gravel (the electric blue bits!). Some slightly smaller talus (lightweight rock debris for railway modelling). And finally some fine grit to represent scree.
I've paid particular attention along the foot of the cliffs (where you always find lots of tumbled rock), and around the base of the pillars in the ravine.
Smaller trails of rock debris and scree tend to gather in depressions around the back slopes and foot of hills, where they have been washed down from the heights.
And finally, the paths down into the ravine should be hazardous to negotiate, so have a good covering of scree, which in turn is scattered along the trackways to and from the ravine


The bigger pieces of rock are stuck on individually, the smaller stuff is scattered onto smears of PVA, with surplus shaken off when dry... You can dob PVA liberally on top to seal it if you want to make sure none of it moves.
The next stage will be to prime and seal the entire creation using a couple of generous coats of matt black car spray (from Halfords in the UK). Again, this is inexpensive compared to hobby spray paints and comes in double sized tins! Whats not to like?

So, thats board 1 of 4 pretty much built and ready for painting and titivation. And board 2 of 4 well underway. Further updates to follow in the days, weeks and possibly months ahead!


 Welcome, Guest. Please
  April 27, 2024, 01:20:50 PM


