*
Welcome, Guest. Please login or register.
April 29, 2024, 12:21:54 AM

Login with username, password and session length

Donate

We Appreciate Your Support

Members
Stats
  • Total Posts: 1691074
  • Total Topics: 118370
  • Online Today: 804
  • Online Ever: 2235
  • (October 29, 2023, 01:32:45 AM)
Users Online

Recent

Author Topic: Car Chase Game - road pieces - Updated 13/12 - Board Pieces finished  (Read 26160 times)

Offline 6milPhil

  • Galactic Brain
  • Posts: 4794
    • Slug Industries
Re: Car Chase Game - road pieces - Updated 28/11
« Reply #15 on: November 28, 2011, 05:21:07 PM »
Looking good, like the three dimensional..er... dimension as most roads for gaming are flat.

Offline Wirelizard

  • Scatterbrained Genius
  • Posts: 3103
  • Needs More Zeppelin!
    • The Warbard
Re: Car Chase Game - road pieces - Updated 28/11
« Reply #16 on: December 01, 2011, 05:09:20 AM »
Going to the trouble to actually get camber on your roads is very cool, looks good now and should look great once you're finished!

Can't wait to see how this progresses.

Offline Daeothar

  • Supporting Adventurer
  • Galactic Brain
  • *
  • Posts: 5828
  • D1-Games: a DWAN Corporate initiative
    • 1999legacy.com
Re: Car Chase Game - road pieces - Updated 01/12 - First paint applied
« Reply #17 on: December 01, 2011, 10:34:20 PM »
And round and round we go...  :D

Another update, for your viewing pleasure. I actually did all this last night, but when I'm going full steam, I simply do not have the time nor inclination to stop and take pictures. To go when the going is good, and all that... ;)

Anyway, first up is a small item, that took a disproportionally large chunk of last night's mancave-time: a payphone. It's basically a plot device in my campaign, and the starting point for the chase, so it needed to be there. I could have gone the easy way and source some dollhouse phone for this, but what's the fun in that? I sculpted the horn down from a piece of sprue, and used different sizes of plastic rod, tube and what not to do the rest. Oh, and some copper wire for the cord of course.

It's a bit of an amalgam of UK and US types of phone and certainly not period and/or location accurate, but it looks the part, and that's what counts after all. I don't even know if such a phone could have been found attached to a telephone pole like I intend to do, but hey... ::) I do intend to make some sort of small roof over it, you know; against the elements and such.


Then there are the telephone poles themselves. I gathered a lot of pictures for these and there seems to be a distinct lack in uniformity of the things in that period; straight poles, with crossbars of wood, or metal, mounted on top or a bit down. Multiple crossbars, porcelain isolators on top, hanging from the crossbars or even completely missing... So I went with a version that would look the part the most and decided on a version with a single, top mounted crossbar, with the isolators on top of the bar.

For now, I have the poles almost ready (they need basing and weathering). They're made from balsa dowels, simply stained with some Vallejo dipping solution mixed with some VGC black. Ubiquous not-Shaun shows off their scale:


Then there is some painting progress on the road pieces themselves. I sprayed the road surfaces black, but deliberately not too evenly, so the surface will not  be too uniform, even before refinements.

The banks and other dirt were given a watered down coat of some house paint I had mixed to colour at the local DIY. I have a liter of the stuff, and it looks like that will probably get me by several tables! It's a perfect base colour for further inking and highlighting though.


And to wrap it up, the same beautyshot again as last time, but this time with all the pieces in their next stage. It all looks pretty autumny now, with all the browns, but the undercoated hedgerows still need their foliage added. They'll summer up quite rapidly once that has been done, trust me. :D


Miniatures you say? Well I too, like to live dangerously...
Find a Way, or make one!

Offline Marine0846

  • Supporting Adventurer
  • Galactic Brain
  • *
  • Posts: 6613
Re: Car Chase Game - road pieces - Updated 01/12 - First paint applied
« Reply #18 on: December 02, 2011, 03:05:06 AM »
Wow, that last photo really brings it all together.
Excellent job. :-*
Semper Fi, Mac

Offline Mason

  • Elder God
  • Posts: 21222
  • Eternal Butterfly!
    • Blind Beggar Miniatures
Re: Car Chase Game - road pieces - Updated 01/12 - First paint applied
« Reply #19 on: December 02, 2011, 04:43:16 PM »
Fantastic!
As Marine says, that last picture certainly brings it all together.
Great work.

Now- Just run the man down next time! That'll learn 'im!


Offline Burgundavia

  • Mad Scientist
  • Posts: 728
    • Coreyburger.ca
Re: Car Chase Game - road pieces - Updated 01/12 - First paint applied
« Reply #20 on: December 02, 2011, 08:53:56 PM »
Beautiful. I would get a piece of black felt to put underneath the whole thing, to make the road stand out more.

Offline Daeothar

  • Supporting Adventurer
  • Galactic Brain
  • *
  • Posts: 5828
  • D1-Games: a DWAN Corporate initiative
    • 1999legacy.com
Re: Car Chase Game - road pieces - Updated 13/12 - Boards finished
« Reply #21 on: December 13, 2011, 08:15:03 PM »
Well,

I believe I mentioned I'm not much of a blogger, and I've proven myself right again; sorry for that, as more updates could have been squeezed in. I took the pictures, but simply did not have the time to write up the next post.

By now, the actual road pieces have been finished, although I'm still hard at work on the additional scenery, cars and whatnot. So, I guess I'll take you through an abbreviated step by step before showing off the finished product.

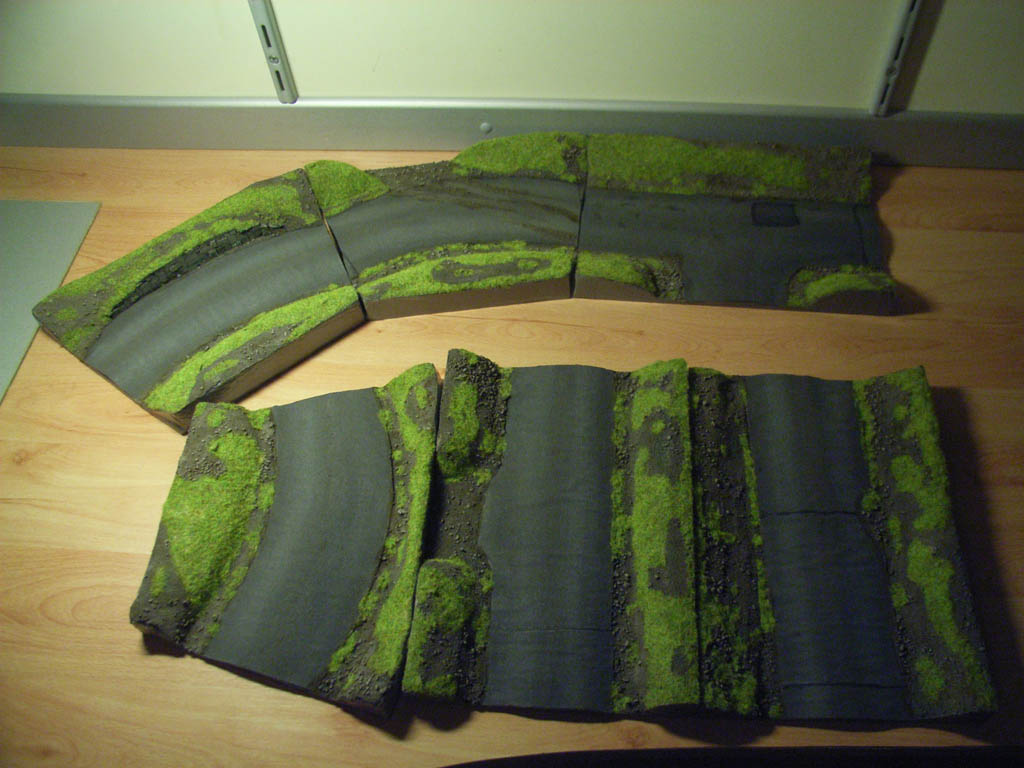
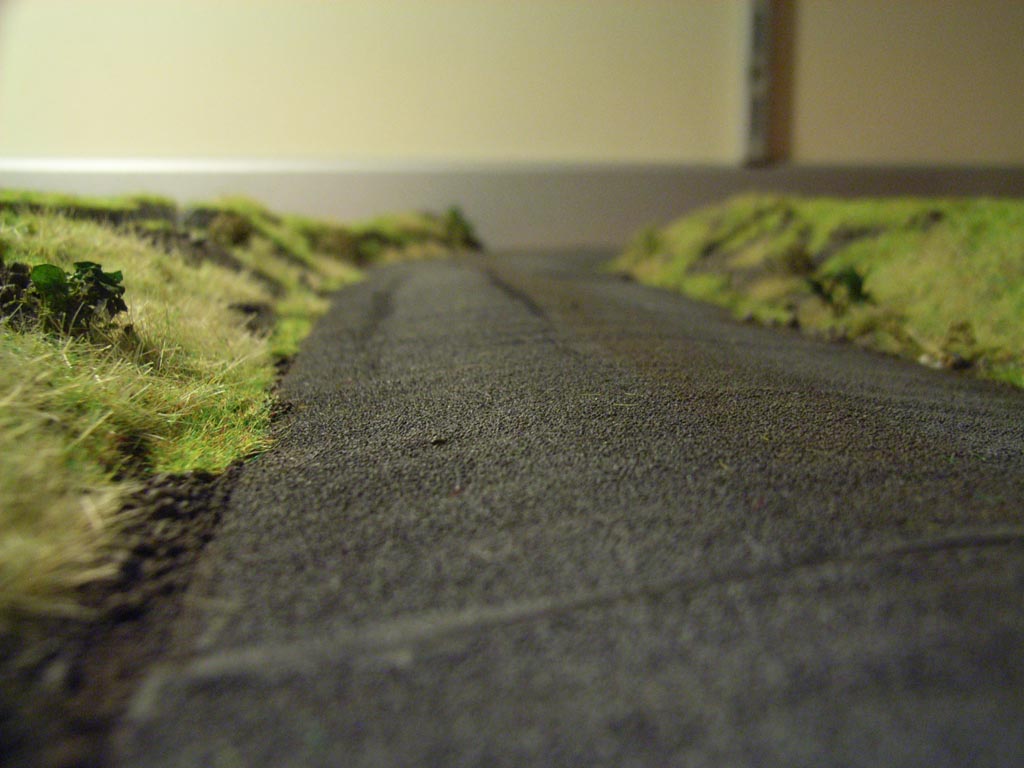
You all saw the pieces with their basecoat on in my last post. So the next stage was to liven up the road surfaces, as they were a bit too pristine, and also the banks received their shading (through inking) and highlighting (several drybrushes). Once the painting stage was over, I proceeded with the application of the static grass.

I used unthinned wood/PVA glue for this, stained brown through the addition of some Vallejo dipping solution. I simply paint the glue on, patch by patch, and then dab large clumps of the static grass into it. I then vigourously shake and tap the superfluous grass off, and gently blow over the surface (not on; over), which causes the individual blades to stand up. Once dry, there is some more shaking and tapping. The result at this stage looks like this:


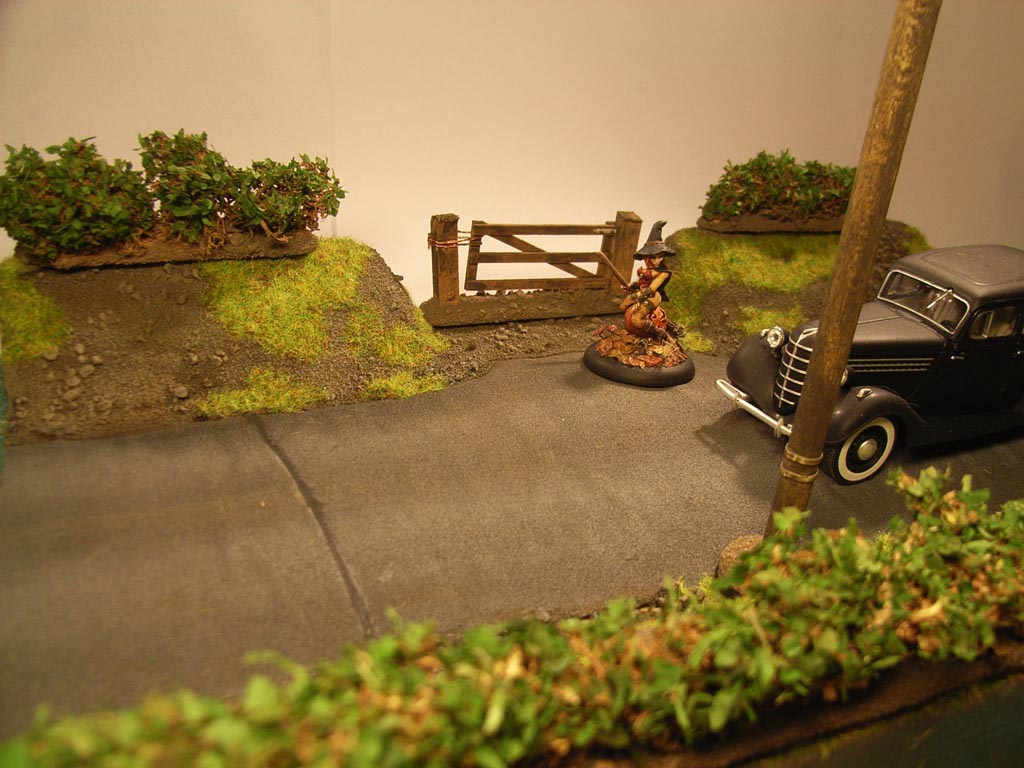
And I could not help myself to take another beauty shot at this stage. Regretfully, the unfortunate not-Shaun took a wooden floor to the face when I attempted to put him back in the display cabinet after last post's picture, so he's undergoing reconstructive face painting at the moment. Here is a Gothic girlfriend of his, doing the honours of posing with the ubiquous 'Black Car'. It's starting to look like something, eh?


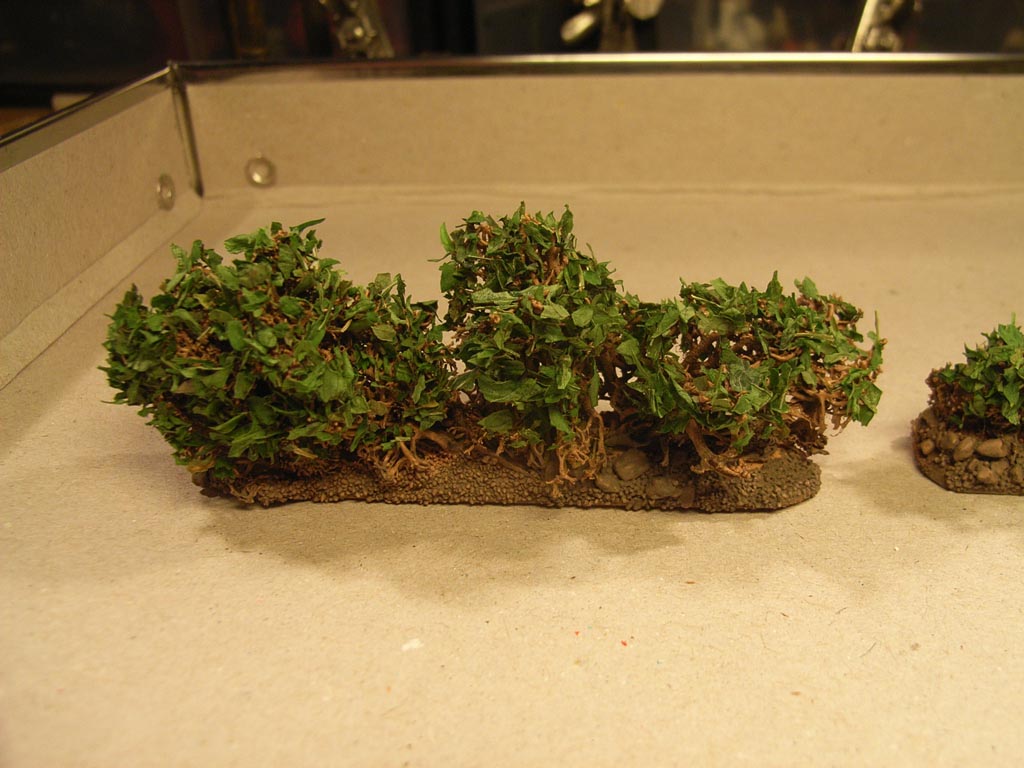
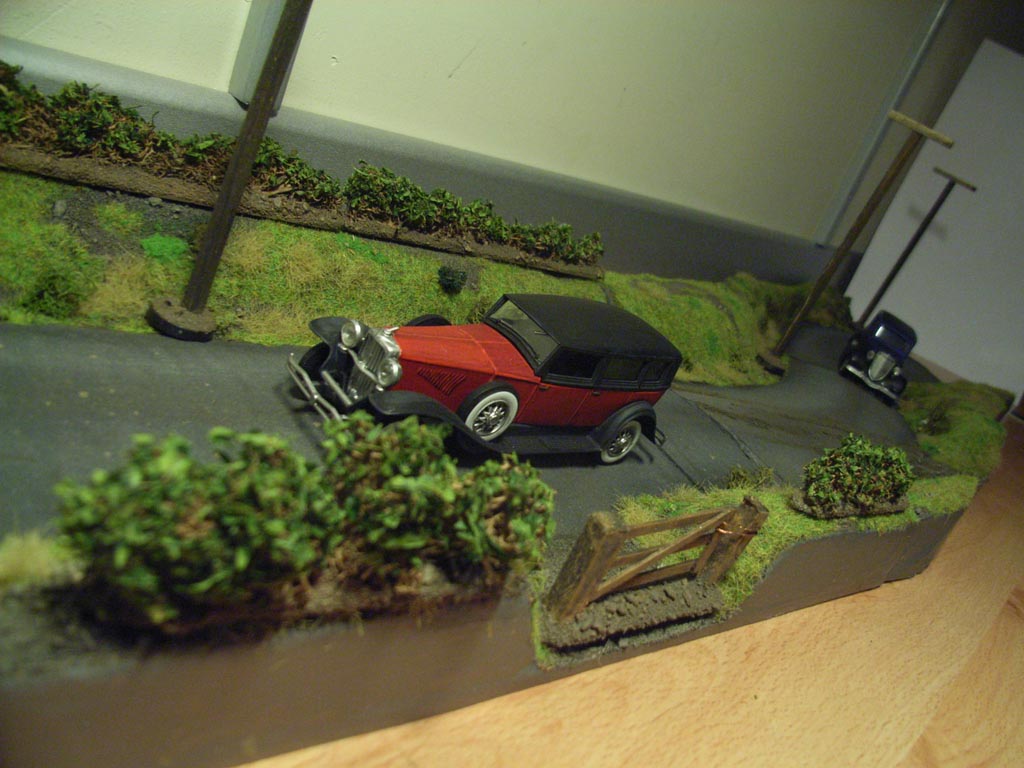
As you might notice, the hedgerows have now had their foliage added, making them look pretty nice all of a sudden, be it a tad brittle at this stage. The glued and then spraypainted reindeer moss has become quite stiff and strong at this point, but the glued on (by means of more PVA) crushed parsley is still very brittle here. Although it really looks like a hedge already.

I would later give them several thick coats of sprayed on varnish, before highlighting the green leaves with thinned down Citadel Camo Green. Like a very wet drybrush is the best way to describe the process. Of course, this was followed by yet another coat of varnish.  

The hedges still need their bases finished and will undoubtedly receive at least one more coat of varnish before being deemed reasonably gaming-proof. They look awesome, and I'm going to try entire trees at some point, but without proper armour in the form of thick layers of protective varnish, they would be too vulnerable to the rigors of tabletop combat.


Next stage of the road pieces was the addition of more static grass. I used a short, mostly green version in the first stage, but here, I used a longer, brown kind, looking like tall, dried grass, which I added in clumps, here and there.

Then, the third stage of the grassing process followd, almost immediately, with both kinds mixed. I filled the large gaps in the grassy areas with that mix, which looks the most realistic of them all. I wanted the banks to look overgrown, without too large, and connected patches of dirt and rocks.

When that was dried, I used small pieces of reindeer moss to create shrubs. I mainly used the tops, as those are naturally formed like an individual shrub anyway.  These were not coloured; this is their natural tone, which looks the best I think.

The moss I used here is even older than the styrofoam used for the banks by the way! They're left overs from when I made model railroads back in highschool. I must have been around 16 or so when I put all that away, mere months before I got my first box of Beakies! And because I always wanted my own gaming table, but never had the space, I've always kept the stuff I could one day use as terrain. I've used several pine trees from the same era to create some wood section for on the table already, and now these hedges. Remarkable how well they kept over the years (over 20 years!). For most of that time, they were stored simply in an old Revell model plane box. Only a couple of years ago, did I transfer them, colour by colour into ziplock baggies. Can't beat nature I guess...

But enough rambling! Here are some shots of this stage:


In that second picture, you can see I've used the same technique as on the hedges on some small shrubs, just for variation.

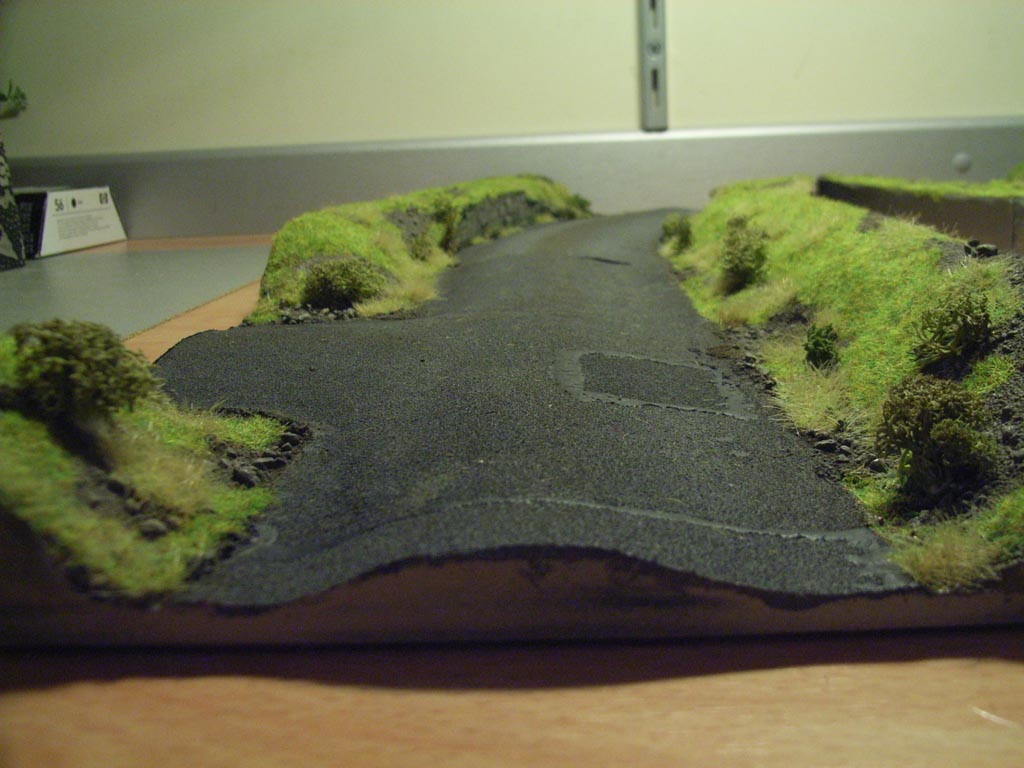
Finally, I added some coloured foam flock in patches all over the banks, to represent weeds growing inbetween the grasses. Here and there, it has crept into cracks inbetween rocks, or is growing out of some dirt on the road surface. That stuff really does grow everywhere eh?

You can see the finished result in the next couple of pictures, with added additional scenery. Regretfully, those pieces are not yet finished, but bear with me, as I bravely struggle on to get more and more ready...

A car chase at full throttle over a winding country road:


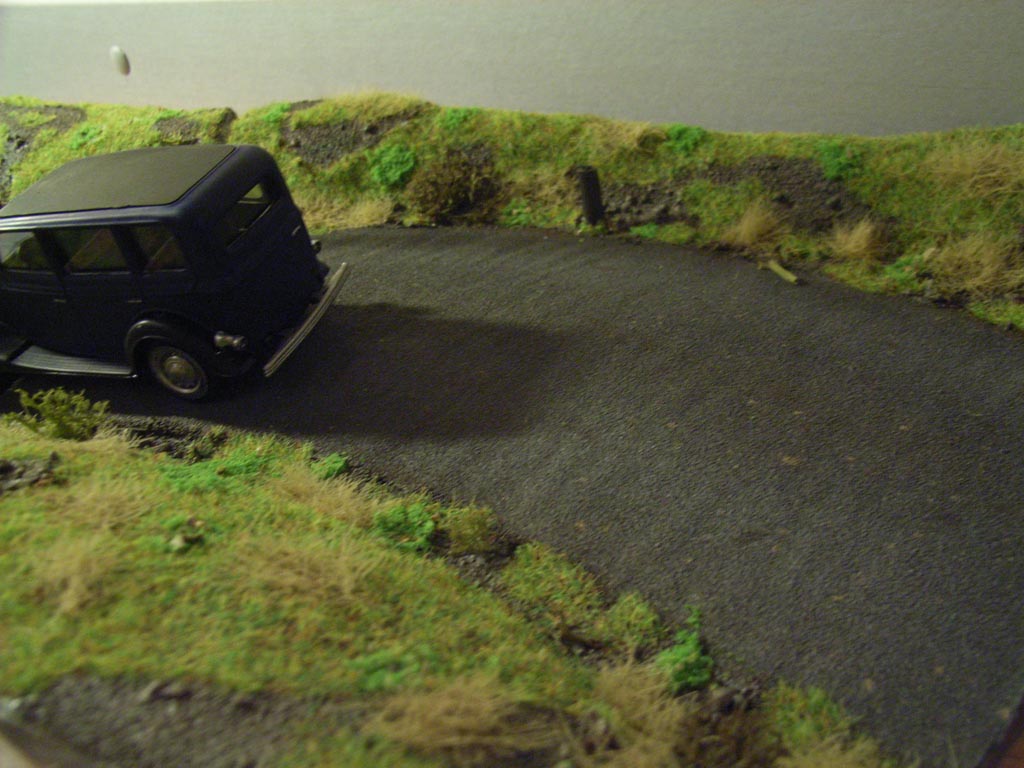
The mysterious chase car is zooming past. Boy they're going fast!


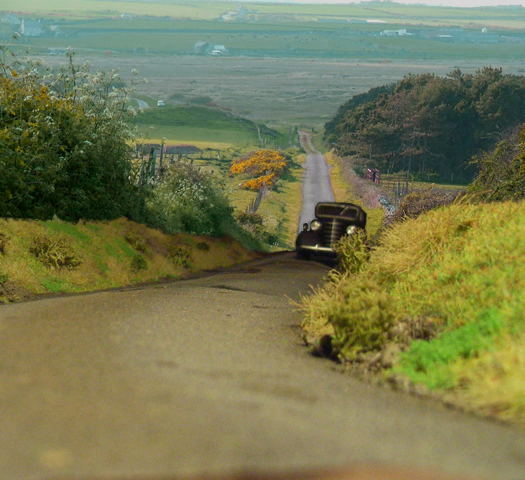
And finally, there's that darn black car again. Who are those people anyway? Some 5 minute Photoshop action took care of the backdrop...


The first gaming session was played with them last night, and was a resounding success. All players loved the experience and I'm relieved they're actually looking forward to using the setup again. We had to play without the additional scenery, and the cars were not finished yet (and had they rolled for a crossing pedestrian during one of their encounters, I would have been forced to produce a bare metal figure), but the basis is there. As it was though, they had to swerve around slower cars, brave curves in the road at breakneck speed.

They managed to shoot out 3(!) tires of the car fleeing from them, sending it careening off into a bend's bank, finally flipping it over. The nazi driver was instantly killed, and his German buddy knocked unconsious. Miraculously, their captive (one of the Player Characters, whose player had been on a long, work-induced, hiatus, but was joining us again for the first time this evening. Of course I had this all planned...) was thrown out of the trunk (hands and feet still tied) and survived without even a scratch!

And as the heroes drove away, compatriot liberated and one unconsious nazi in the trunk for further questioning, the crashed vehicle's leaking fuel finally reached the still red hot exhaust pipe, exploding the wreck in a spectacular fireball, visible to the elated heroes through the rear window of their vehicle...

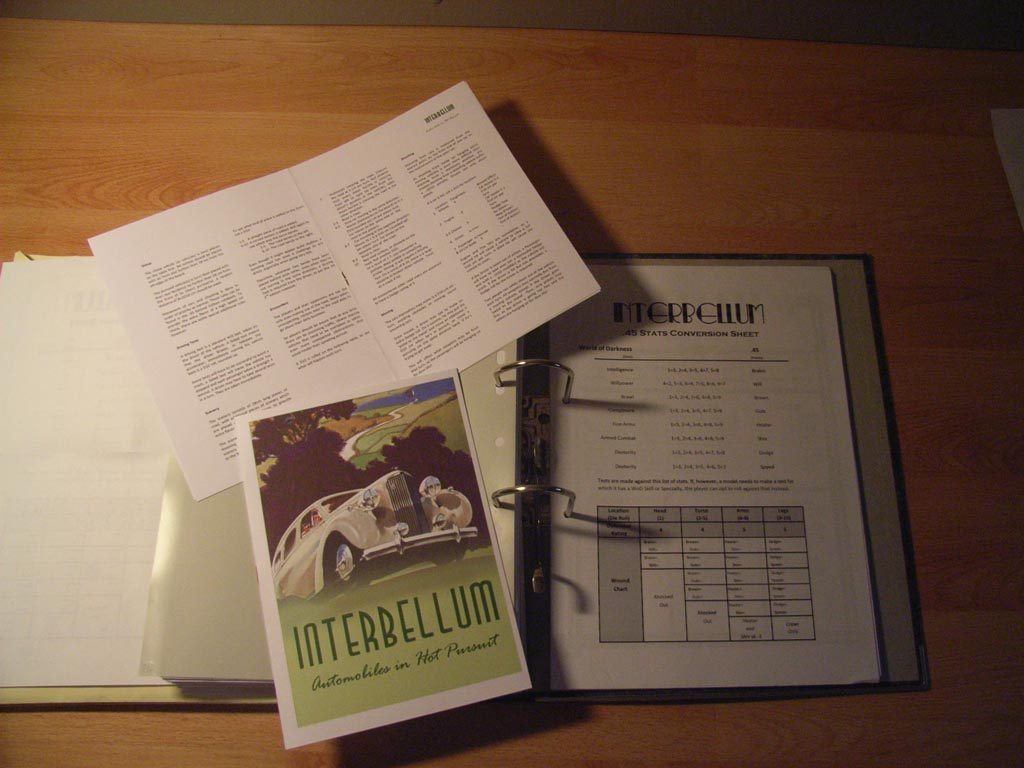
Like I said, we play with the World of Darkness system, and the magazine rules were geared towards use with the 'Legends of the Old West' ruleset, so I had to modify them accordingly. I had to convert to a D10 system, and find a way to use the WoD skill system within the game, as it did not cater for different skill levels in, for instance, shooting or driving. But we made do.

I even created a little booklet as a handout for all the players, so they could familiarize with the rules. I also made a conversion table for converting WoD characters into the .45 system, which I mentioned I will be using for combat scenes:


So, next up are the cars and other additional pieces, including some unsuspecting pedestrians. More news at eleven... :D
« Last Edit: December 13, 2011, 09:55:39 PM by Daeothar »

Offline matakishi

  • The Teacher
  • Galactic Brain
  • Posts: 4471
  • Cousin of Hammers
    • Matakishi's Tea House
Re: Car Chase Game - road pieces - Updated 13/12 - Board Pieces finished
« Reply #22 on: December 13, 2011, 08:39:34 PM »
What an excellent build and this...


...is a fantastic picture  :-*

Offline Mason

  • Elder God
  • Posts: 21222
  • Eternal Butterfly!
    • Blind Beggar Miniatures
Re: Car Chase Game - road pieces - Updated 13/12 - Board Pieces finished
« Reply #23 on: December 13, 2011, 09:28:57 PM »
Great work!
Everything looks fantastic- Roads, scenery, photos, the works!
 :-* :-* :-*

As Matakishi says, that photo at the end is genius, but, in my humble opinion, you went the extra mile (no pun intended, please forgive!) with the collection of handouts etc that must have really help clinch the 'feel' of the game.
 :o

Well done.
(Consider your idea filed away for future theft use.
Thank you!


Offline Burgundavia

  • Mad Scientist
  • Posts: 728
    • Coreyburger.ca
Re: Car Chase Game - road pieces - Updated 13/12 - Board Pieces finished
« Reply #24 on: December 13, 2011, 11:11:16 PM »
Absolutely staggering. I love the ground-level shots, they really take you there. I think I might have to build some of these now.

Did you repaint the cars too?

Offline uti long smile

  • Galactic Brain
  • Posts: 4359
Re: Car Chase Game - road pieces - Updated 13/12 - Board Pieces finished
« Reply #25 on: December 13, 2011, 11:29:25 PM »
Wonderful stuff!
Something Crooked this way comes...
http://www.crooked-dice.co.uk/
Wargaming in the world of Cult TV

Offline Wirelizard

  • Scatterbrained Genius
  • Posts: 3103
  • Needs More Zeppelin!
    • The Warbard
Re: Car Chase Game - road pieces - Updated 13/12 - Board Pieces finished
« Reply #26 on: December 14, 2011, 03:17:26 AM »
The awesome period-feel handouts and the photoshoppery really top this off in grand style.

I'm thinking with a little bit more work on the outer edges of the banks, you could pop these down as regular scenery on an ordinary table, too. Inspiration filed away for the next round of scenery building, perhaps - we've been saying we need more European/UK scenery for our games...

Offline Furt

  • Scatterbrained Genius
  • Posts: 2627
  • Barbarous...
    • "Adventures in Lead"
Re: Car Chase Game - road pieces - Updated 13/12 - Board Pieces finished
« Reply #27 on: December 14, 2011, 04:12:14 AM »
What an awesome looking project and it sounds a lot of fun.

Your players are very lucky (and spoilt)!

Are the road sections sufficient to finish a game or are they "recycled" to the front?

Also I'd love to see those handouts if it is something you'd be willing to share.
“A prisoner of war is a man who tries to kill you and fails, and then asks you not to kill him.”

http://adventuresinlead.blogspot.com/


Offline Blackwolf

  • Potato Cup 3 winner
  • Supporting Adventurer
  • Galactic Brain
  • *
  • Posts: 6225
Re: Car Chase Game - road pieces - Updated 13/12 - Board Pieces finished
« Reply #28 on: December 14, 2011, 04:56:11 AM »
Wow!!!! More cracking stuff,love it :-* :-* :-*
May the Wolf  Walk With You
http://greywolf1066.blogspot.com.au/

Painting Clubs Joined: APC,MPC, PPC,PAPC,LPC.

Offline Steve F

  • Scatterbrained Genius
  • Posts: 3139
  • Pedantic bugger, apparently.
Re: Car Chase Game - road pieces - Updated 13/12 - Board Pieces finished
« Reply #29 on: December 14, 2011, 05:51:38 AM »
Tremendous stuff.  A wonderfully thorough job, with fine specifics too - the right camber to the road, those dangerous-looking hedgerows ...

I'm sure your players appreciate how much you've put into this.
Back from the dead, almost.


Related Topics

  Subject / Started by Replies Last post
4 Replies
5046 Views
Last post April 03, 2010, 07:36:26 AM
by dijit
4 Replies
3925 Views
Last post December 23, 2010, 01:23:01 PM
by Flashman14
33 Replies
8258 Views
Last post March 18, 2012, 09:39:31 PM
by Sangennaru
82 Replies
19338 Views
Last post January 19, 2014, 10:25:59 PM
by Mason
32 Replies
4169 Views
Last post February 17, 2024, 05:03:02 PM
by Codsticker