Since it's a very cheap and easy build, thought I'd share the process of recycling a pinboard for wargaming.
Requirements (for a desert board):
- A pinboard what a surprise! Preferably made of cork. No need for an expensive one.
- Craft paints. Here white, yellow ochre, and any kind of sienna/orange brown are sufficient.
- Cork mat or coasters. To make rocks.
- Filler/putty.
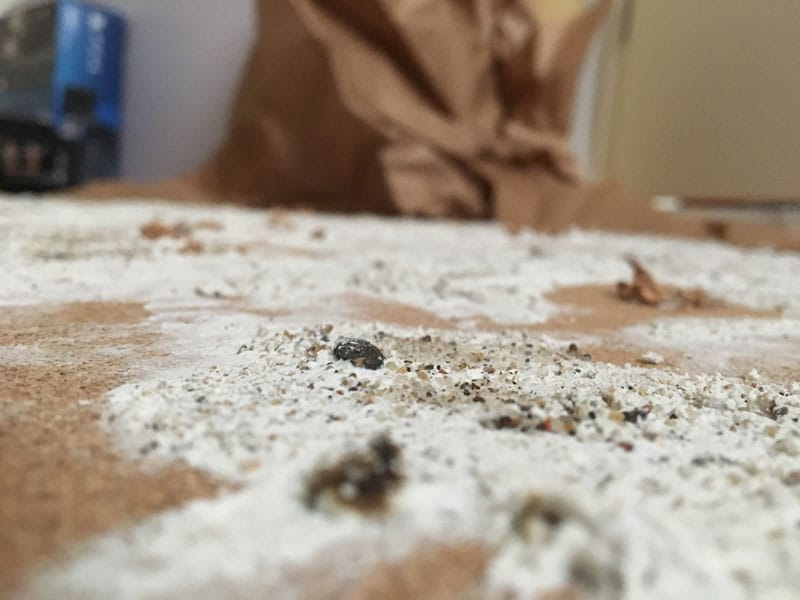
- Sand. Mix of coarse and light sand works best.
- Tufts. Or model grass. Or flock.
1) Cover most of the board with filler. Add sand and pieces of cork (torn from the coasters).
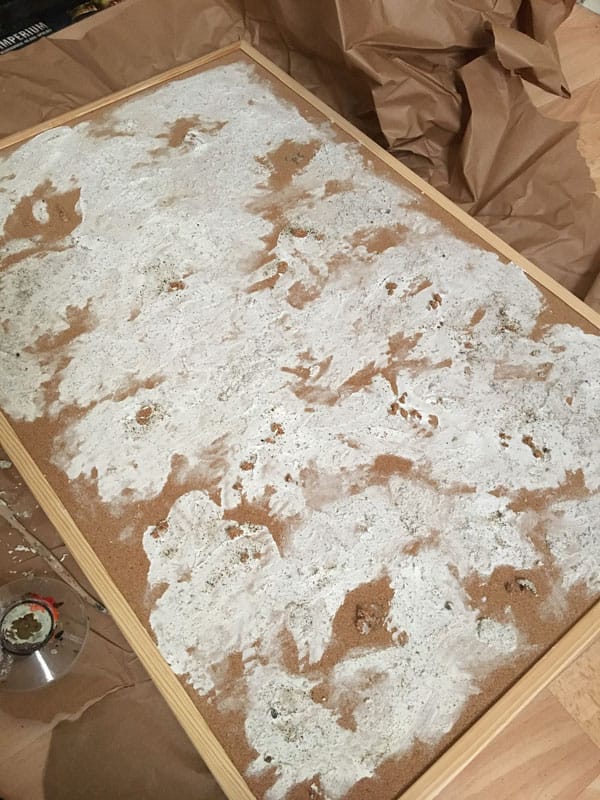
All in fairly random manner.
2) After this has dried (couple of hours), paint the whole surface with sienna. Aim for good coverage. (Colours are off on this one, you get the idea.)

3) Again, let it settle for a while. Then apply yellow ochre quite liberally. Start adding white immediately, while the paint is still wet. This will result in a very natural transition. Finish with drybrushing pure white all over it. The picture shows the final stage as you have to be quick.

4) All done. Drybrushing has brought out the small furrows of the cork board. I don't mind them, but be aware. The board will also warp due to all the materials added, yet the frame should keep it in shape. If you're worried, use a more expensive pinboard made of thick cork and perhaps with a metal frame.

5) An optional step. I want to use this board for games which require a gridded surface, like Rommel or To the Strongest. My measuring method was quite time consuming, but I enjoyed that relapse into archaeological habits.

There are 12x8 squares, each 7x7cm which fits the 90x60cm (or rather 86x54cm) board nicely.

6) Adding tufts. Dark green ones were used here to mark corners, light brown or straw coloured ones to break up the sand and stone surface.

Of course, it looks a bit too regular now. But I hope it will ease with some additional scenery and miniatures on the board. The ones shown here are just for size reference.
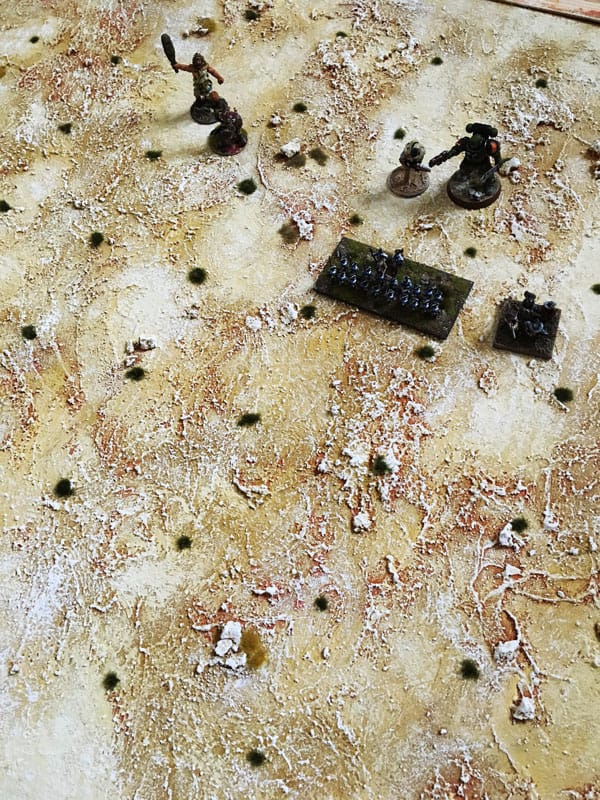
There are 10mm (Pendraken, SYW), 15mm (Tercio, TYW), and some random 2832mm ones. Most bases don't match the light sand colour of the board, however, bear in mind that the pics were taken in fading daylight; contrast is less stark under a ceiling lamp.
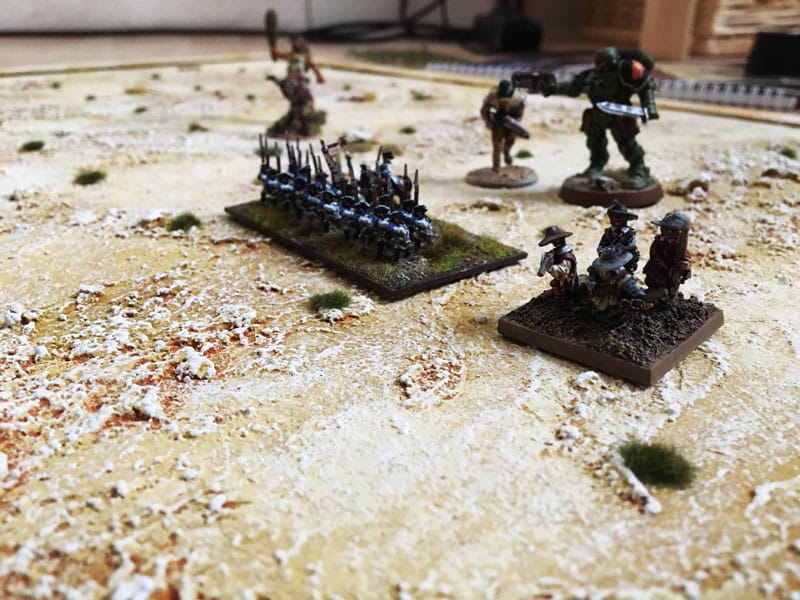
And there you have it, a small, very cost effective gaming board. I've done this on a day off within a couple of hours. While I aimed for a fairly generic look with rather flat surfaces and little fixed scenery, features like roads, hills, or valleys are easily added at the first step.
C&C welcome!


 Welcome, Guest. Please
  April 27, 2024, 03:12:37 PM


