Played a small test action to try out 'Iron Cross' rules from Great Escape Games.
The board is makeshift as I havent started building my proper desert boards yet, but it does the job.
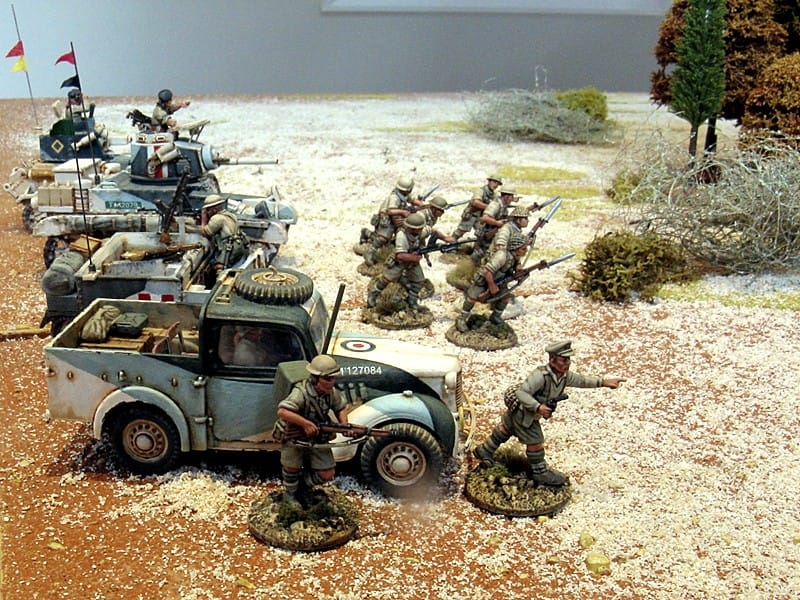
British Forces: 1 x Honey, 1 x Vickers light tank, 1 x Bren carrier with infantry section, 1 x Austin Tilly HQ vehicle and commander.
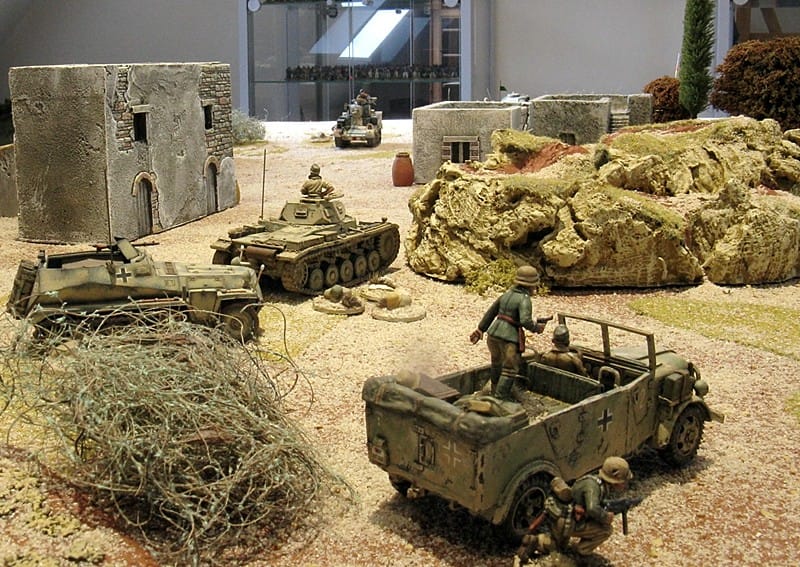
German Forces: 1 x Pz III, 1 x Pz II, 1 x SdKfz250 with infantry section, 1 x Steyr 1500 HQ vehicle and commander.

Thats an almost exactly balanced force, although with a sight edge to the Germans in quality of armour and firepower.
The British objective to secure the fuel dump in the village. The German objective is to take it.
This game is all about spending your command tokens wisely. You get one token for each offensive unit so in each case that's three: two tanks and an infantry section. Transport vehicles dont generate command tokens. However, an HQ presence does generate two more, meaning each side has five command tokens to spend each turn. (To be spent on activations to move, fire, recover morale, and so on the usual).
You can also gamble however, and spend command tokens to try to interdict the active players activation with a reaction to any activation.
This is easier said than done however, especially once the unit testing to make a disruptive reaction has taken some morale hits of its own.
So, in summary, the rules (movement, firing, damage etc) are all pretty simple.
The tactical difficulties of managing command resources and morale, are very apparent, even in a short and simple test game like this
You can see straightaway it makes for an interesting game where you have to constantly balance marshalling your resources against the temptation to go for the jugular. On;y to then find that you dont have enough command tokens left to react when you need to, or to try to recover morale which can deteriorate spectacularly quickly in a sustained firefight.
Thus far, quite realistic I guess.
In the opening move, both sides fling their tanks forward, with the Honey and Panzer II immediately engaging at a distance.

There are no ranges everything is assumed to be in range, although under 12 does count as close range and gets a +1 in shooting.
Each side manages to activate and react, and many command tokens are expended (as you can see!)
This leads to a rapid accumulation of 'hits' and thus morale markers, with the Honey coming off second best and failing to recover any of its morale when tested. One more hit and its a goner. The crew will bale out and leg it, their morale limit exceeded.
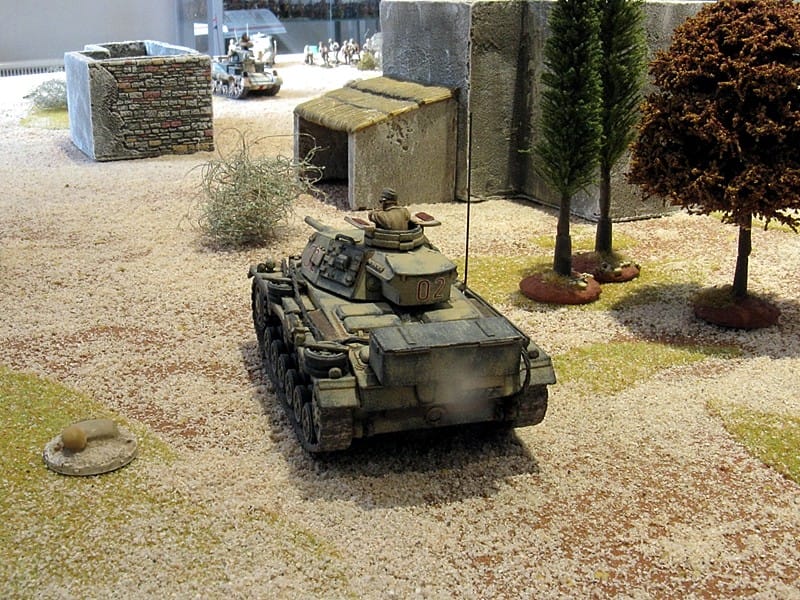
Meanwhile the Panzer III commander decides to skirt around the duel in the sun, with a flanking move
The British infantry section occupy the flat roofs of the buildings to prepare to fire at the advancing Germans. (Note, an infantry section is these rules requires only four figures, being strictly representative. Theres no figure removal, and no difference between LMGs, SMGs and rifles. Basically an infantry squad is a combat element. It fails and is destroyed only when its morale collapses. For the sake of appearances though, Ive decided to make my infantry sections a more likely eight figures strong
)

There are rules for support squads by the way: HMGs, mortarts, A/T rifles, A/T guns etc, but in the interests of mastering the game basics, we keep it simple for this first test run.
With the Honey teetering on the precipice of doom having failed a morale test and unable to fall back, the gallant Vickers light tank trundles forward into the fray, putting itself in harms way.

Whilst inferior in armour and weapon to the Panzer II, nonetheless, the Panzer is already compromised by its own heap of morale tokens, and therefore pretty much unable to react to try to grab the initiative. Whilst the Panzer had the edge on the Honey, its disadvantaged against a new opponent because its already lumbered with so much morale damage of its own.
The Vickers comes into close range and lets rip.

The Panzers armour is penetrated and bang! brews up. Absent black smoke, orange lichen serves as flame

The German commander decides to throw his infantry forward, whilst the other Panzer is still making slow progress on its flanking trip.

Eventually however, just as the Vickers and the British have exhausted their small supply of command tokens for the turn, the Panzer III puts in its surprise appearance

The Panzer III prepares to fire at point blank range, but the Vickers manages to react and tries to get a shot in first. Unfortunately it misses. The Panzer III commander licks his lips, and prepares to put an armour piercing round into the flank of the Vickers

Meanwhile the German infantry disembark from their halftrack and rush onto the high, rocky ground overlooking the village.

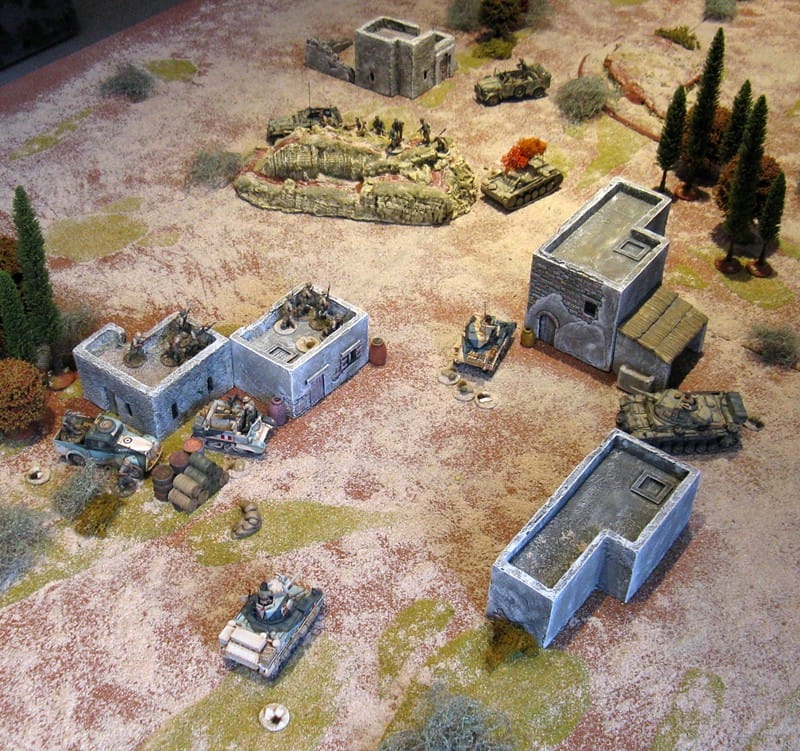
A general view of the action at this point.
The Panzer III scores an armour-penetrating hit on the Vickers and kaboom!.

At this point, unfortunately my camera batteries died! (Kaboom!) But essentially, there was then a short and determined fire fight between the British and German infantry, with the British coming off worse, despite initiative switching to and fro a couple of times.
At the start of the next turn (4), with the Germans holding the initiative and the British infantry just one morale marker away from total collapse and flight, they abandoned the rooftops and fell back.
The Honey was slowly recovering, but would almost certainly have to face the Panzer III at short range, and still with a significant morale disadvantage affecting its fighting ability.
At this point, the British commander ceded the encounter - and the fuel dump - to the Afrika Korps
That was three and a bit turns to get to a pretty clear result, took about 90 minutes to play - and that was with a lot of reference to the (very short) rules. On the whole, pretty promising Id say.
Next time Ill try a slightly larger game
I like it though.


 Welcome, Guest. Please
  April 30, 2024, 08:21:49 PM


