Right, so this thread is supposed to be aimed at those maybe just starting out in the gaming world. I hope to show that its not rocket science to building decent terrain. I'm going to try and explain everything and show a step by step in pictures. If you think there's maybe a better way of explaining what I'm doing or an criticism in my process, I'd love some feedback! That way I can edit my post and hopefully find the best way to teach new peeps!
So, to start.. The reason I'm doing this is. I started playing Crooked Dices 7thVoyage about a year ago. I have a wee board already built but not much scenery. I had an idea that it might be fun to play a Trojan Horse scenario. The idea being that troops inside the horse would have to exit it and race to light beacons to signal their army before being stopped/killed by the castle guards. Big problem....when you search the net, there isn't many(if any!!) 28mm scale models out there! They all seem to be paper craft ones! So this is how I plan to build one from scratch.
I plan to do the tutorial in three parts...
1. How to sculpt wood effect over a cheap toy.
2. How to sculpt the wooden mane/tail.
3. How to build the carriage it'll ride on.
I plan to show the steps as I build myself, so there may be a wee bit of time between tutorials.
So here goes....
First the tools. To do this wee aren't going to need much and it'll be fairly cheap!
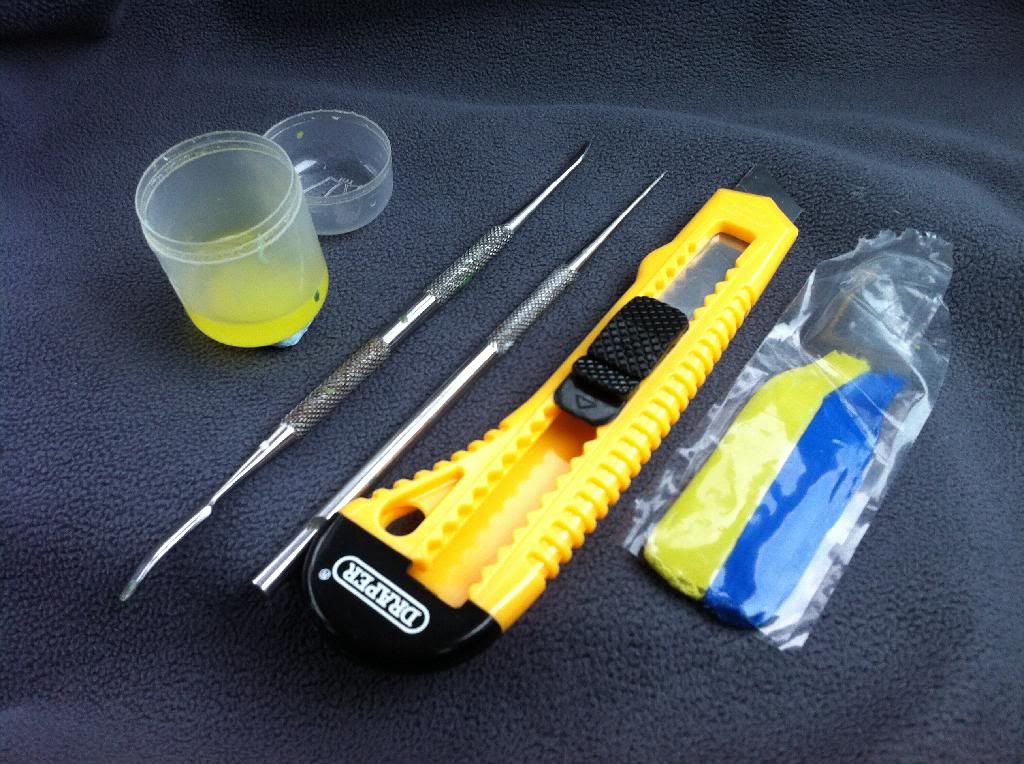
Items required....
1. Green Stuff(kneadite). This is basically a two part putty. The stuff I get from eBay already comes in its perfect proportions of yellow/blue, ready to mix. eBay is your friend here! I can get 36" of the stuff for approx. £8(including p&p) I reckon I'll use about 6" on my horse. Always make sure you mix it well. When done properly it should all be the same colour of green. It's easier to mix when it's warm. Trying to mix(and work) with it in a cold garage will not help! Only mix small pieces at a time. Maybe about an inch off at a time. It's just a less daunting way to work. Always keep your tools with a nice coating of your release agent. This will stop the Green Stuff(GS) from ripping and make it easy to smooth out! And most importantly don't try and do too much GS work at a time. Concentrate on a small area. Then leave it for a day! If you try and do too much, chances are you'll put your finger on your already perfectly sculpted parts and smudge them out of shape!! There very few things in the world more annoying!!!!
2. Release Agent. I know other people use other things, but I use washing up liquid( Fairy Liquid here in Britain). Keep a wee drop on some sort of small container beside you. I found over the years that its worth sticking it to the table with Blu-tac( the amount of times I've spilled it everywhere!!! Grrrrrr!!!!) When working with the Green Stuff(GS) I put a small blob on the back if my hand(so its within easy reach!) and just wipe a wee but on my tools when I find they start to stick to the GS. You don't need loads. It shouldn't drip off of your tools, just coat the working edge. You'll find that if you do one layer of GS, wait until it dries, then want to go back an sculpt something else on top, that the new layer will not stick because of the washing up liquid. So once your piece of work has cured and your ready to do your next piece I would wash it gently with a soft brush and water and dry it.
3. Knife. Just a simple craft knife. I prefer the snap-off blade type. Specifically for other types of work.
4. Sculpting Tools. I'm only going to use two for this. Mostly I use the one shaped like a small paddle. It's my fav tool and I use it for everything. I'll be using the tapered end throughout this part. Using the point for detail and the flat back of it for smoothing. Again eBay is your friend here for cheap tools.
So to start!
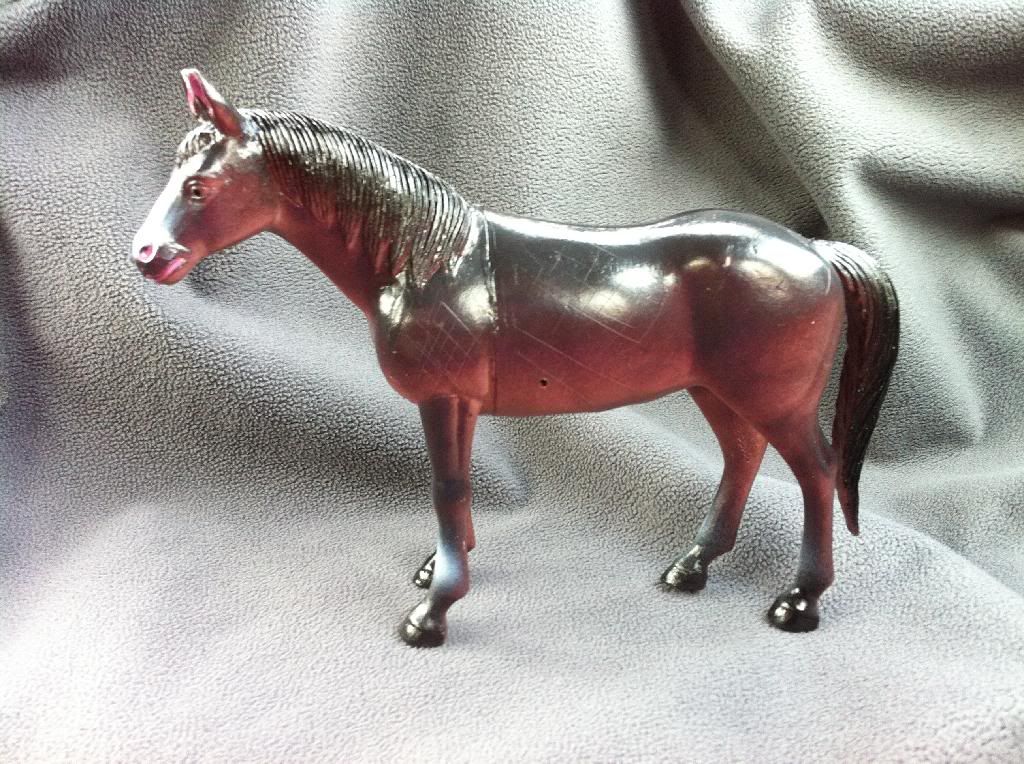
Here we have the toy I chose for the basis of this model. It was a pound from ASDA here in the uk! I've been struggling, that long, to find one for a while (and NOT spend £25 on a barbie horse) that I was nearly making a Trojan Elephant!! The cheap Elephant toys are a plenty out there, but surprisingly hardly any horses!!.....
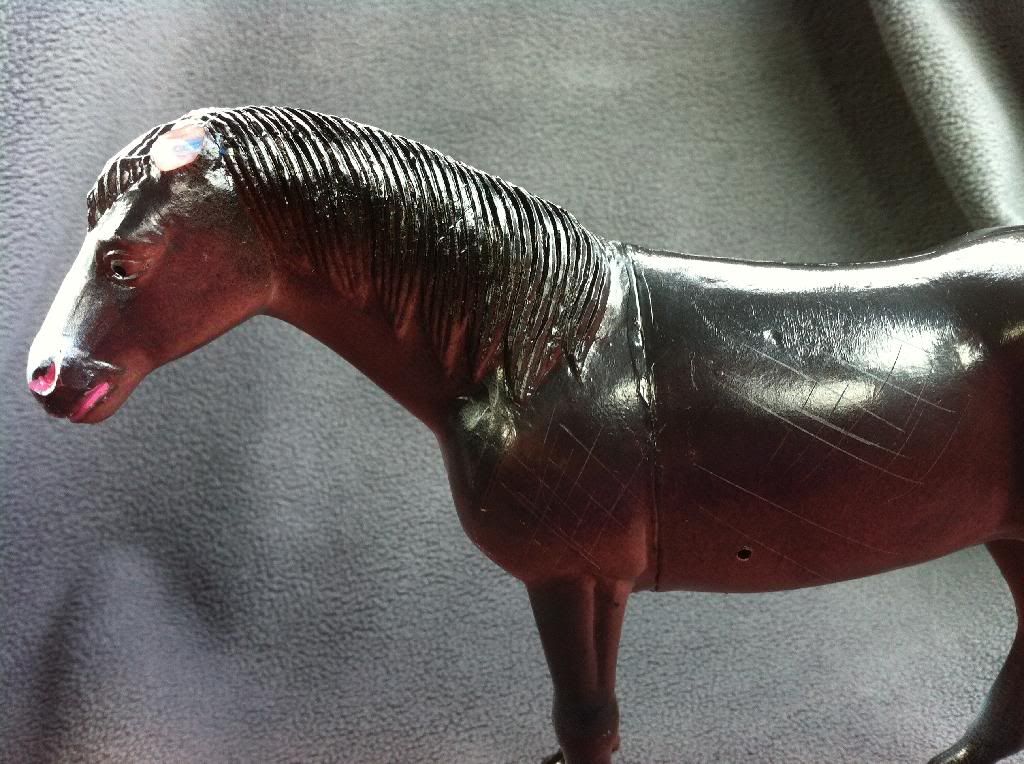
I didn't like the ears on this(it looks like a donkey!!) so using the knife, I've chopped them off! I've also scored the surfaces of the horse. I felt my toy was a bit shiny and smooth so I wanted something for my GS to stick to.....
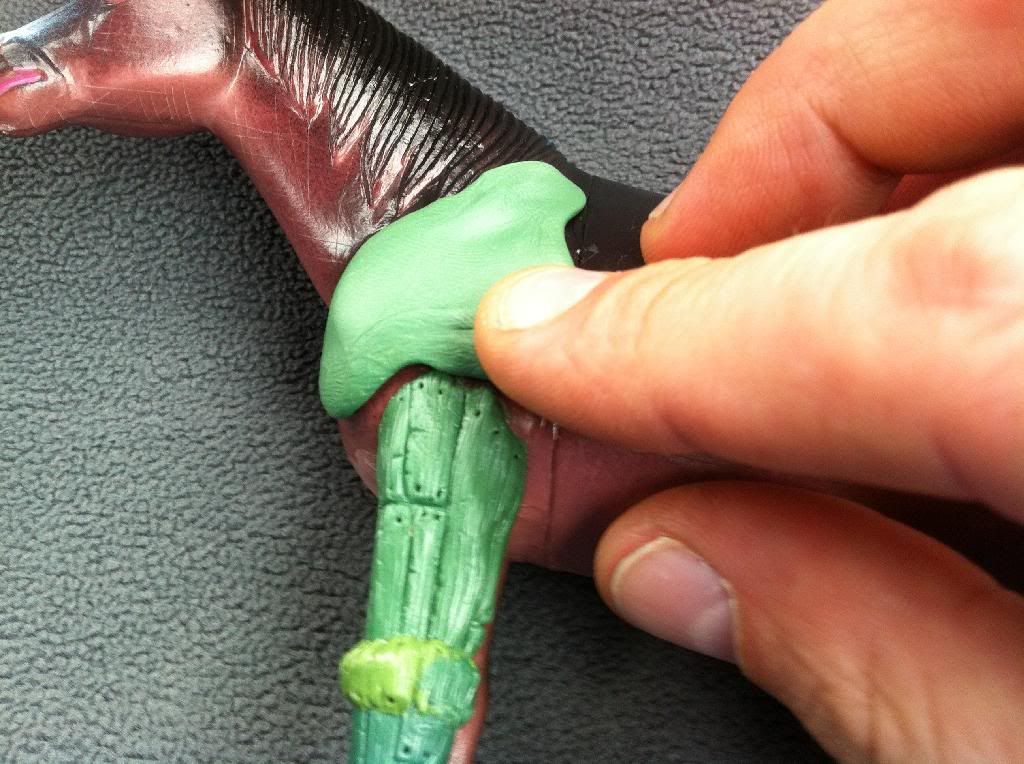
So now we're ready to start using the GS. We're only going to do a small part at a time. The plan would be to do, for example, the calf and thigh, then let it cure over night. The next day wash it and do the knee and shoulder, then let it cure. So on and so forth until the toy is covered in GS!
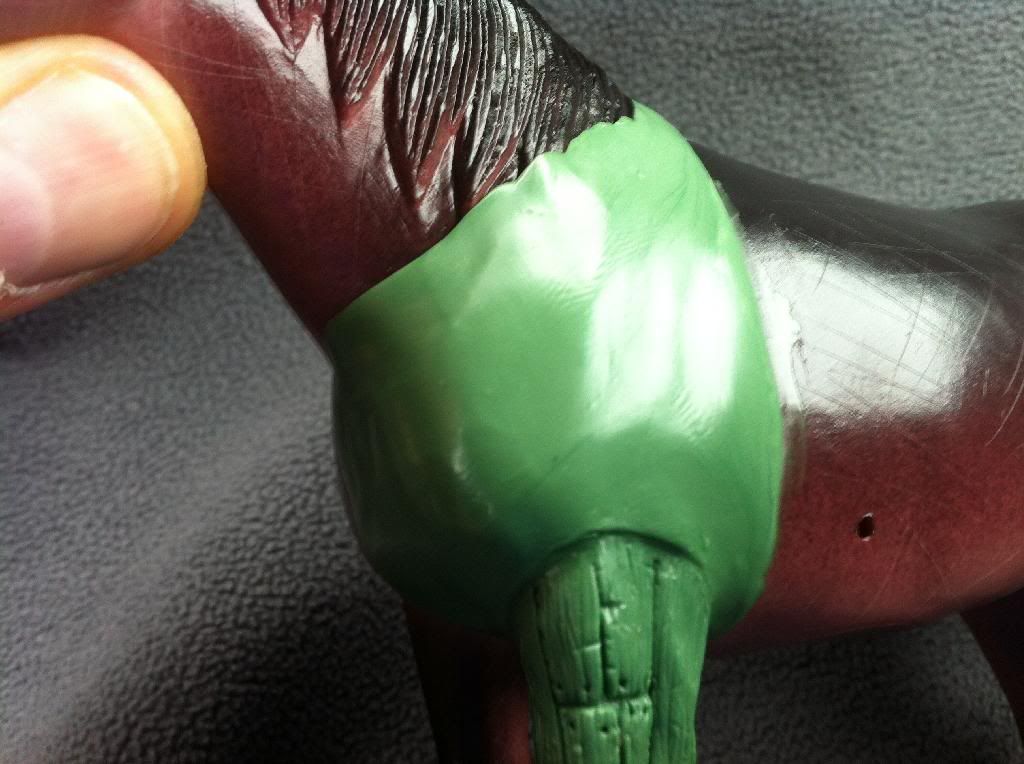
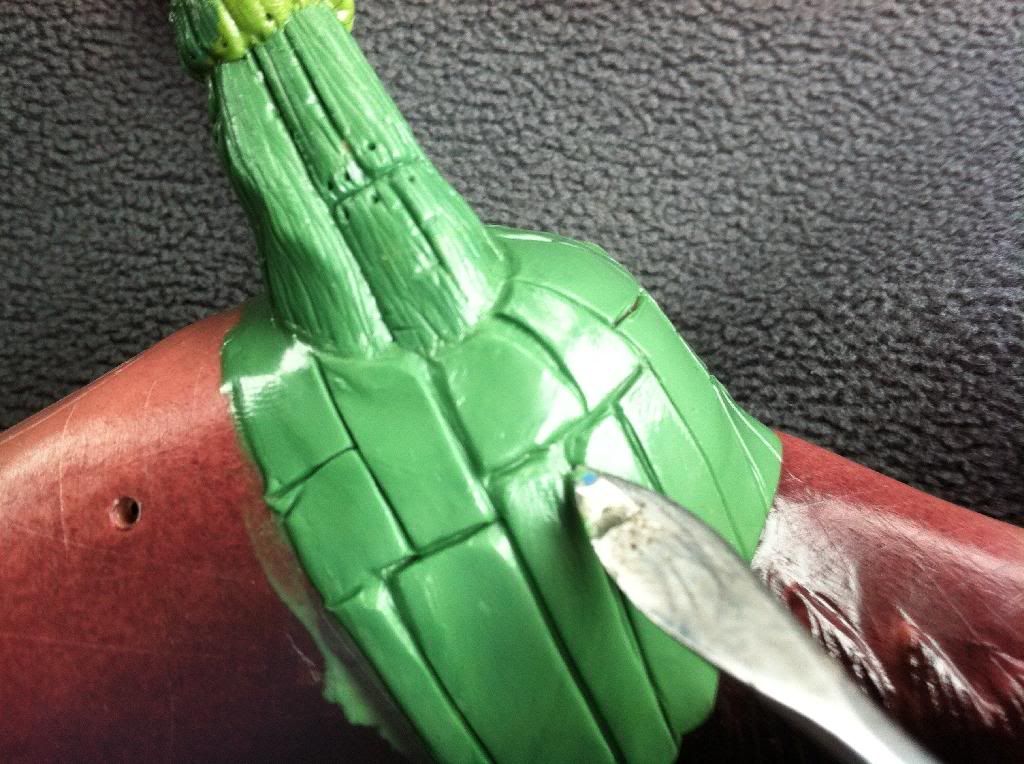
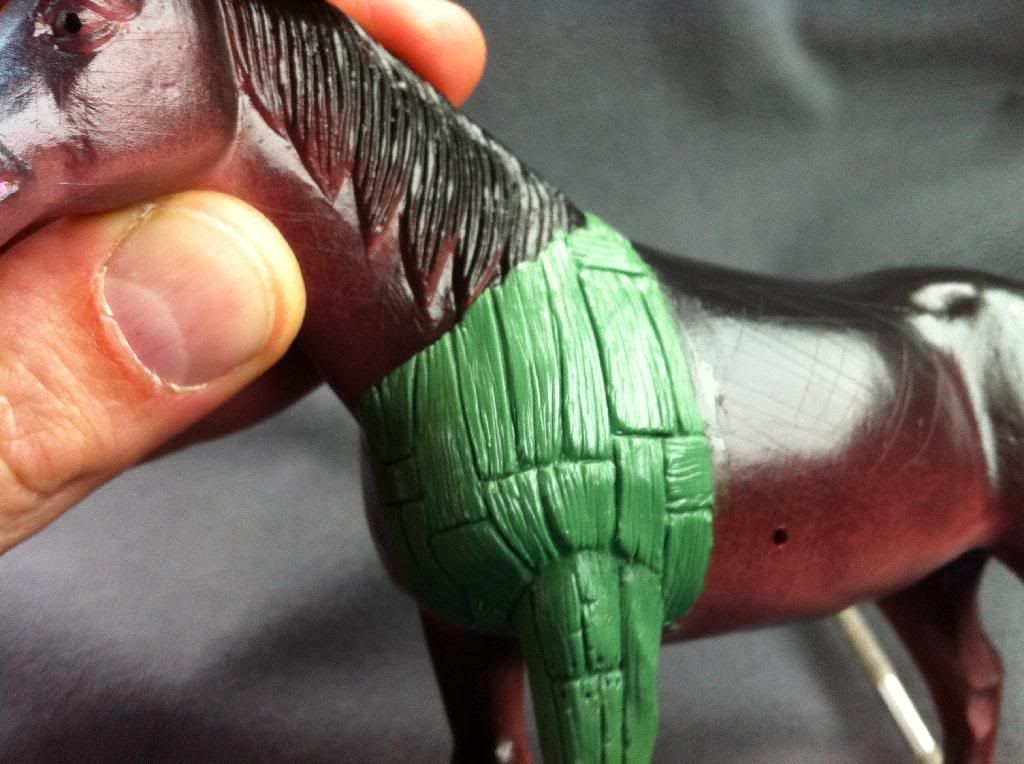
So taking about an inch worth of GS, mix it well and roll it into a ball. Now press that ball into the area we are going to cover. It's easier if the GS is warm. If your in a cold room, a hair drier may help! The warmer the GS the thinner the layer we can spread. This will also make it easier to work with! Wipe a wee bit of washing up liquid on your thumb and push the GS around the area you want to work with. Try and stick within the contours of the horse, for example don't push the GS past the shoulder onto the main torso, it'll look better in the end!
Next we're going to use the pointy end of our sculpting tool. Wipe it in some washing up liquid before you start to draw the panel lines. We're going to make them fairly deep....
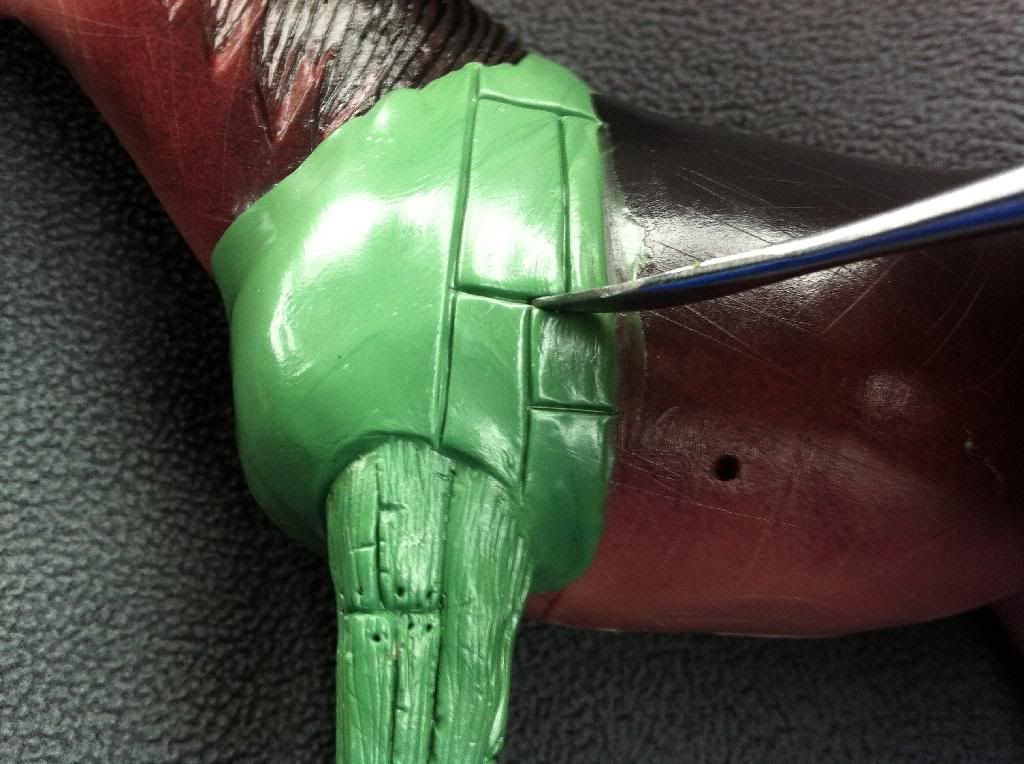
The panel lines we made will have slightly raised edges. Again wiping your sculpting tool in the washing up liquid, use the flat part of the tool and gently run it in circles over the whole area to smooth out.....
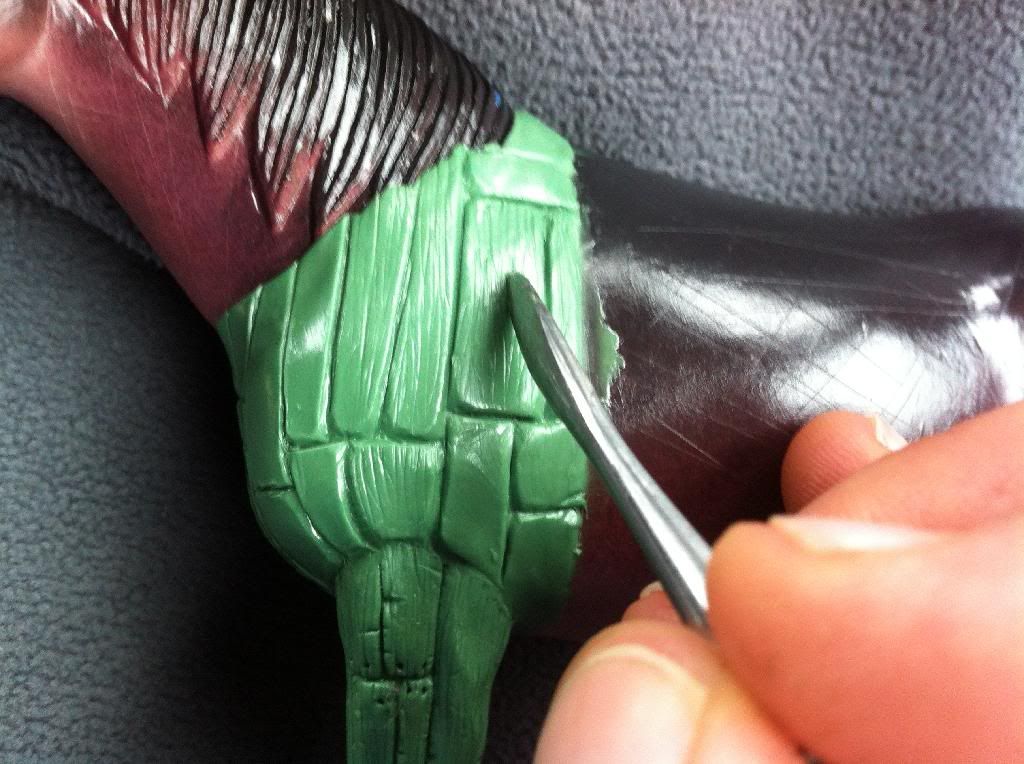
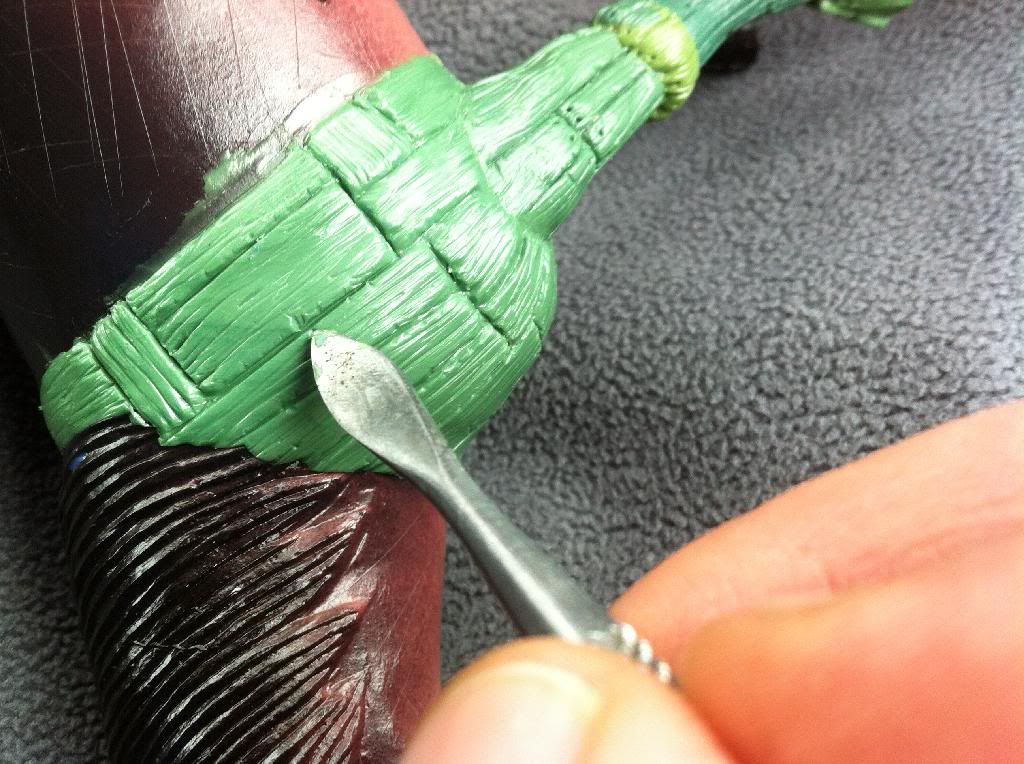
Next, just so the wood we make looks worn, we're going to round the corners of our panel lines. Using the sharp tip of the tool, gently pull it round the corner. It's always easier(and neater) to pull it towards you, so constantly turn the model to help!....
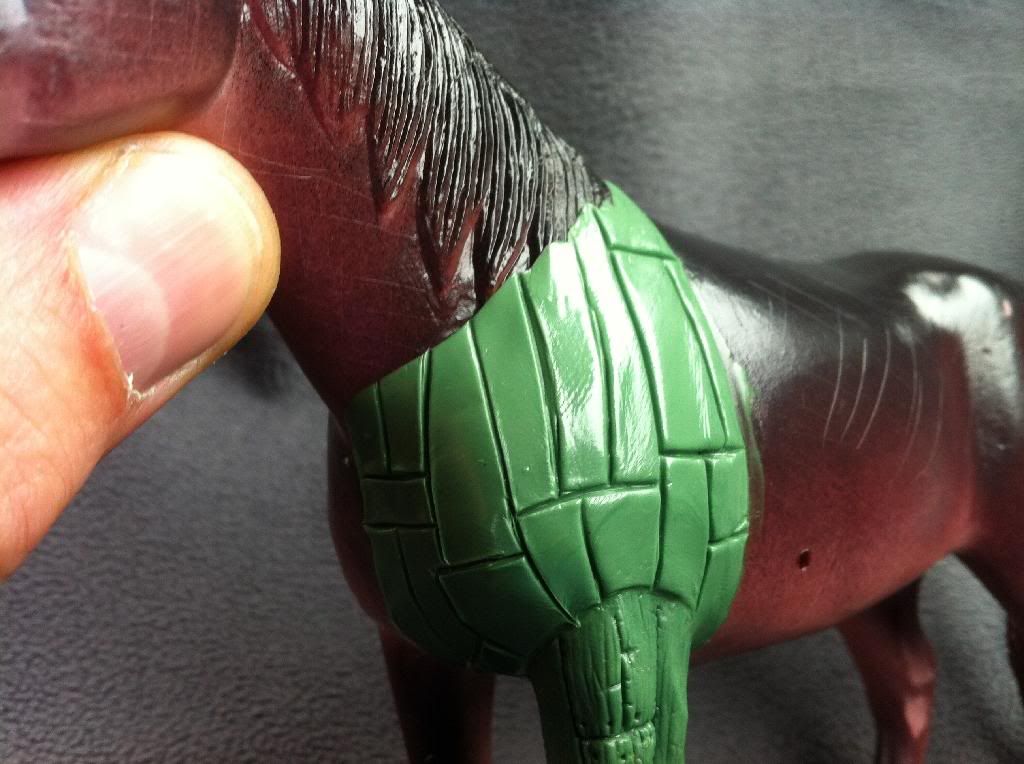
After that we're needing to add some texture. The more we add here, the easier it'll be to paint later! Gently, using the tip of the sculpting tool, quickly score lines down each panel. They don't all have to be exactly parallel, just roughly in the right direction. Here I've done some vertical and some horizontal....
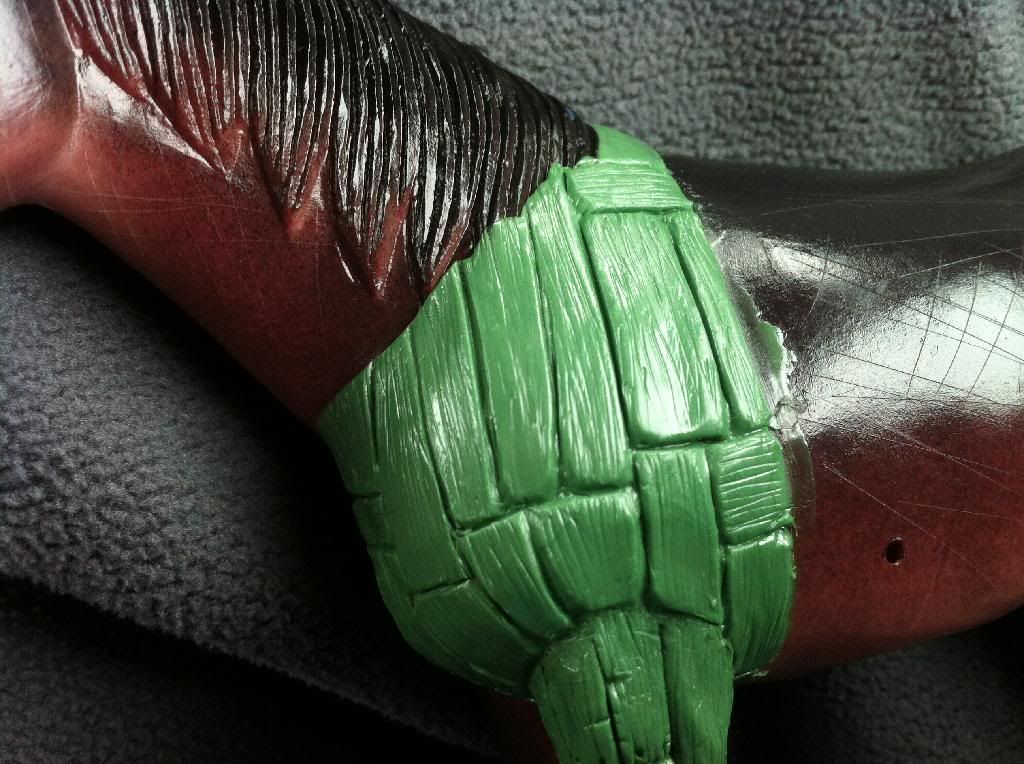
To make the wood look more worn, I've used a slightly heavier touch at the edges to leave some small notches. You can also run the tool up the sides of the panel, gently touching it in places like morse code, to give even more texture. Again the more texture here, the easier it is to paint....
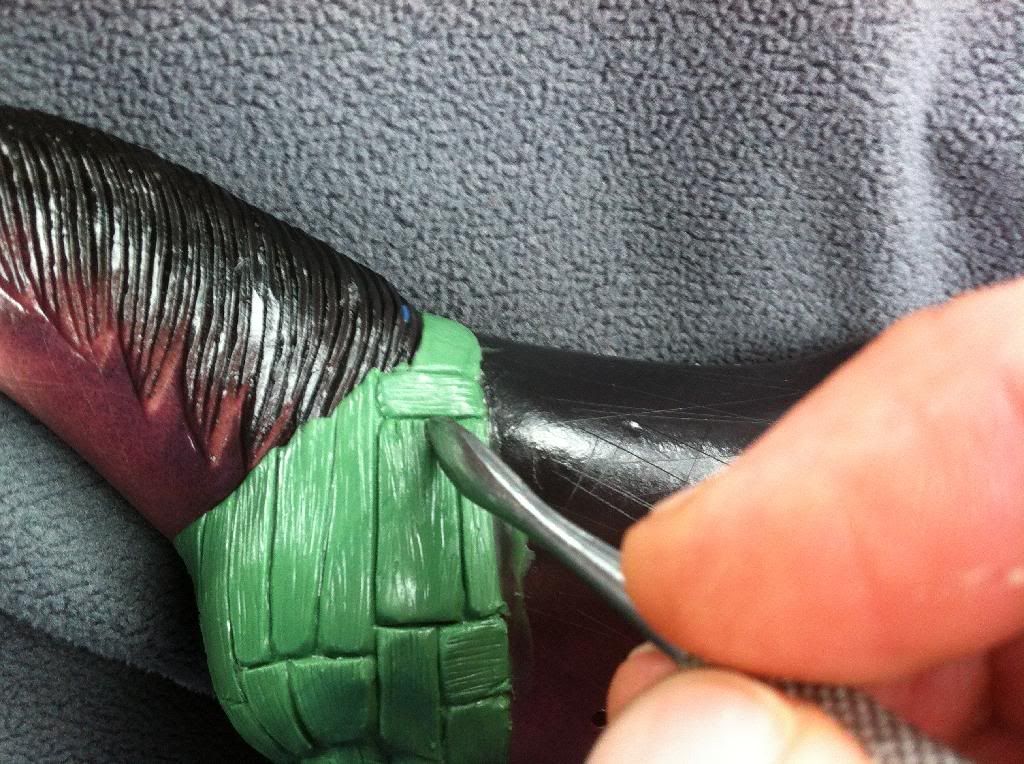
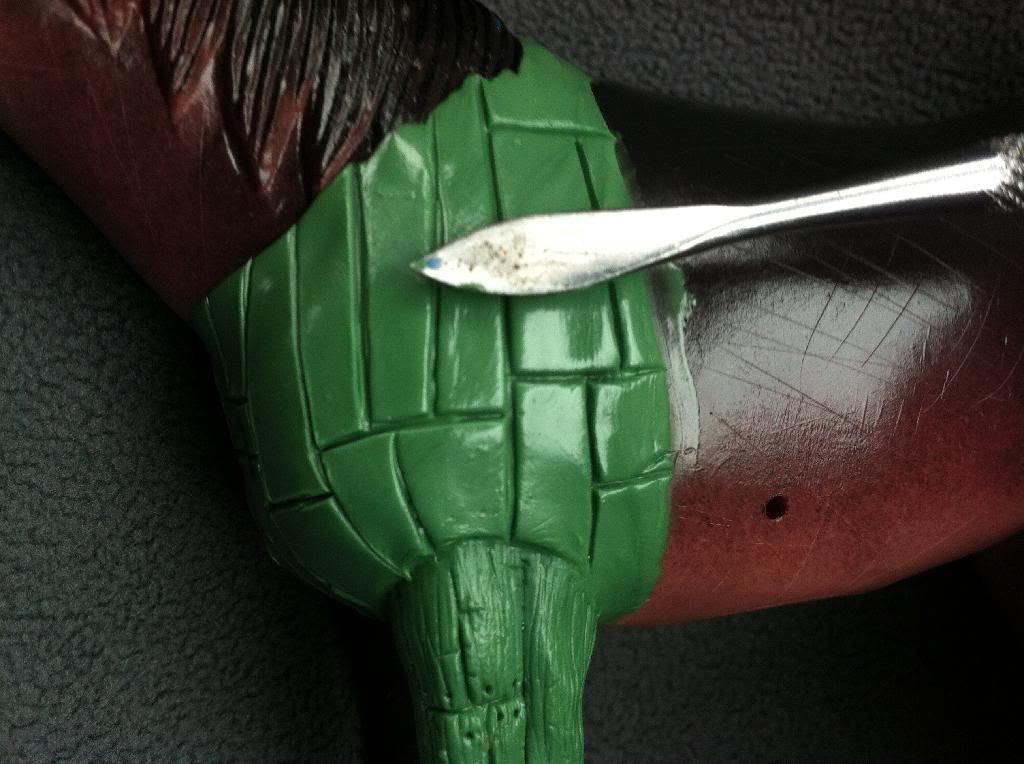
Lastly, for this part, I use my other sculpting tool. This just has a point on the end and I use it to make little holes at the corner of each panel. I do this to make it look like some has hammer a nail in at these points....
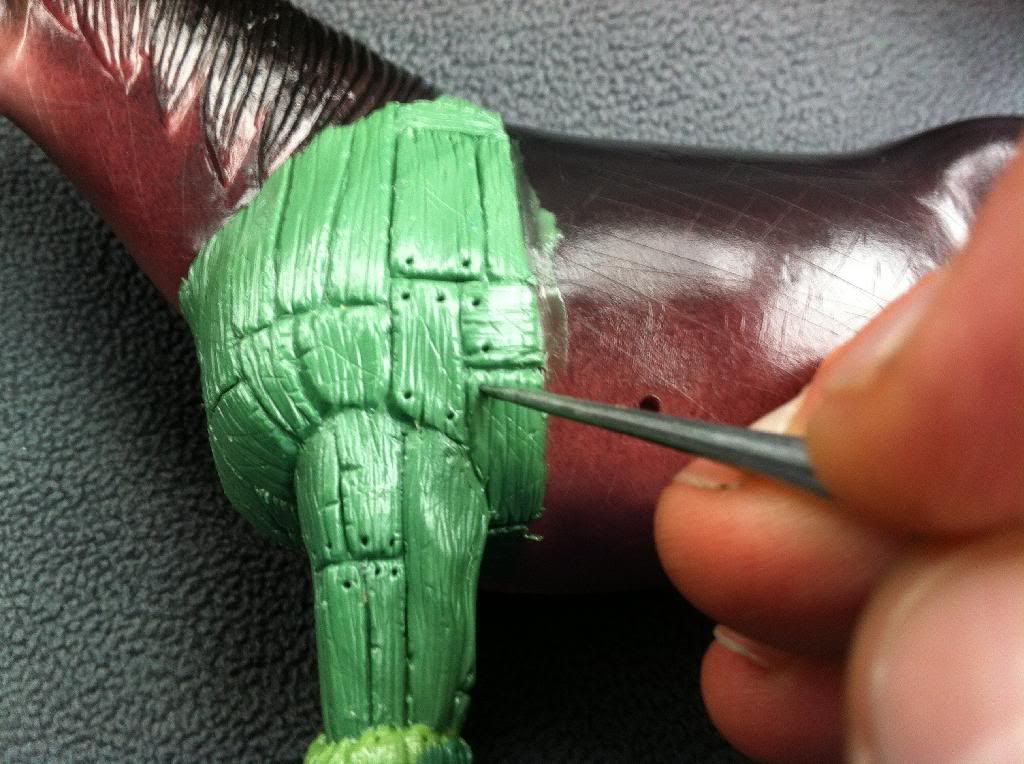
Finished panel....
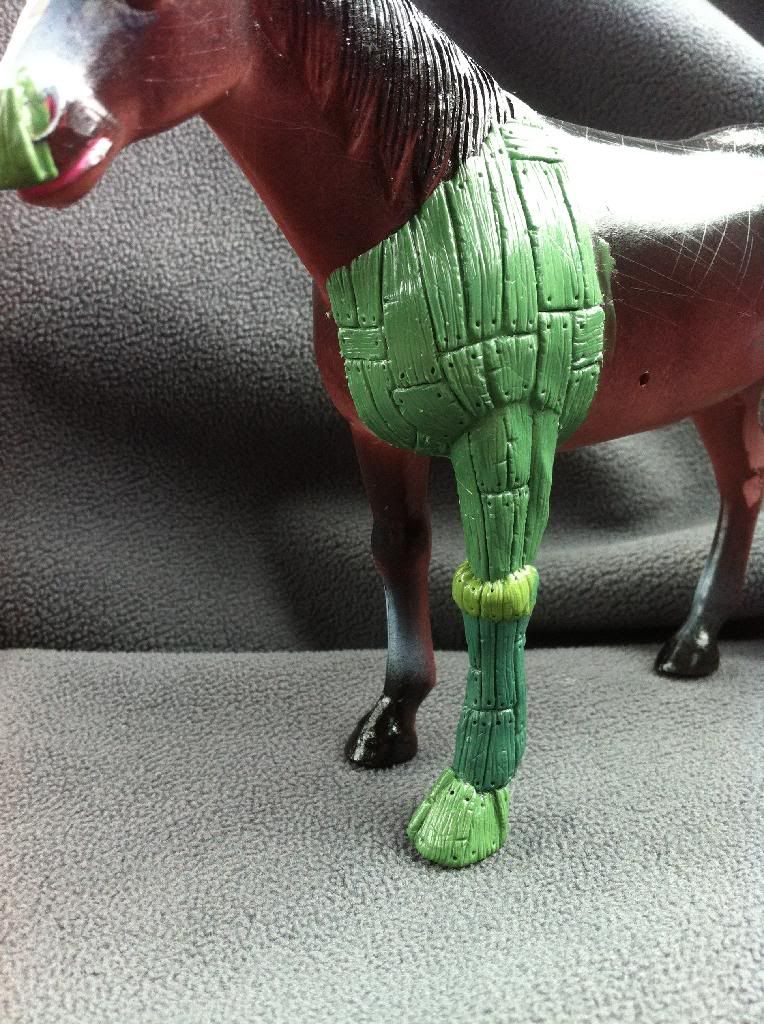
In the last pic, I started with the calf and thigh first, let that cure. The next day, I washed it and done the foot and knee, and then the day after that I done near side of the shoulder. I'll continue that until the whole body is covered.
I'll get the second part up soon. Moderators choice, do I make a new thread or just add on to this guys?


 Welcome, Guest. Please
  April 25, 2024, 08:38:14 PM


