Over the weekend there was a short 2-3hour window where I had the opportunity to try out
Lion Rampant rules for the first time with my son. We opted to play out the ‘Hold on Tight’ scenario using my Gondorian and Haradrim forces fighting for possession of a river crossing.
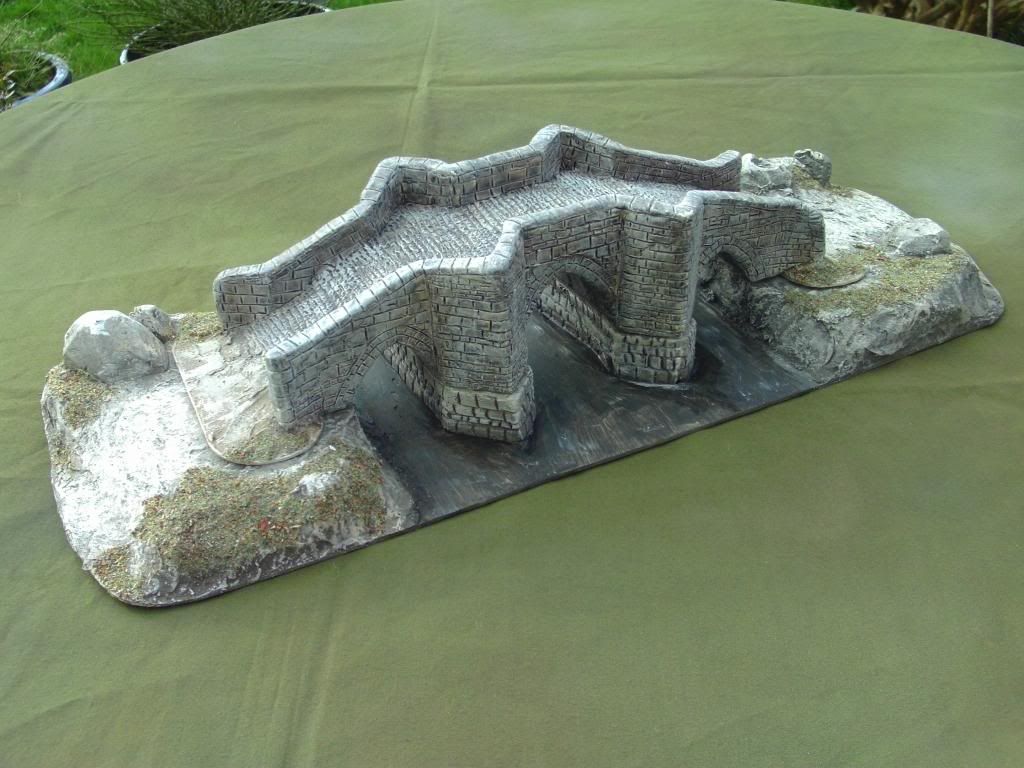
The TerrainOur usual playing table is a 3’ x 6’ dining table. I bisected the long side with some river sections. The river sections (seen here in another setting) were each 3” across and counted as rough ground.

The scratchbuilt medieval stone bridge made the river 9” wide.
On either side a small wood was placed on opposite quarters, with a rocky hill on the other quarter of the Gondorian side.
The White Tree (22pts)6 Dismounted Men at Arms @6pts *
12 Foot serjeants @4pts
12 Foot serjeants with mixed weapons @6pts
12 Archers @4pts
6 Skirmishers (Ithilien rangers) @2pts
The Black Serpent (20pts)6 Mounted ‘serjeants’ @4pts
12 Foot serjeants @4pts *
12 Foot serjeants @4pts
12 Archers (Expert) @6pts
Skirmishers @2pts
The battle commencesAfter a delayed start by the Captain’s own unit, the Harad infantry advanced, though the archers on the right of the main body proved particularly truculent. As Expert troops they were the most expensive unit which was not only galling but placed the whole Harad attack in jeopardy.
The Harad skirmishers swept through the woods on the right flank unhindered to gain the rough ground to the right of the bridgehead.
The Harad cavalry dashed ahead in a bid to gain the bridge first. This was a rash move as it turned out since they arrived without any fire support.
We diced for ‘initiative’ since we could not decide who would be the attacker, though more careful reading of the deployment might have resulted in Harad moving first. The Gondorians won the roll but their foot also showed some initial reluctance to advance and sporadic hesitancy among the units resulted in some jostling for the position of honour first on the bridge. This created something of a logjam on the narrow approach. Meanwhile the Ithilien skirmishers were first to gain the riverbank to the left hand of the bridge. First blood went to them since they were in position to rain a withering fire on the advancing Harad cavalry. With half their number killed in the first salvo the cavalry were halted in their tracks, failed their courage test and beat a retreat back in the direction they’d come. Two turns later they rallied and by this time the lone survivor gamely advanced only to be picked off by Gondorian archers who had by now gained the riverbank next to their skirmishing brethren.
The Harad skirmishers gained the river bank not long after the Ithiliens, but rather than trying to eliminate these, instead apparently stopped in full view of the enemy, posed for selfies and admired the scenery. They soon discovered standing in the open with only armour 1 was reckless endangerment when the Ithiliens rolled 10/12 hits! As the sagas go “and the rivers ran red with their blood” as the entire unit was wiped out.
Meanwhile the Harad Captain led the first foot unit onto the bridge to be met by the spearmen of Gondor. Once again Ithilien archers proved decisive as Harad advanced. The Gondorians charged home and traded blows and the combined assault forced the Harad foot to retreat with the Captain narrowly escaping a Lucky blow.
Despite their best efforts and much to the disappointment of all neither Captain came close enough to issue a challenge.
The Harad archers at this point finally woke up long enough to let fly a volley at the advancing Gondorians but despite their expertise only managed to inflict the sole Gondorian casualty of the game, otherwise performing dismally.
The Gondorians having twice beaten Harad entirely off the bridge, with the Harad leader’s own unit battered and in retreat and half his force shot to death, the scenario was concluded a Gondorian victory, though Harad did clock up 0.5 points for turning up under strength.
All in all we were both very impressed with the simplicity and playability of the rules. Neither of us occasional gamers are renowned for rule retention, but my son was pleasantly surprised he could remember some aspects with relative ease. The mechanics were simple and reminded me of the playability of DBA without feeling too generic. With effectively each figure dicing it felt like each model had a part to play in the combat, rather than just being some abstract rank filler.
With hindsight, given the effectiveness of skirmishers even without adopting ‘skirmish’ orders, Harad should at least have invested in a second skirmish unit. Had we replayed the scenario, I would have been tempted to throw the Harad cavalry across the river (which we both deemed fordable but only at half movement for all units). This would have taken them only 2 turns, but they would have done so only with fire support. I might also have counted the bridge parapets as partial cover.
Timing is obviously important and marshalling units into position effectively only half the equation. We both made rookie deployment mistakes, but agreed this was a most enjoyable ruleset that we would be using again soon.


