Hi LAFfers,
As a storage space and budget restricted gamer, (perhaps you know someone like that?) I needed to build a set of portable, packable, robust and sufficiently realistic set of 28mm buildings for my fortnightly gaming sessions.
Like many gamers I have ogled over and eventually collected some nice feature pieces in plastic and MDF from Italeri, Sarissa and 4Ground, there was a gap in my collections for the more mundane buildings that turn up time and again in my 28mm games, so I set about building a farm complex that could be easily stored and transported after each game.
Here’s a tutorial on how I went about constructing one of the buildings. Apologies for the picture quality, I only had my mobile phone handy when building this.
1 - Whenever I go to my local big hardware store, I rummage among the discarded boxes they leave for customers to take in lieu of plastic bags. To my fellow Aussies, it's the big green one that starts with a 'B'. There’s always a few small boxes which will suit the kind of size needed on the 28mm table. This one is for ‘O’ ring washers, and measures about 10 x 11cm (or approximately 4" square).
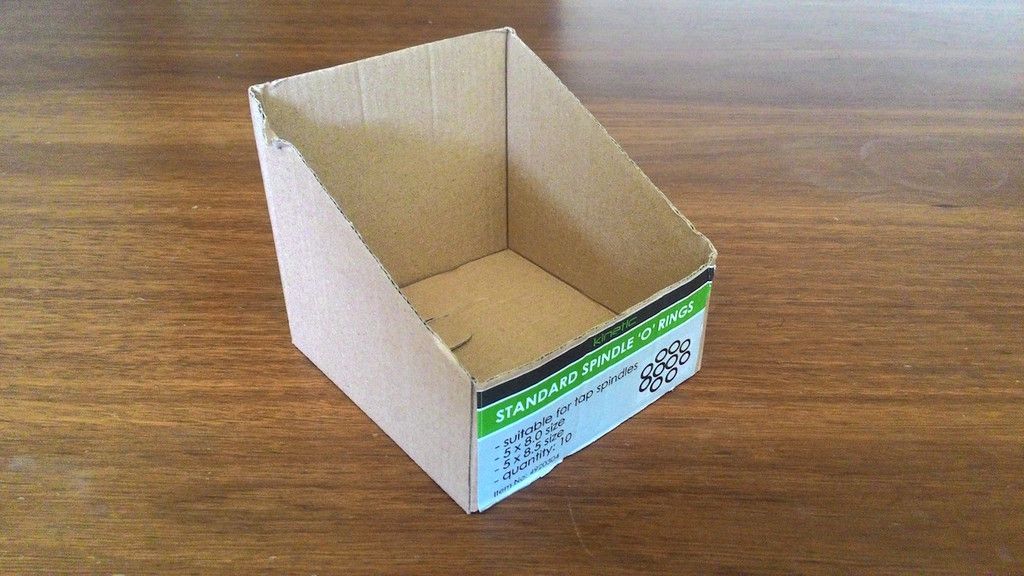
2 - Try to get boxes with an ‘X’ shaped fold on the base like this one. These form a robust basis for a building that will be assembled/disassembled over a period of many games.
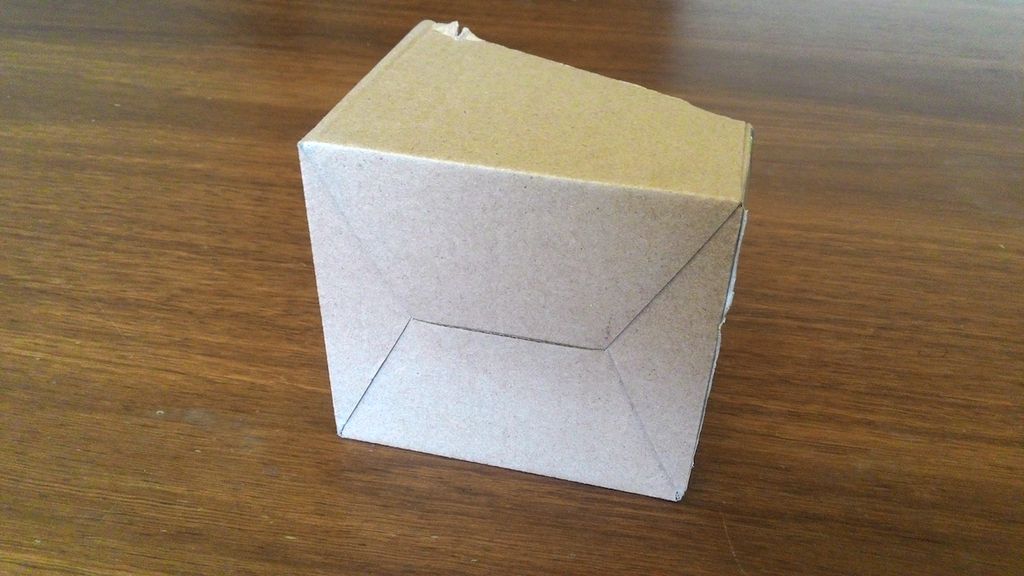
3) At home and away from the prying, questioning (pitying?) eyes of the hardware store staff, ensure the box isn’t glued or taped into position. If it is, but it still looks viable, carefully flatten the box, remove adhesive and labels if possible
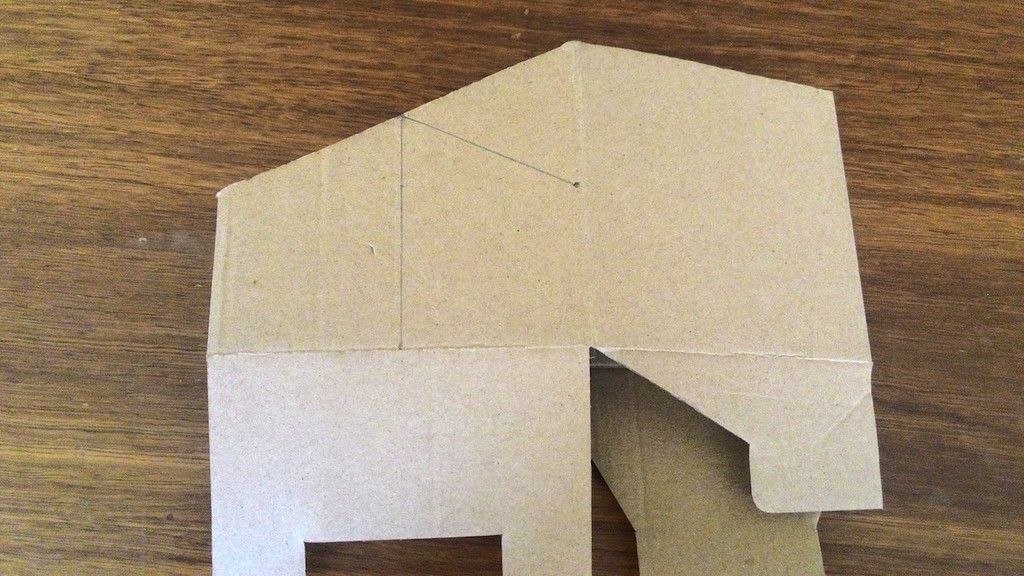
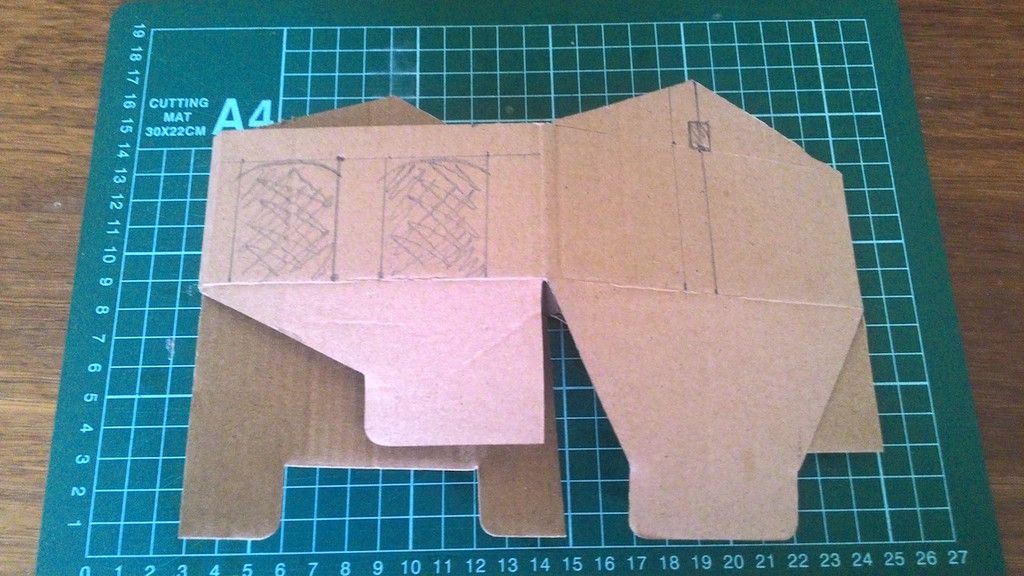
4 - Using the dimensions of the box as a guide, decide on the shape of the building. This one’s going to be a simple stone built cart/hay shed, with a gable roof that used the existing slope of the box top so I start by marking out a basic
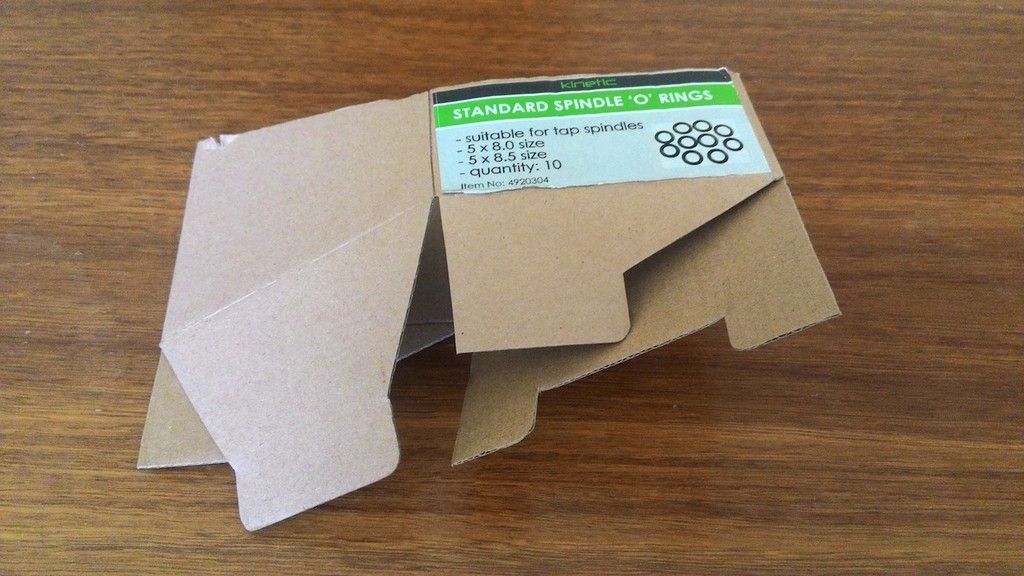
5 - Once the basic shape is marked and cut, and throughout the build at key stages, flatten the box to ensure it can be correctly packed and assembled using the design you have made. If you are not familiar with the assembly sequence, this gives you good practice.

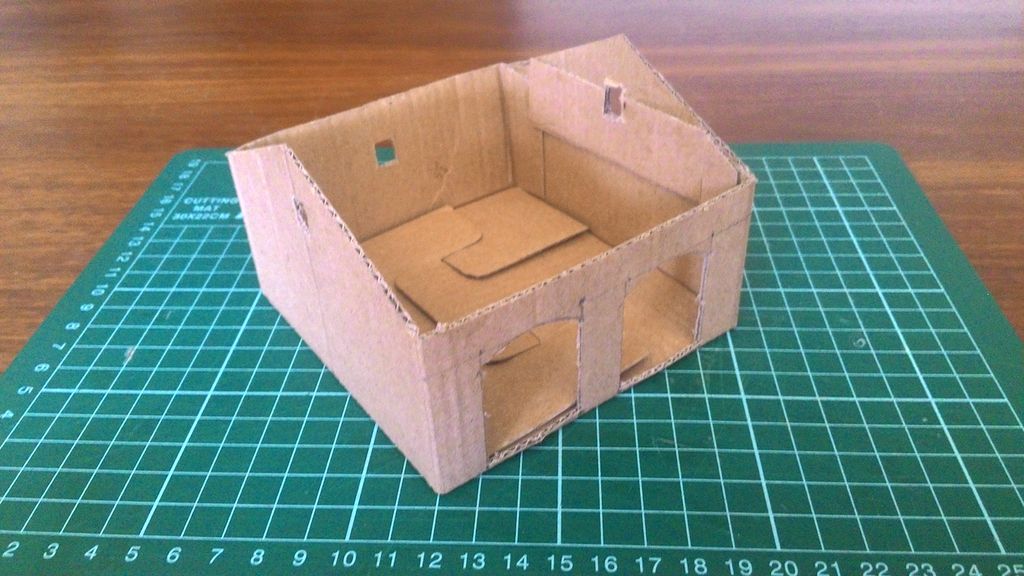
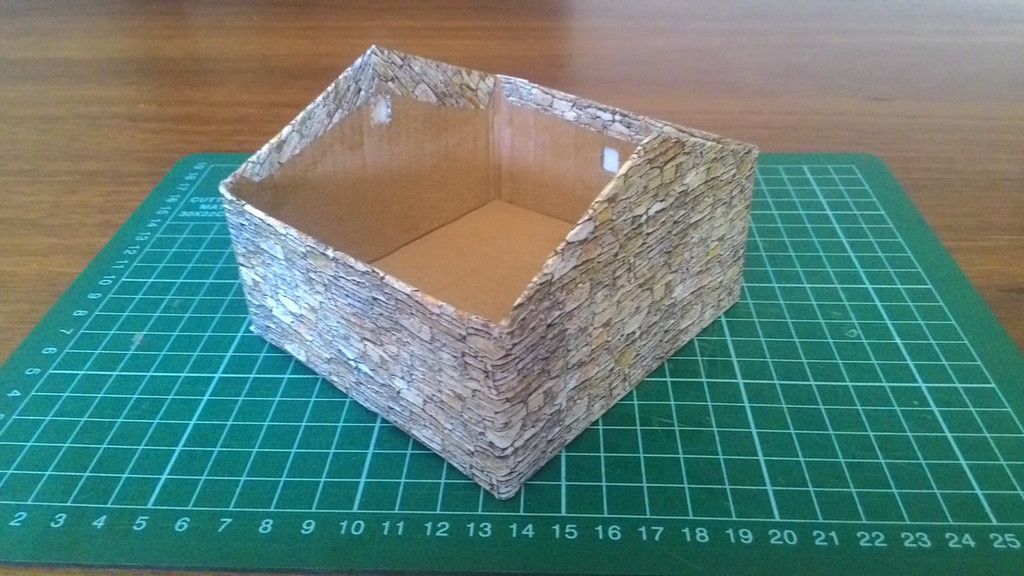
6 - Now we can see our cow shed taking shape.

7 - Flatten again, and mark doors and windows. Always cut with the box flattened. Doors and windows can then be cut out.
8 - I have access to a colour laser printer, and I’ve create several PDFs of various textures for walls, floors, rooves and wood panels. These are printed onto plain A4 paper, and stuck to the card exterior with PVA. Due to the varying size and shape of the boxes, I usually stick a basic square to the building, and then cut tabs once the glue has dried a minute or two. Ensure there is enough overlap to cover all corners, top and bottom.
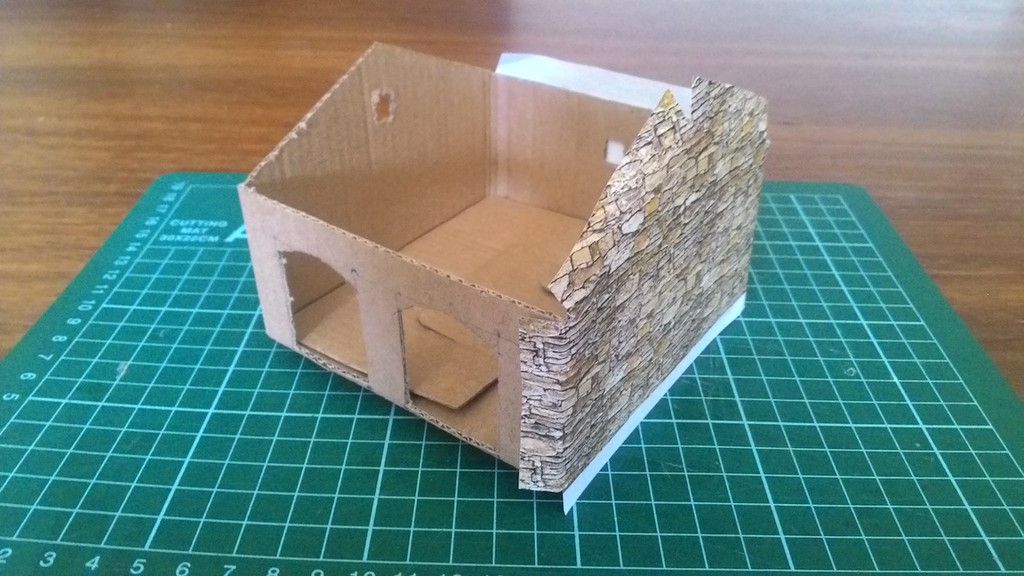
9 - Once the overlap is cut, fold over and glue into position. Ignore windows and openings
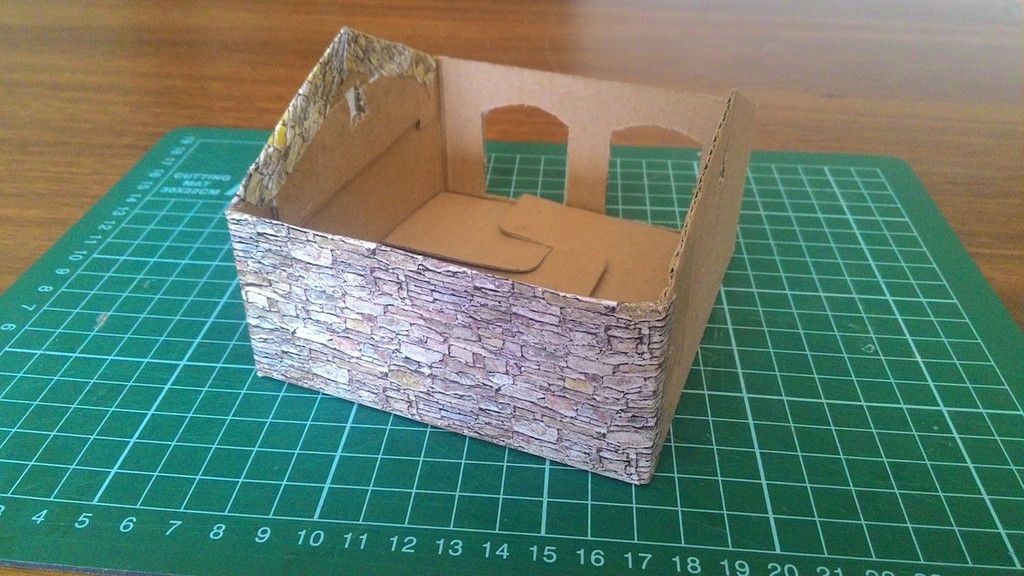
10 - Here is the building completely covered in a stone texture. It’s a 2D print but passes the ‘3 foot rule’, which is what I’m aiming for.
11 - The paper covering the doors and windows has been sliced with a sharp craft knife, trimmed if necessary, folded back and glued into place. At this stage it’s time to measure and cut another piece of card for the floor. Its important to have a flat floor to place figures, rather than leaving the fold tabs exposed.
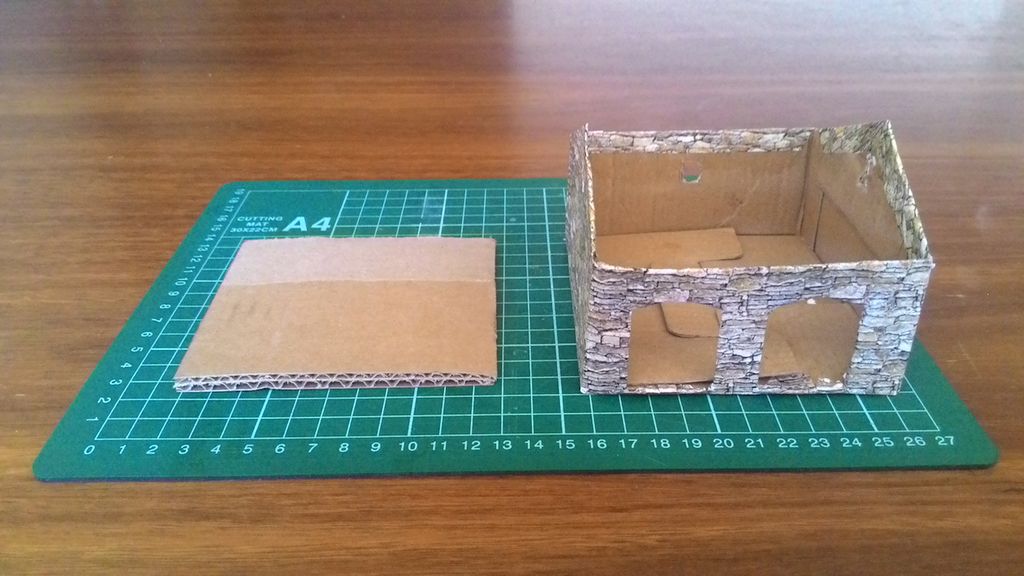
12 - The floor has been covered in appropriately printed paper, and inserted into place. Note the tabs are keeping the floor from being flat, and you can see an irritating gap underneath it in the arched doorways. I tried creating an edge of stonework to obscure this, but it hasn’t really worked. We'll fix this later. Next to emerging building are my flat roof panels, cut to size.
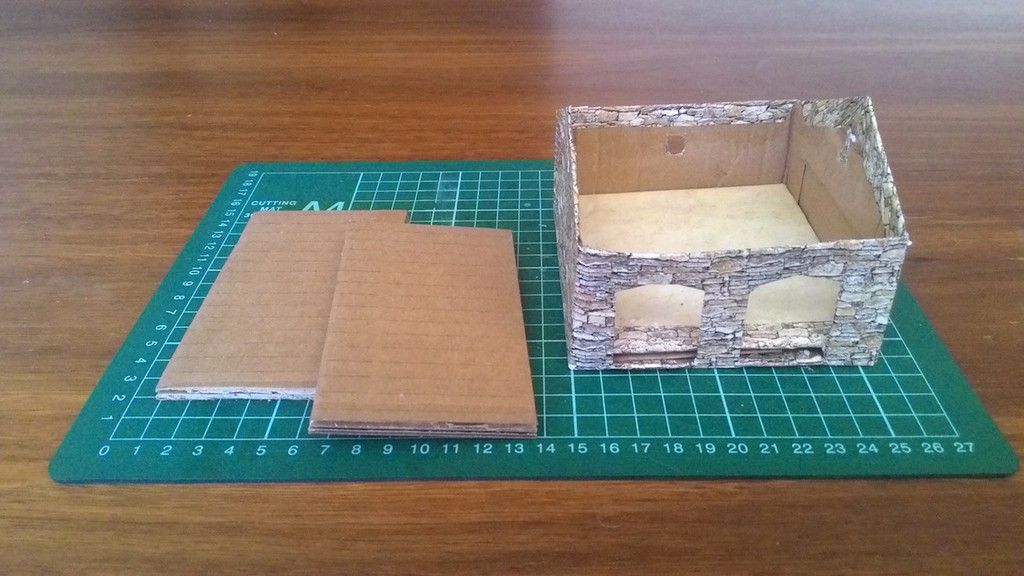
13) Roof panels covered with a slate effect print.
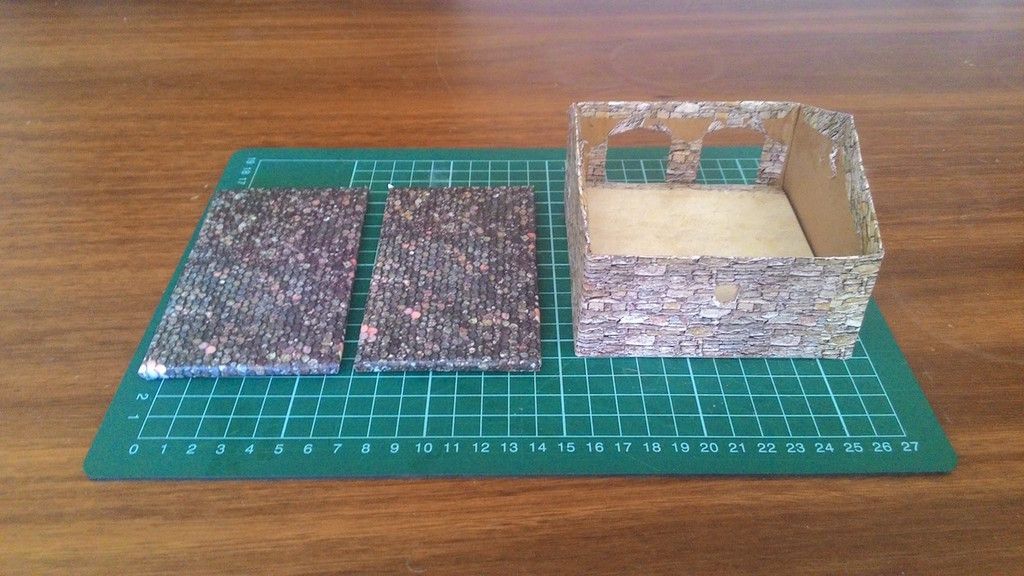
14 - The roof sections are joined with another thin hinge of card, which has been covered with the same slate print. The building is finished with two doors that cover the entrance. The doors provide a reference point for figures entering, leaving, or shooting to or from the building, so are functionally the same as open holes, but in this case also serve to strengthen the thin card of the box and cover that annoying gap between box base and floor.
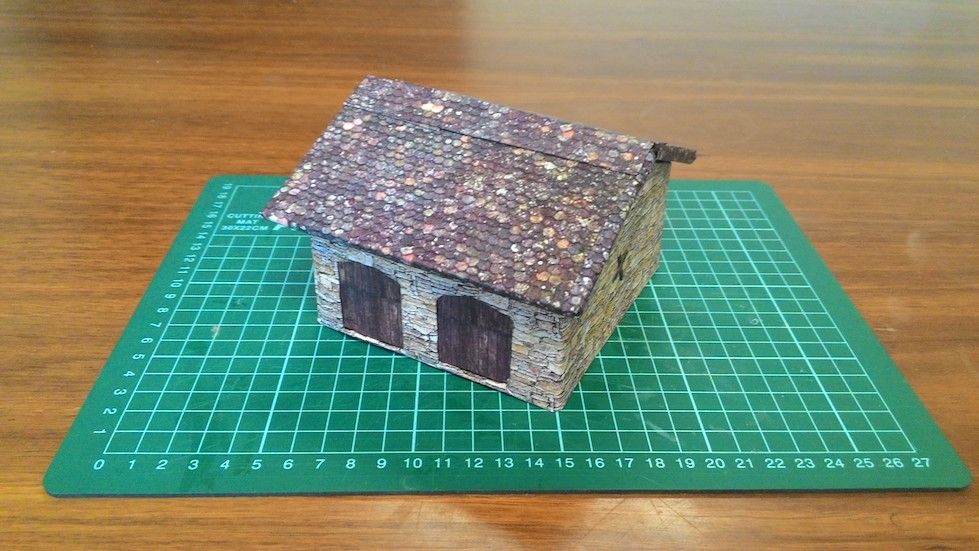
15 - A few features are added to the exterior of the building, and it sits nice and flat
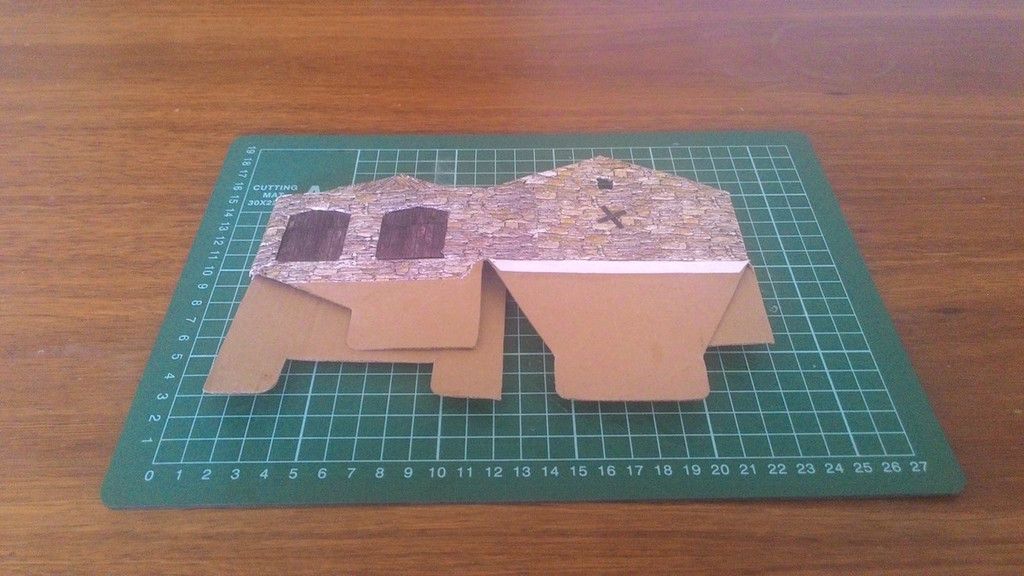
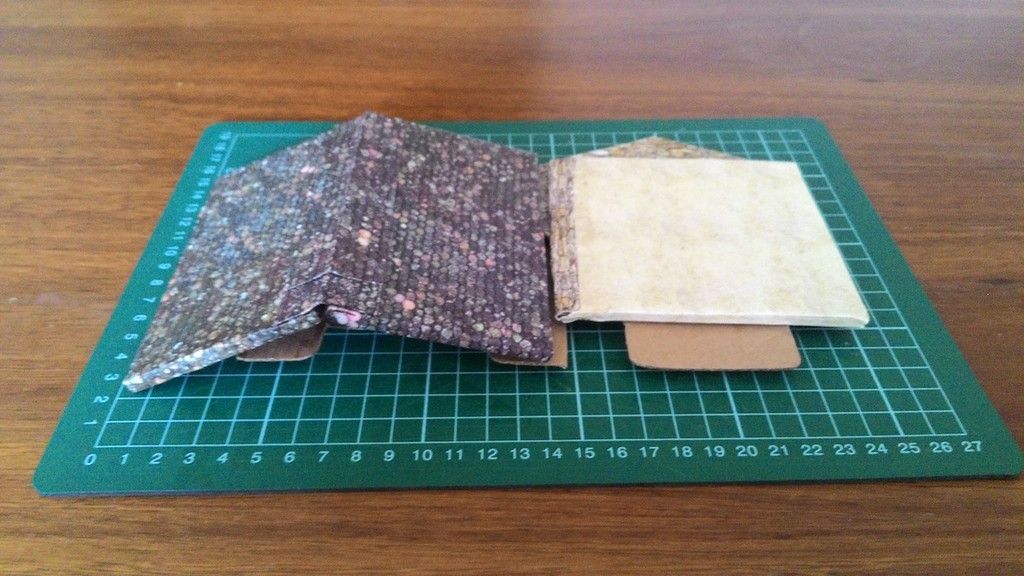
16 - The whole building in bits, flatpacked and ready to be transported to a game.
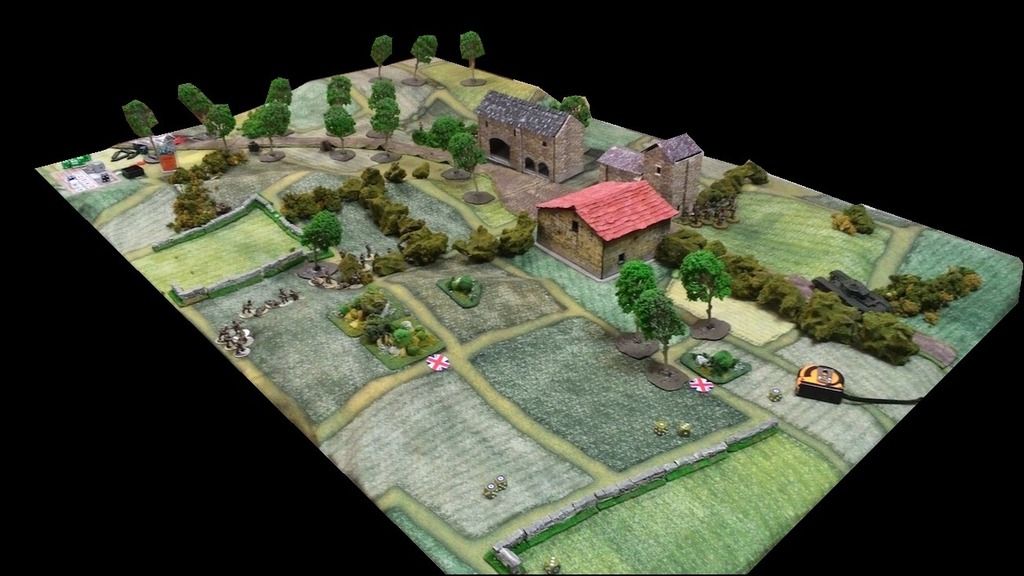
I've made a few of these now, and will make more. This design is a simple box, but I've made two - storey buildings, and one with a tower. They've stood up to a few games.
Here's some in action:
Thanks for watching.
agentbalzac


