*
Welcome, Guest. Please login or register.
April 29, 2024, 12:57:05 AM

Login with username, password and session length

Donate

We Appreciate Your Support

Members
Stats
  • Total Posts: 1691075
  • Total Topics: 118370
  • Online Today: 804
  • Online Ever: 2235
  • (October 29, 2023, 01:32:45 AM)
Users Online
Users: 6
Guests: 708
Total: 714

Recent

Author Topic: Oldskoolrebel's Terrain Board Project (Picture Heavy)  (Read 14312 times)

Offline Eric the Shed

  • Galactic Brain
  • Posts: 4200
    • The Shed Wars Experience
Re: Oldskoolrebel's Terrain Board Project (Picture Heavy)
« Reply #45 on: November 25, 2016, 11:38:27 PM »
I've been adding sand to pva and then painting the top coat. Do you still get a gritty surface...?Might try this gloop method.

Offline Wargamer Dave

  • Assistant
  • Posts: 49
  • Lover, Gentleman, Wargamer, Dave
Re: Oldskoolrebel's Terrain Board Project (Picture Heavy)
« Reply #46 on: November 28, 2016, 07:15:08 PM »
These look fantastic...one question on the spray paint. If the spray paint hits the unpainted sides won't it melt the foam?

Offline oldskoolrebel

  • Supporting Adventurer
  • Mastermind
  • *
  • Posts: 1144
    • My Campaigns
Re: Oldskoolrebel's Terrain Board Project (Picture Heavy)
« Reply #47 on: December 01, 2016, 04:56:17 PM »
I've been adding sand to pva and then painting the top coat. Do you still get a gritty surface...?Might try this gloop method.

This is what the texture is like. Sorry it's maybe not the best of pictures. I quite like the texture. Although I think the ratios are slightly wrong... next time round I'll probably put in extra paint. This should thin the mixture allowing better coverage.


These look fantastic...one question on the spray paint. If the spray paint hits the unpainted sides won't it melt the foam?

Eh, the sides are protected by MDF and sealed with filler and PVA. I would need to be very unlucky for there still to be any 'raw' foam left unexposed.

Take care with a spray undercoat - I've covered foam with two heavy layers of paint only to watch it dissolve when I sprayed on the top  :'(

So far the ground work has had a heavy coat of PVA, a coat for gloop mix. The gloop mix goes rock hard. I take your point though. I think Captain Blood managed it without any ill effects.


So I had a bit of a chance to work on the boards today. It was spent mostly just adding detail ahead of undercoating. Here are the four boards which I added this detail to.


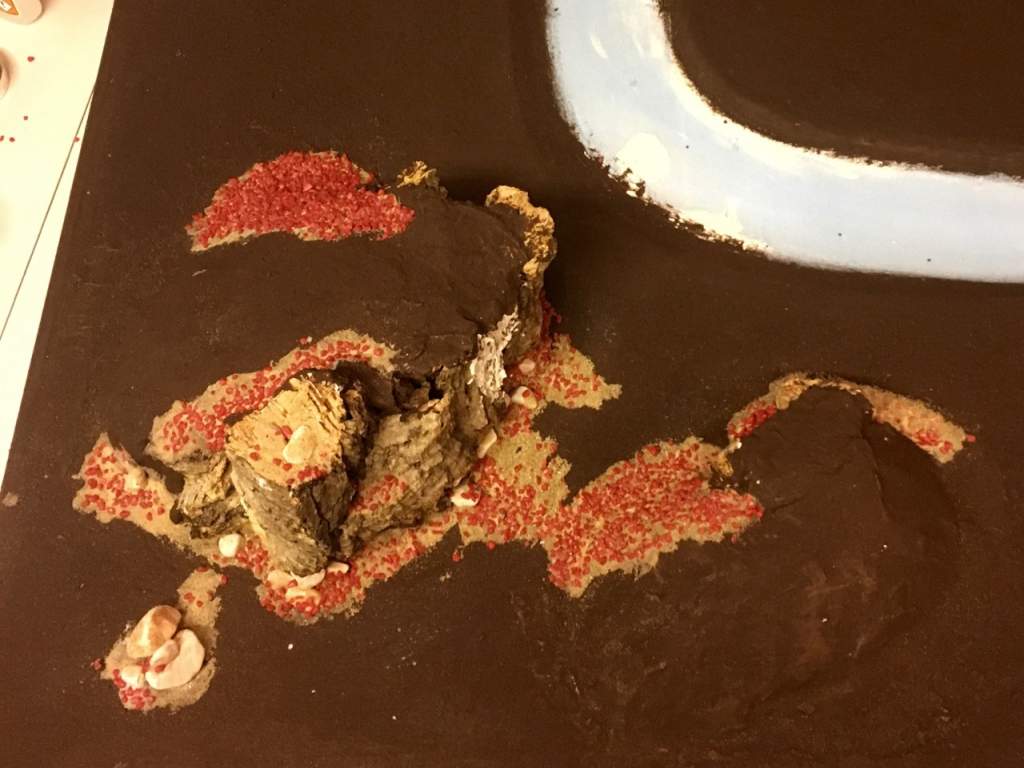
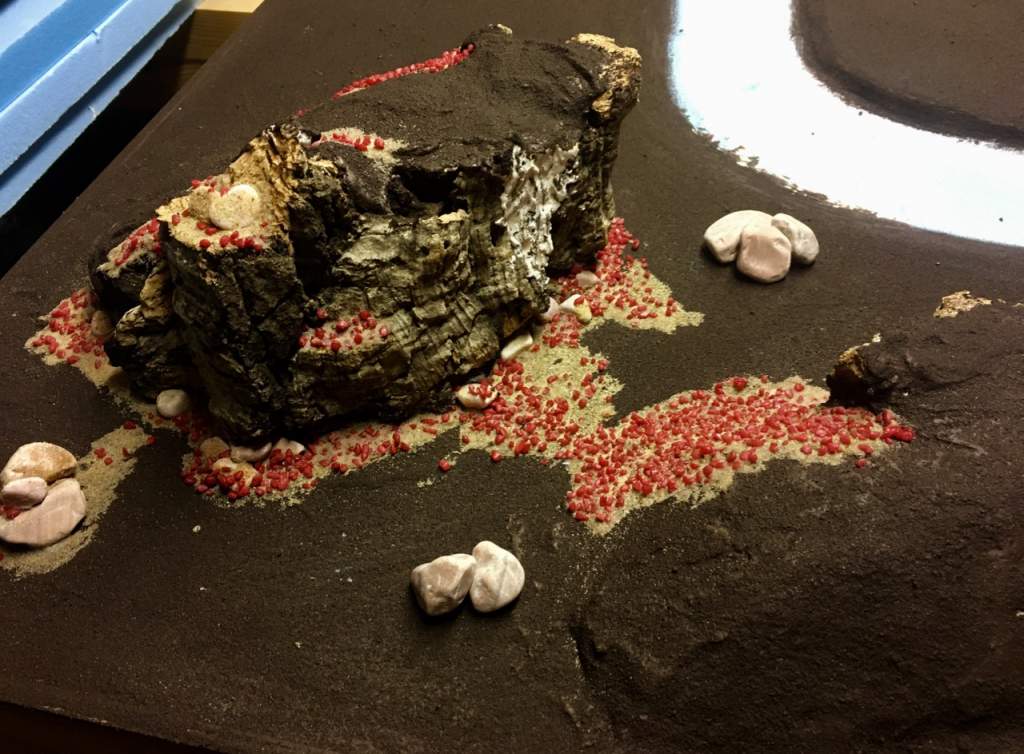
I've been using aquarium gravel and more sand to represent rock fall and scree. I think that I'll need to add some more gravel in between the size of sand and the red stuff to provide a bit more of a transition. In addition to this small pebbles act as rocks/boulders. I quite like the small cairn.

The process was pretty simple, PVA with a tiny amount of water painted onto the board. I then scattered gravel, followed by sand. Leave it 10-15 and then shake the excess off.

I really like the first board pictured, the one with the small valley between the two outcrops. I've spent the most time on this adding additional rock fall and detailing. The idea is that the valley floor itself will be scree laden difficult ground.

I'd like to get peoples opinions. Which of the two layouts below do you prefer? I know which I prefer.
1)
2)

The ultimate plan is to have areas with steep topography/added features and then areas which are much flatter. This should allow quite a contrast in different set ups.

And finally one last picture (because I like it)
« Last Edit: December 01, 2016, 04:58:32 PM by oldskoolrebel »

Offline Elk101

  • Supporting Adventurer
  • Elder God
  • *
  • Posts: 10530
Re: Oldskoolrebel's Terrain Board Project (Picture Heavy)
« Reply #48 on: December 01, 2016, 07:06:20 PM »
The close ups of the textured finish look good. I think that'll work really well.

Offline Captain Blood

  • Global Moderator
  • Elder God
  • Posts: 19320
Re: Oldskoolrebel's Terrain Board Project (Picture Heavy)
« Reply #49 on: December 01, 2016, 07:39:05 PM »
Looks good Andy. Looks like you've got a good finish there.

Yes, provided the foam is completely covered in gloop and or PVA (including PVA'ing the sides) you can spray paint it to your heart's content.

But if you've left any tiny bare bits of foam, the paint will slightly dissolve the surface. All adds to the interesting texture  :)

Offline Mason

  • Elder God
  • Posts: 21222
  • Eternal Butterfly!
    • Blind Beggar Miniatures
Re: Oldskoolrebel's Terrain Board Project (Picture Heavy)
« Reply #50 on: December 01, 2016, 08:36:06 PM »
Looking good, mate.
Very good!
 8) 8)


Offline Vagabond

  • Mastermind
  • Posts: 1627
    • Vagabond's Wargaming Blog
Re: Oldskoolrebel's Terrain Board Project (Picture Heavy)
« Reply #51 on: December 02, 2016, 01:12:30 AM »
Hi there - this looks very promising, my first thought was "I like the lava flow looks very effective"

Imagine my disappointment when I realised they were only red stones for texture and you will cover then with paint.

Looking forward to seeing this finished :)

Offline oldskoolrebel

  • Supporting Adventurer
  • Mastermind
  • *
  • Posts: 1144
    • My Campaigns
Re: Oldskoolrebel's Terrain Board Project (Picture Heavy)
« Reply #52 on: January 06, 2017, 06:29:33 PM »
It's been so long that this thread ended up on the second page!

I've still been working on the boards. The ground work has mostly been finished. I'm currently just finishing the rocks. After this it will be turning the boards green.

I've set up a wee test board. This is what it's currently looking like (The PVA is still wet and it's not been sealed yet)


I'm using a mix of woodland scenics in the following ratios:

WS Green blended turf (1 cup)/WS Dark Green Static Flock (1/2 cup)/ WS Burnt grass fine turf.

Hopefully some pictures of the final boards to follow.

Offline Silent Invader

  • Galactic Brain
  • Posts: 9667
Re: Oldskoolrebel's Terrain Board Project (Picture Heavy)
« Reply #53 on: January 06, 2017, 06:43:19 PM »
That looks great Andy  8) :-*

Well done on recording your flock ratio!
My LAF Gallery is HERE
Minis (foot & mounted) finished in 2024 = 32
(2023 = 151; 2022 = 204; 2021 = 123; 2020 = ???)

Offline Captain Blood

  • Global Moderator
  • Elder God
  • Posts: 19320
Re: Oldskoolrebel's Terrain Board Project (Picture Heavy)
« Reply #54 on: January 06, 2017, 07:42:57 PM »
That looks absolutely great Andy. Well done  8)

Offline Elk101

  • Supporting Adventurer
  • Elder God
  • *
  • Posts: 10530
Re: Oldskoolrebel's Terrain Board Project (Picture Heavy)
« Reply #55 on: January 06, 2017, 08:10:10 PM »
Yes,  nice work, really nice effect.

Offline Charlie_

  • Mastermind
  • Posts: 1516
Re: Oldskoolrebel's Terrain Board Project (Picture Heavy)
« Reply #56 on: January 06, 2017, 09:42:24 PM »
Fantastic!

Offline oldskoolrebel

  • Supporting Adventurer
  • Mastermind
  • *
  • Posts: 1144
    • My Campaigns
Re: Oldskoolrebel's Terrain Board Project (Picture Heavy)
« Reply #57 on: January 07, 2017, 12:24:00 AM »
Two posts in on day!

I'm just after finishing tidying after a big session. During this session I managed to get all the rocky outcrops painted, and all the ground flocked.

Just a couple of teaser pictures I'm afraid.

I pretty much started with this earlier on today.


I'm pretty happy with the mix that came up with for the rock. It reminds me of a weather gabbro.

I then applied my flock mix to get the following.


I'm pretty happy with it so far. However I do worry if the grass is a little bright? It feels a wee bit too much like goblin green to me.

Any way, I've still to paint the river, ink the road and add clump foliage/undergrowth etc. All the wee jobs that actually take quite a bit of time.

Any C&Cs are appreciated.

Cheers
Andy


Offline Charlie_

  • Mastermind
  • Posts: 1516
Re: Oldskoolrebel's Terrain Board Project (Picture Heavy)
« Reply #58 on: January 07, 2017, 01:08:39 AM »
In regards to bright green flock, I have found that the colour is toned down / darkened a bit after hitting it with a spray of watered-down PVA to seal it as the last stage.

Also, looks like you've got some very neat grass verges. Have you considered roughing them up a bit? You can hit them with a stiff brush to work away flock to give them a more ragged edge. You could also do this in patches to break up the green turf look. Make sure the PVA has completely dried first. Bits of the texture underneath will start to show through, giving you nice areas of drier, harder earth.

Offline Andym

  • Supporting Adventurer
  • Galactic Brain
  • *
  • Posts: 6562
Re: Oldskoolrebel's Terrain Board Project (Picture Heavy)
« Reply #59 on: January 07, 2017, 07:35:26 AM »
That'll look really good when get some scatter terrain on it mate! One suggestion may be to add a wee bit more flock? Grass, plants and stuff tend to grow in cracks and things that the seeds get blown into and stuck. Maybe add some longer tuts in those cracks? But these are minor things, you're doing a great job!


Related Topics

  Subject / Started by Replies Last post
88 Replies
29910 Views
Last post November 03, 2016, 07:15:59 PM
by NurgleHH
10 Replies
4459 Views
Last post April 25, 2014, 08:19:23 AM
by guitarheroandy
21 Replies
8457 Views
Last post January 31, 2016, 03:00:06 PM
by FifteensAway
171 Replies
23647 Views
Last post September 02, 2018, 02:14:06 AM
by Helen
11 Replies
2090 Views
Last post January 23, 2017, 07:34:28 AM
by Mad Guru