*

Recent Topics

Author Topic: Sectional Mountain Terrain Project  (Read 2104 times)

Offline jmilesr01

  • Librarian
  • Posts: 124
    • lair of the Uber Geek
Sectional Mountain Terrain Project
« on: 24 May 2017, 11:14:27 AM »
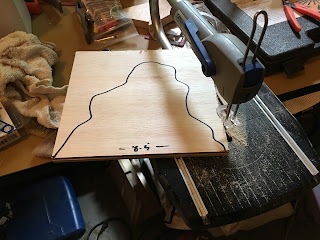
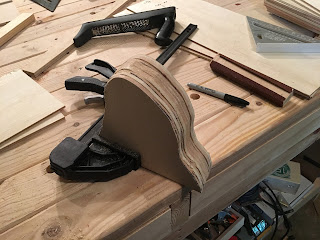
I've starter a new terrain project on my blog.  For my upcoming Historicon games I need some mountain ranges in 28mm to break up the table and I need a lot (12 feet).  I decided to build the mountain in 8" wide and 24" long sections to allow for a little variety in set up.  Of course, like almost all of my other terrain ideas, I've stolen the basic concepts from Eric the Shed and modified them a bit to fit the materials at hand. 

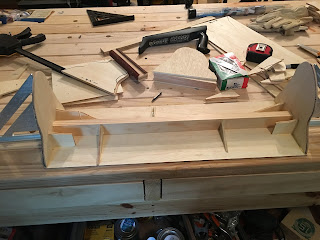
The frames were built over a weekend
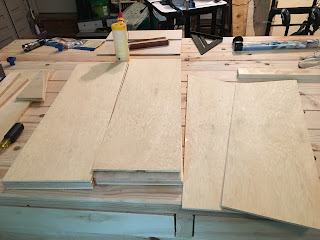


I tried to make all the end pieces the same, which I got 98% of the way - that's close enough for 28mm terrain isn't it?

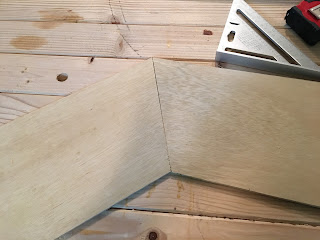
For a little variety I adjusted the ends of two sections to have a 22.5 degree angle that when put together allows the "mountain range to veer of 45 degrees.  That meant new end sections but keep the terrain a little more interesting to the eye.


A shot of the first three frames:
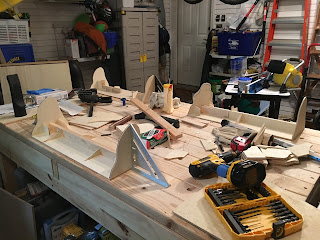


My workshop is a bit of mess right now.

I'm running two different "pulp" games at Historicon which are essentially the same game with figures from either WW2 or Modern.  The game titles are:

DAK and Dragons

SOCOM and Sorcery

Both games involve the exploration of "strange new" Egyptian ruins by forces from either the North African Campaign (DAK, 8th Army, Italians etc) or Moderns (US/Taliban/Somali Pirates/Russians and a few more).  In addition to the desert terrain and ruins there will be an Egyptian themed dungeon to wander through.  It will either be a lot of fun or a complete disaster (made both).  Preparing for the games have been a nice break from the standard "big battle" games I usually put on.


Next stage is adding in the EPS foam and then carving the rock faces.

Miles
http://lairoftheubergeek.blogspot.com

Offline Larry R

  • Bookworm
  • Posts: 96
    • 7 Pillars of Wargaming
Re: Sectional Mountain Terrain Project
« Reply #1 on: 25 May 2017, 05:39:59 PM »
Really looking forward to following this and seeing the end product in July!

Offline jmilesr01

  • Librarian
  • Posts: 124
    • lair of the Uber Geek
Re: Sectional Mountain Terrain Project
« Reply #2 on: 26 May 2017, 12:19:30 PM »
Once the frames were finished, the next step was to fill in with Extruded Polystyrene (EPS or "pink" foam insulation).  I had thought about using the spare expanding foam but had enough of the pink stuff in the shop so went with that.  I really don't have a plan here other than make two sections with a mountain pass and create enough crevasses to hold bases so a plyers miniatures can "climb" up the rock face (the will be in another post).


With the basic foam shapes in place, it becomes times to carve in the rock face.  I really like this part of the process as the "mountains" really begin to take shape.  I'm using a carving style I borrowed from Dave Frary from the model railroading world (my first hobby before gaming).  It's a really simple technique that involves making series of horizontal and vertical slashes across the foam.  The slashing shouldering by at 90 degree angles.  It's really messy in terms of foam particles but gets the job done.  Just remember to take a break every 5 minutes to see how the carving looks from a few feet back.  My knife of choice was an old Cutco steak knife I liberated from the kitchen.

Here's a link to a youtube video from Mr Frary on how the technique works:


Before starting the carving I used a hand held hot wire cutter to "shape" the foam to remove the right angles


and then it's carving time


Once you're done carving take some sand paper (I used 220 grit but I'm not sure that really matters) and lightly sand the surface to remove the loos particles and provide some more texture to the foam "rock face"

It actually looks pretty good


The next step will be to carve in details and areas of interest before coating the whole thing in dilute white glue.

Offline FifteensAway

  • Galactic Brain
  • Posts: 5859
Re: Sectional Mountain Terrain Project
« Reply #3 on: 27 May 2017, 01:56:33 AM »
Watching with interest - and a bit of concern.  Carved foam can end up looking great but it can also be an extreme pain in the ass to 'carve' in those figure 'steps'.  This is why I finally caved and settled, mostly, on 'wedding cake' hills with flat surfaces for figure placement.  Opted for playability over visual effect.  Curious to see how your effort turns out in the end.

I do like the angled pieces, will give the hills more visual interest.  And the profiles, will be doing similar with my series of cliffs I've got underway, slowly.

One thought for future pieces, pre-carve the layers before assembly and leave flat spaces in tact for figures and then do some adjusting carving after all put together.  Hope you understand what I mean for this bit.

Keep on going.

I still have some mesas to do and I will create a flat bottom and a flat top but undecided on how to do the intermediate portion - maybe insulation foam like you are using but with thinner foam for those flat spaces or maybe wooden profiles (with level steps here and there connected by pieces of thin wood for figure placement) with a  shell from a product available from Bragdon Enterprises, a model railroad supplier, placed over screen wire to provide durability.  (The screen is fine mesh such as is used for screen doors - at least here in the states.)
We Were Gamers Once...and Young

Offline jmilesr01

  • Librarian
  • Posts: 124
    • lair of the Uber Geek
Re: Sectional Mountain Terrain Project
« Reply #4 on: 27 May 2017, 10:29:23 AM »
15'sAway - thanks for the thoughts.  I agree with you on having enough flat area for figures and will make some additional cuts to trade for more gaming space.  As it pertains to pre-carving the foam before inserting that would require pre-planning and thought, neither of which I use in abundance for my terrain projects.

Great thoughts that I will try to incorporate in the project going forward.

Offline jmilesr01

  • Librarian
  • Posts: 124
    • lair of the Uber Geek
Re: Sectional Mountain Terrain Project
« Reply #5 on: 29 May 2017, 11:58:55 PM »
Today was a productive day - all the carving, ground texture and the initial cost of painting is now completed


All six sections are now fully carved and ready to be painted.  The carving process does make a mess and the tried to sweep all the off bits into a box to use as rubble on this and other projects.  I suspect there will be some carving adjustments as the projects moves on.


The next step is the adding of ground texture.  I use a mixture of tinted flexible grout (Sandstone) with a bit of white glue mixed in.  It provides a really nice ground tetrode that works in multiple scales and creates a really durable surface.  One the rock face painting is complete I'll also coat it with matt medium to provide some stiffness.


I use liquitex basics for scenery painting and am goings for a red-brown coloring so 1/4 red and 3/4 brown.  Once the paint is mixed I'll dilute it 50/50 with water.


This is just the first coat and is really dark.  I'll lighten the shade with some dry brushing to get a more "desert-like" look and feel.  I want to to give this first coat a long time to dry (12+ hours) before moving on to dry brushing.


A shot showing the 6 sections aligned


The 45 degree angle came out nice

Offline Patrice

  • Mastermind
  • Posts: 1962
  • Breizh / Brittany
    • "Argad!"
Re: Sectional Mountain Terrain Project
« Reply #6 on: 30 May 2017, 01:00:12 AM »
Very good! :o I'm waiting to see more. :)

Some years ago I made three sections of fantasy mountains in polystyrene, each of them 60cm long, to put across a gaming table too. There was not so much work as in yours, and they would still need much improvement. They appear there:
http://leadadventureforum.com/index.php?topic=77336.msg951870#msg951870

Offline Hammers

  • Amateur papiermachiéer
  • Moderator
  • Elder God
  • *
  • Posts: 16143
  • Workbench and Pulp Moderator
Re: Sectional Mountain Terrain Project
« Reply #7 on: 31 May 2017, 09:52:20 AM »
Splendid stuff. Very useful this. Who doesn't like a snug fit between sections?

Offline jmilesr01

  • Librarian
  • Posts: 124
    • lair of the Uber Geek
Re: Sectional Mountain Terrain Project
« Reply #8 on: 12 June 2017, 11:14:26 AM »
A bit more progress as the "mountains" have been painted.  I used a 3 layer process (Ok the term "process" is a bit grandiose - I'm just winging it here).

The first layer was a thick coat of red brown (3 parts burnt umber, 1 part red).  I end un doing two costs of this color - the initial coat was thick followed by a watered down version to get in all the crevices.  In hindsight, it would have been easier to reverse the order.

The send coat is a heavy dry brush of raw sienna ( a leather/tannish color) and the third a lighter dry brush of yellow Oxide.  I used Liquitex Basics paints for all the rock painting.  The last step was painting the "sand" which I used some latex house paint that was mixed up to match the Vallejo "Iraqi Sand" paint.


The next step will be coating the sections in a diluted Matte Medium (50/50 with water) which will both reduce the shiny look of the paint and harden the exterior).  Once that's done I'll move the sections inside to my painting bench to finish out the details .  Almost done!

http://lairoftheubergeek.blogspot.com


Offline jmilesr01

  • Librarian
  • Posts: 124
    • lair of the Uber Geek
Re: Sectional Mountain Terrain Project
« Reply #9 on: 26 June 2017, 11:44:43 AM »
A little bit more progress - the sections have been covered in diluted matte medium (50/50 with water) and some scenery was added.  There are a few white spots that need to be touched up (matte medium dried to thick) but these are about 99% done.


http://lairoftheubergeek.blogspot.com/2017/06/terrain-tutorial-sectional-mountains_26.html

Offline jmilesr01

  • Librarian
  • Posts: 124
    • lair of the Uber Geek
Re: Sectional Mountain Terrain Project
« Reply #10 on: 17 July 2017, 10:46:00 AM »
Here are a few shots of the Mountain sections in use at my Historical games this year (2017).  The games were rather silly in theme "DAK and Dragons" and "SOCOM and Sorcery" and featured either WW2 or Modern figures fighting against the "Dark Gods of Egypt"


Online OSHIROmodels

  • Supporting Adventurer
  • Elder God
  • *
  • Posts: 28301
  • Custom terrain a speciality.
    • Oshiro modelterrain
Re: Sectional Mountain Terrain Project
« Reply #11 on: 17 July 2017, 10:47:33 AM »
The mountain sections look great  :)

cheers

James


Related Topics

  Subject / Started by Replies Last post
2 Replies
2137 Views
Last post 31 May 2012, 10:06:18 AM
by fastolfrus
0 Replies
919 Views
Last post 13 December 2014, 09:02:01 AM
by kingsmt
4 Replies
1932 Views
Last post 12 February 2015, 10:09:38 PM
by cacofold
28 Replies
11865 Views
Last post 22 July 2015, 10:09:29 AM
by Atheling
2 Replies
1978 Views
Last post 24 August 2016, 11:07:23 AM
by jmilesr01