So the first six boards now are almost done. I am stil awaiting my order of static water but apart from that I think they've turned out quite well.

But backtracking....With trepidation I took my scissors to the teddy bear fur...Ten minutes later once the fibres swirling through the air had settled into a nice blue coating on everything in my garage it began to take shape.

I had made the shellholes first so it was a little tricky cutting shapes to fit around them, but I got there eventually.

With the fur cut I made certain to tease out any loose stuff around the edges then dipped the whole lot in a bucket of paint and PVA. I had used a lot of yellow ochre paint! Squeexing out the excess I put a thick layer of PVA down on the board and layed it out, not worrying for the moment if the fur went over the edges as I intended to cut them when dry. I used wire brush and a variety of toothbrushes etc to tease out the fur into more convincing patterns. I certainly wasn't trying to get the crop to look as though it was falling all the same way.

I spent about a half hour with the hair dryer on hot to even start to get the whole thing to dry, then went to bed.
Next day I applied the two brush coats of paint to get the lighter 'wheat' colour I was after. I wasn't trying to blend it in too much with the other boards..I wanted this field to be a feature. I also at this point decided to cut out two strips of field to emulate vehicle ruts. The broken farm gate was placed in the lane as well. After a little while I flocked the remainder of the board. I didn't want the wheat field to go up to more than 2 board edges to give me more flexibility in laying.


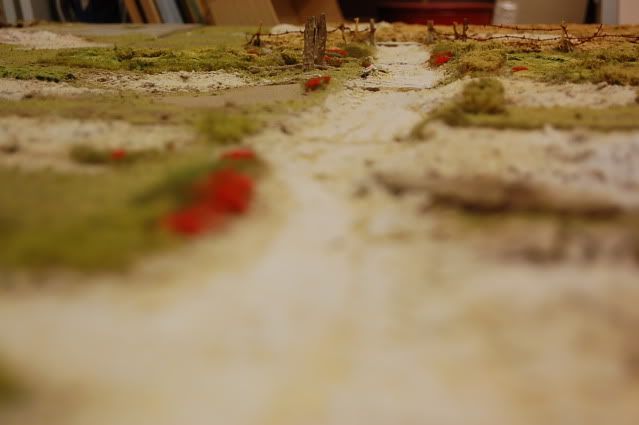
All of the boards were pretty much up to the same stage at this point. It was just a case of finishing details. I applied the poppies and some of the wild grasses, especially at the road edges and in hollows. The bits of rubbish pig iron and barbed wire that had been added to the groundwork at the start were given a rust treatment with my 2 part paint method. This looked o.k but made them stand out too much, so I mudded them up a little.


Finally the shellholes and earthworks were given a final dusting of crushed limestone. This was especially useful around the edges of the roads where you could imagine larger chunks of chalk being flung up by cars and trucks, as well as on top of the grass around the shellholes.


This allowed the chalk and grass areas to blend in better with each other. Finally I added the barbed wire to some of the fencing around the farm courtyard, the wheatfield and by the bridge. This was nice stuff I'd picked up from a company called timeline models. Now I know the barb is hopelessly out of scale here (and yes, it is a real barb...OUCH!) but it was one case where I was content to allow representation take the place of reality. I guess I just liked the look of it!
So here they are....pretty much completed. I've taken a few shots to give an idea of the aerial look and of course a soldiers eye view, with our old friends the stormtroopers there to give an idea of scale. They will receive their first playtest this coming week and I'll post pics of that too, though probably in the WW1 subject area.


It's been a lot of fun and has turned out better than I'd hoped. It gives me inspiration to continue with the other three sections of the WW1 boards. These will be:
Canal/ river (with blown and intact bridge structures and barges)
Town
Trenches
Thanks again for keeping me going with your comments..all much appreciated!


