So since LAF forum helped me to track down an old set of 15mm Japanese castle castings from the Village Green Company I thought I would document my build of it for any interested LAF’ers. I normally have limited time on my projects and get going so fast that I do not take pictures of the builds, so it is with the beginning of this one. In fact there are some huge jumps in the build between pictures! If you have a question I’ll try to answer it. The other thing to remember here is that I have tools most people do not have, so describing some of the steps is tough if you don’t have access to the same tools. I have nearly finished this project and will list it as I can in continuing post here.
First a gentleman from England let me know he had one but it was so badly cast and in need of work that he had set it on a shelf for years because it was beyond his abilities to re build. After receiving the package from Steve in the UK, I saw what he was talking about. Pieces were half cast, millions of bubbles, huge globs of resin hanging off like “flash” from old molds. All of the pieces had broken corners and voids a plenty! The piece also had stains and dirt covering it like it had been out in the yard! The amount of work I saw caused me to put the castle up on my shelf for several months… then the upcoming convention season got me interested in running a game of Samurai Battles in the Age of War (BAWS) and I wanted the castle as a back drop! So I got the pieces out and set to cleaning and repairing them.
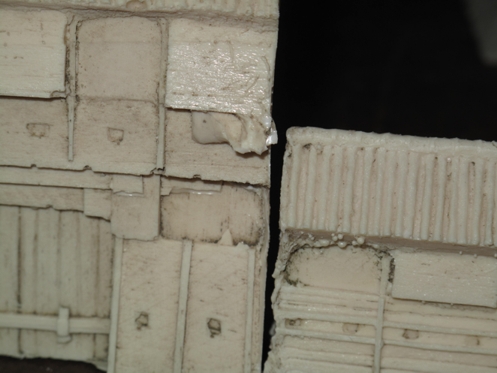
After scrubbing them I had to straighten out some of the misshapen pieces by dunking them in boiling water for 20 minutes. This allowed me to slightly re bend them. Next I got out the Dremel tool and several different xacto knives and started into cutting and grinding the excess resin material off the castings. Since some of this “flash” covered details the ”details” had to rebuilt after the resin was cut away using wood, glue, plastic stock, and putty. I figure there was 12 hours into the castle at this point! And I’m pretty quick!
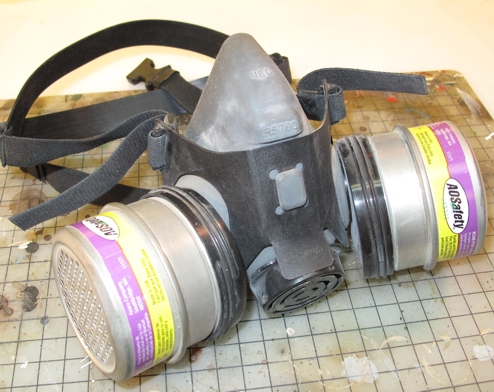
By the way…when you work with resin especially grinding and sanding the causes dust or small particles to float about you need to use a GOOD respirator mask!!!
Once I had the castle walls I had to see how the “layout” would work. I had only so many walls that Steve had sent and there was little chance of buying more. Battles in the Age of War has rules to simulate a “castle attack” and so I was planning to layout/build mine so as to fit the layout used for a “siege” in the rules but I also wanted it to look good as I would use it during regular games for “eye candy” at one end of the table.
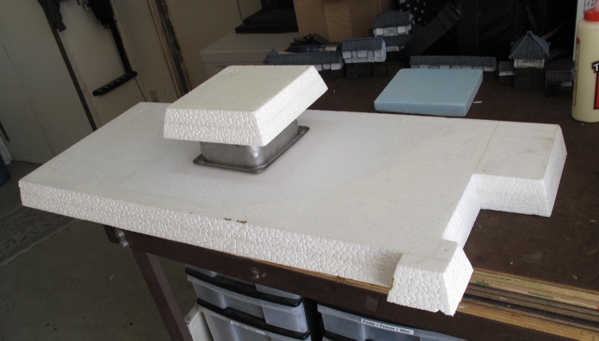
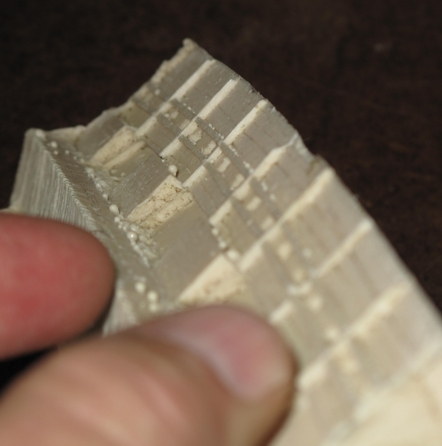
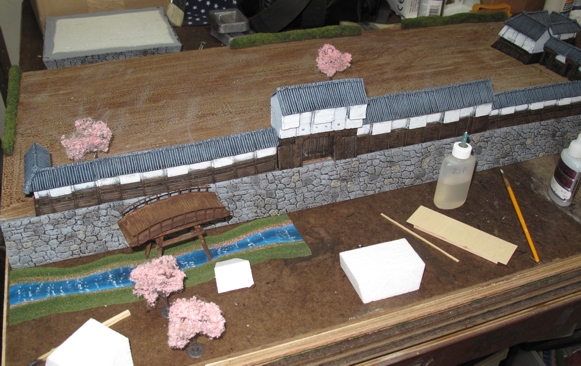
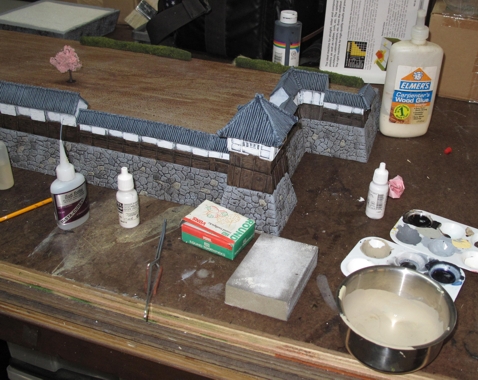
This picture is at a point where I have already cut the foam to size and cut the 15 degree angle that will be the front "slope" where the "rocks" will be carved. About 10 pieces were cut out at different angles to build this. The cuts were done on a full sized Delta table saw and allowed very precise cuts to be made. Once the fit was checked and all angles were checked the pieces were glued together using WATER based wood glue and pinned together with tooth picks (round) sunk at angles. Use a wet sponge to wipe away excess glue before it dries or it will interfere with the "hot knife" rock carving we are about to do.
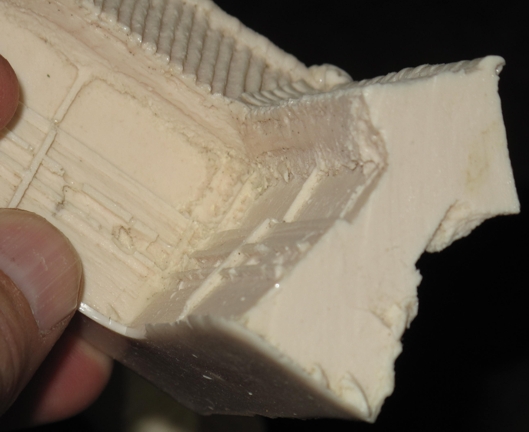
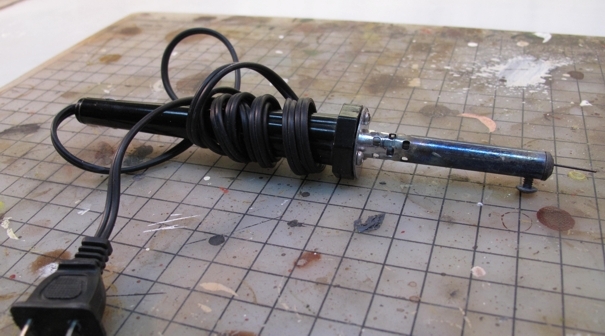
I once built a "Boxer Rebellion' game and the "Tarter Wall" contained 11,000 hand pressed 28mm bricks over a 4 foot length (two sides) and I knew I did not want to go through that again for the rock face on this fortress. I decided to try a "hot knife" approach and try to carve the rocks into the foam. The "hot foam" tools I had were just not right so I took a cheap soldiering pen I had and removed the soldiering tip. I took a very small piece of brass wire (1/32 x 2") and locked it in place of the original tip. It worked great and allowed me to basically "draw" the rock face on in 3d.
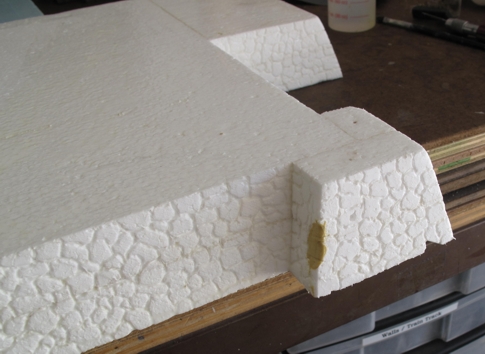
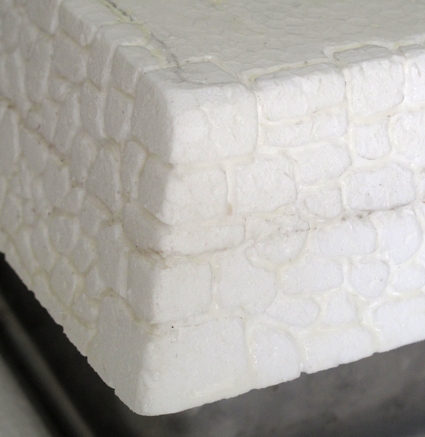
After the rock "carving" is done I lightly sand the foam with a 400+ sandpaper to remove "strings" formed when using a hot knife and also to round out rough edges.
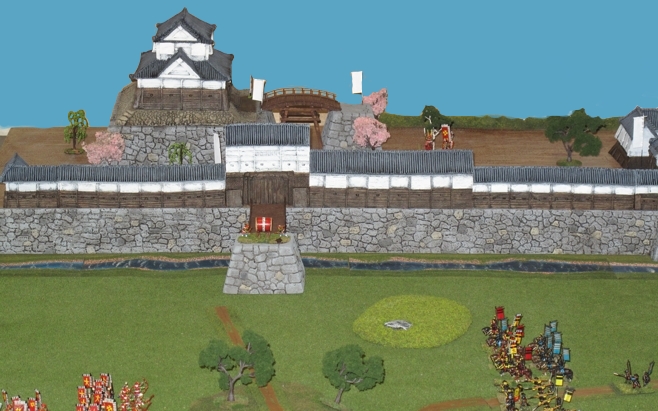
There is a big jump here and the next picture shows the castle base fully painted as well as the castle. I had rushed it so as to use it in a few games over the weekend. You can see one of the handmade bridges in the foreground.
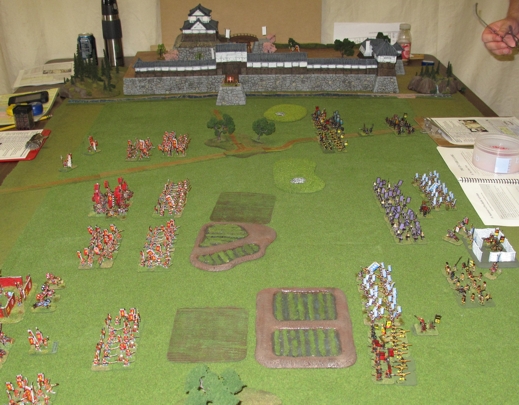
This is the Fortress as it appeared at "Mini Mini Wars" summer campaign. I sometimes find it helps to actually play on the terrain you are building as you can find problems and make modifications before it becomes to hard.
Ok that it for now, the castle is still being worked on and I'll soon have new pictures up.


