When I came out of the cinema after enjoying that grand "Django unchained" I could not stop thinking about the dentist wagon of Dr. King Schultz, and how nice it would be to have my own one for my old west town. I was able to stand up to the temptation for about two weeks, but yesterday I gave in. As I'm working on something else actually, I allowed myself only two days for the main build.

So first step was researching the wagon on the net, and there are indeed some nice pics available:


After studying the pictures, I sketched the model roughly in scale, comparing the horse, the King and the wheels to each other. Counting the planks on the wagon's sides gave me some suggestions about proportions.
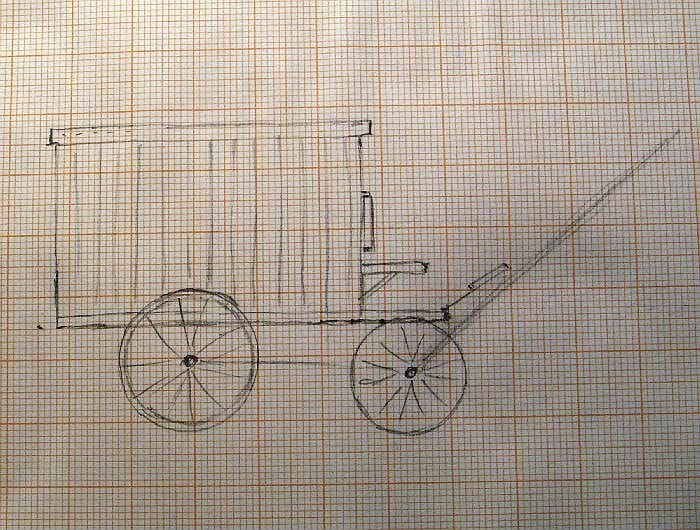
Main problem no.1: the wheels. I looked through my lead pile for something that might work, but either found the wheels too large, too small or too less detailed. Then I thought about an old Imex 1/72 kit I had laying around for quite some time and could not even remember why I had bought it anyway (cheap?), but there they were: the exactly fitting wheels, and even two pairs (the rest of the quite shitty kit goes to the bin).

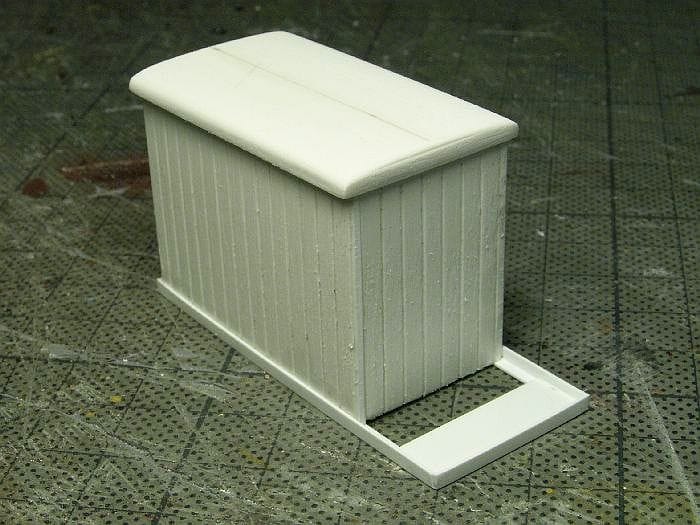
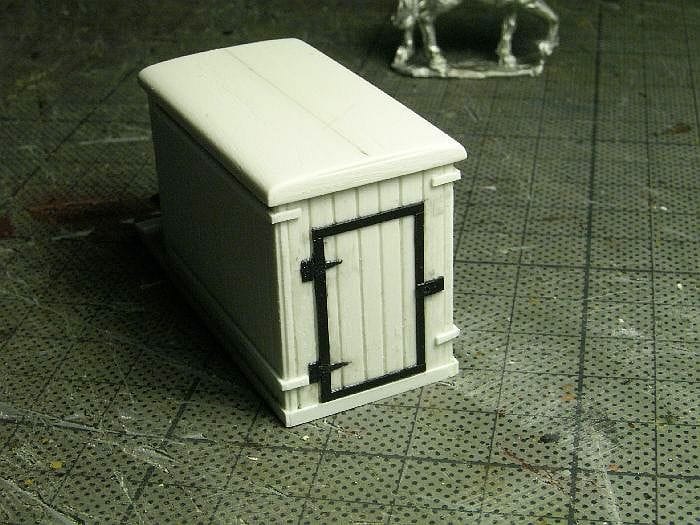
Cabin construction was quite straightforward, no complicated things at all, just exact measuring and cutting of plasticard. I decided to rate the planks 3 mm each, that gave me nice looking proportions compared to the pics.


The wagon's top was a bit more work as it's arched slightly, so I filed and sandpapered it to the correct shape from thick plasticard.
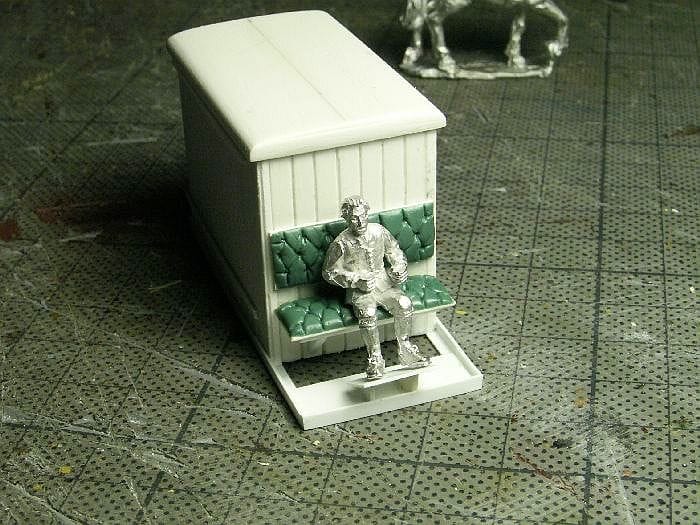
Last work yesterday evening was the upholstered seat and backrest. Sculpting with greenstuff on thin plasticard was fun again. Hardening through the night.

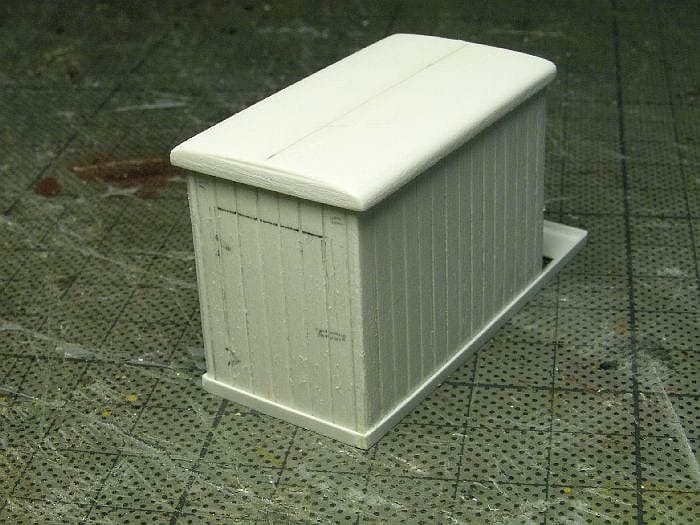
Main problem no.2: who would be Dr. King Schultz himself? Again searching through the lead pile for a suited miniature with conversion potential. Found one of the very nice drivers from the Minden Miniatures sets, and he will be transformed later. Now the miniature served as a dummy to help finding the correct measurements for the seat and footrest. The back of the wagon got his door and hinges.
Now to the tricky part - the undercarriage. I kept it simple as most of it won't even be visible, but the main components needed to have the right proportions to work for the wagon at all. That was mainly trial and error, and a good bucket full of swearing each time another tiny bit shoot out of my tweezers ...


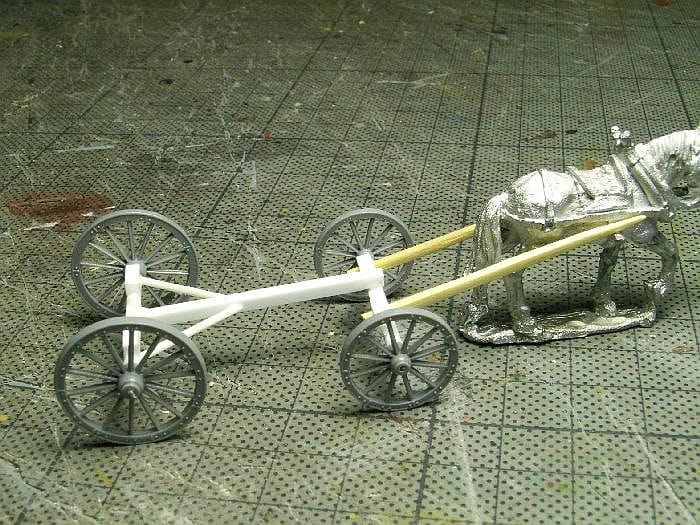
The undercarriage needed about the same time as everything else, but in the end I finished the main construction about an hour ago. Some details will be added, the figure must be sculpted, and, of course, the tooth will be added on top of the roof!


Will be continued when I made some progress ...


