On to part 3 of my gold mine project. Or was it a silver mine? Have to check the next ore car ...

The next pics show the latest developments on the building site:
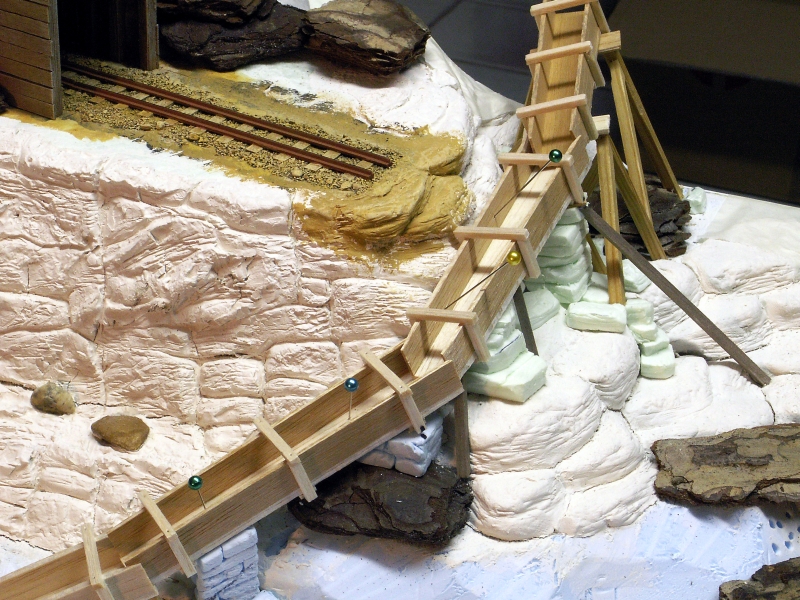
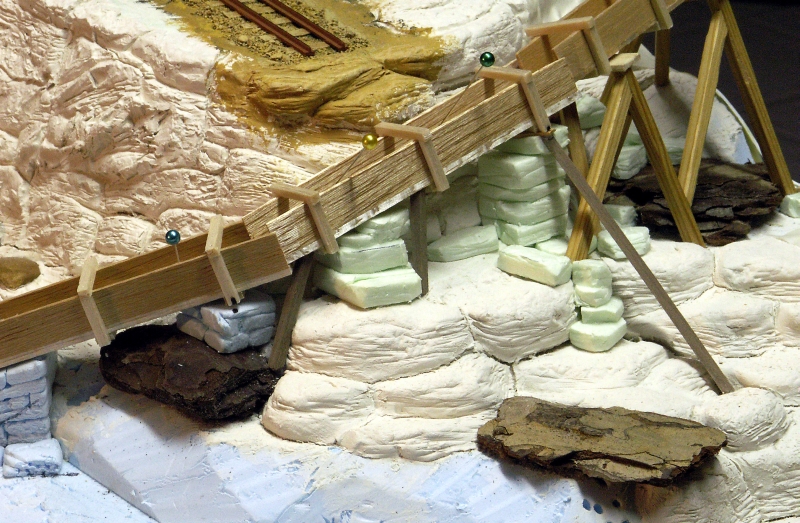
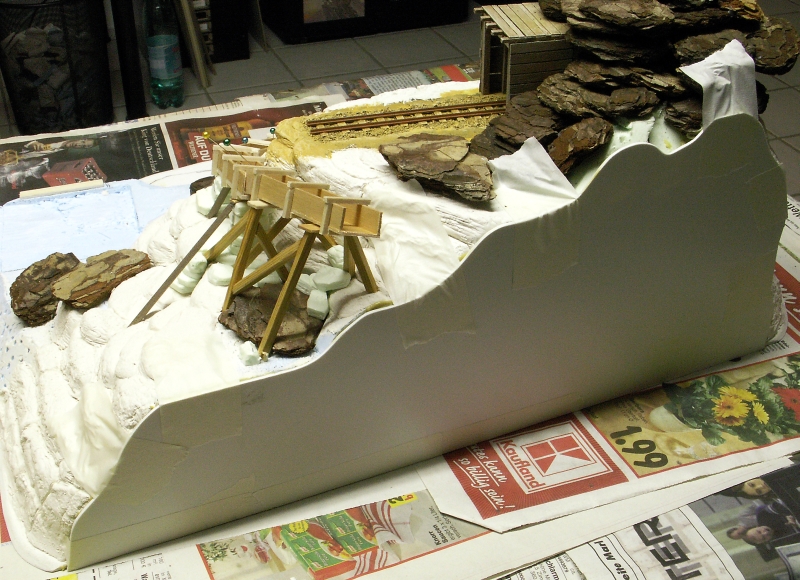
- the flume (or was it the Long Tom?) has been constructed;
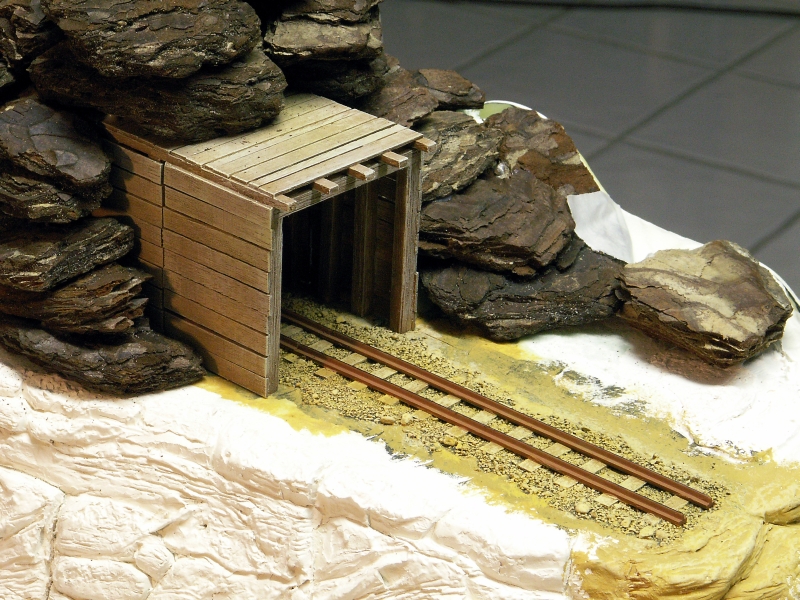
- support constructions from stone and timber have been created;
- trackbed and shaft-entrance have been painted and weathered;
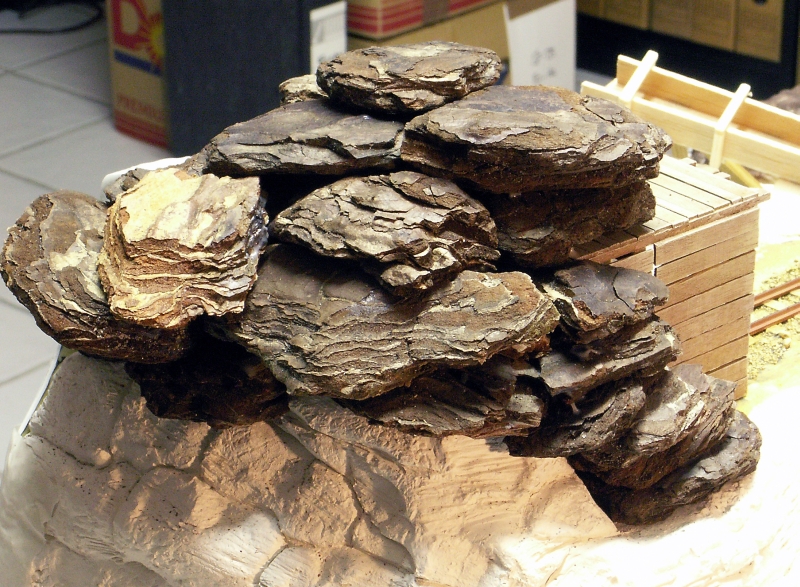
- rock formations above and behind the adid grew quite naturally ...
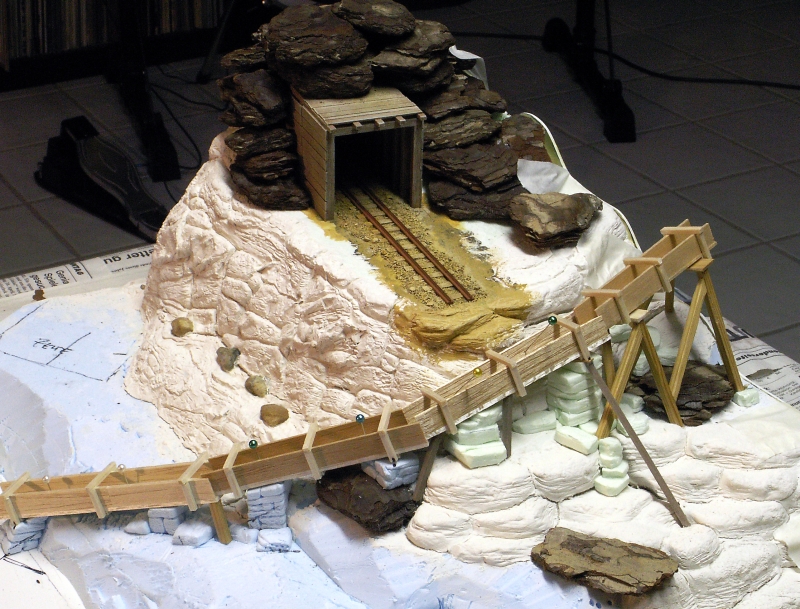
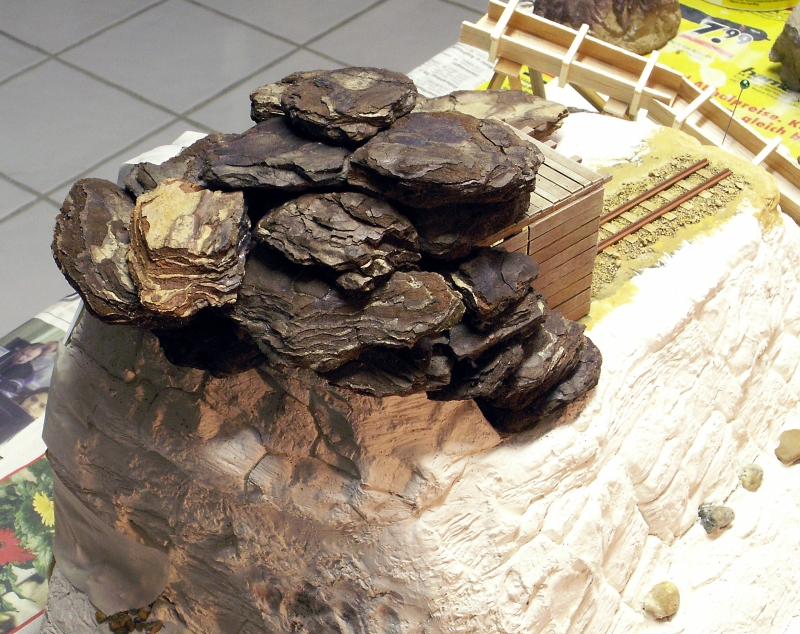
I had been thinking for quite some time about the best way to create some kind of illusion for the mine entrance leading into a mountain; the problem being that very tiny amount of available space without creating a huge model mountain. Initially I would have done it the same way as before, laying some pieces of styrofoam around the entrance and sculpt the rock strata into the clay. But then my friend Bob da dawg sent me a small bag of pine bark pieces he'd collected on some north sea island, and I gave it a try. It was a bit of a hassle to find matching pieces of bark fitting around the entrance and on top of each other, but some cutting, pinning and a careful step-by-step glueing did it in the end. The single pieces will now be blended with each other and into the finished rock formations with some more of the clay material, and hopefully it will come together quite naturally. It's all some kind of experiment, but it's exciting as well ...

Have a look at some details:
The water troughs were build entirely from balsa wood. I cut my own strips from larger balsa sheets of 2 and 3 mm thickness, available from shipmodeller's suppliers. For glueing the balsa I recommend not to use white glue, as balsa will soak up the water in white glue quite fast and that will lead to a weak bond, especially with so small edges. I used Uhu-Hart, a special contact glue for balsa. It's very fast and you get a real strong bond, so all four troughs could be finished in roughly 1,5 hours.
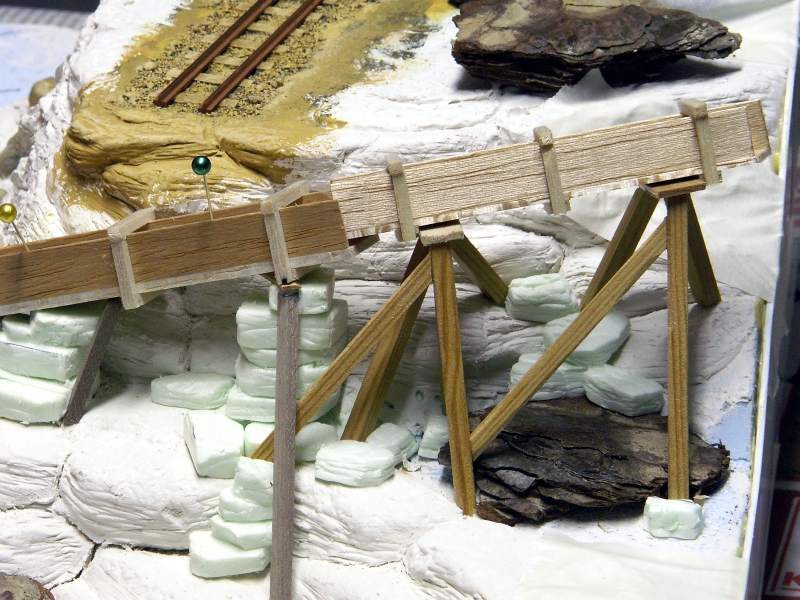
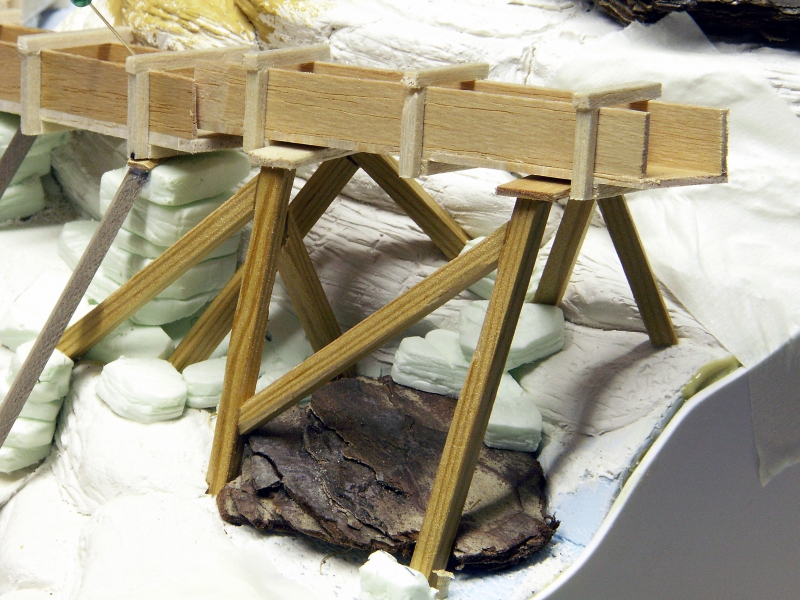
As done with the foamboard placeholders, the finished balsa troughs were fixed to the ground and into each other with some needle pins to get the correct height dimensions for the support constructions. All in all a very delicate setup, but I had no other idea to do it. The supports were mainly carved and engraved from styrofoam and then glued to the ground. Some wooden supports from wood strips were added in the back as stone supports of such a height are quite unlikely and unstable. Everything was arranged as if the builders didn't have a real masterplan in mind and did it more to trial and error ... The troughs themselves were not glued in place but are removable for ease of painting.
As you will have noticed in the meantime this terrain piece will be used with its backside to the edge of the gaming table. To get a nice flat side looking like the scene has been cut up, a contour piece cut from 2 mm plastic sheet was contact glued to the backside and fixed with some tape until the glue was fully cured. This will later get some black paint and flat varnish.
So, that is it pretty much up till now. Next steps will be smoothing out the rock formations, getting the rest of the groundwork done and start painting the thing. I'll take some break now and be back when there is more to show ...
Thanks for your interest and support!


