I'm going to be blogging about my experience building a city for 28mm supers gaming and not scratch building much.

It can be found below and at the following link.
http://crossoverminiatures.com/2014/03/22/creating-emerald-city-part-1/So once you’ve bought your awesome Crossover Miniatures (or some other manufacturers cool minis) what do you do next?
You build a city to fight in. Most classic comics pitch the heroes against the villains in a city scape, so that’s what I’m going to build. Now, like a lot of folks, I’m pretty terrible at ‘scratch building’ terrain. Lucky for us there are plenty of great companies out there that are producing cool terrain that we can combine into an impressive city.
Of course super powered battles don’t have to take place in a city, if you have some other suitable terrain that’s to your taste go for it. But a well built city will work for so many different genres of gaming, Pulp gaming, Supers gaming, Zombie gaming, modern gaming, the list goes on.
Emerald City
Every good city needs a good name, and good names lend character to things. Emerald City will be a major city in a generic state in the United States somewhere, near the coast. It’s got broad main streets and lot’s of side streets, parks, and a dock section.
Start From the Ground Up
I think the best place to start is the street grid. I have seen some really awesome permanent boards that some really fine modelers have built. They look amazing and have some really cool features and they will be my inspiration. I want my board to be flexible and able to fulfill many different roles. So it’s a modular board for me.
I started with World Works Games Streets of Legends. They offer a great selection of street pieces, wide streets, narrow streets, narrow intersections, plain asphalt, and plain concrete. They come in 6 inch squares and have a system for mounting them that has clips to hold the small pieces together. I opted to not to use their system but went with a less flexible but less fussy 1 foot grid system.
Modular Planning
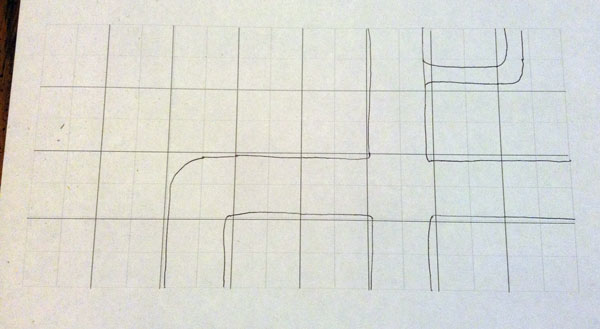
I was going to cut out the small 6 inch pieces and organized them into groups of four to form 1 foot squares. In order to make sure they would give me the layout I wanted, I took out a piece of legal paper and drew a rectangle and then divided it into 24 squares (4×6) so I could plan out the layout. With the street sections coming in 6 inch blocks, it’s really easy to plan for them to match up. I wasn’t concerned with how many different ways these 24 tiles would fit together because I can just make another couple of tiles if I really find a piece that needs to be changed.
I wanted a table that looks like a city but with two types of density alonside each other; first, some open spaces for a throw down, second, lots of cover as well. To achieve that I have a nice wide road going north/south with a curve at the end crossing a wide east/west road. Off those main roads lots of smaller ones. The centerpiece of this particular setup will be a warehouse in the center of the table with an open lot next to it.
Construction
Once I knew what I wanted it to look like, it was time to start construction. World Works gives you PDF files to print on your own. I printed out enough pages (one 6 inch block to a page) on card-stock and got to work cutting them out. I used a cutting mat, a metal ruler, and a box cutter. This part was pretty tedious but it goes quick with some entertaining podcasts on in the background.
OK, now I have a stack of printed streets and sidewalks. Next up is securing a few square feet of foam core. I found it comes in odd sizes so there is quite a bit of wastage. So the bigger the sheet you work with the better. I used black foam core as it does the best job hiding your mistakes.
I bought a spay adhesive, Arlene’s Tacky Spray, to stick the card-stock to the foam core. It’s kinda pricy ,but boy does it save you some work. I marked out a rough 1 foot by 1 foot section with a pencil, spray it liberally and began sticking the terrain squares on. Once all four squares were on the board, take out the metal ruler and box knife and cut the square out of the piece of foam core. Voilà, one down. Repeat 23 more times to complete a 4×6 table.

Getting it all Together
I worked on this in the evening for about a week. You can get into a rhythm and start knocking them out. You need to get about 6 or more together before you start to gain a sense of accomplishment and see how great it will look when you get finished.
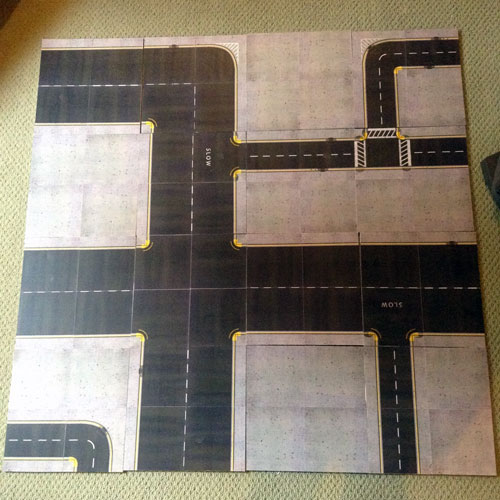
Here are all of my 24 tiles laid out in the original configuration.
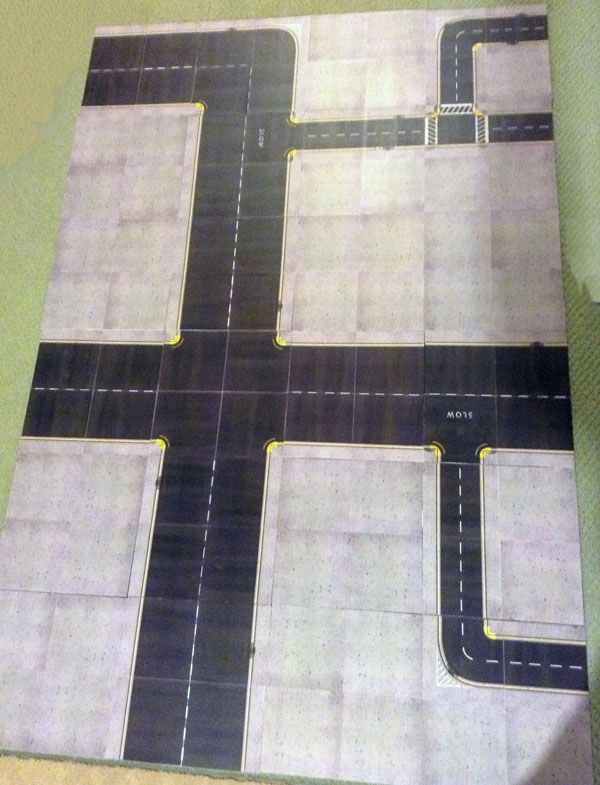
Here are some of the same tiles laid out in a much denser configuration for a smaller table, 4 foot by 4 foot.