So, despite the overwhelming response to the new building, I decided to plough on...

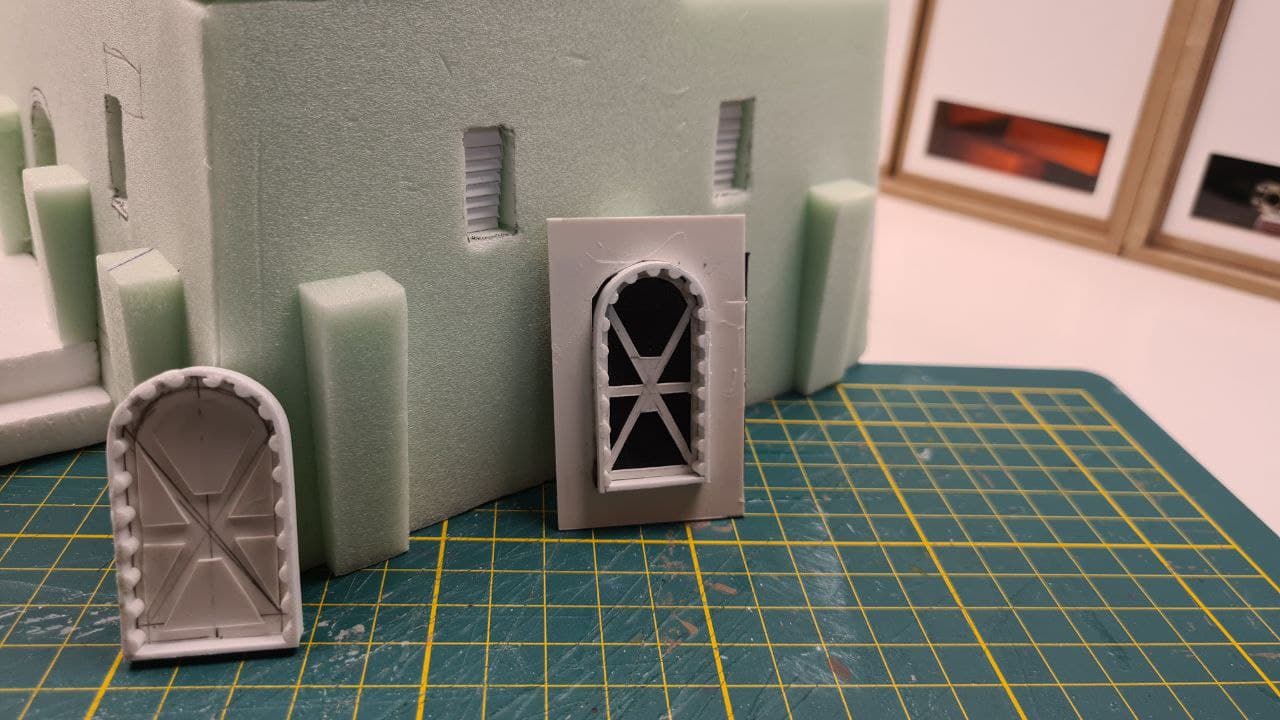
First up were the doors and windows. Yes, windows; I cut several window slits high up in the walls, right below the (envisioned) ceiling, because I felt that the otherwise rather bland side and back walls required a bit more visual interest. But leaving them open would not be an option. I mean; they would let in all the outside heat, plus the sand (Course; gets everywhere) and probably a multitude of creepy crawlers, most of which no doubt parasitic.
So I built shutters for al of them by means of a strip of plasticard the height of the windows, on which I glued overlapping smaller strips, to look like some lamelated covers.
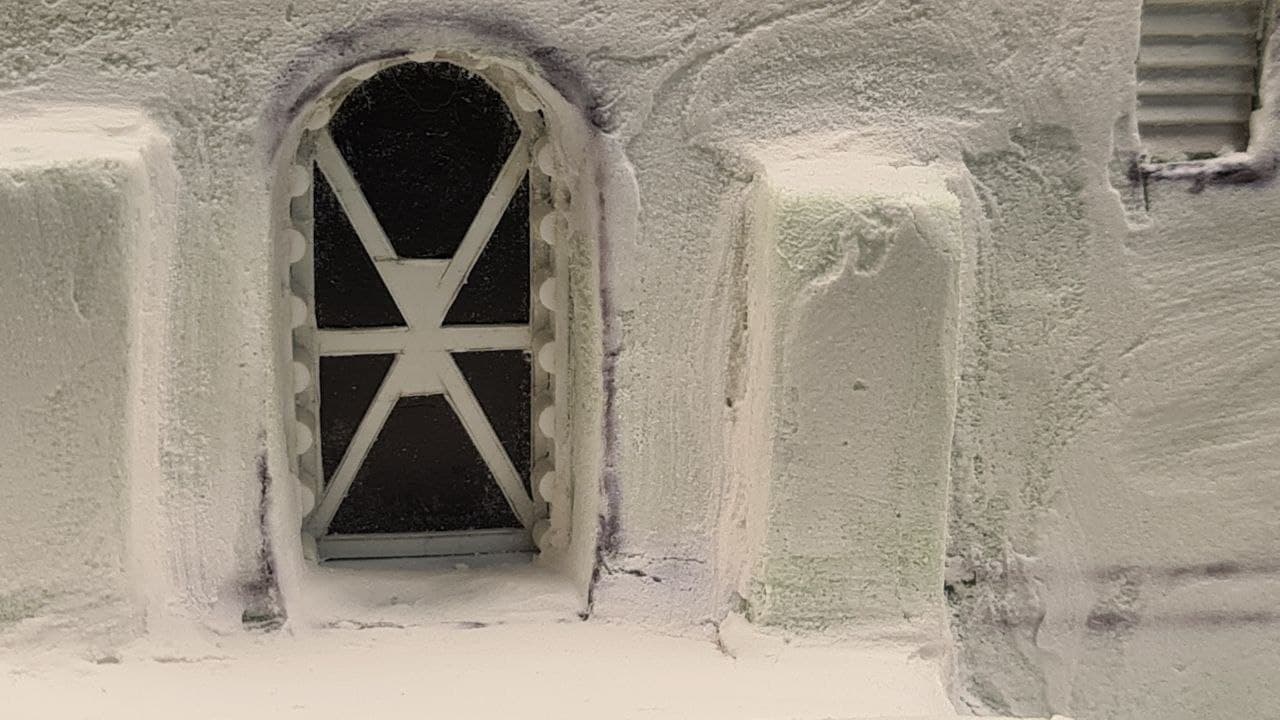
Then the doors. On this larger construction, there are two; one on the ground floor and one on the second story, leading to what can't be anything else than some storage attic of sorts; it's too small even for a guestroom. Unless the guests are Jawas, but who in their right mind would invite those thieving little vermin inside their home, right?
Anyway...
I constructed two doors, using the same template. Except for the lower one I used the design, and for the top one, I used the cut-outs. The results are nice enough in both cases though. I then constructed an arch around both for those ubiqutous Tatooine recessed doorframes. These I then embellished with pieces of semicircular styrene rod, interspaced regularly.
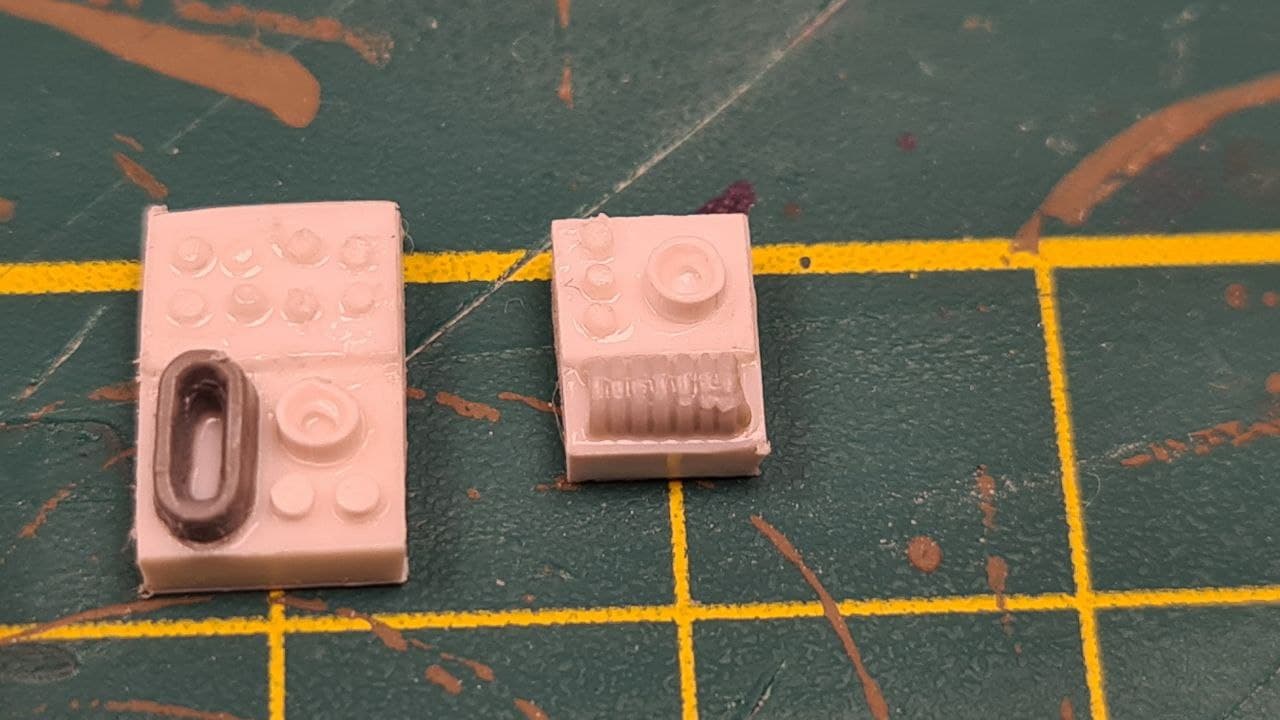
Then it was time for some greebling.
Firstly, I assembled some control panels for the doors, by combining several styrene strips, -sheets and -rods, and a couple of small gubbinz from the bitsbox.
And then I raided another bitsbox for some larger pieces to dot around the building. I settled for some tubing, a part that I
think belonged on the rear of a Predator Lascannon turret and some tie-wrap cut offs (that will probably not be used in the end).
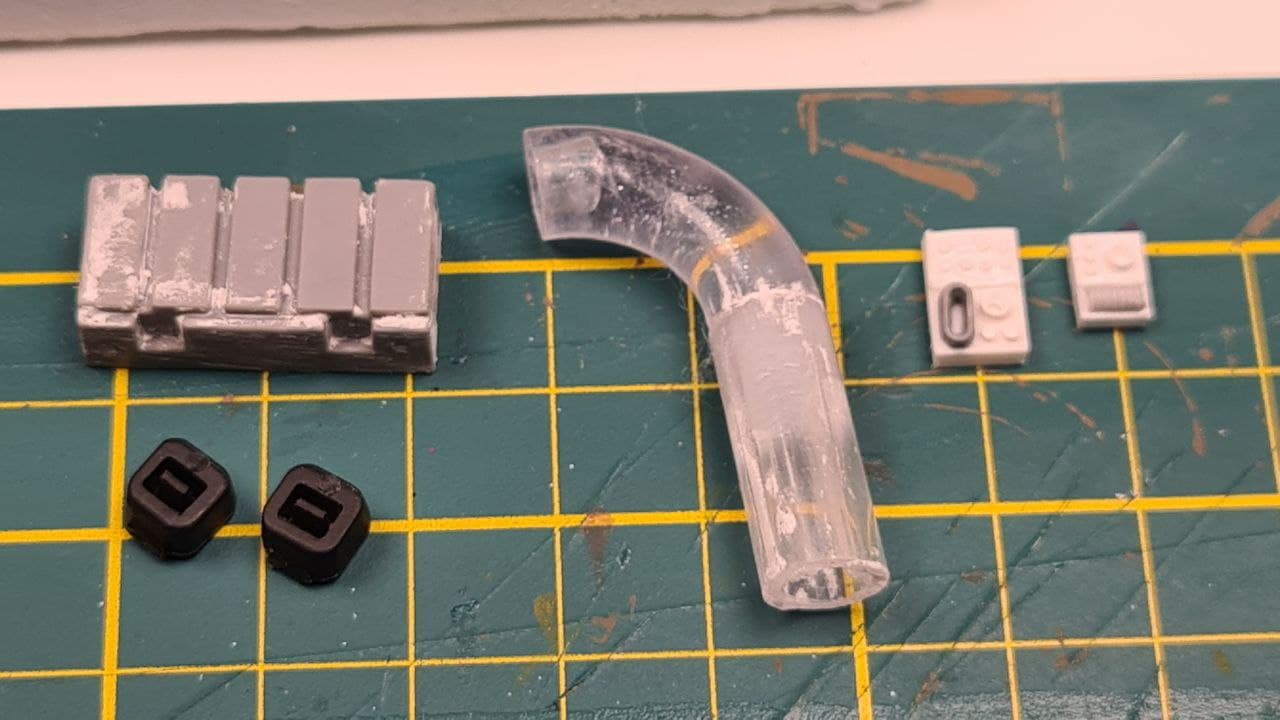
The box will be positioned high up on the second story wall, and once painting is done, I will probably add some cables to it. Also, I will be adding some scatter terrain such as crates, boxes and barrels at the end, like I did with the other buildings.
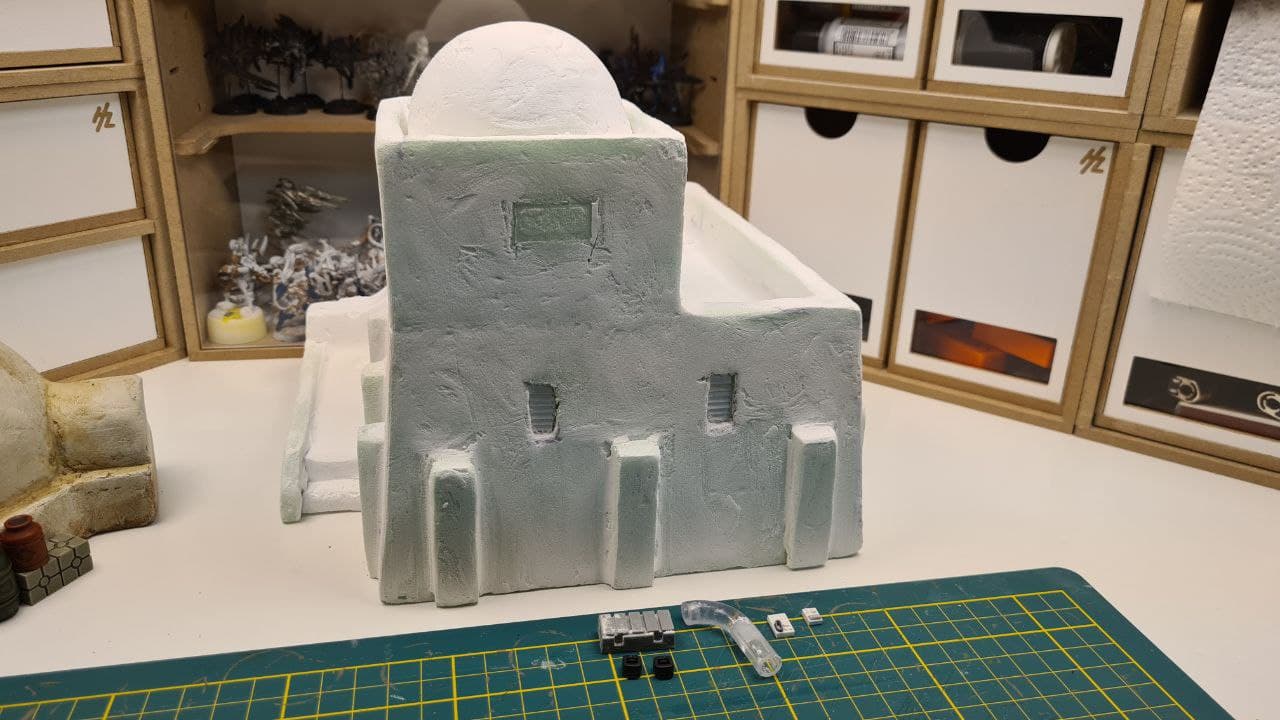
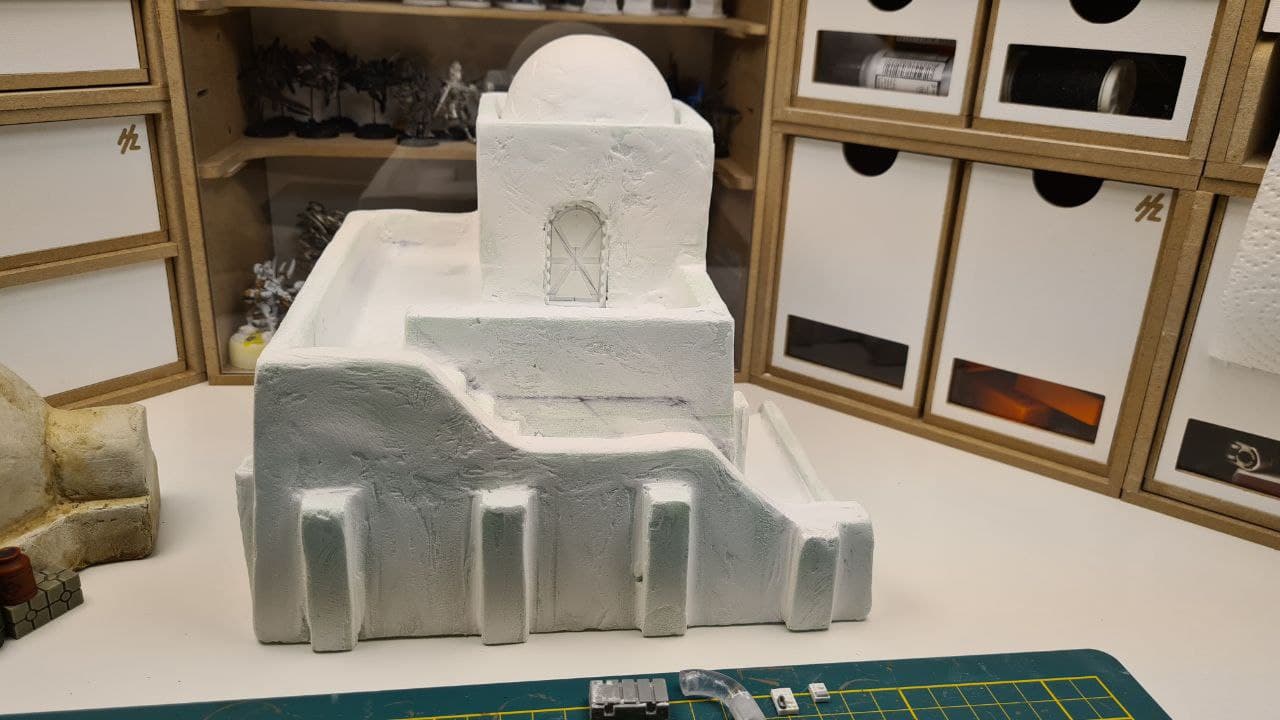
Once this was done, I covered the entire building in wall filler and let that dry completely. Once dry, I then sanded it smooth as well as I could, taking care not to take too much off so as to expose the foam underneath.
This time around, I had decided to carefully mask off the doors and windows before applying the filler, but that was not a success. For once, the tape stuck like crazy, and it also got stuck by overflowing filler, so in the end masking was more trouble than it was worth. It had the added negative of ruining the perfectly square window openings too

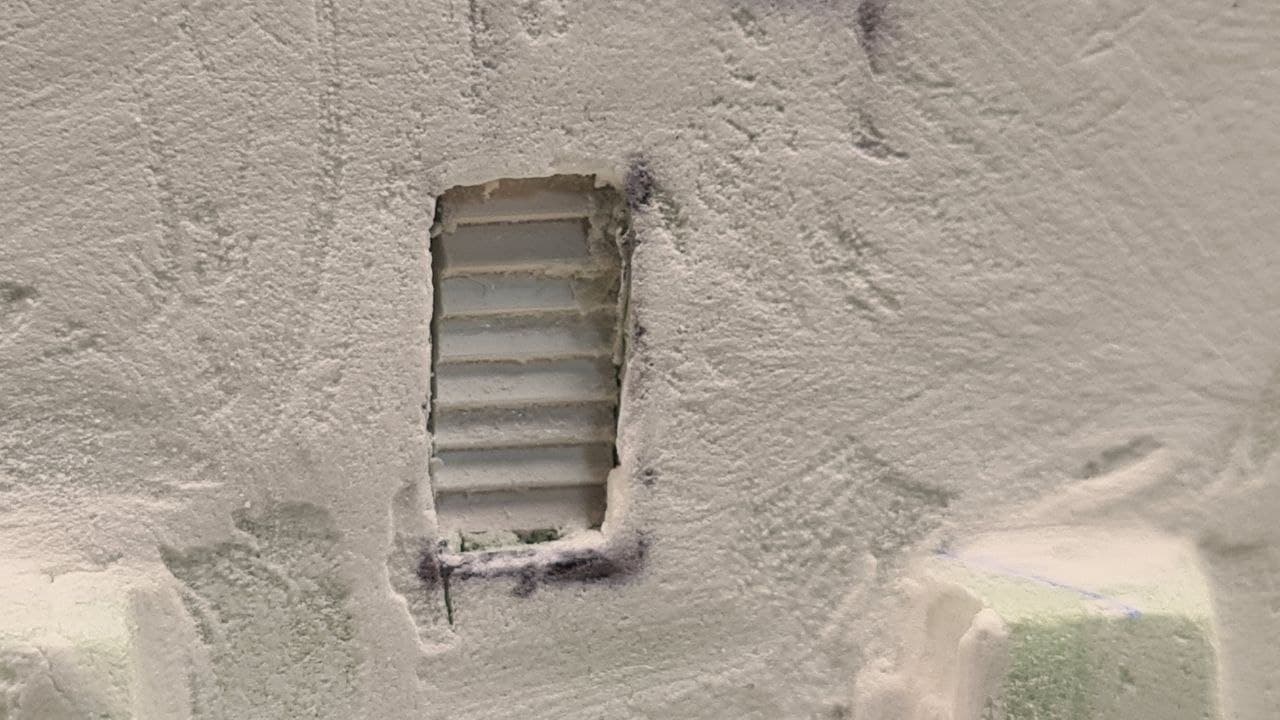
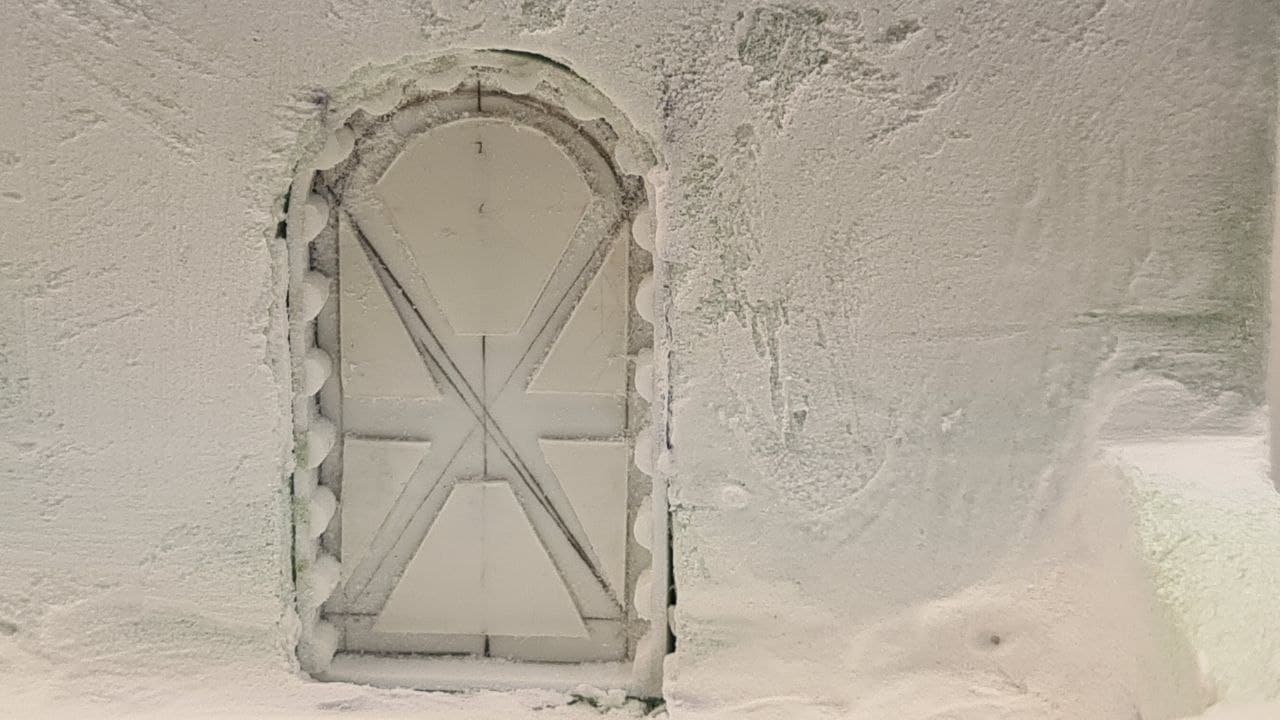
Maybe next time I will leave the doors and windows out, but instead I will put a dummy in each place, which I can then later remove, leaving the filler intact, while also not filling up the textures of the windows and doors.
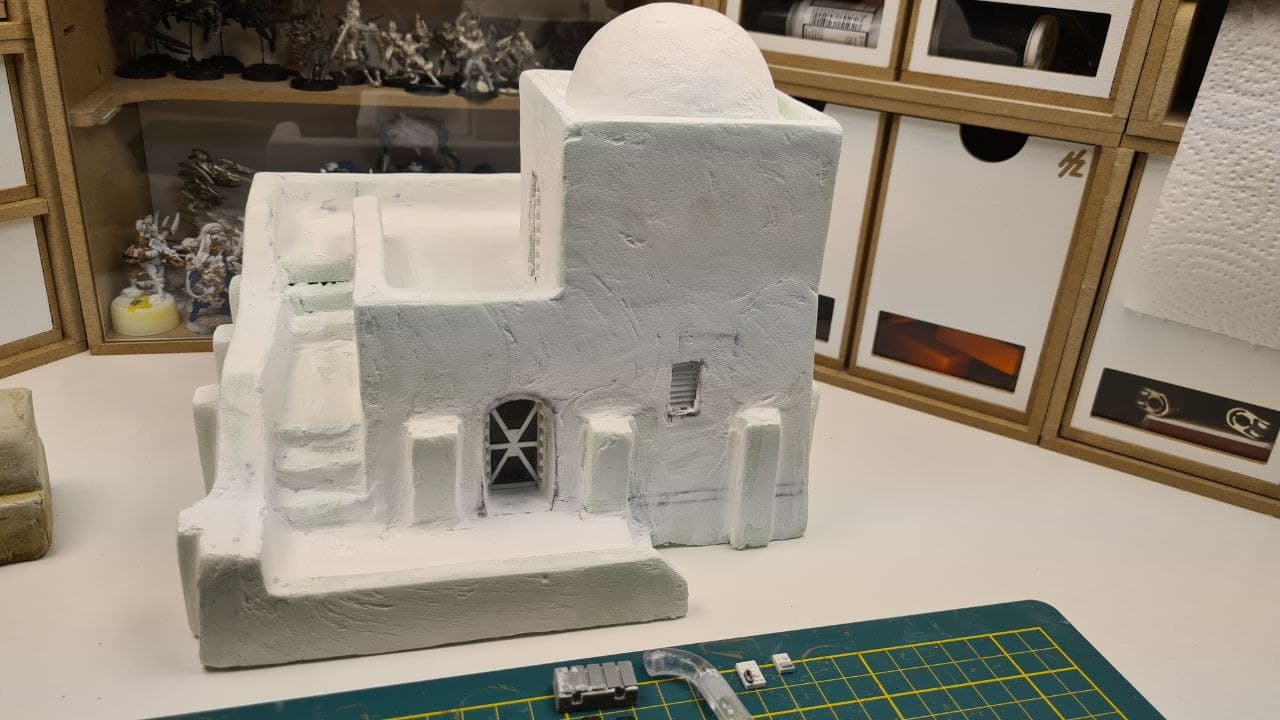
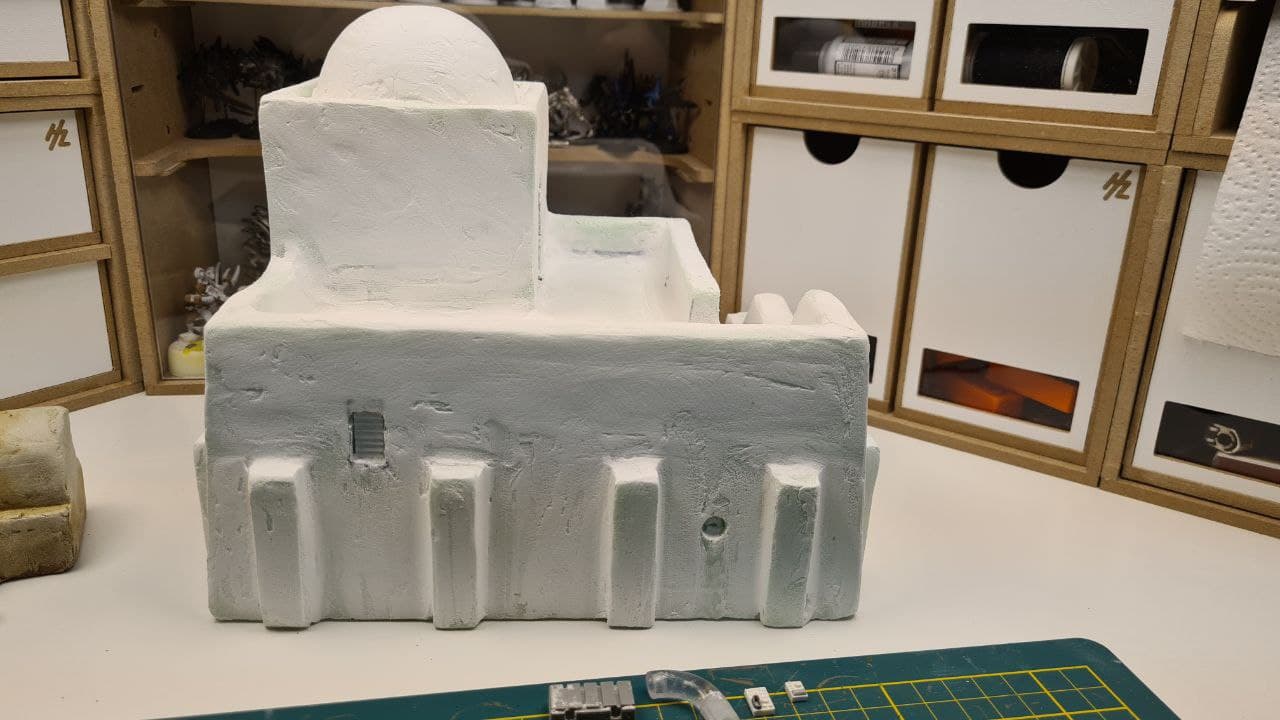
But once sanded, the building started to look like a proper adobe-style construction, and it was ready for painting.
I am in the process of painting this thing right now, so I will probably only be adding pictures once those steps are done, but who knows.
So far, the building has received two layers of a protective basecoat of the standard desaturated brown wall paint I use for all my terrain, mixed with water and PVA glue.
Then I sprayed the entire building with Armypainter Sand, and added a reddish stripe to the walls, made by sponging on a mix of a burnt red, sand and white, with the stripe once again taped off with masking tape. This tape took off some small chips of plaster here and there,so I will have to touch those up with a sand coloured paint, but this will probably only add to the overall look.
Next up will be washing with brown and then drybrushing with bone white, after which it's off to my favourite part; detailing


