It's a telepathic topic.
If you can't see the pictures, you aren't one of the Xmen.
Exactly. So by inference: if you can see the below you're a mutant freak with rather mundane capabilities...
We here at Hammers Industries are proud to introduce a system to the public which e have been testing and developing during the last oh so many years or so. We've been calling it the miniforge for some time but our marketing department has been urging us to conceptualize the whole thing by slapping a lower case 'i' in front of it in the hope that we'll be selling off the whole shebang to venture capitalists for 19 billion dollars in a year or so.
The truth is that we, well I, quite often replace or add weapons and other details on miniatures with items crafted from brass. While pinning and brass rod banner poles conversions are common as muck among wargamers I have seen very few posts on how one makes a spade, spear, oil can, the horn of a phonograph or rope bridge with the help of brass materials and a solder.
An opportunity has risen for me to patronize you with another tutorial as I need to replace a pick axe and a shovel in a chain gang set from Brigade Games. I know there are some of you who find my tutorials long winded and self evident. What can I say? I never forgo an chance to wind Plynkes up. Plus, *someone* has to cater to those who still have their mothers tying the strings of their sneakers. Jim Hale, please let me know if it is easier for you to read if I use ALL CAPS.
Anyway here are the main tools I use for the iMiniForge system:
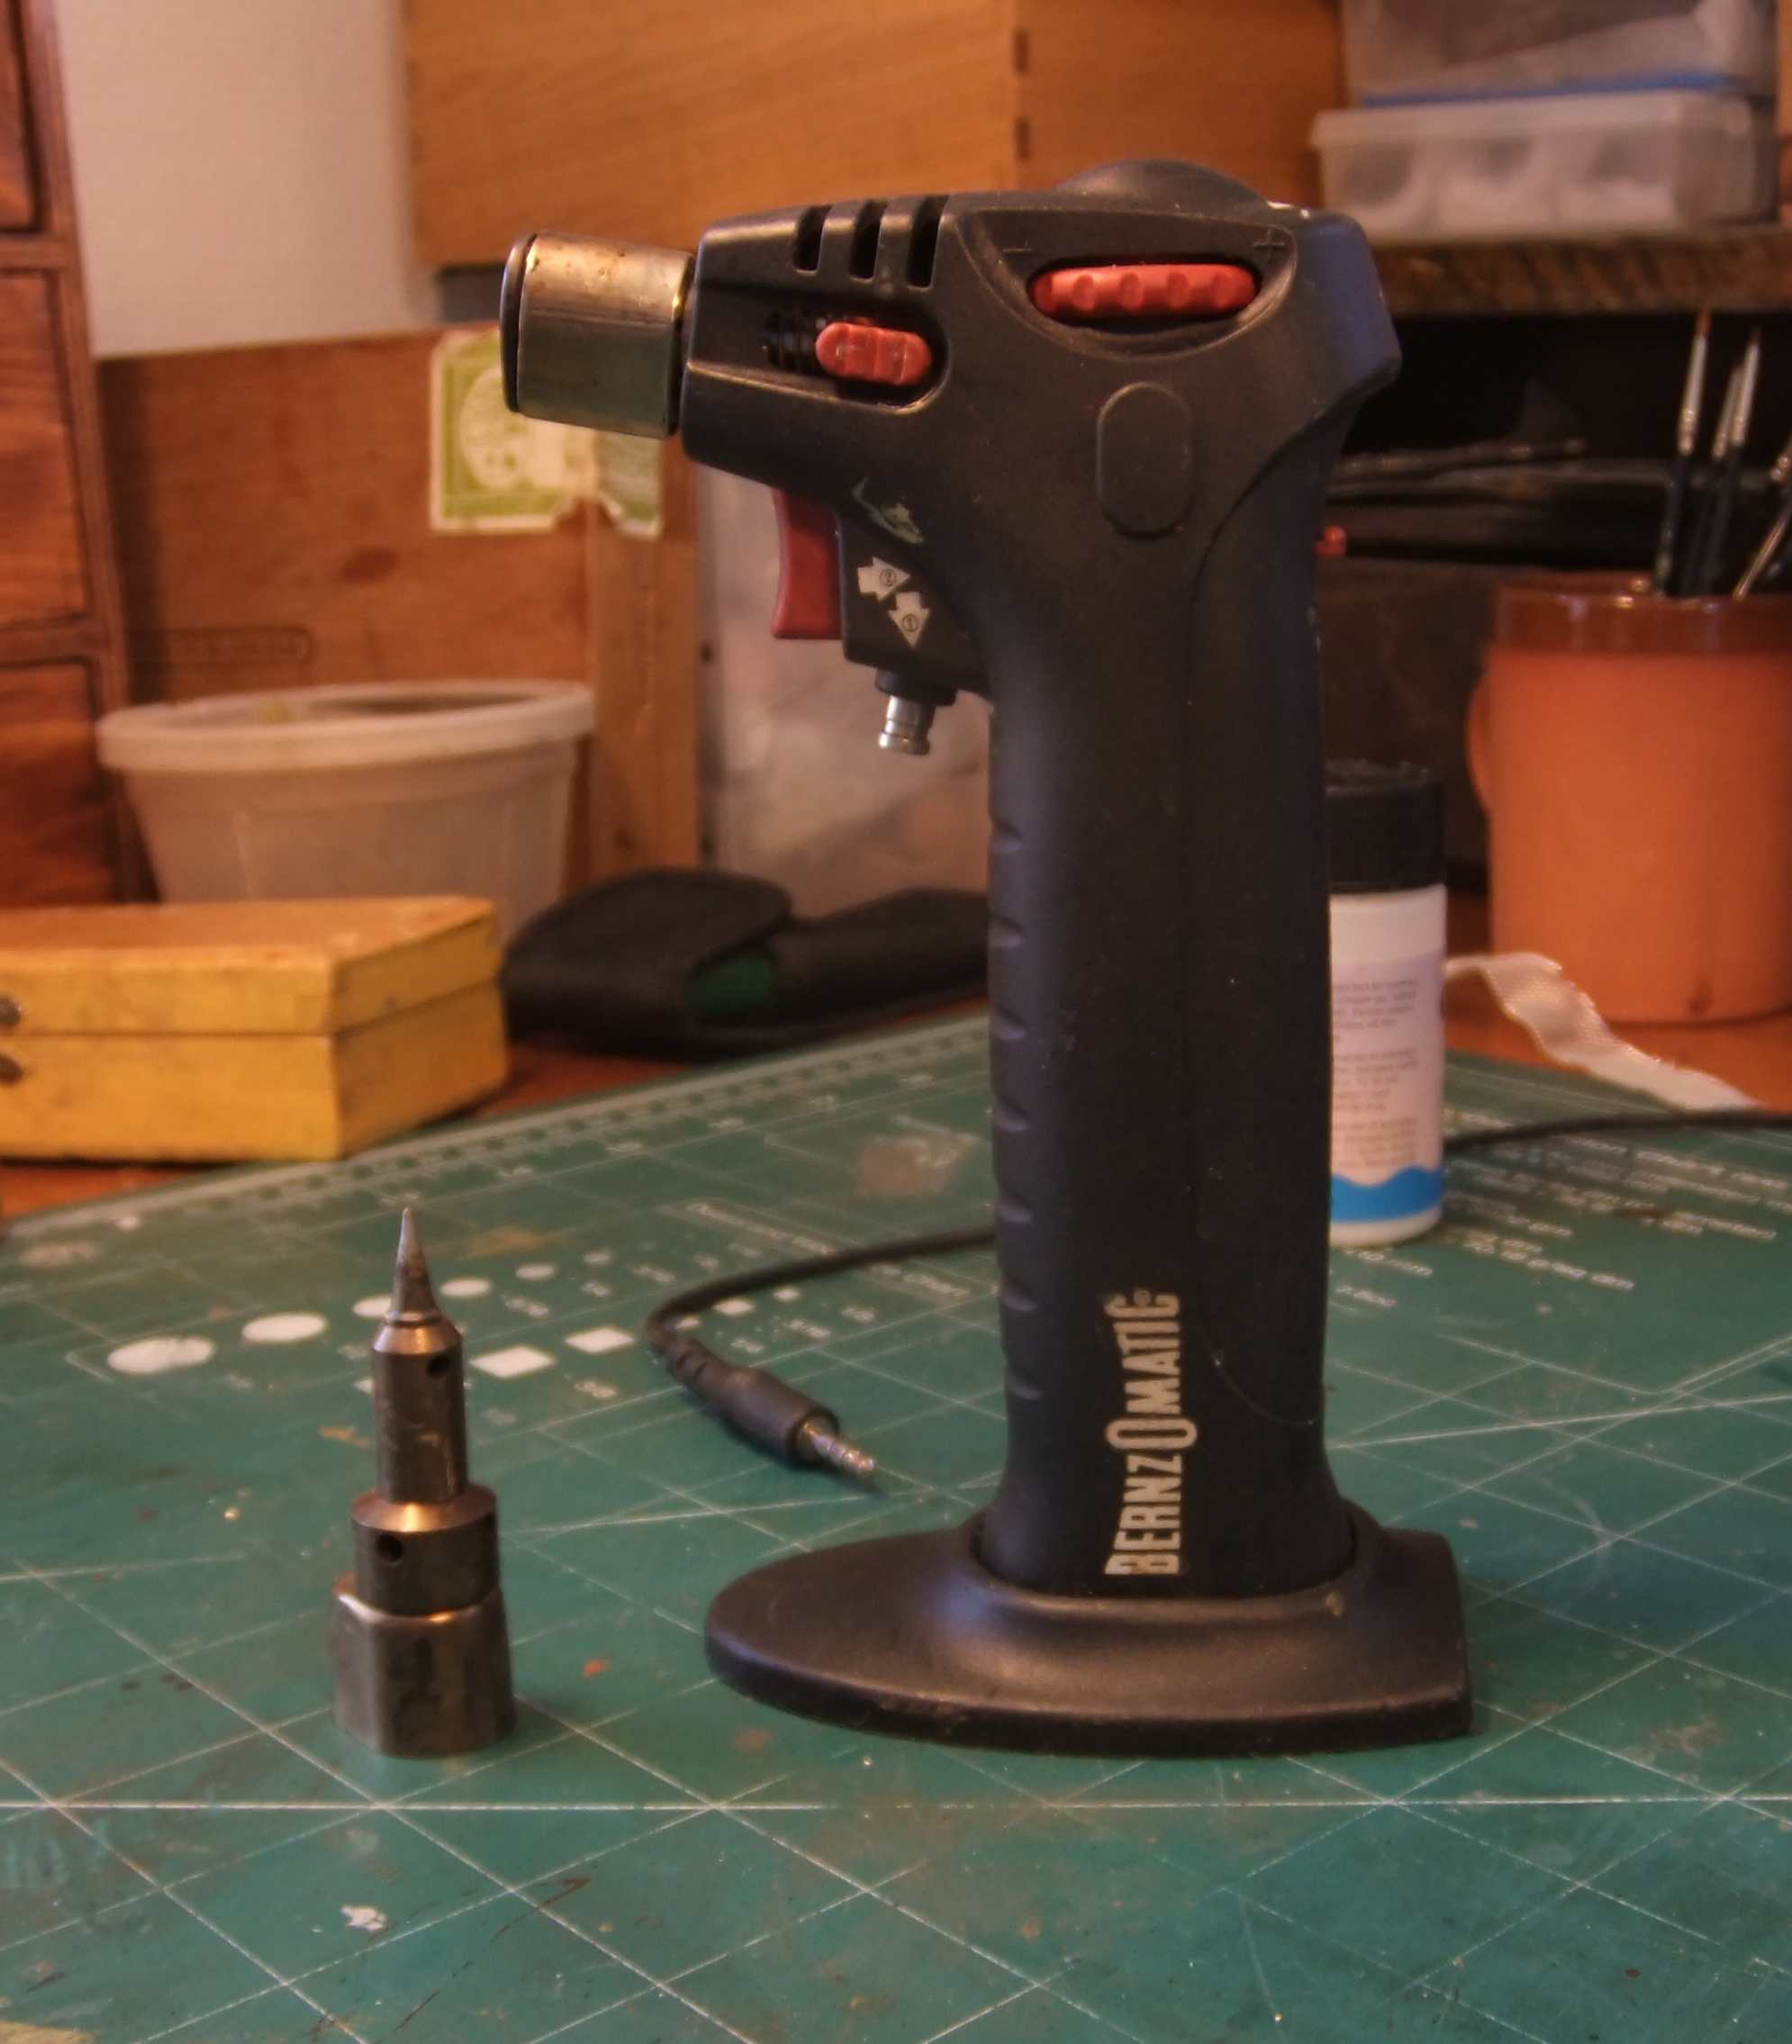
A butane powered torch and soldering iron. Or, as our French readers knows it, the gadget one uses to melt the sugar on top of the
creme brulee. I use it both for soldering and to heat the brass to make it malleable. It is so to speak the very furnace of the iMiniForge. I also have an electrical soldering iron. Both variants have their advantages.
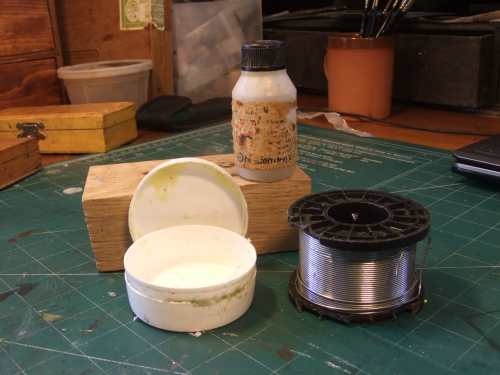
Solder and flux. The flux, here in both paste and fluid form are used to improve adhesiveness and flow of the solder onto the metal. I prefer the paste. The tag on the bottle probably just says something uninteresting about lethal toxicity.
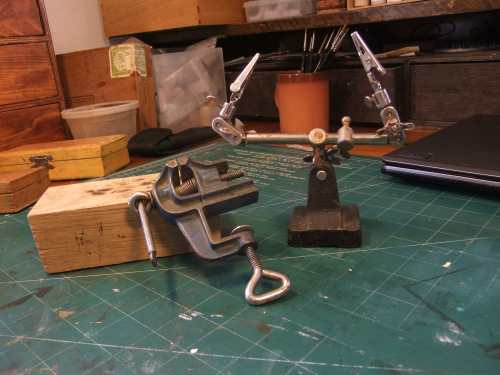
A vice and 'second hands'. Both are vital. I have a larger vice to but this small watchmakers vice I inherited from grandpa Hammers. It has a little anvil thingy on it. You could of course use any lump of reasonably flat iron but the vice/anvil combination is very handy. The second hand thing is familiar to most people who work with soldering irons. If you don't have one you'll soon find you need one when you do this kind of work.
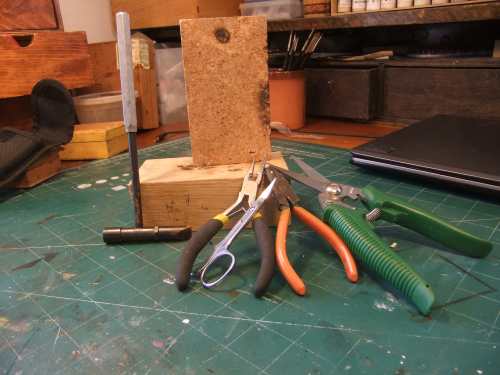
Needle nose pliers, scissors, cutters, a watchmakers hammer. Wooden blocks. Pliers are needed to bend the material and to hold it, because it gets hot, hot, hot. Thin brass sheet can be cut with nail scissors, which is preferable, since the cutters tend to warp the sheet metal in ways which is less than desirable. A small hammer like this is a bit of a speciality tool but I find it hard to do without since it gives you better precision. The heads on this one are screw on and comes in different shapes and materials. The wooden blocks are of oak and cork, materials which doesn't burst into flame as easily as other types of wood.
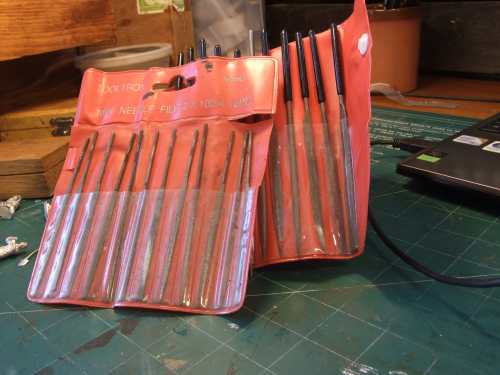
An assortment of needle files. To shape and tidy up the brass and to remove excess solder. I also have a Dremel tool with various 'business ends' which makes some tasks a bit easier.
What else do you need...? A pot of water. Your wits about you. Good insurance against accidental fires.
To be cont...


