Since I will be painting pigs and geese as objective markers for my Dark Age skirmish games, I figured those animals will need a pasture to root around in. It seems that a type of fencing called "wattle" was popular in Dark Age Britain, so I decided to try my hand at scratch-building one. A wattle enclosure is essentially a giant basket. It has a line of posts with branches interwoven between them. I did some searching around on other gamers' web pages, and then came up with an idea for my own adaption. And since it worked out reasonably well, I figured it would be helpful to do a tutorial on how I did it, detailing materials and methods.
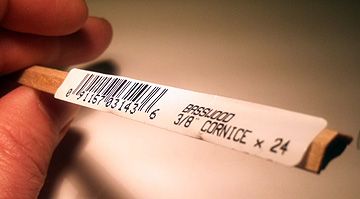
The first step was to cut a rectangle of black styrene as the base. I knew I would need something with "grip" to hold onto posts, so I chose bass wood. My guess was balsa would be too soft. I went to the hobby store and found a "cornice" piece that looks like a speed bump that you would see in the road in cross section. It is angular, though, and not rounded. I measured out my perimeter and cut bass wood sections (but did not glue them down, yet). Next, I marked out where I would drill my post holes on the pieces. I used a pin vice to drill each hole, which ended up being slightly smaller than the diameter of my posts.
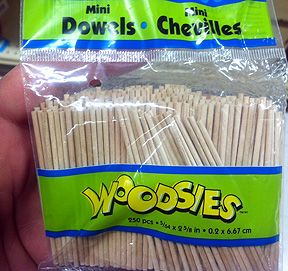
For the posts, I used "Mini-dowels," available at the local craft store, again. First, I affixed the drilled bass wood sections to the base with tacky glue. I figured that would have a little more flexibility, which I might need in the next step. Once dry, I cut each mini-dowel in half, then positioned them over the hole. I used the blunt end of a pair of pliers to tap them into the hole. The bass wood was soft enough to give a little and accept the harder wood dowels, but firm enough to hold onto them. This gave me a better grip I think, and should prove strong in the long run against mishandling.
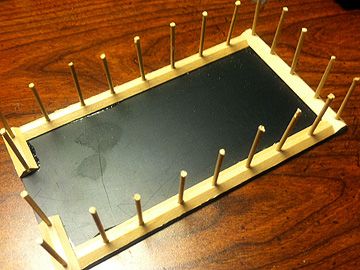
Here is a shot of the bass wood pieces glued down and the mini-dowel posts in place. Note the gap I left for the gate. In hindsight, I should have just gone ahead and created the gate at this stage. This decision made me later have to do another step to fill the gap between the posts and gate.
I decided to flock the pasture before putting in the wattle material. My thinking was that it would be a royal pain to get underneath and around the fence with flocking and paint. My new method of flocking comes courtesy of my friends David and Joe. I mix white glue and my favorite earth tone paint, Ceramcoat Burnt Sienna, together in a 50/50 mix with just a touch of water. I painted the styrene base and the bass wood with that mixture. Then I pour Woodland Scenics medium ballast onto it, tapping off the excess. Once the mixture is dry, I mix up a much more watered down version of the paint and white glue. This I slop on top of the ballast, then I pour sand onto it, tapping off the excess, again. The sand absorbs some of the watery color in a nice, shaded way. While it is still wet, I sprinkle lightly some Woodland Scenics brown turf to give even more variety in color. Finally, once this is all dry, I use straight white glue and put down patches of Woodland Scenics blended green turf.
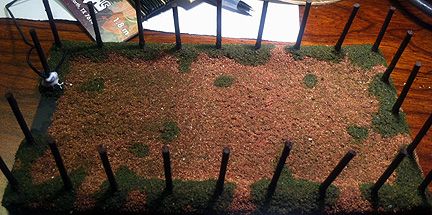
In the picture above, you can see the flocking of the pasture, plus I painted the posts dark brown. You can also see how I started the wattle. There is a glob of white glue attaching one end of the 1mm black lace leather cording (available in the craft store jewelry department) to begin my weave. The other tutorials that I'd read suggested using wire as a material to represent the braches of the weave. I'd worked with wire before for crafts and never really liked using it. So, I hunted around in the craft store and found the leather cord material pictured below. By choosing black material, I didn't have to paint a base coat on it, and would be able to just dry brush the lighter tones on top of the black. As it turned out, I really didn't need to glue the start point for the lacing. When one spool ran out, I could just start the next one and the weave itself seemed to keep it in place.
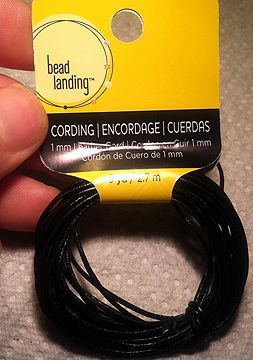
So, the idea for the weave was to start at the bottom and go to the inside of one post and then the outside of the next, "weaving" back and forth to create a visible pattern. One thing I didn't plan for, though, was the corner posts. You can't go "inside" of a corner post, as the cord will just be tugged off at a 45 degree angle to the next post. I solved that, to a degree, by completely looping the cord around the corner post on the inside weaves. It did cause the material to build up more quickly on the corners, so I had to keep pushing it down to condense the weaves closer together. I ended up using a LOT more cord for the pasture fence than I'd planned. My circumference of the pasture was about 17 inches. That ended up needing nearly 7 yards of cord material to build the wattle up to a good height for 28mm figures!
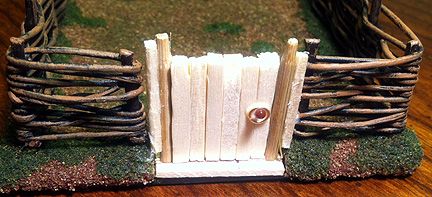
After the wattle was done, I constructed the gate out of bamboo skewers and craft sticks. As I mentioned before, it would have been smarter to construct the gate in the beginning, simply leaving a gap for the cord between the last post and the gate. I ended up having to put in additional craft stick posts to make it more seamless of a front. I then painted it a base of dark brown, dry brushing a medium and khaki color atop. The handle is simply a jewerly link and a pin head pushed into the craft sticks.

So, my initial thought was that after finishing the gate, all I had to do was dry brush the leather cording and I'd be done. However, once I finished it, I thought the pasture needed a few more touches. So, I took a few plastic plant bits I keep to garnish up a battlefield and glued them into spots along the fence. I mean, if weeds grow along my chain link fence in my back yard, wouldn't they grow along a Dark Age farmer's? I really like how the pasture and wattle fence turned out. There were a LOT of steps, though. I can't really think of any way to streamline the process, though. The funny thing, though, is the actual weaving of the wattle took the least amount of time. It goes pretty quickly, snaking the cording in and out of the posts. I didn't yank the cord really tight, just a gentle pull to make sure there wasn't a lot of slack.
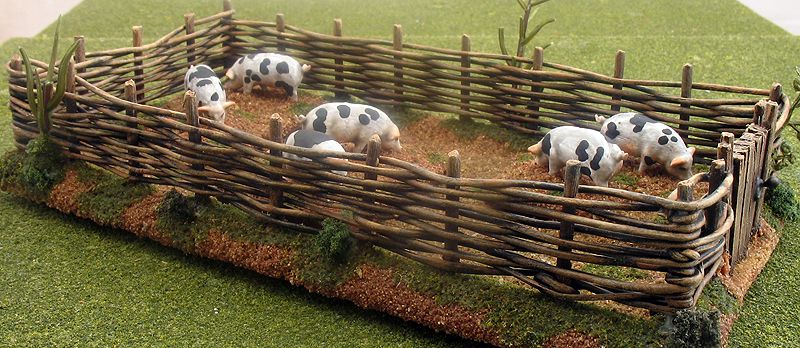 The finished product, with pigs rooting around in the pasture