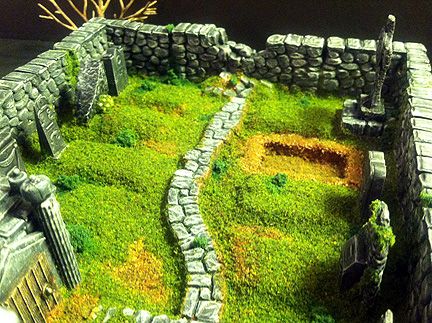
So, here's the latest scratch-built terrain piece -- a 28mm graveyard. First of all, let me apologize for the low quality of pictures. I used my iphone to get closeups, and in general, was too lazy to dig out my light box and digital camera! Anyway, I wanted the graveyard to be usable for everything from my Dark Ages skirmish games to 1930s pulp. I tried to make it relatively generic. I'm sure some of the tombstones don't fit certain periods, but by using a mixture of them, I think it gives a good effect. It turned out nicely enough that I doubt players will complain and say, "Well, this style of marker wasn't in use until such and such date..."!
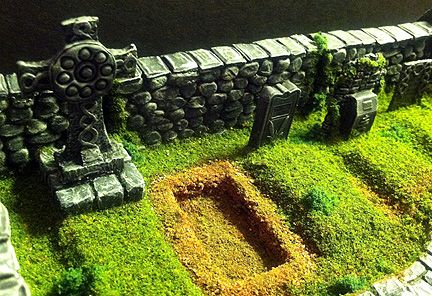
Anyway, the base that it is built upon is composite, or a sandwich of four layers. Both the top and bottom layer are black styrene plastic. The middle two layers are black craft foam. The reason I did this was I wanted to be able to dig down into it for the freshly-dug grave. I also figured the multi-layer construction would make it strong enough for the weight of the piece, which turned out to be true.
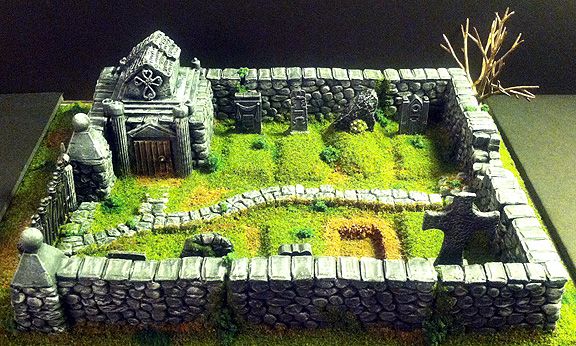
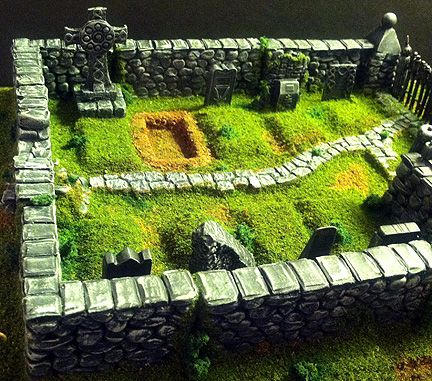
The walls are Acheson Creations terrain resin pieces. There are four different types present: End pieces, which have the pyramid and ball decoration on top; Middle pieces, which are simply straight wall sections; corner pieces, which are the 90 degree angles; Crumbled wall section -- which I used one of in the back. I think these were in the $2 bin at one of the shows they attended. So, with 9 pieces in use, that meant the walls for the graveyard cost me about $18. Different configurations could change your costs, of course. The walls were spray painted black, and then painted with a watered down acrylic black once dry. I affixed them to the base with Tacky Glue. The next step was to wet brush a dark gray, then dry brush a light gray for the stone effect.
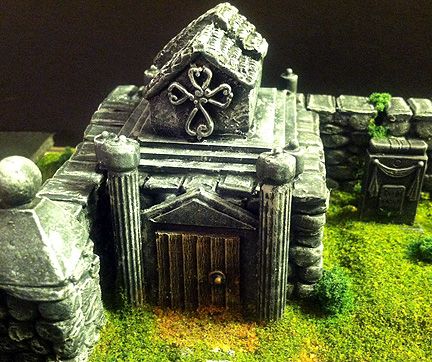
After the walls were done, I affixed another corner piece into a front corner to create the mausoleum. I painted these walls the same, though I should have done it at the same time as the others. I originally intended a removable roof for the mausoleum, but changed my mind. So, it could have been done all at once. The mausoleum's roof is made of several layers of styrene, with a small-scale resin house atop it as the roof and walls. I tacky glued a charm cross on the resin house for decoration. The columns are fluted wooden dowel-like pieces you can buy from craft stores, and the decorative shapes atop are simply beads with a pin head inserted in the top.
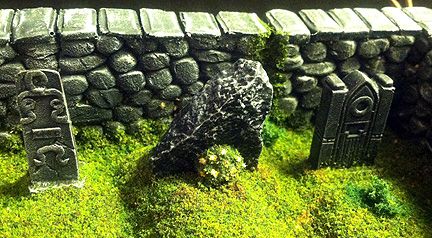
The tombstones themselves are a mix. The cracked stone wedge one is an Acheson Creations piece (50 cents). The others are either metal ones from Iron Wind, or resin ones from...well, I forget where I got them from! They've been in my box for years, and how I finally found a use for them. These were painted black, then dry brushed two shades of gray. I took a tiny paint brush and made hatch marks in solid black to give the impression of engraving of names and dates on some.
The grave humps in front of each are made using balsa wood, and the stone path is done using Hirst Arts stone sections left over from earlier projects. As an atmospheric touch, I added a "dead" tree...a plastic Woodland Scenics tree drybrushed to look dead (what other kind of tree belongs in a graveyard?).
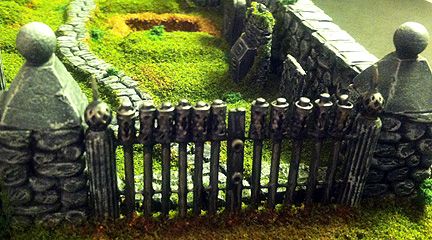
Finally, the fence was pieced together using fluted dowels, mini dowels, brass wire, and craft jewelry pieces. I took each mini dowel and end column and drilled two tiny holes aligned in the same place. These were the vertical posts and ends of the fence. These were then threaded together with brass wire, which became the horizontal posts. Two pieces of craft sticks were put in the middle as the rectangular locking pieces where the two sections of the gate would appear to join together (however, it was all done as one piece and does not swing open). Tiny jewelry spacers were set atop each vertical for decoration, and two globe-like pieces on the posts. Each globe bead had a leftover spear point inserted atop it, too, and white glued in place. A leftover piece of chain link was glued to the rectangular locking sections to look like, well, the lock! The gate was painted black, then steel, and highlighted gun metal to give an iron look.
Finally, I used my "new" method for the ground. I mixed 50/50 white glue and water, with a squirt of earth red paint, and painted it on the surface of the ground. Medium ballast was then poured over it and tapped off. After dry, I did the same thing -- painting the surface with a slightly more watery mixture and pouring sand over it. Next, the same thing was done with Woodland Scenics blended green turf. After the whole thing was dry, I put in spots of darker colors -- earth brown, darker green grass, and pieces of thicker flocking -- to give it a slightly overgrown appearance.
I'm really happy with how it turned out, and can't wait to get it on the tabletop for my next skirmish!


