And back again!

Those six months of me being out of town during the weekdays have finally past!
No more coming home on friday evenings, leaving again sunday afternoon and cramming my entire social/family/everything life in those 1.5 days!
Which means I actually have time for my hobby again.
I decided to celebrate by building some hills. (You see, despite wargaming for close to 20 years now, I've never had any proper wargaming hills, just books stacked under the terrain sheet.

That needed to be remedied).
They would also tie in nicely to the amalgamated Warhammer Quest/Generic Dungeoneering/Chivalrous and Heroic Questing Project that is one of the (attempted) areas of (wavering) focus I'm trying to stick to, hobby-wise.
I will, somewhere in the coming weeks/months, also try to build a creepy/haunted forest, to match the hills. Because, as everyone knows, all the proper quests and heroic journeys lead you to either a hilly uneven area, a scary forest or a combination of the both. Apparently it's where all the "cool" monsters live...
Anyway, on to a picture report of last week's progress:

Cutting the rough shapes of the hills.
This is actually day two, day one consisted of buying the foam, cutting the bases, cleaning their edges and finding replacement wire for the foam cutter.
The tree you see is a test of concept for the "scary forest" plans.
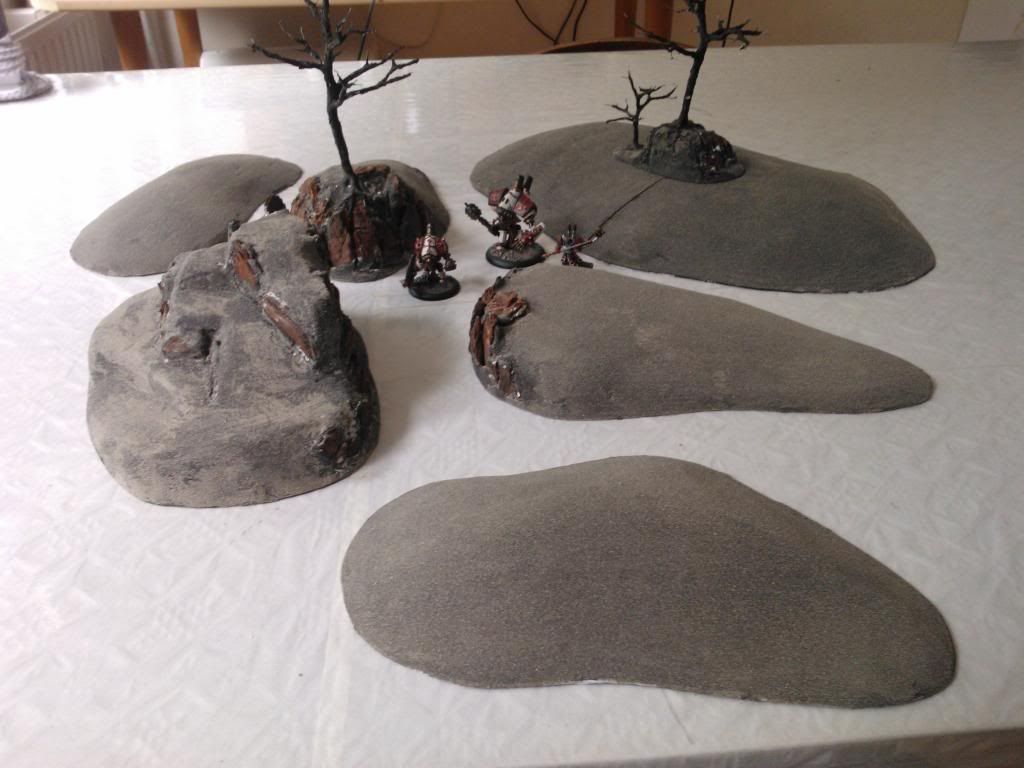
And here is one of the hills after sanding it and glued to the base:

As you will see in later pics, the majority of the hills are rather flat and flowing. They're just a single layer of 30mm XPS, on top of a 2mm layer of foamed PVC. Total height is then 32mm. This is one of the exceptions:

With the rough structure done, it was time to start prettying them up:

Glueing on bark to represent rocky surfaces, and filling out the tree.
After this, I covered the foam with a layer of wall filler. Once dried I then filed it smooth(ish) again, to get rid of the rough spots. (sadly no pics of this, I preferred not to get wall filler dust in my electronics....)
Once that was done, it was time to put some texture on.
I started with just my basic basing sand, glued with thinned PVA (I added some black paint to this. That way, it was easier to see what I had covered already, it gave me some more info on how fast the mixture dried, and it will prevent light spots showing through in areas where primer or paint don't cover completely)
This I followed with my cork rocks and rougher basin grit:
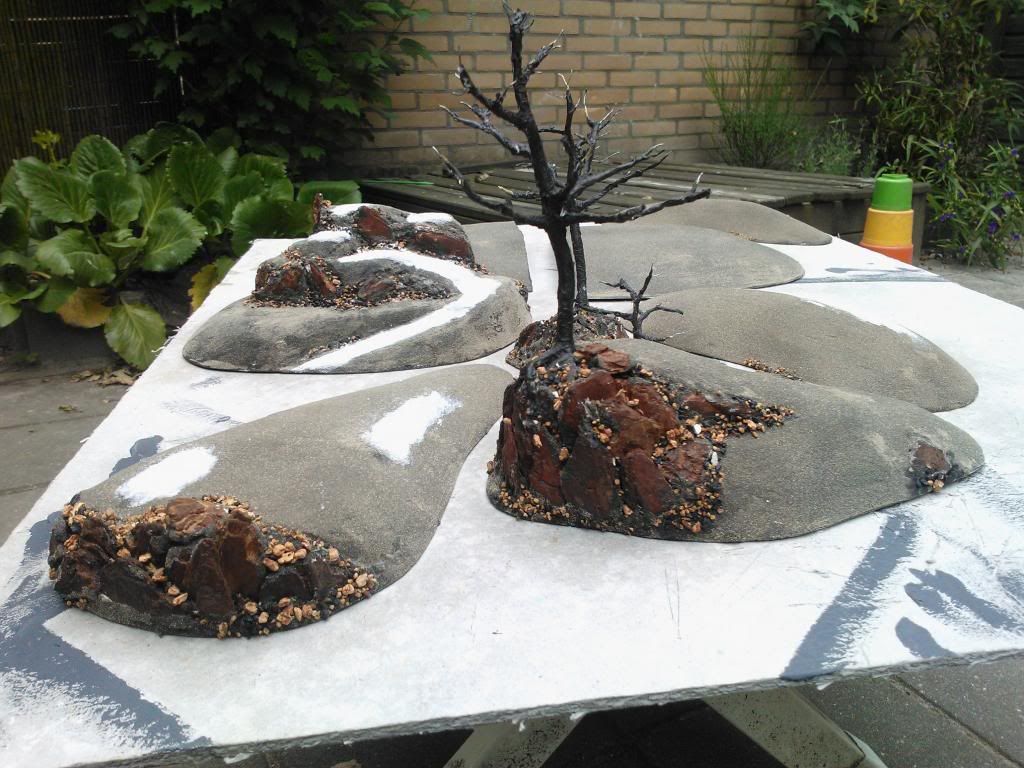
As an experiment, I also covered some areas with talcum powder, to see if this could give me a finer texture, and just a bit more variation. It wouldn't stick properly, but I'm hoping it will still be visible after painting.
And that's where I'm at now, a week later.
The hills have been primered, and I hope to have time to paint them somewhere around next weekend.


