Part 3. Painting.
(Parts 1 and 2 are here:
Part 1:
http://leadadventureforum.com/index.php?topic=7777.0Part 2:
http://leadadventureforum.com/index.php?topic=7778.0 )
Okay, so you have this weird-looking polystyrene and matchstick and glue and sand and plaster and grit construction…
It just requires the magic of paint to transform it into a beautiful, realistic piece of model scenery…
Step 18. Spray the entire thing matt black.
I use a black car primer from Halfords, the UK's biggest car parts store. But I'm sure you can get something similar wherever in the world you are.
In fact, give your entire model a couple of generous coats of primer, because it will help to bind the whole construction together and strengthen it even more.
The transformation is remarkable. All of a sudden, your model concocted from all sorts of bits and pieces starts to take on a unity of its own.
It starts to look whole, integrated… (Pics)


Step 19. Next drybrush the whole in a dark earth colour matt emulsion.
Dark earth? What can I tell you? It’s kind of rich dark brown. I had 5L mixed for me a couple of years back and I’ve used it on all my scenery ever since.
You could probably pick a suitable ready-mixed shade though.
When drybrushing the main earth areas, use a small decorating paintbrush – not a modelling brush. It will be much quicker.
Make sure you drybrush across the ground in all different directions, to avoid streaking and obvious brushstrokes.

Step 20. Next, dry brush on successive highlights, gradually adding a little more white to the earth colour in each layer. You’ll probably need to apply at least 3 or 4 layers of highlights, with the application getting more subtle with each layer.
It doesn't matter too much if your earth painting spills onto the woodwork areas, as you can retouch these in the next step.
Step 21. Next, pick out the woodwork sections using the same drybrushing technique, but with a kind of grey-khaki colour as the base colour.
Timber doesn't need to be exposed to the elements for very long before it takes on a kind of pale greeny, silvery grey colour. Never paint any woodwork on your wargames table brown. Wood is virtually never brown (unless it's been stained and polished).
And rivers are never blue.

The critical thing in this step is to drybrush against the grain of whatever timber section you are painting. Do not paint with the grain, as that will just fill in the grain and any gaps between your timbers. And we want to keep those gaps between timbers nice and dark…
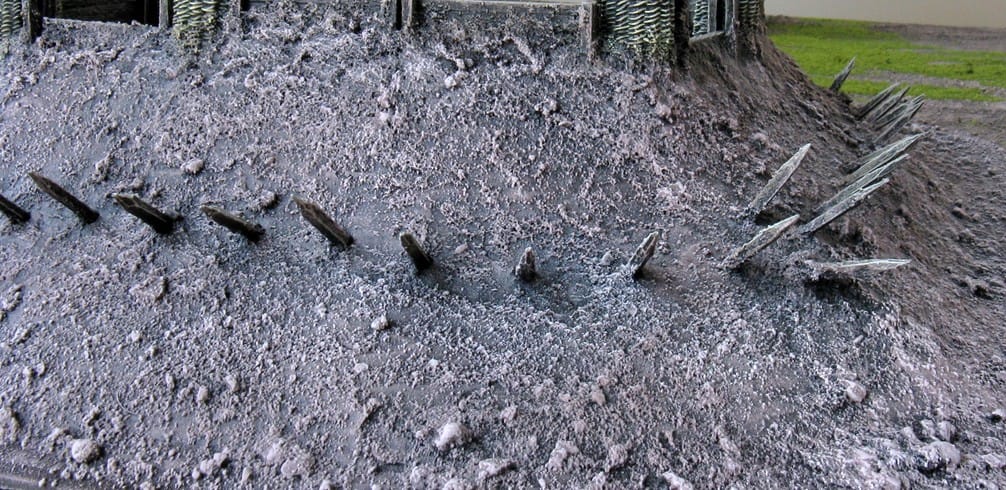
Step 22. Now use a fine brush to pick out any small details in different colours - like the wicker of the gabions, or loose cobblestones lying about in the roadway. Or any larger rocks or bits of broken tree you may have chosen to stick into your groundwork.
Finally, Step 23. Add any grass or flock you feel is justified… On the whole, I think not too much, since the nature of earthworks, trenches and so on is that the ground has been brutalised and trampled - so not much in the way of grass or vegetation is actually likely to have survived. But you may want to add a few clumps of burnt looking grass, or some scrub...
Step 24. As an afterthought, I decided to add an iron bound gate as an optional accessory to block the rather inviting entrance to the bastion.
This was simply made from a piece of balsa cut to fit the aperture, with some matchstick reinforcing bars, and some built-up blobs of PVA representing bloody great rivets. The rear of the dor was scored to represent planking, braced and hinged, so it can plausibly look as though it’s mounted on one of the main revetment walls…

Coat the whole thing in PVA, then paint black, then drybrush with iron, then final light highlight with silver. Then add a few rusty streaks. Done.

Slot into position when required. I suppose I could have made it swing, but there are lengths to which it is probably not worth going!
Step 25. Give yourself a pat on the back, sit down with a beer and admire your handiwork...
I guess this model took me a week to make, but that was usually only for an hour or two on each evening.
Between times though, you do have to wait for glue / filler / paint to dry, so it’s not really something you can make from start to finish in just a day or two…
That’s it.

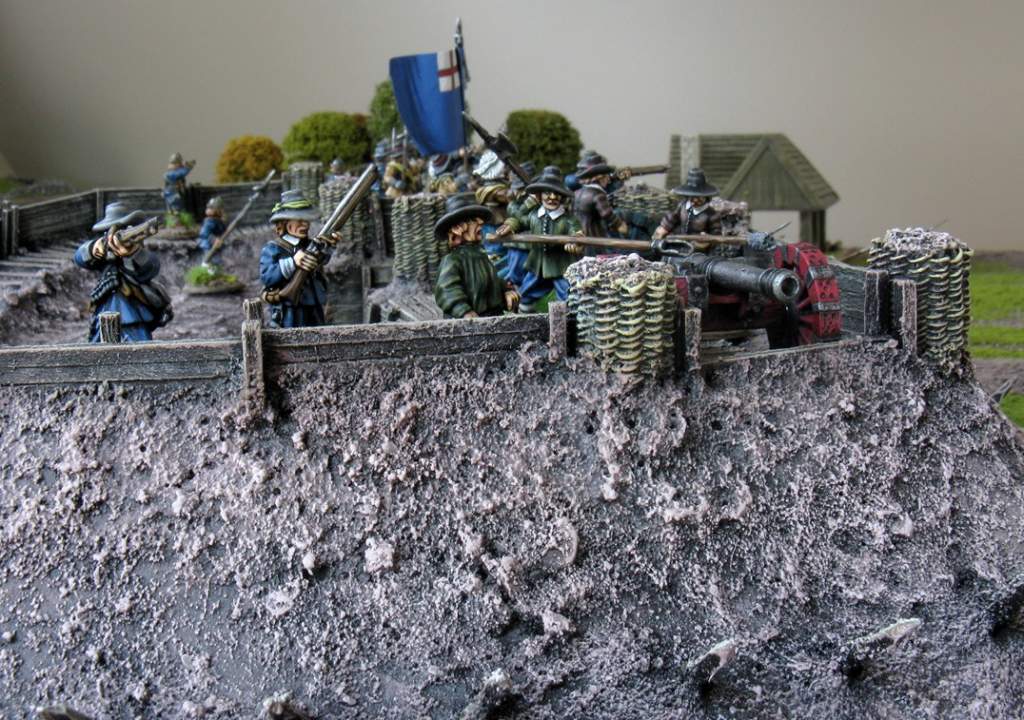
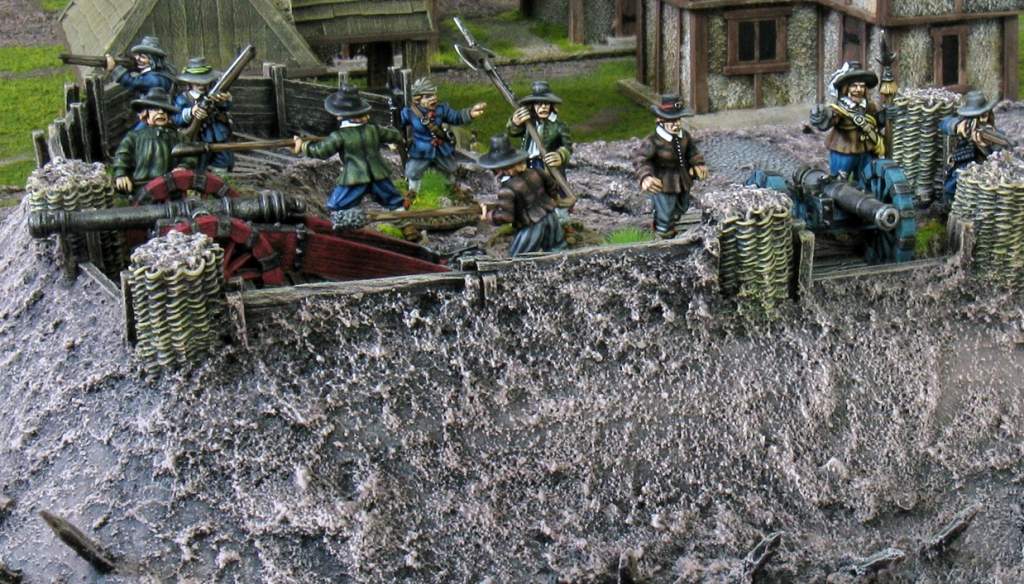
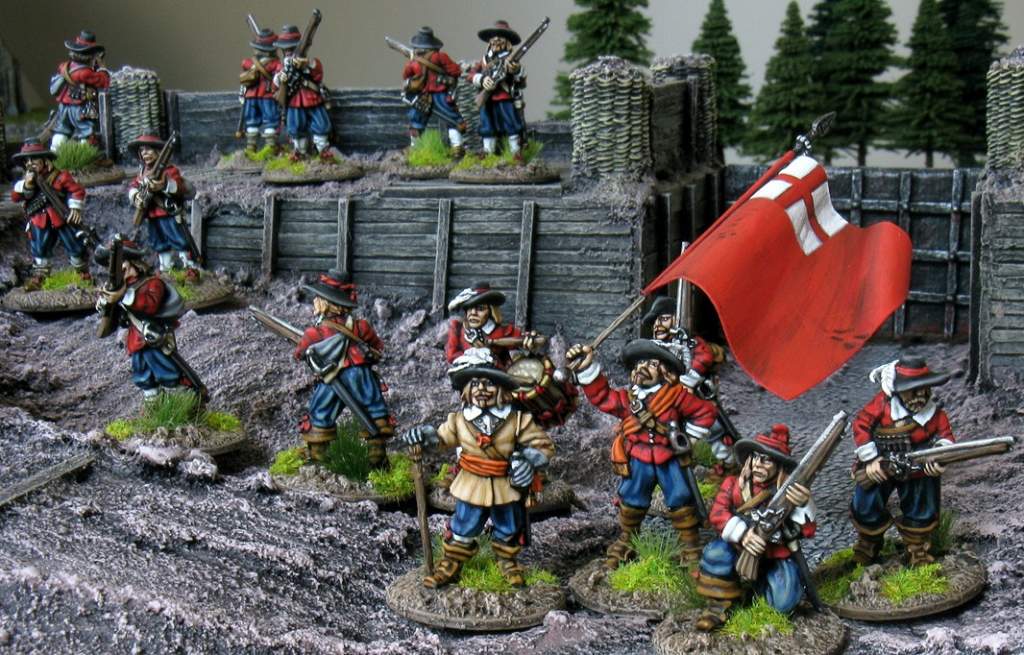
A few shots of the end product...


And with troops in situ