Hear that, Disney??

Last night I managed to finish the power generator I had prepped earlier.
It's one of a pair, but I haven't built the other one yet. I figured I'd just need the one for now.
Built right out of the packaging, it was rather bland, so I decided to use some card and chipboard to break up the flat surfaces. That was not enough though, so I also used some coffee stirrers on the 'vanes'(?) of the turbine. Still not enough, so I added the tips of a bunch of really small cable ties on top of the stirrers, and a larger cable tie to the chipboard ridge on top of the turbine.
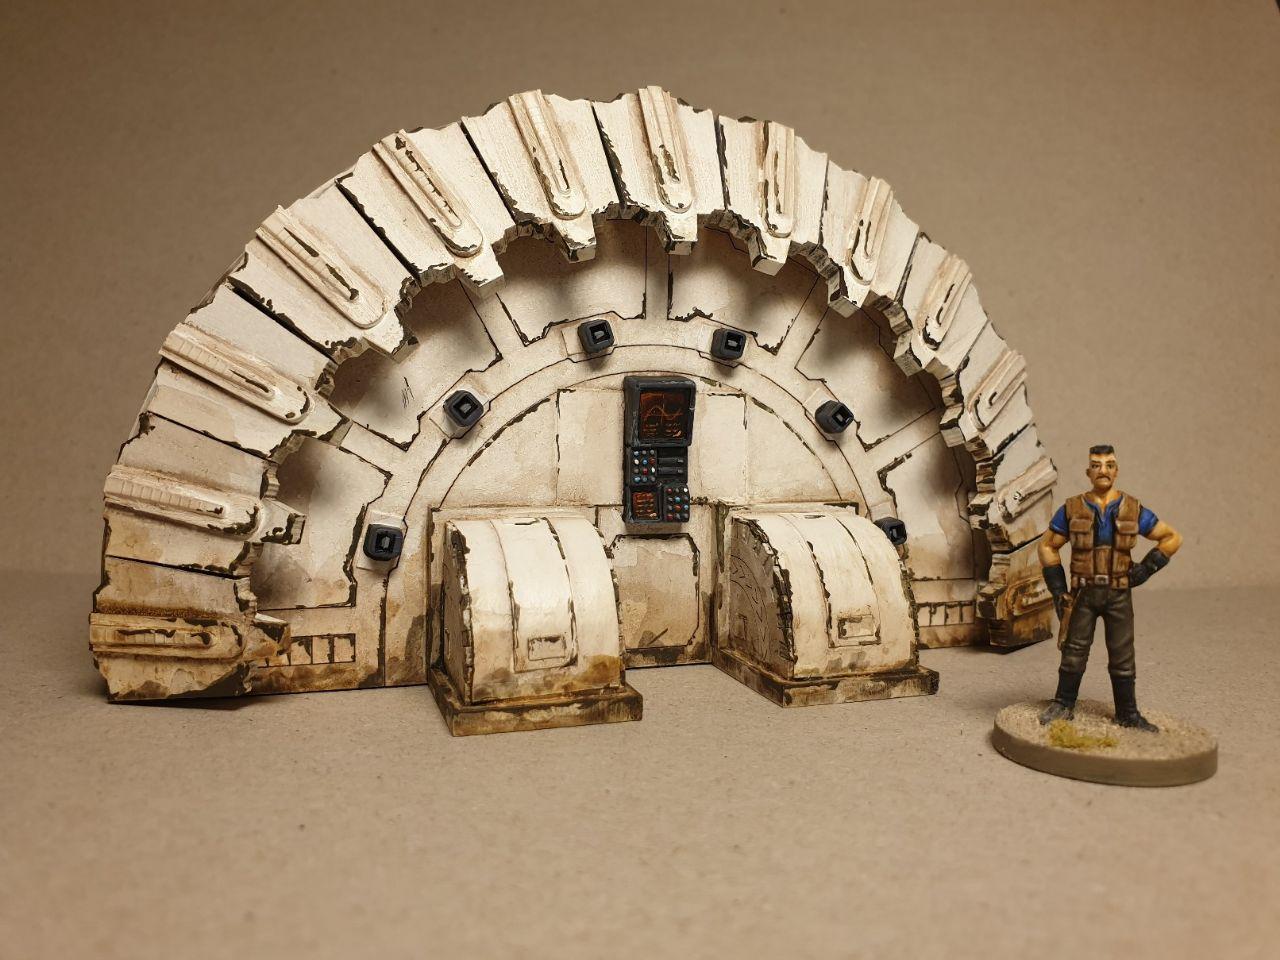
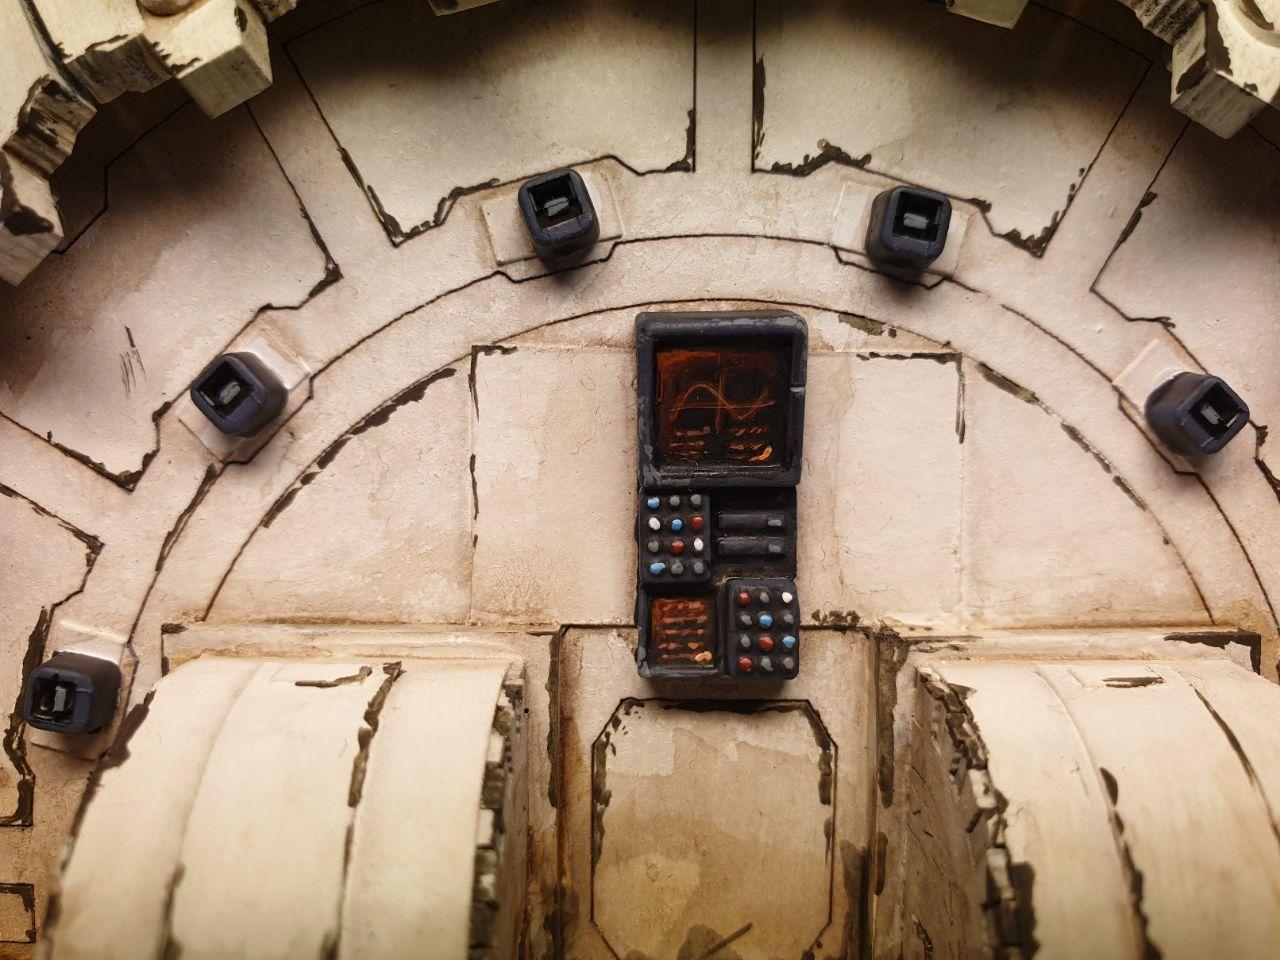
Then I added some Antenociti control panels to the sides; one with a few screens and another one with a large lever (á la Deathstar shield generator; it's even on the nominal rear side

), plus the eyes of the same small cable ties I used on the vanes on the sides. there were some small shapes laser-cut into those positions, often painted as lights, but I covered those first with some card squares, and finally added the eyes; as vents I suppose.
All of this neatly broke up the flat surfaces, and after a couple of coats of primer and paint, it was ready for the real work.
It was a simple job; basically the same method I used on the moisture vaporators and barricades. Except that the chipping of the edges took
forever!

Finally some detailed attention to the control panels (specifically the screens), and it was done.
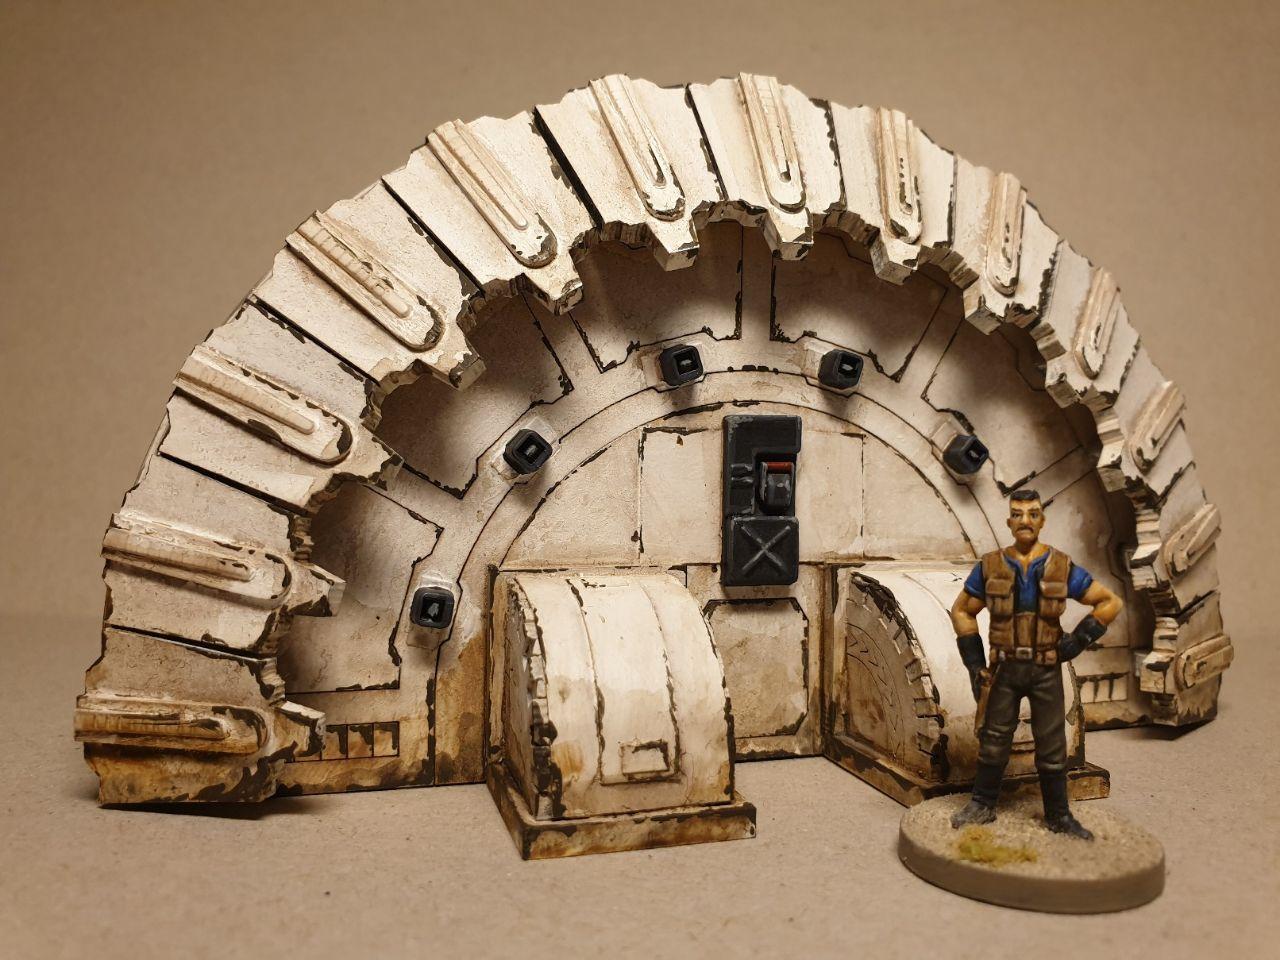
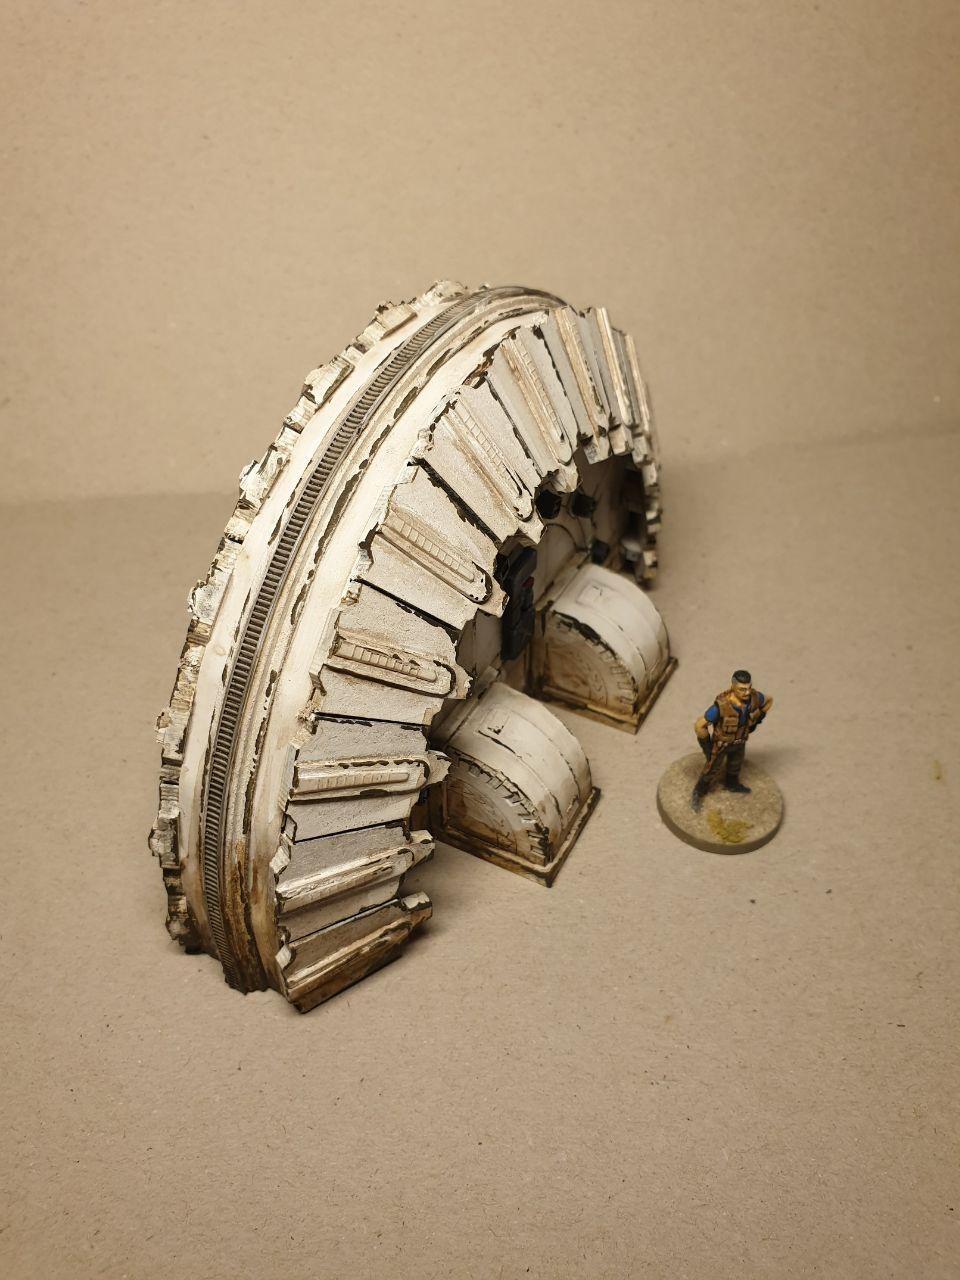
I only now realize I totally forgot the last step of adding weathering powders, but as it still needs a coat of varnish, I'll do that before I spray it. This will add some more colour modulation, which should be a good thing.
Next on the bench is a converted WotC landspeeder; it began life in the service of the Naboo Royal Guard, with two crewmen, a gun on the rear spoiler and two large, blocky engine pods. I took out the crewmen, built the seats back up with some plasticard, cut off the repeater blaster (this is now a civilian vehicle), and replaced the peg and base with something a bit less obvious (Renedra 40mm plastic base with a groove cut out for the metal rod I used to hold the speeder up, which I then covered with a circle of 0.5mm thick plasticard).
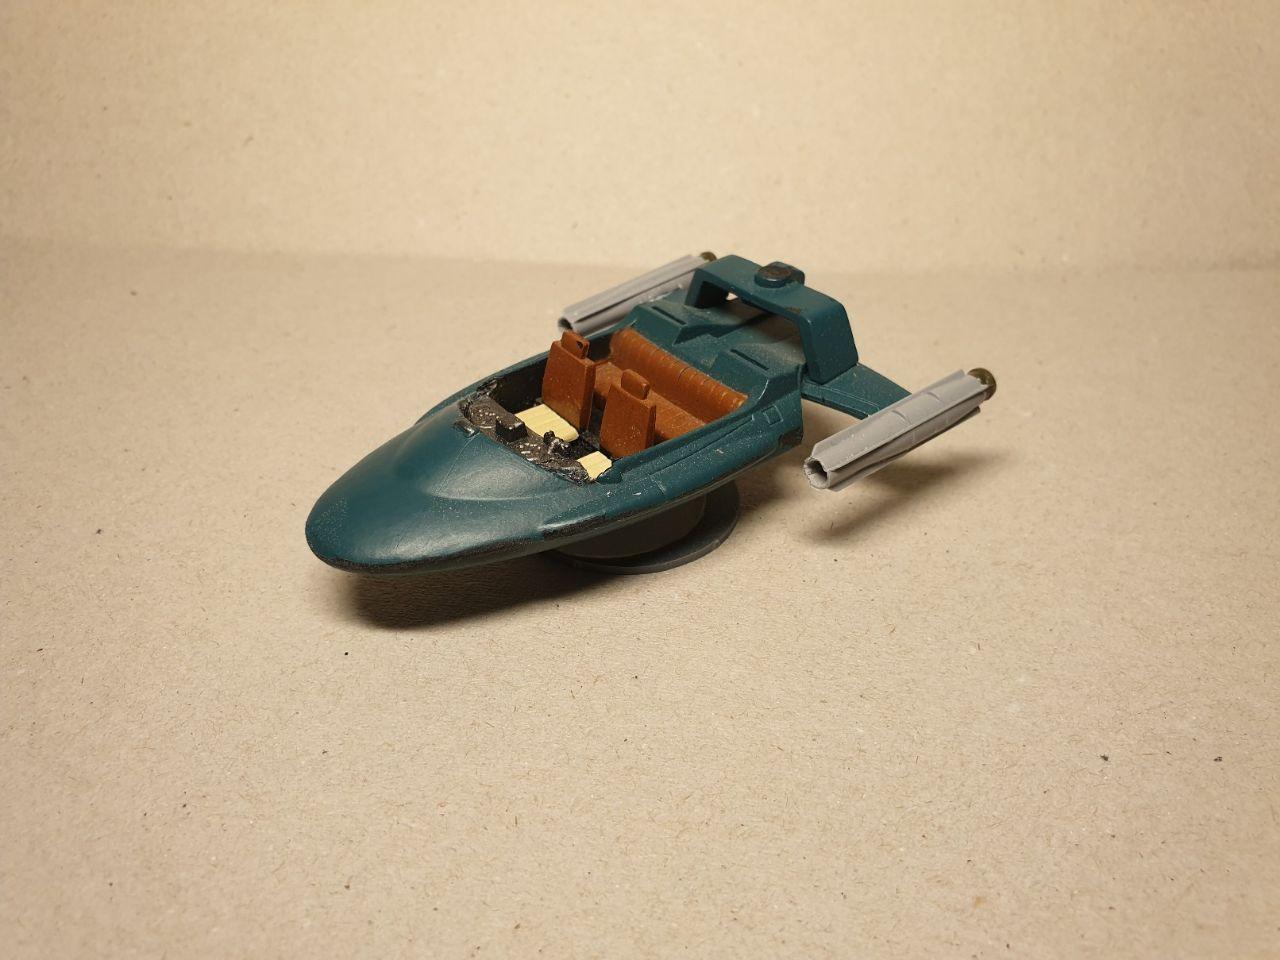
The engine pods were too large in my opinion, so I took them off, and replaced them with two 1/72 guided bombs with the fronts and rears cut off and nozzles from the bitsbox added to the rear.
Only when I had attached them, did I realize that they now look exactly like a couple of wall plugs. Had I seen that earlier, I might have saved myself some work, but hey...

Right now, the windscreen is missing, but that's for painting purposes only; it'll be replaced once that's in the bag.
And then there's the first squad of Stormtroopers, with an officer and droid in support. I'll undercoat them white, and will work from there.
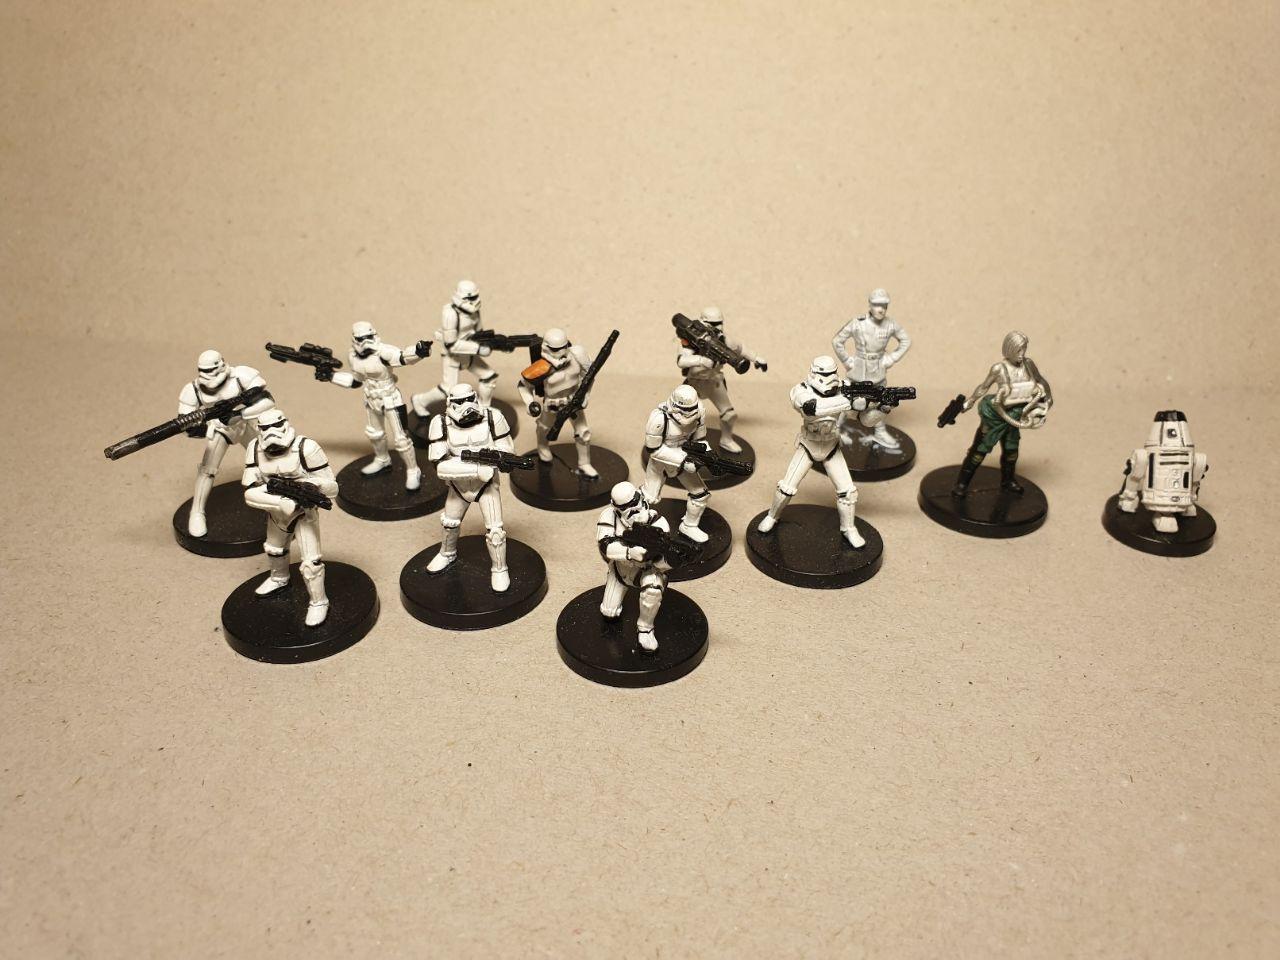
The pilot figure btw is the only character of our (concluded for now) SW RPG campaign I had not come around to painting, so she'll finally be finished too. You've seen two characters of our group so far; the Saurin was my character, Gilaan Fal'kas, and the human (ex-imp) scoundrel was the nominal leader of the pack.
The pilot was the only real conversion required for the characters bar a single headswap, but it was an extensive one; there are parts of 4 miniatures in there; the legs of a WotC Swoop Ganger, the body and head of a hasslefree not-Starbuck, the pistol of an actual WotC TIE-pilot and the helmet of a stormtrooper, converted into a pilot-helmet. The conversion also required sculpting the left arm and the coveralls tied around the waist and the building of the control box on the chest from plasticard and white metal tubing.
I'm pleased with the conversion, but now that the campaign is over, I will paint her up the way I want to (there were specifications of elaborate tribal tattoos, patterned flight suit, long, flowing and braided hair, etc). So expect the final result to be a bit less gaudy...


