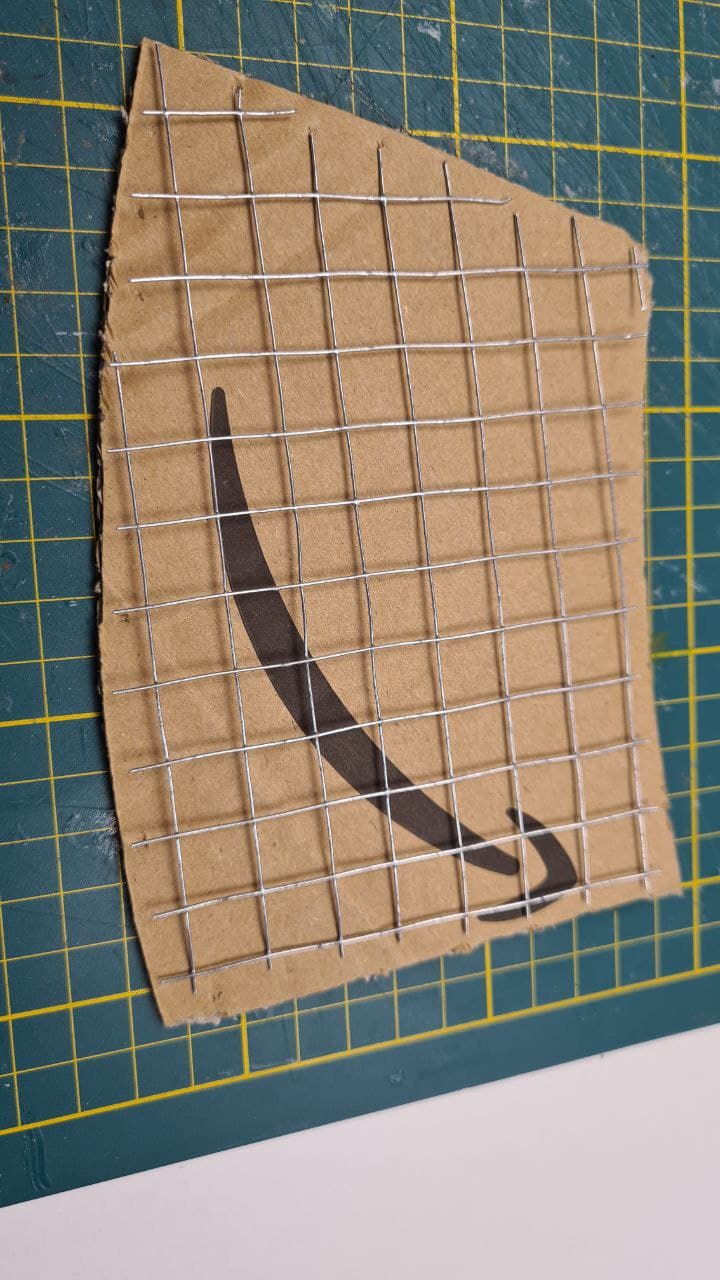
And putting my shopping slot reservation where my keyboard was, I popped over to the hardware store this morning, and bought me a 50x500cm roll of birdmesh. This is enough to last me 9 lifetimes (when I stick to miniatures, obviously).
I cut off a piece to fit the cardboard template I cut, and immediately it was clear that this looks ten times better.
So I then got to work creating a mould for the most important piece; the collapsed section. I will need two of these, as the part of the ramp that's up on supprts on the far edge of the base obiously will have to continue the same curvature.
I built it out of styrene sheet. There were several considerations for this: I have all the materials readily available, and I'm well versed in polystyrene construction. It's got a smooth surface, and it's also quite flexible, which comes in handy when de-moulding.
Also; the only other obvious method would be to create a master, and then pour a mould around that. This is something I haven't done before, and getting the supplies is both time consuming (in research and lead-time) and expensive.
So I came up with this:
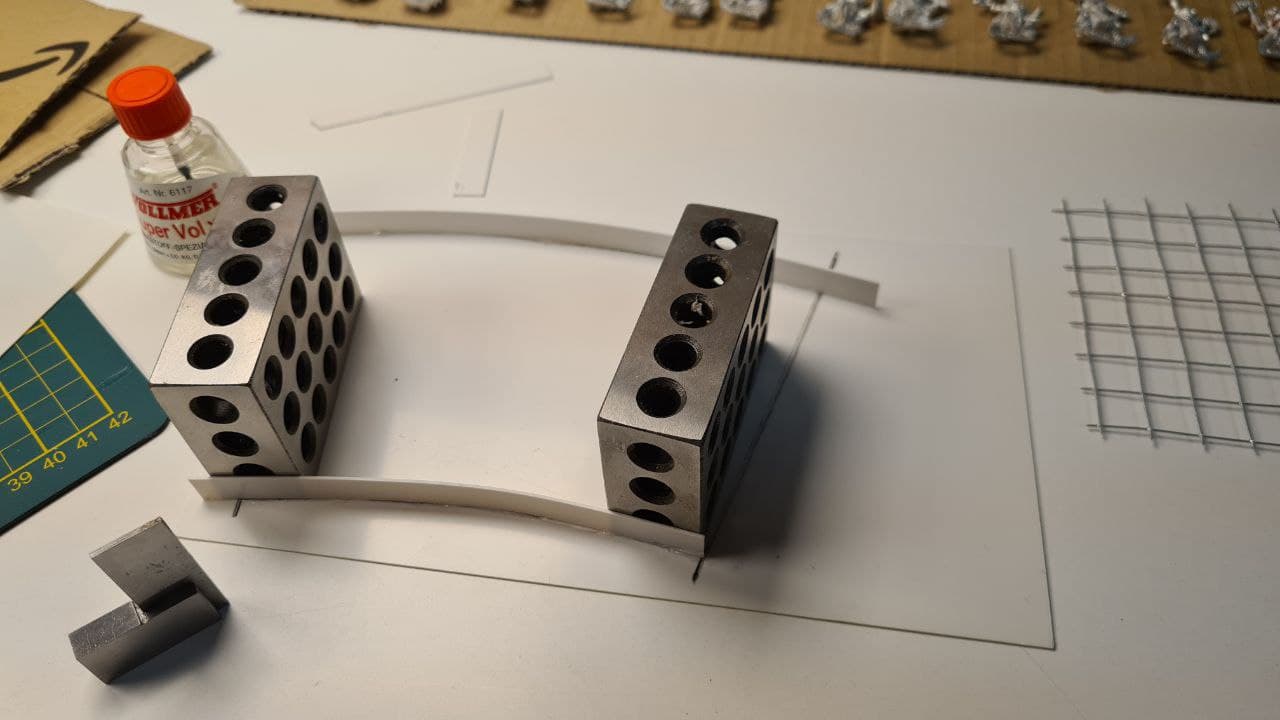
And it came together really quickly too.
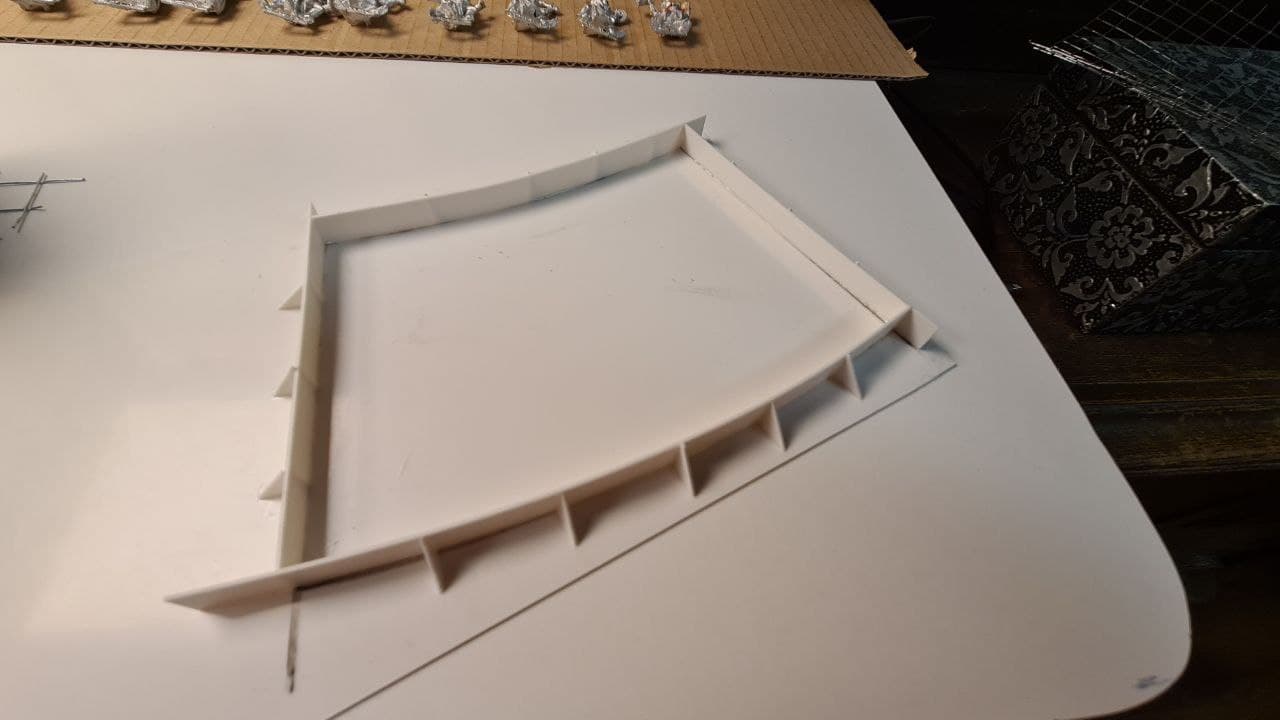
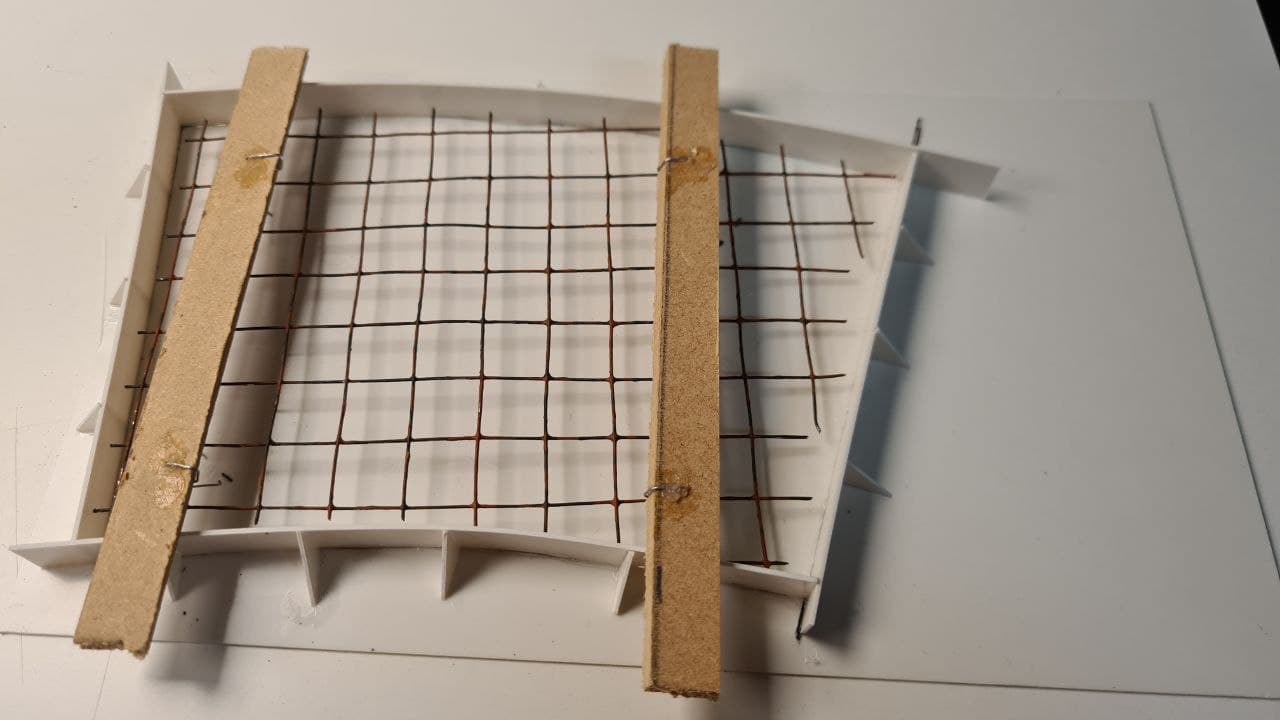
The next step was fitting the rebar into the mould in such a way that de-moulding would not be an issue. I started out with styrene supports glued to the bottom, half the height of the mould. The rationale was that the small glue points would break off the bottom when getting the cast out of the mould, but I changed my mind after I glued them in.
Instead, I went for a hanging construction, with two beams with thin metal hooks supporting the frame from above, and this was a winning idea.
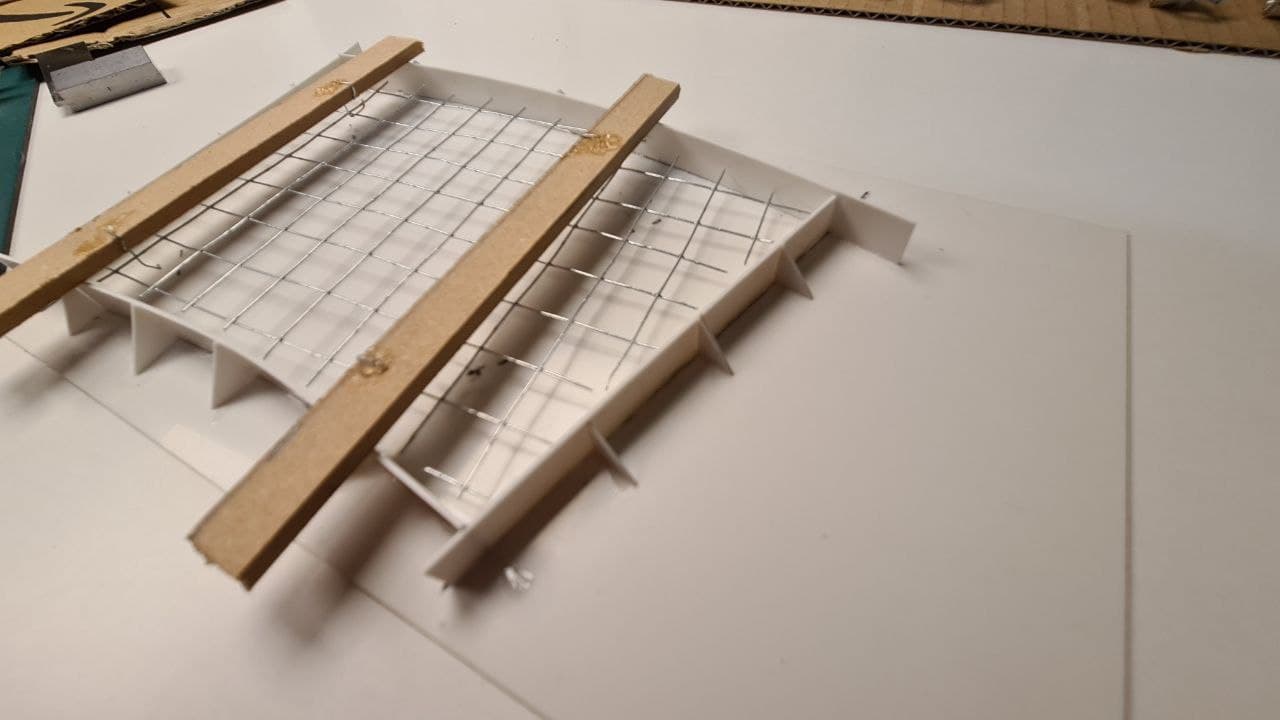
However, before I poured the plaster, I took out the frame one last time and painted it a chocolate brown colour, with some brighter rust brown stipling on top. After all, once the rebar was covered with plaster, it would be impossible to paint*.
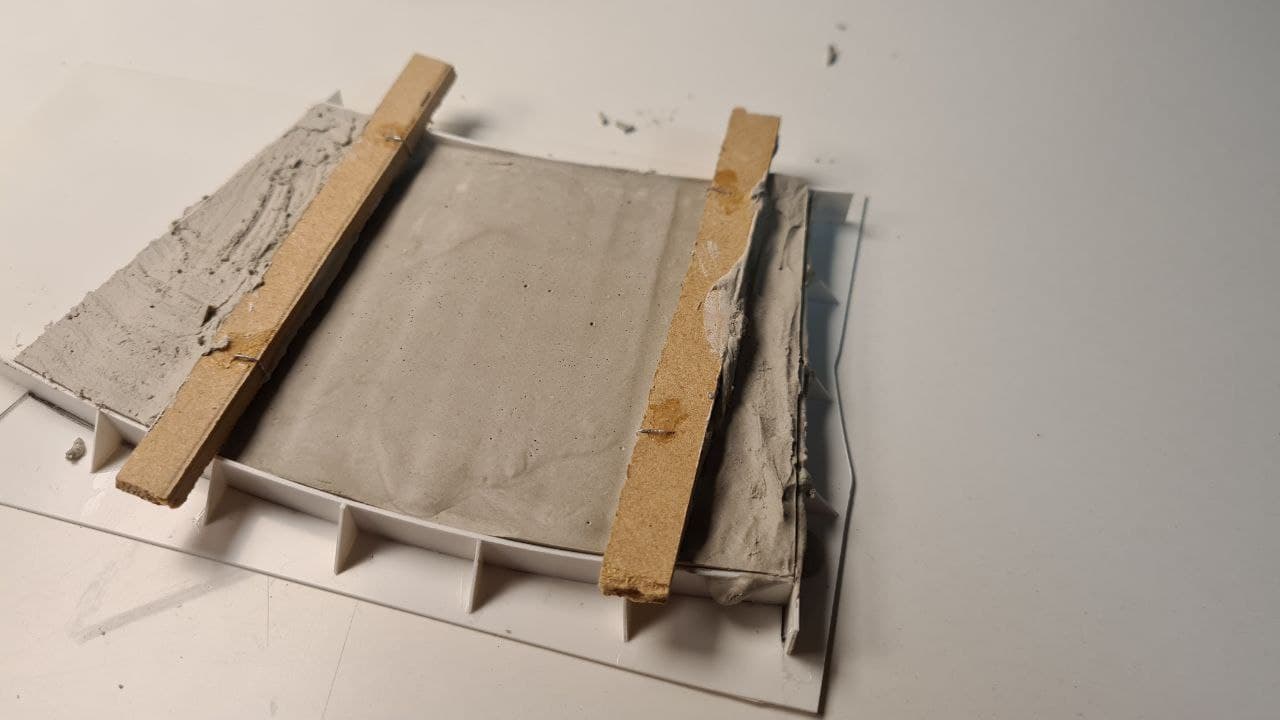
Then it was on to the most exciting part of this session; the plaster!
I tinted the dental plaster I always use with some Vallejo weathering powders; Light Siena and Carbon Black. The result was a stunningly accurate concrete colour, but I will be sourcing some cheaper pigments for this, considering that quite a bit is required and the Vallejo powders are rather dear...
It was then that I discovered two flaws in my process. One: I should have made the mix a lot thinner. As it was, it dried very, very quickly, and pouring quickly became plastering instead. Not good; I'll remember that one for next time.
Two: The supporting beams holding up the rebar were flush with the top of the mould, meaning I could not smooth out the surface as much as I'd have liked, and together with the thickness of the plaster, I could not fully reach under the beams.
Only time will tell if the cast will be usable in the project, or if I will need to cast up a few new ones. This was pretty much a proof of concept trial, and all things considered, I'm pretty chuffed with it so far.
The de-moulding went really smoothly too.
I had feared that I would loose the mould after each casting, but the shape came out perfectly without even a hitch, and it is fully re-usable.
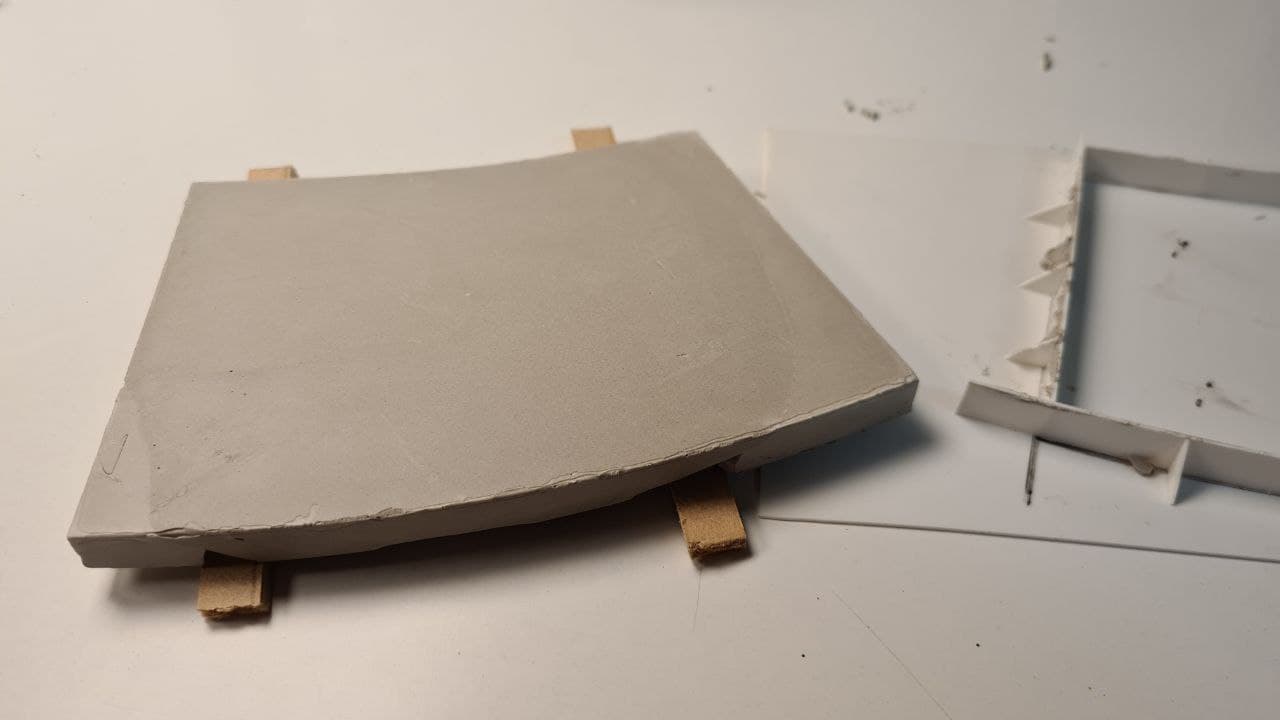
The surface of the cast is ridiculously smooth too. In fact it's so smooth that I will probably rough it up before painting on the stripes and weathering it. It's really perfect. On the top surface anyway; the bottom (which obviously was the top when still in the mould) is not smooth at all, due to the thickness of the plaster and the beams that were in the way.
Next up will be another one of these (possibly two), before I cut up the mould and re-use the material to create moulds for the other components. I'll need quite a few beams, tiles and at least one column. So I'll be casting for some time to come I think.
Which is not a problem; it's fun (as long as everything goes as planned of course

). But the funnest part will be breaking the concrete up, revealing the rebar underneath!
*
I hope I'm staying within the rules here, but I had to paint them before starting the casting process. It's only a very minor detail of the entire build...


