Given the time it takes to paint the little buggers, having a basing scheme that allows skirmishing and big battles is definitely the way to go. As a 'collector' of leaden antiquities (i.e. someone who spends far too much money on old figures he will never paint ... ;-), I have the additional constraint of not wanting to modify the base or tab, and that effectively means using GW style 'slotta' bases.
Another consideration is the use of magnets, it's one thing to have a movement tray but it's bloody frustrating to have the figures fall out all over the place. 'Rare Earth' magnets can be had in various sizes and are perfect for the task.
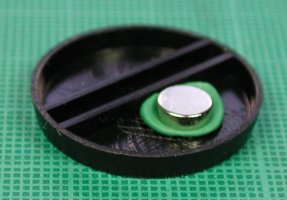
The key difference in my bases and the ones discussed previously then, is using .5mm metal sheeting as the bottom layer. This makes the tray only slightly higher than the base, provides the necessary surface for the magnets and if you line whatever you use to carry the trays in with magnetic sheet, makes for a nifty overall transport solution.
The only downside is getting the metal cut, I ended up getting a 'lifetimes' supply in one go from a metalworking outfit which got the cost down to (AUS) $0.50-$0.90 a piece for varying sizes from 120mm x 40mm to 120mm x 120mm.
The top part of the tray can be made out of whatever you want. I had originally thought of using laser cut Perspex or wood like the original post but decided against it because not having a laser cutter myself, I had to get a bulk lot done for cost reasons and I could never decide on exactly what 'hole' arrangements I needed. (And because I am quite anal and didn't like that fact that my bases were 3.5mm thick and the perspex or wood was only 3mm.)
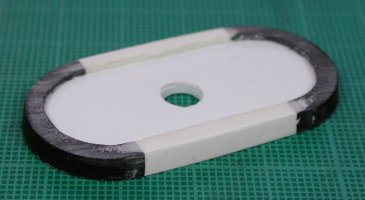
In the end I use .5mm cardboard for a top layer, cut slightly smaller than the metal base (~.5 to 1mm each edge), then after cutting out the appropriate holes I glue on a suitably thick layer of blue foam sheet that I have cut out using a hot wire 'table saw'. Excess foam is then removed from the edges and holes using a hot wire 'knife'. This is then glued to the metal base and the edges 'bulked out' using Acrylic modelling paste which is sanded flat when dry to make nice smooth and quite durable edges.
The cardboard and exposed foam is painted with diluted PVA to toughen it up before spraying with a suitable undercoat.
Told you I was anal ... ;-)
Obviously, if you are not using 'slotta' bases you can probably get away with one layer of material and cut to exactly the dimensions of the underlying metal, saving the need to putty up the edges.
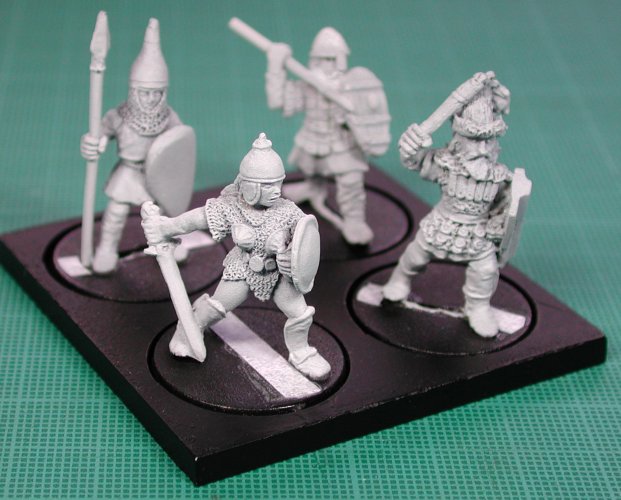
However, since the average base will contain at least 8 figures, which would have taken me a minimum of 20 hours to paint and probably a lot more, spending a bit of time on the base they will spend 99% of their working life in seems quite reasonable to me.
Hand building like the above also means that I can get the positioning of the figures 'just right', rather than arbitrary positions and can also accommodate any shape or size of figure on the same base as required. Like in yet another example of my 'dedication to excellence' ;-P I'm making my own bases for cavalry and 'long monsters':
Cheers!


