It may be the "Great Minds" thing or a spooky coincidence, but this morning I felt a "need" to start on my West Wind Cat Creatures (insert B Horror Movie theme music here). At any rate. the Feline Fiend is really cool & painted up GREAT!
AND the Banshees are equally fine creations. VERY WELL DONE!
Thanks, Amigo!
Looking forward to seeing those Cat Creatures, oh yes!

Wow , great banshees....nothing scarier than an undead pissed off ginger woman
Thanks, Thorlongus!
I assume that you are speaking from experience......

But If you have no soul... how do you become a ghost?

nice and creepy additions!!
Thanks, einarolafson!
I have the third one of that set and been thinking of stealing her from my VC army...it is the one in the dress with open arms.
Great work!
Thanks, styx!
Steal it!
You know that you want to...
Love the banshees. 
Of course they are both redheads. 
Thanks, aggro!
Naturally....

Nice addition to your lurkers. They look old and terrifying. Now you need sceneries inspired from this:
http://www.google.fr/images?client=safari&rls=en&q=newgrange&oe=UTF-8&redir_esc=&hl=fr&sa=X&oi=image_result_group
Thanks, Enethaeron!
That is exactly what I was thinking.

I finally found the time to sit down and mess around with the picture that I wanted, so that I could do a step-by-step of how I make the 'vintage' pictures.
It is very simple, actually, just a little messing around with the 'edit' function on Photobucket.
Obviously, this will only work if you host your pictures on Photobucket, but I am sure that every picture hosting site will have a similar editing function.
First up, here is the original picture, having been cropped to an area that I like the look of.
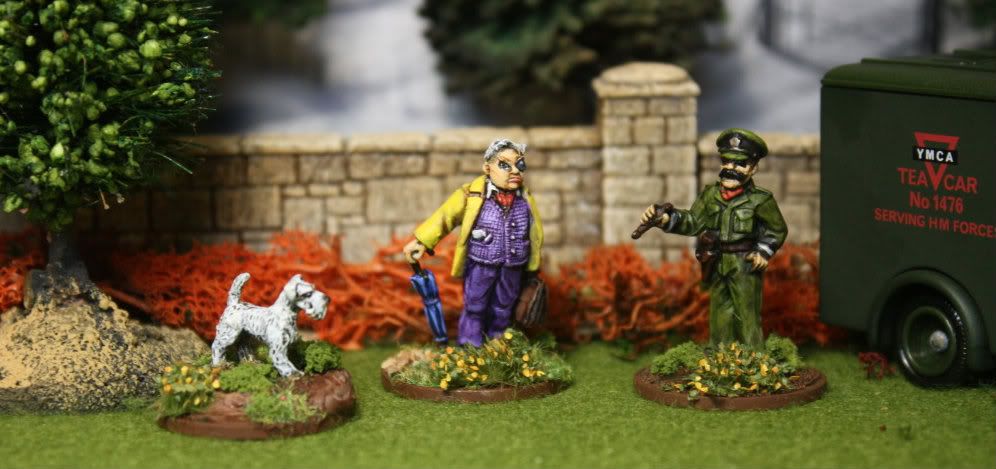
I chose this picture as the more colour and depth it has the better.
A picture that is predominantly one colour will not work as well.
The next step is to click on 'edit'.
This will bring up the options bar at the bottom of the screen.
Click on 'Effect'
This brings up another set of options.
Click on 'Vintage'.
Again, another set of options appear.
Click on 'Rusty'
Now click on 'Apply'
You should now have a picture like this:
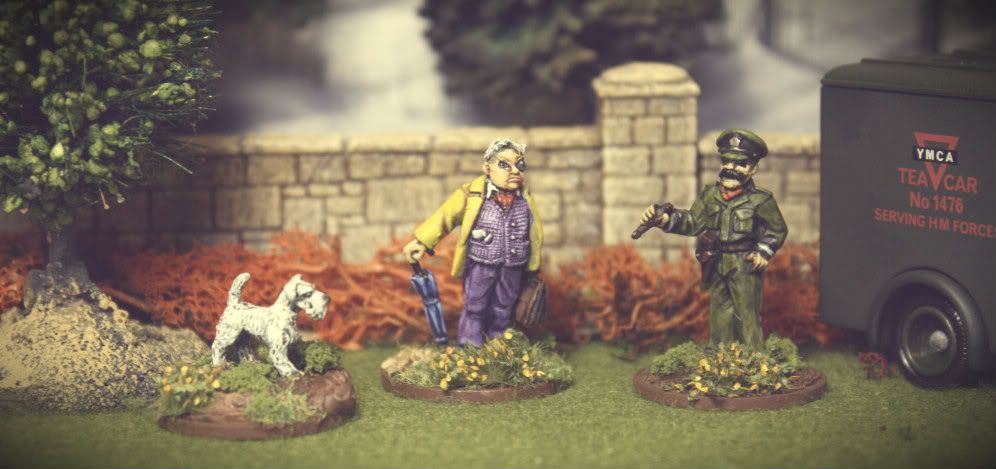
So, to recap, it is:
Effect>Vintage>Rusty> Apply
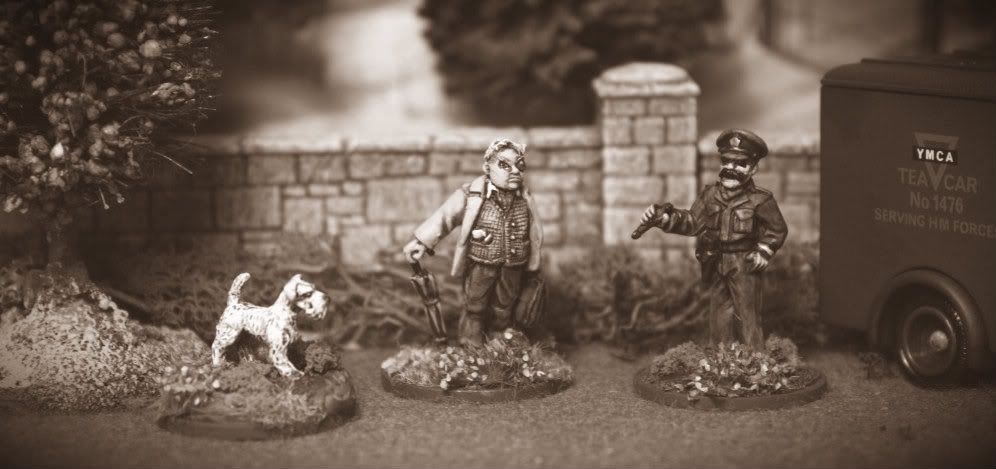
Following on from the earlier example, the next stage goes like this:
Effect> Too Old> Shaan> Apply.
You should now have something that looks like this
The next stage is a repeat of an earlier one;
Effect> Vintage> Rusty> Apply.
It should now look like this
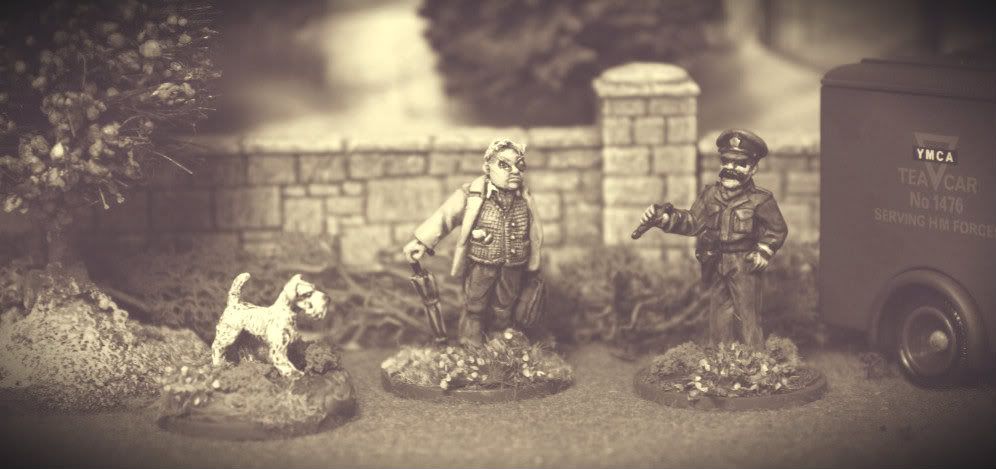
The final stage, which brings it all together, goes like this:
Border> Default> Dirt> Apply.
You should now have a finished 'vintage' photo that looks something like this;

I think, for something that is so simple, it gives a good effect.
It sounds quite a tedious process, but like anything, a little practice makes it easy.
Once you are used to it each photo only takes a couple of seconds.
Try messing around with the different 'effect' settings on Photobucket for different final results.
I hope that you found this useful.
Back with a chainsaw-wielding Maniac tomorrow!


