Hi everyone,
This was my new idea for a light box to photograph miniatures.
There are other threads on this forum on how to create one. The problem I had with a traditional light box was mine was too small, and over the summer I threw it away. When I joined the Lead Painters League again this spring, I knew I needed a new light box. I wanted something that wasn't as constricting as a "box." No matter how big you make it, a cube may not be large enough for a more ambitious layout. The box's size acts as a limit -- not to mention making it a pain to store, or even adjust miniatures or move things around that are farther back in the box. The bigger the box, essentially, the more inconvenient.
It was that point that made me come up with the idea of creating a framework for a light box that you could assemble when needed, then dissemble to store. As usual when I have an inspiration but no idea how to make it reality, I wandered around Hobby Lobby craft store (US chain of stores). Eventually, I hit on the idea of making four posts out of dowel rods, then latching the posts together magnetically with cross beams. In the end, I probably chose dowel rods that were too thin, but the construction has been proven to work. Here's a tutorial on how I did it.
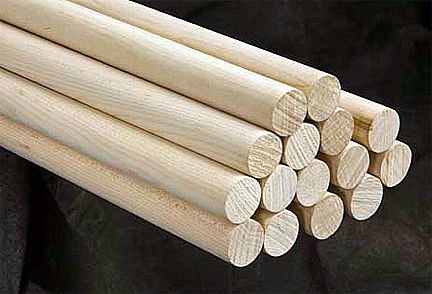 Start with 4 thick dowel rods that will be your posts...
The first thing you need, of course, is four dowel rods as the posts. At this point, you'll need to decide how tall it is going to be, as well. I chose 18" in height. I figured that would keep the translucent material far enough from what I was photographing to cut down on glare. Cut your dowel rods to the appropriate height.
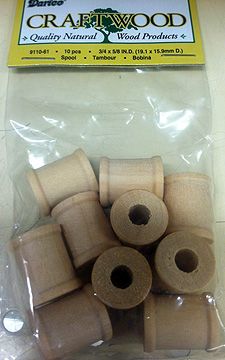 Spools that the rods will be inserted into after they are glued to the posts' bases
Next, you need a base for the posts. I am not very handy with wood, so I chose these craft wooden spools. I picked a size whose center hole matched the width of my dowel rods. A snug fit meant no drilling and easy connection. I placed one of these on my chosen base, which was just a wooden rectangle. Here is where I would do something different, though. If I were to do it again, I would choose a much heavier base. An 18" dowel rod has a lot of sway to it and a heavy base is needed to keep it level and upright. I'm not sure if I would use thick metal or tile or stone or whatever, but I would make sure it was sturdy. Anyway, I used Tacky glue to affix the spool to the base.
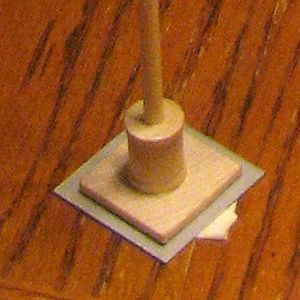 The dowel rod / spool / base construction...I'd make my base a lot more heavy and substantial, if doing it again...
The next purchase was a pack of powerful round magnets (you need

. Glue a spool to each magnet. Once dry, fill the spool's central hole partially with Tacky glue and slip the dowel inside. When it is dry, reverse it, and tacky glue the other dowel end into the spool attached to the base.
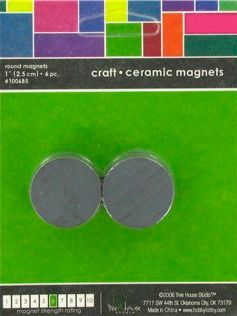 Powerful magnets that hold the posts to the framework, making it stable...
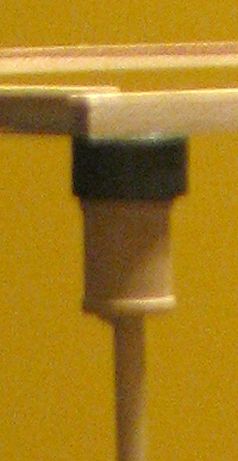 And a blurry pic of the posts with magnet atop connected to the framework with its own magnet
Next, I measured and cut four square, wooden dowels. These would run from pole to pole, linking them together. At this stage, you need to decide the dimensions of your framework. I chose 18" again, but you could easily create more than one set of these to give yourself a flexibly sized framework. At the end of each of the crossbeams, glue another of the large, round magnets. Be sure that their polarity is set so they are attracted to and hold tight the magnets on the end of the pole. At this point, your framework is two separate upside down "|_|" shapes.
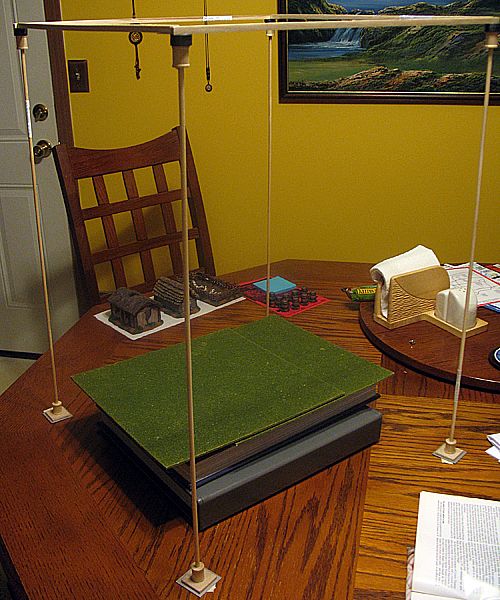 The framework with square dowel crossbeams assembled and held together by magnets...
Now, you need crossbeams to connect these two sections. Take another pair of square wooden dowels and glue a narrow steel base to each end of them. Being metal, these will attach to the magnet that the crossbeams are glued onto. These link the two sections together and provide stability. If your framework is wobbly -- like mine was because I didn't make the bases heavy enough and used too thin of dowels -- simply masking tape them to the surface of the table or wherever you are photographing.
The final step is what to use as the material to diffuse the light. For my first experiment with this, I simply taped white tissue paper to the crossbeams and let it hang down on 3 sides of the cube. Once I was sure the contraption worked, I went to the local fabric store. I bought some thin, white muslin fabric. I had a friend sew it into the cube shape (minus two sides -- the bottom and the front end that will remain open for you to photograph from).
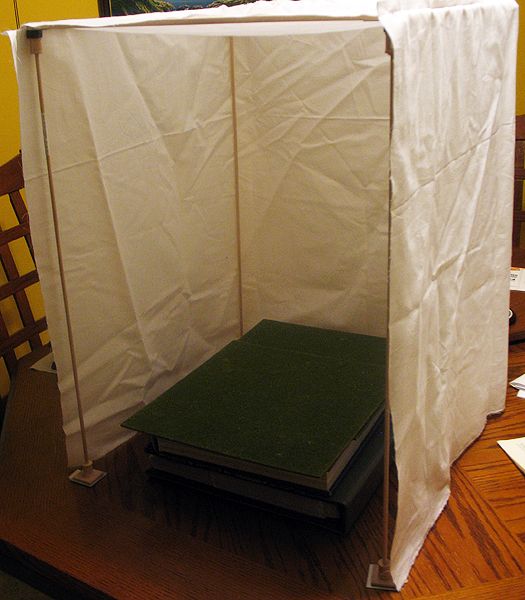 The framework with muslin fabric cover that acts to diffuse the light. Normally, I have lights placed next to the muslin on either side (and a chandelier hanging above), so light comes from all sides. Additionally, you can place it near a sliding glass door on a sunny day for even more light...
When I want to set up a scene to be photographed, I lay out my flocked surface, set up the buildings, figures, etc., and then set up the framework around it. Once I am satisfied with how everything looks through the camera -- and I've made my last-minute adjustments -- I slip the muslin material over the framework carefully. Lights are placed above and all around the muslin, which scatters the light and makes it seem to come from all around, not one or two direct sources. This diffused light is the key of a good light box. It will even out the lighting on your photographs and cut down on glare. You WILL need a tripod and a camera with a timer, though, to effectively use a light box. I tend to shrink the aperture down to the smallest size which gives you a wider "depth of field." This means more of the image will be in focus. What setting you use depends on the strength of your light sources, the translucence of your material, and your camera, or course. It generally allows me to take a 2-3 second exposure, which usually produces good results.
If you have any questions about how I created my light box frame, feel free to email me. I hope this has been useful. I'm sure more crafty and creative folks could take my ideas and improve upon them...!
Mike Demana


