Last update before PolderconPoldercon is in two days so time to wrap things up. I’ve painted like a madman in the past two weeks to finish up the last things to dress up the table more. A lot of fun to finish them too.
Lion Statues
Fenris sculpts…easy to paint, fun to do. Nifty as blocks of cover.
Pallets and wire spools
One sheet of MDF from Multiverse (and one pallet from Pat’s Laser Cuttings) but a hassle to assemble and stuff like this always takes more time than I like. But I like them for what they are. You can place them in alleys, behind buildings, next to cars, etc. And suitable for all kinds of games too.
Back alley accessories
Awesome resin casts from TT Combat. Lots of fun to paint. The hobos can also be placed on the couch (looks really cool) and they are perfect for alleys and to make the city come alive. Newspapers were printed and attached with matt varnish.
Old Fridge

This –cool- fridge was also from the TT Combat pack. I first primed it grey, airbrushed it white and then gloss coated it to get that typical lacquered fridge look. Then I added lots of rust. Unfortunately the rust won’t stay fixed at all (even with Pigment fixer). Maybe because of the gloss coat? Anyway, better not to handle it too much. I added some newspapers and cardboard boxes. The ones on the side don’t have any printed underside, but since it will be placed against a wall, I don’t mind.
Walls
These walls are so cool, they are the best. You’ll love them. They were made and painted by hardworking Europeans, really nice people. They’re so high, models have to move around them. No way any bad hombres will scale them.
Anyway, awesome walls from Micro Art Studios. Initially I wasn’t planning on adding them, but I was afraid my scenery wouldn’t fill up the table enough. So time for some fast painting:
>Prime them grey
>Airbrush with white to highlight
>Airbrush the lamps with yellow and then with white in the centre
>Airbrush the lower part with rust and dark green
>Add streaks and grime with Vallejo Streaking liquid
>Add graffiti decals (and 1 with permanent marker) and some posters and newspaper to finish it off
Done! Went quite fast, was fun to do and it adds a LOT of filler material to the table.
Car 4
Once more an awesome resin car by Third Fate Creations. One piece and really nice and weird design. I can imagine it as a slick and expensive corporate cruiser. I airbrushed it with dark green, added shading with rust and highlights with light green and yellow. The window was painted with P3 Coal Black and then airbrushed with black and white. No masking involved! Went rather well I must say. Finished off the details, added two coats of gloss varnish, matted the wheels and done!
Car 5
Same model, different treatment. I airbrushed it with chrome and then shaded it with arirbrushed Purple Wash. Went rather well! Windows were done the same as car 4.
Bike
Awesome model and I see it as an expensive motorcycle, going at insane speeds. I think it fits in with several novels. The model took some time to prep as the body is made from two halves (with the ‘wings’ added). So I had to smooth the joins with putty. But with Apoxy Sculpt this went rather easy. The stuff is fantastic for smooth joins as you can really smooth it with water and then use sanding paper to get it really slick. For painting I went for big contrasts and a lot of colour.
THE TABLE!!!So yes, as promised, I have built a table with everything I have and made some photos to show how it all looks together. Took me quite some time to build, so I am happy I did it before Sunday. This should speed up the next prep.


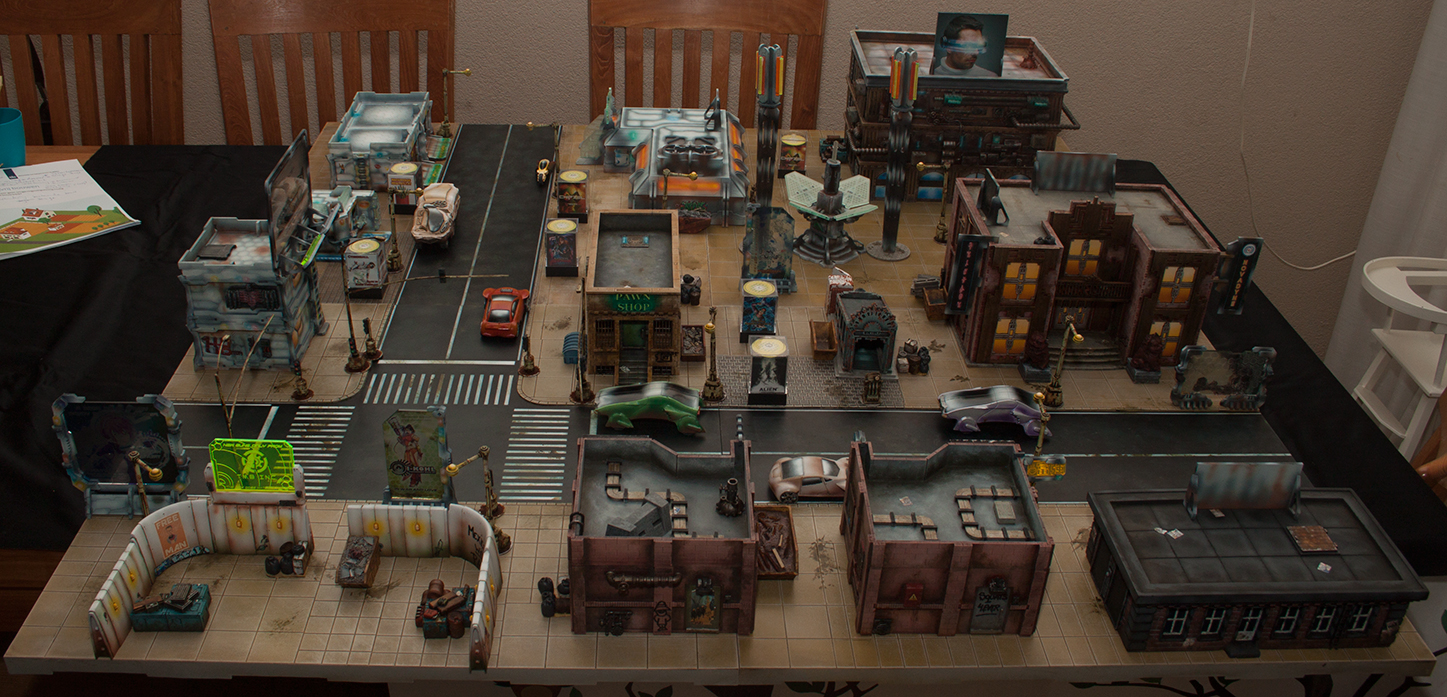
So that’s it for now. After Poldercon this project will be stored for a while (apart from playing the game and working on the rules), but I have more stuff to add in the future. It will never be truly finished, as it should be


