Last year I was asked to try my hands on another ship model, this time a chinese junk for an upcoming BoB/Pulp-game. There are two options to do that: scratchbuilding from plastic or foamcore like this fantastic example
http://leadadventureforum.com/index.php?topic=54453.0, or, working with Artesania Latina's 1/60 scale pre-cut wood kit for the "Red Dragon" junk. I've never before tried to build a wooden ship around a set of frames using small wooden strips, so I had serious doubts about this endeavour ... But my customer was quite clever sending that kit over to me "to just have a look around and decide later" ... Well, he knows me quite well. When the large box arrived I was hooked again and started to gain some basic knowledge about the shipmodellers trade. But one thing was quite clear from the start: it would be a time-consuming process!
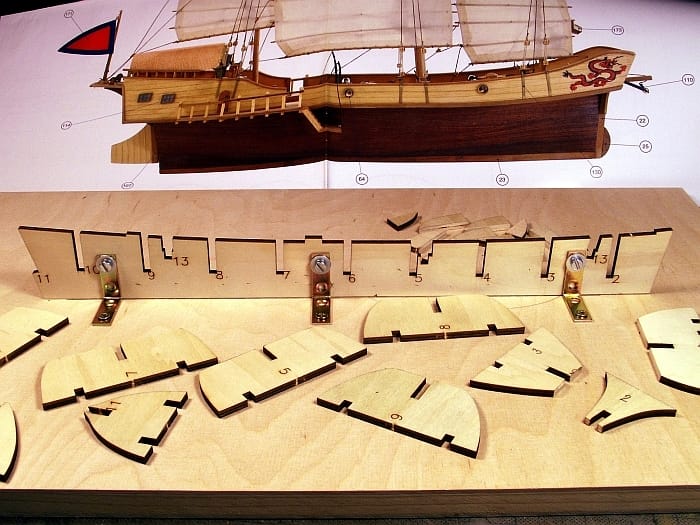
This picture shows the finished ship model (built by someone else ...):

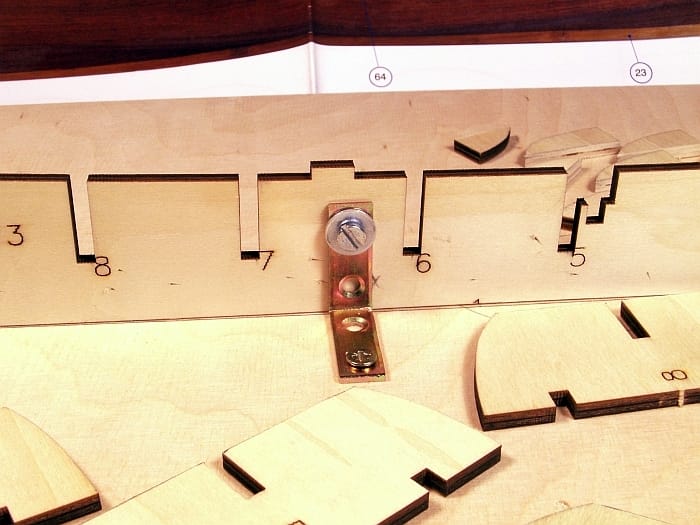
A fine ship, and showing the first major problem: it doesn't have a waterline hull! How to achieve that? Finishing the hull and cut it down then? The risk that all inside frames would crumble and break would be too high, even if you could manage to work with a fine bandsaw and keep the angle at precisely 90°. After much thinking about I decided to cut the keel and all frames separately before glueing them together. Estimating a correct waterline all parts were cut to the same final height. After that I fixed the keel with three metal brackets down to a piece of thick and plane plywood to prevent any warpage of the keel and keep the framework absolutely straight. As always, a pic shows more than many words:
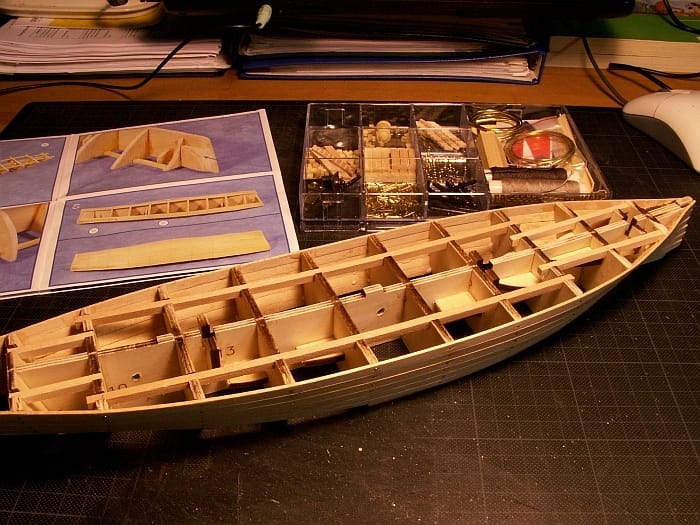
This was in December last year, and after a couple of hours of accurate work I had the basic ship's frame glued and finished. It's astonishing sturdy and solid. And this has a reason ...

After some days of hardening time I started to add the outer planks from 1,5 mm thick basswood. The strips were soaked into water to get them more pliable and then happy gluing and hammering started. And here the sturdiness of the framework came into play, enabling the modeller to use a hammer without shattering the frames at all. The kit contains 500 smallish nails. After working through the planks you can see on the following pics, I had 132 of them used. In 5 hours time yesterday. Oh my ...


To be continued ...


